
About This Recipe
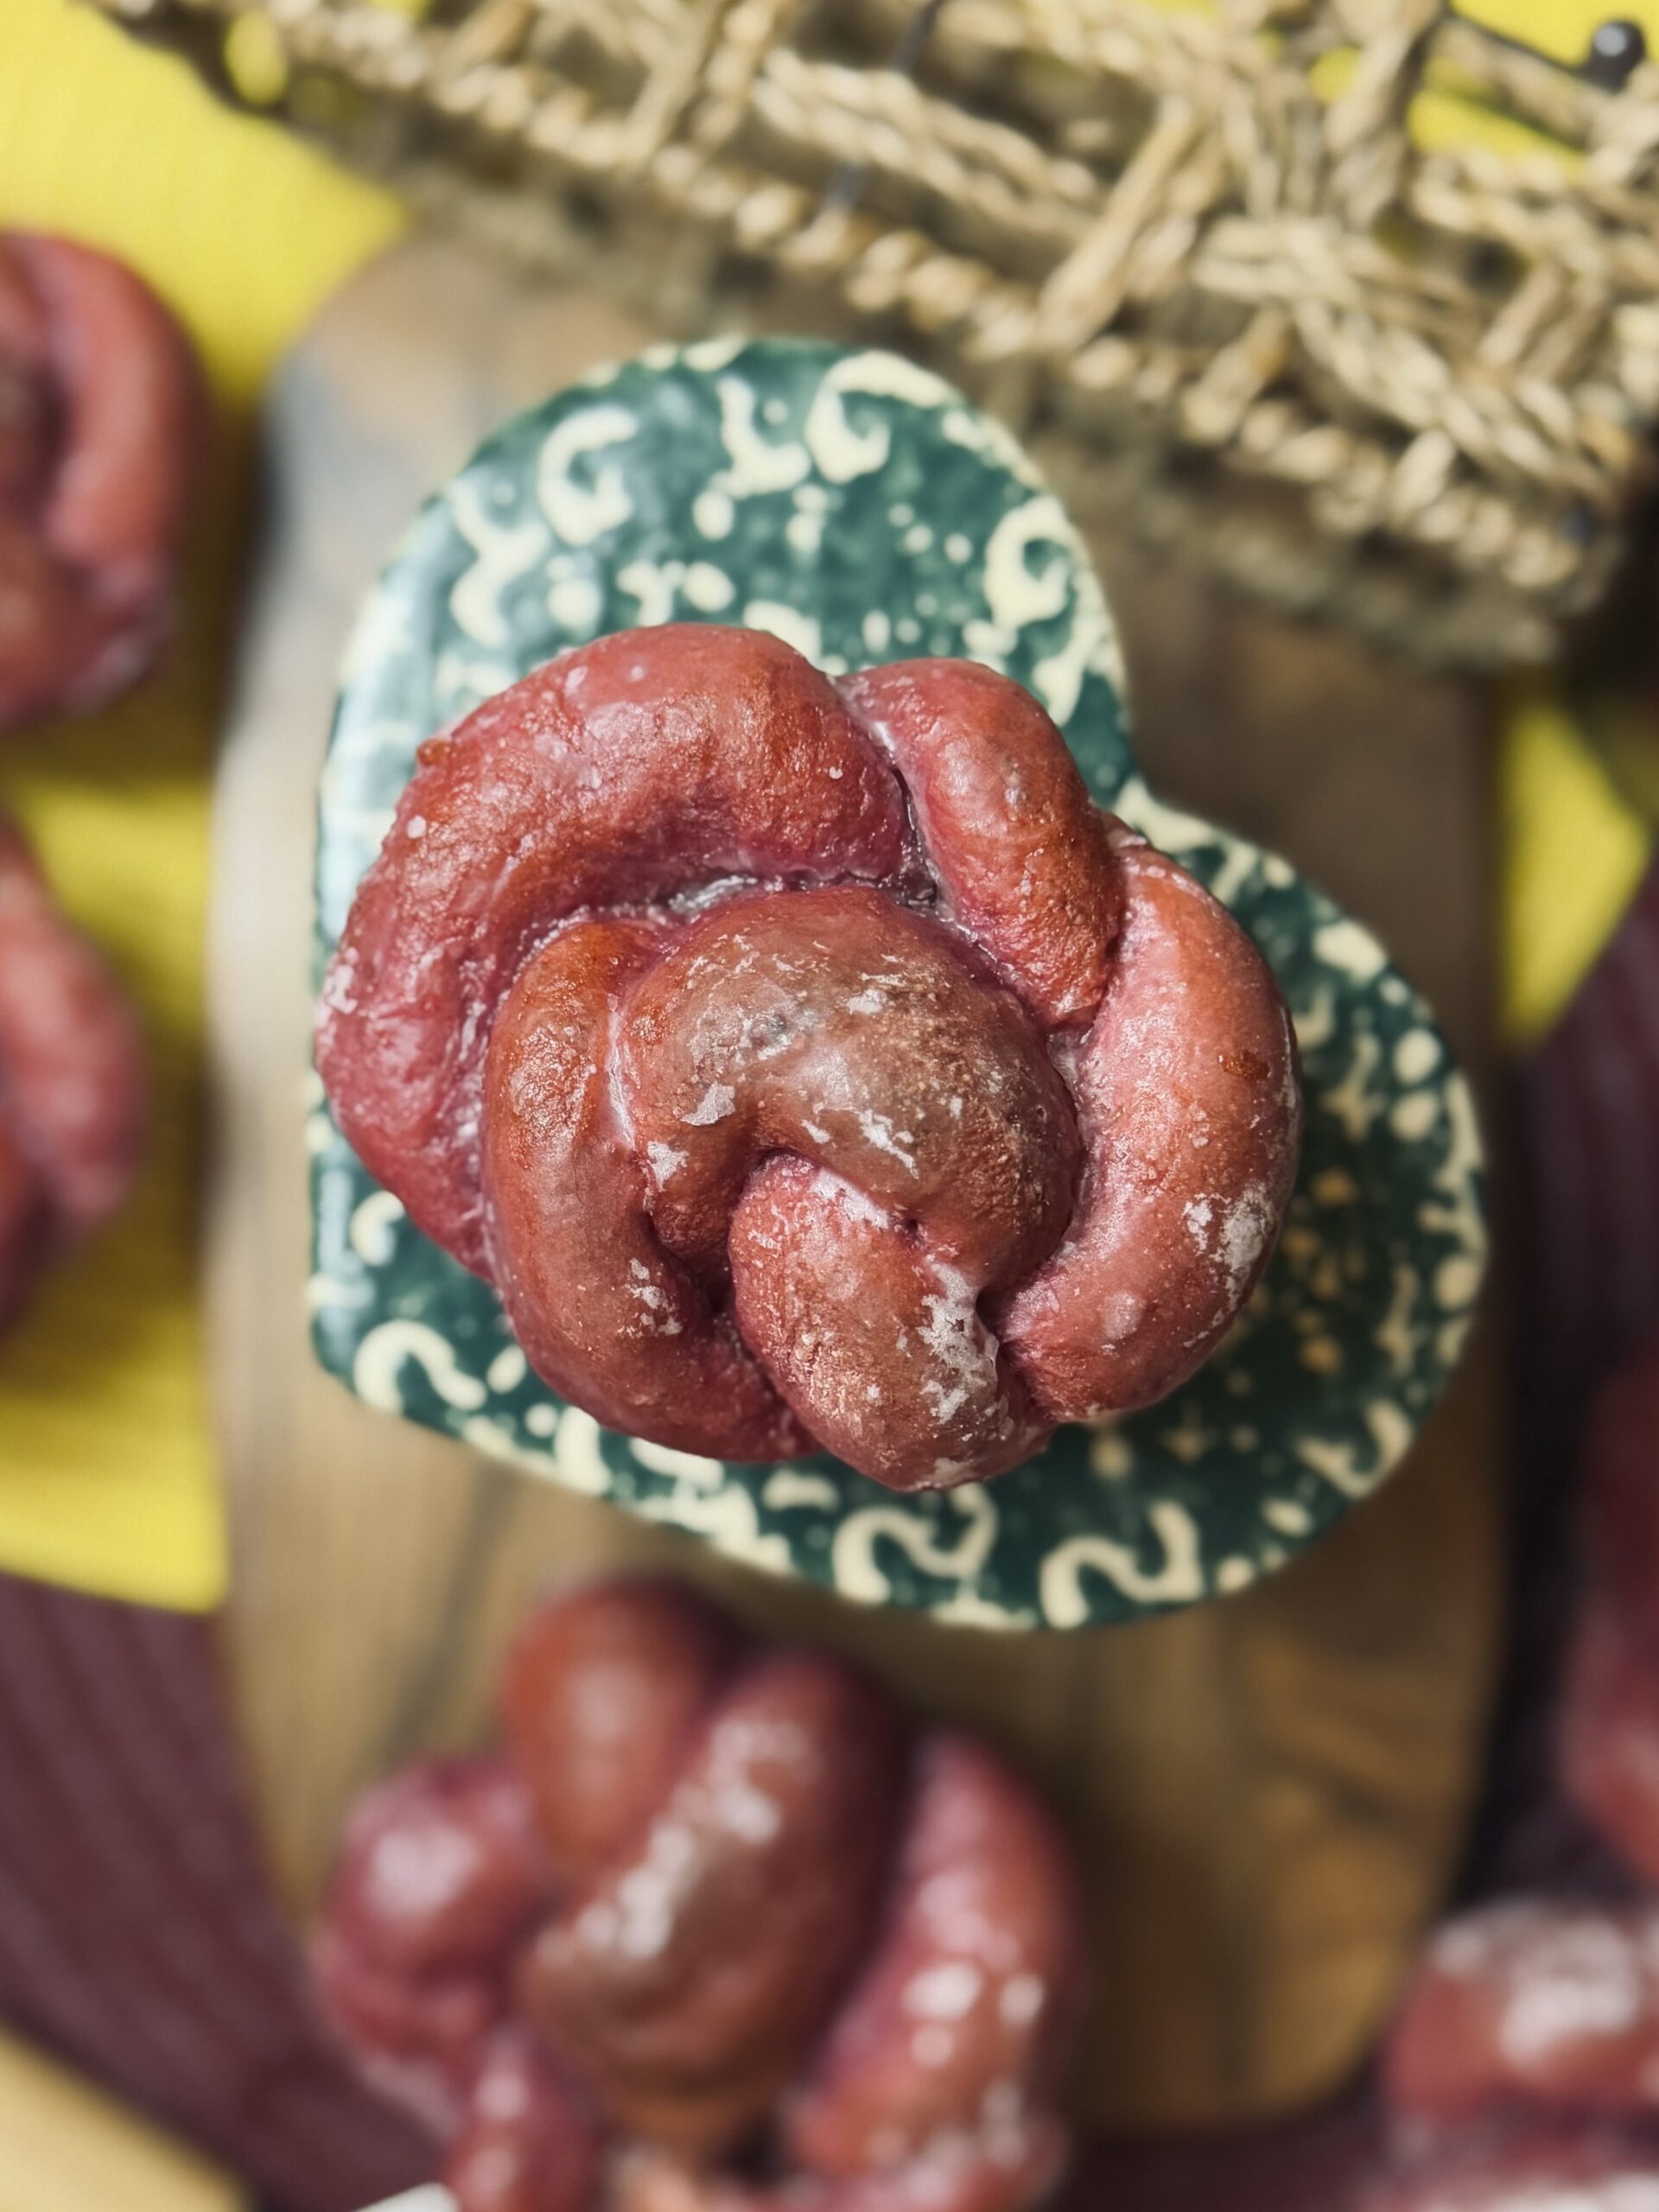
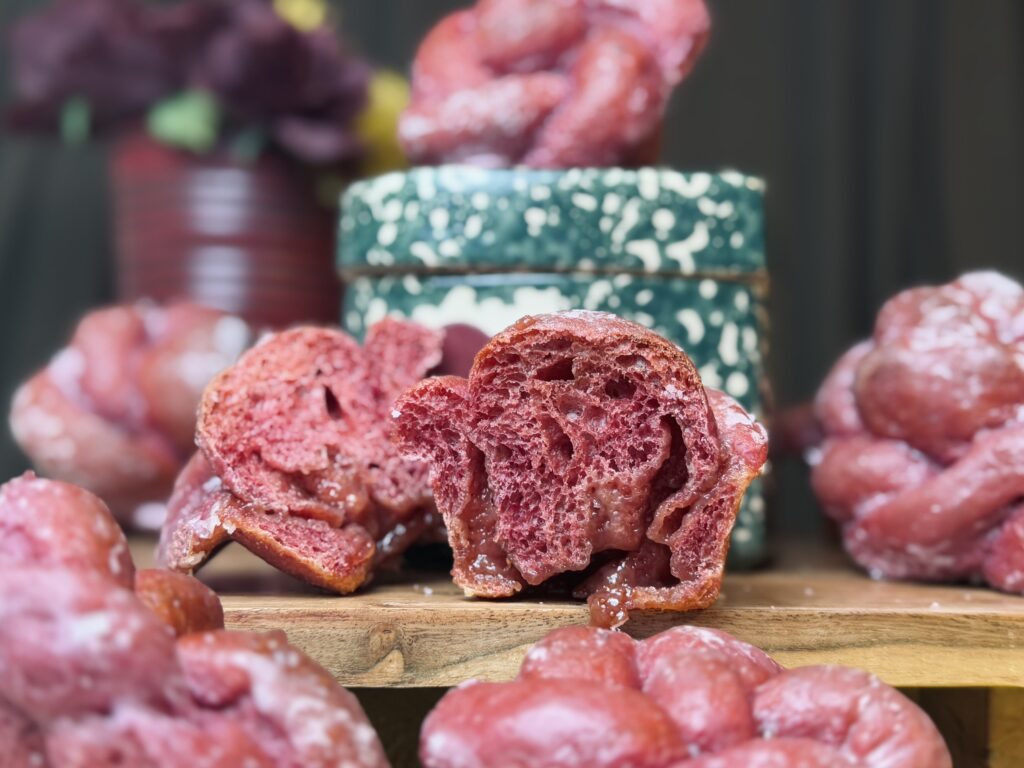
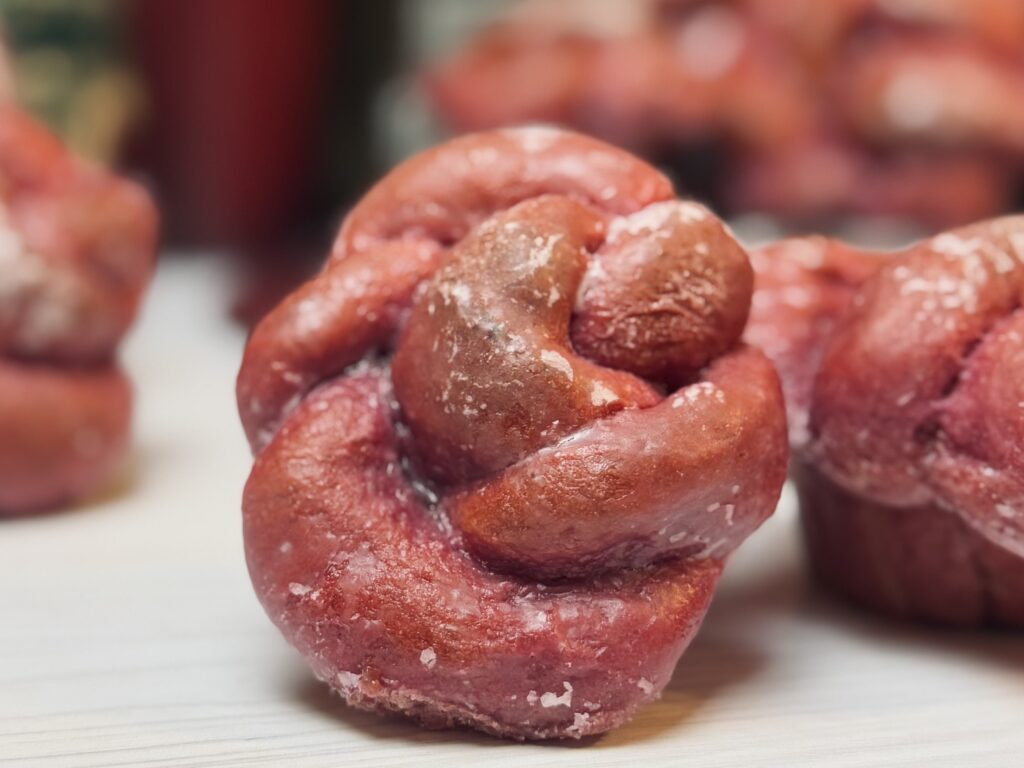
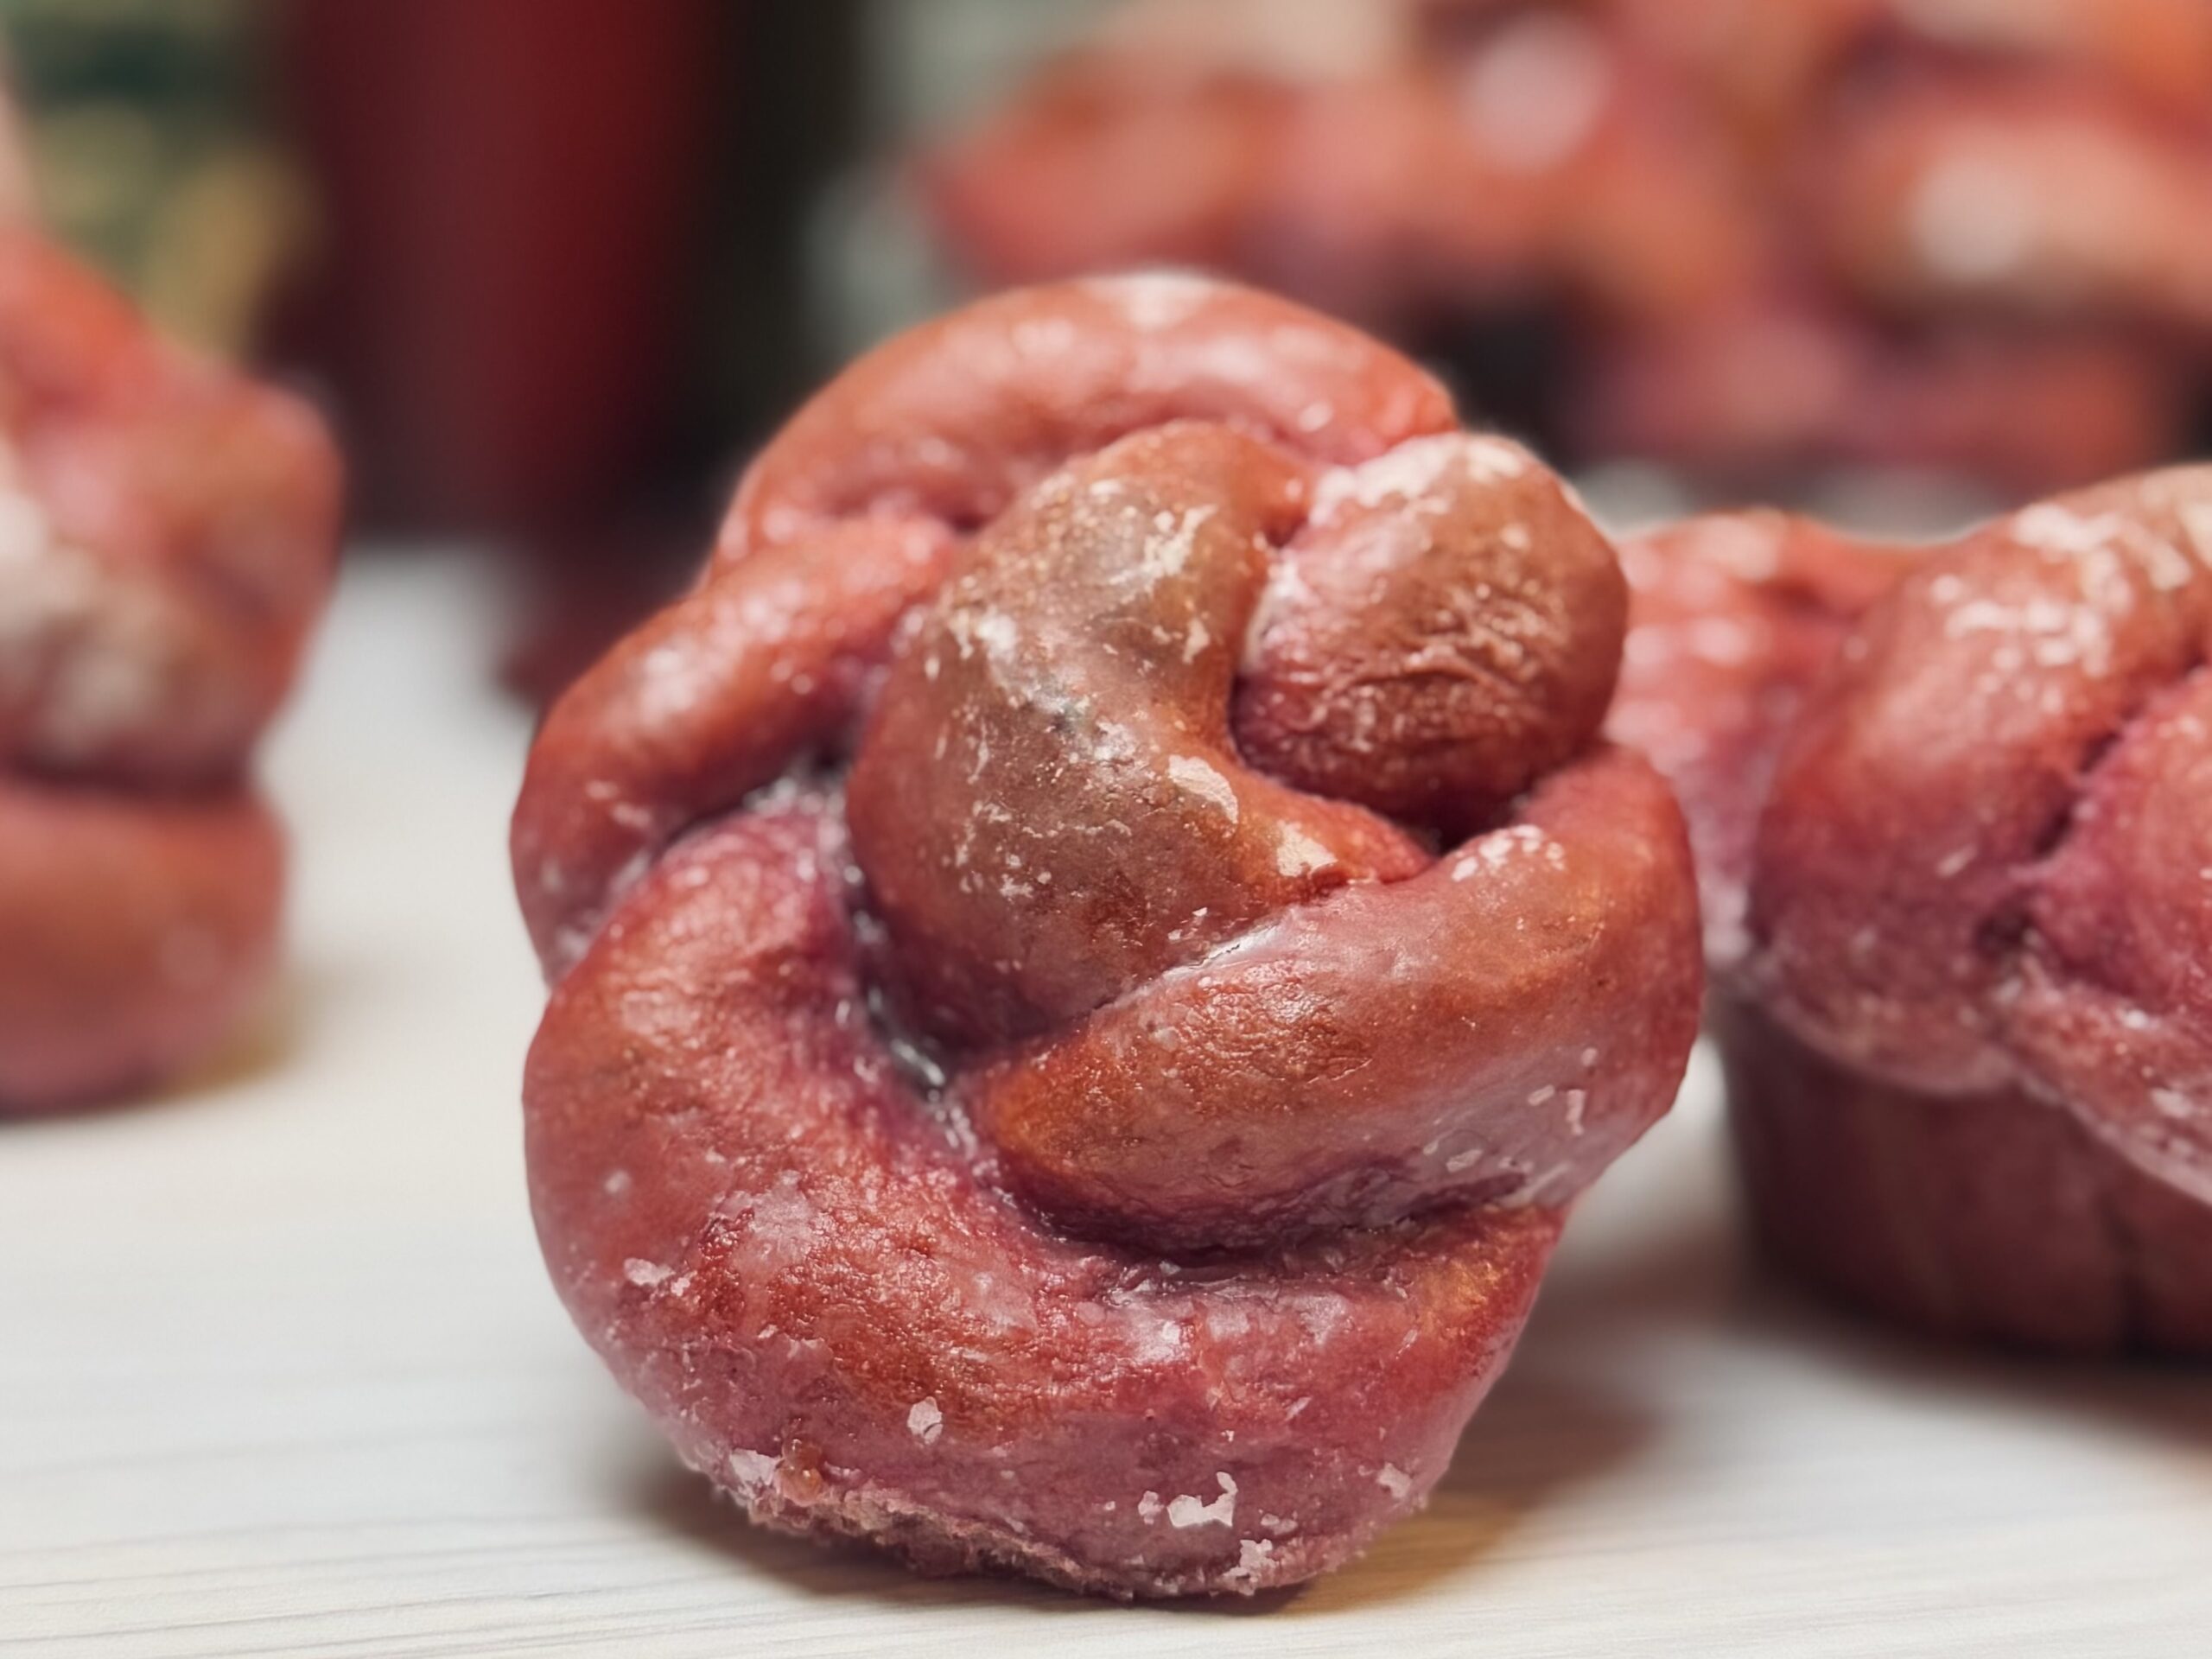
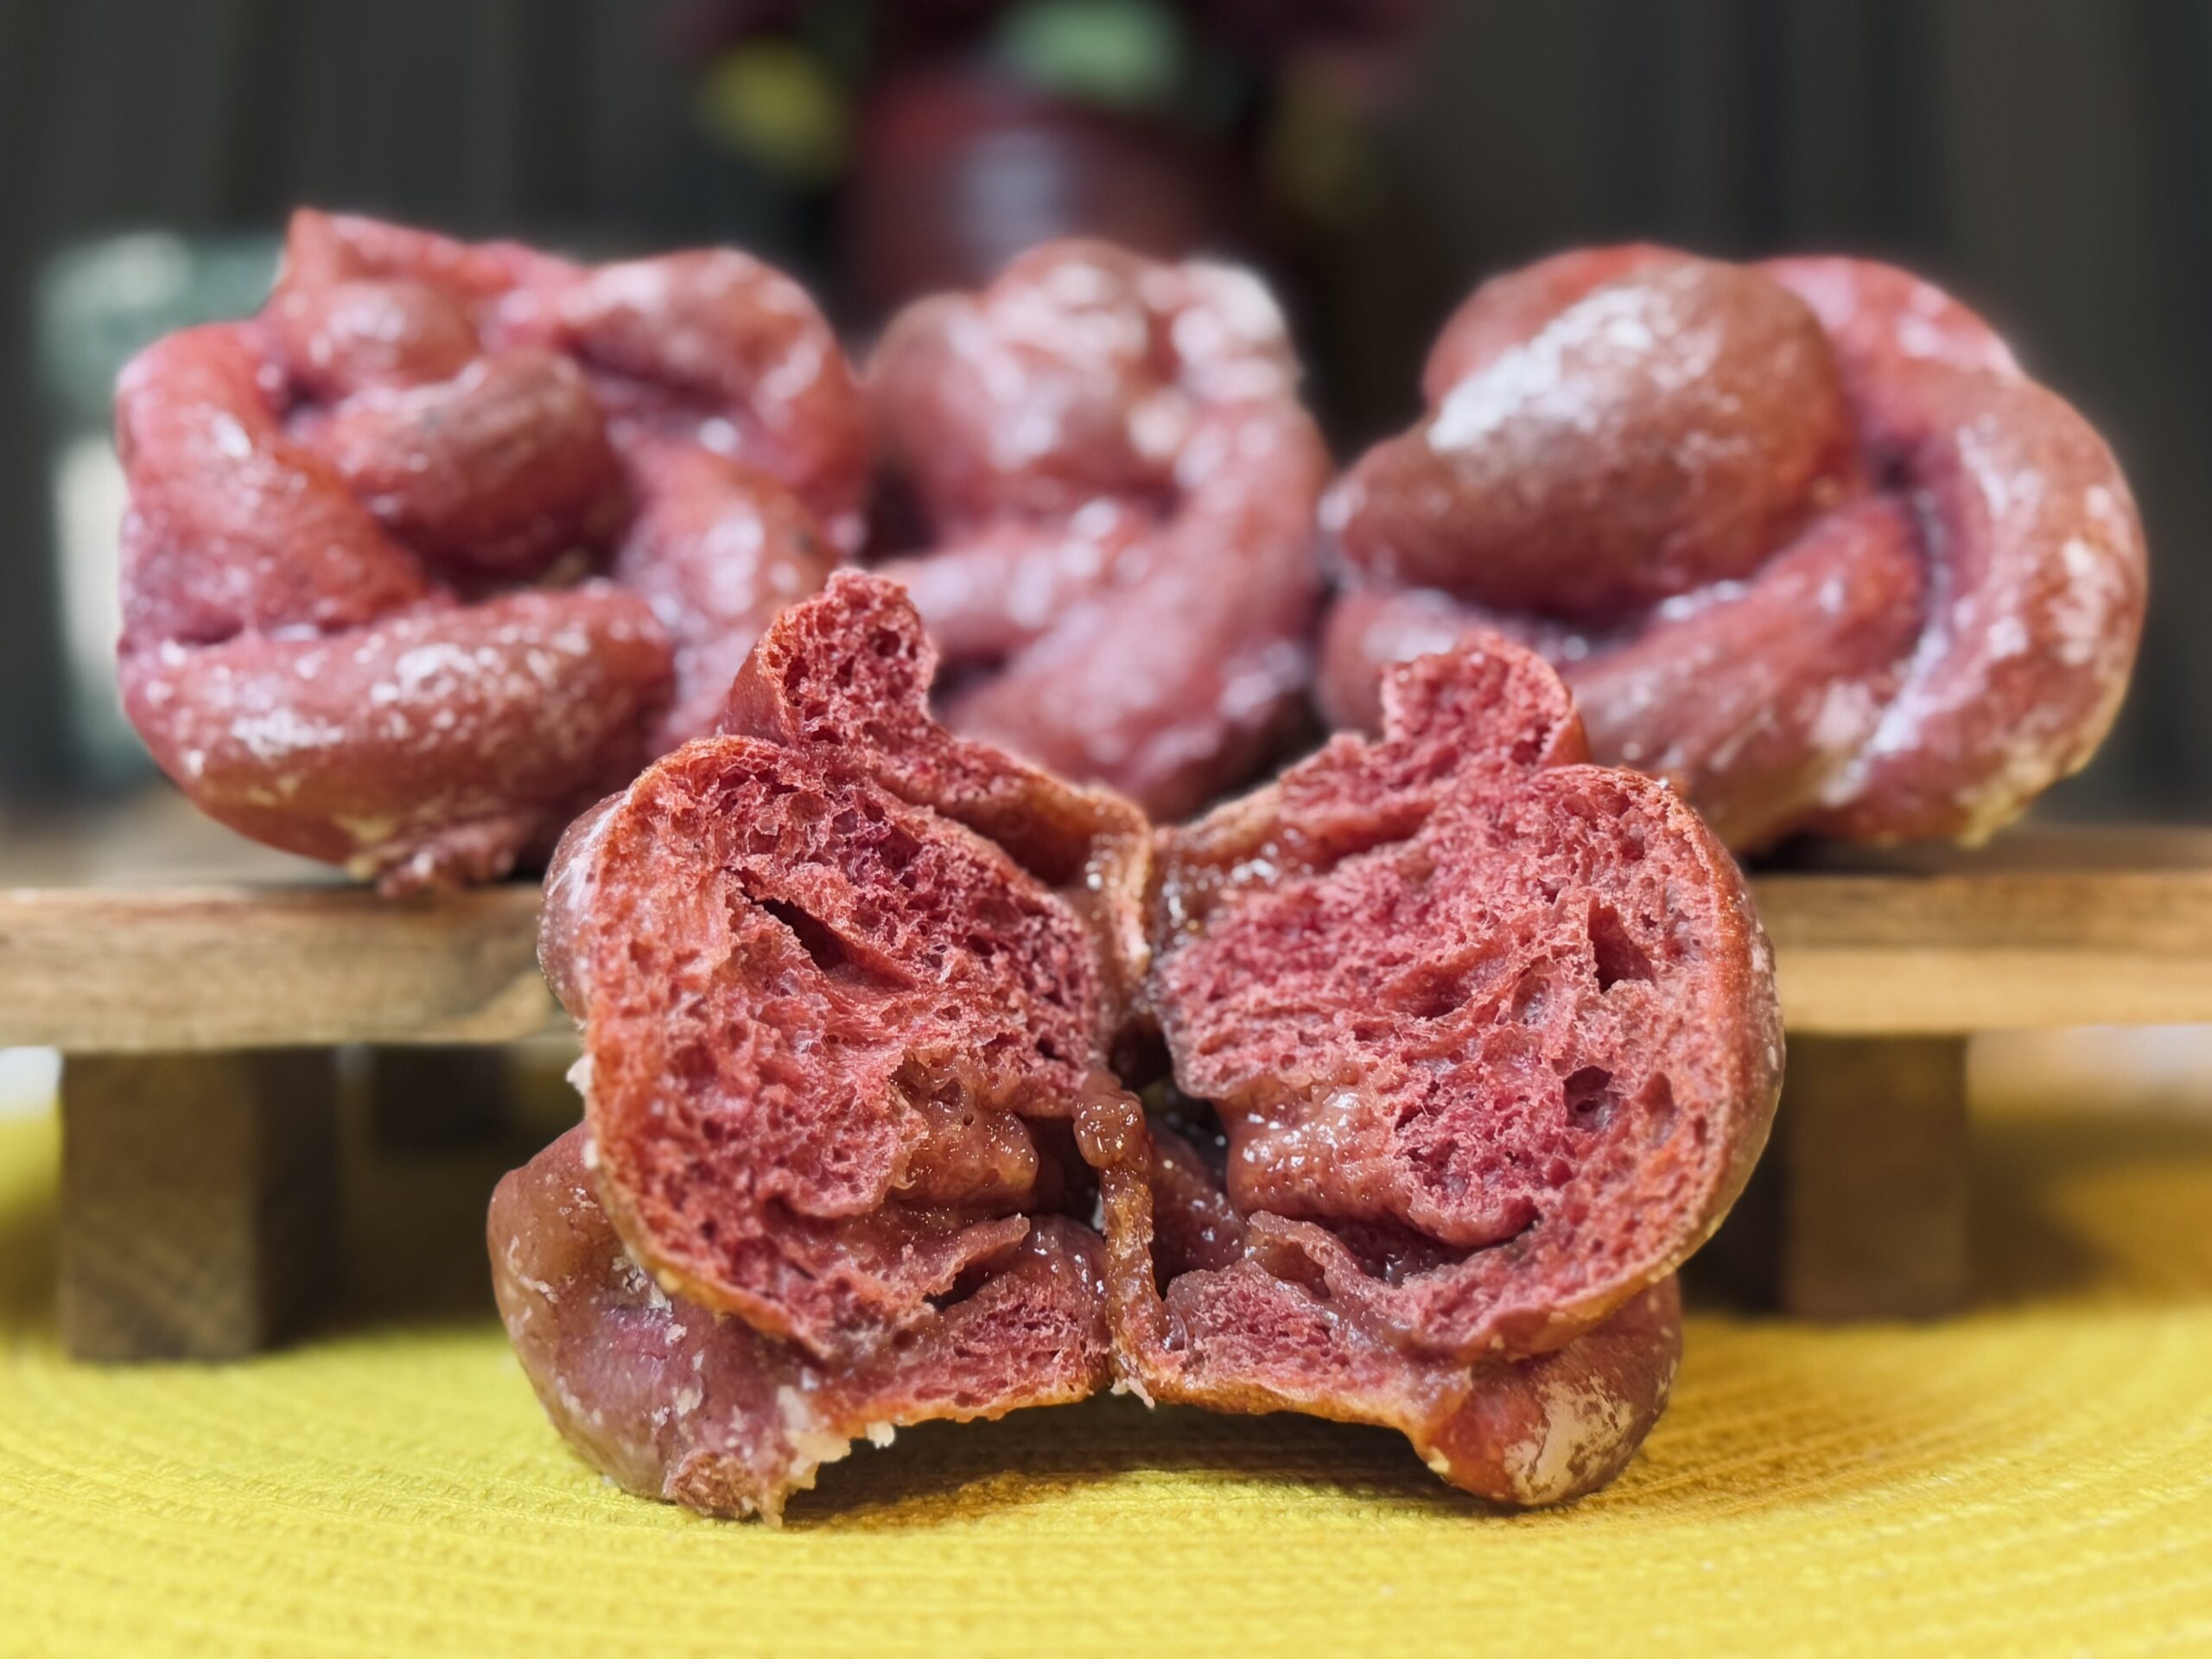
These soft, fluffy rolls are just as pretty as they are tasty, with a bright pink color from beets and delicate layers filled with sweet, fruity jam. Topped with a smooth, sugary glaze, they are the perfect mix of beauty and sweetness. They make a wonderful treat for Valentine’s Day, adding a fun and festive touch to any celebration. Whether you want to surprise someone special, try a new dessert, or just bake something unique, I hope these rolls become a favorite in your kitchen!
What Are Rose Jam Rolls?
These rose jam rolls were just a figment of my imagination, until I brought them to life. They were inspired by a creative reel I saw on Instagram, which I then reworked to become a sourdough bread roll recipe. To say the first try did not work out would be an understatement. I changed this recipe so many times to get the features I was looking for! Between getting the perfect dough consistency, figuring out the easiest way to shape, determining how to get the best color, texture, and flavor, I had an adventure with this one. I hope you are able to enjoy the fruits of my labor!
What I Love About This Recipe
These rose jam rolls are a feast for both the eyes and the taste buds. The addition of beets gives the dough a striking, rosy hue, making each roll as vibrant as it is inviting. Shaped into delicate roses, they bloom beautifully in the oven, revealing layers of soft, pillowy dough infused with a subtle earthiness that complements the sweet, fruity jam nestled within. A luscious glaze drapes over each roll, adding a touch of glossy elegance and just the right amount of sweetness to balance the flavors. These delightful rolls are not only a treat for dessert but a stunning centerpiece for any table, blending artful presentation with irresistible flavor.

The “Why” Behind The Starter Build
Why Build A Starter (Levain) For This Recipe?
A “sour” flavor is not generally preferred for sweet breads. By building a levain, we can use a formula that helps to reduce overall sourness in the starter and in the bread. To do this, it is important to understand the starter, which consists of yeast and bacteria, and how the formula works to reduce sourness.
Sourness comes when bacteria are overpopulating in your sourdough starter, meaning they are out of balance with the yeast. This happens naturally, as bacteria reproduce faster than yeast do, especially in ideal climates. To limit sourness, it is important to favor the yeast in starter care. In this levain formula, I do just this in order to limit acidity and reduce overall sour flavor.
Stiff Starter
By giving the yeast more food (this means they can continue to eat, multiply, and produce CO2) and reducing the amount of water (bacteria favor wet climates), we can effectively reduce the amount of acidity in our starter at the same percentage of rise as a starter made with equal amounts of flour and water.
Sugar
This is one of the most important components of this levain – do not skip it! Sugar is a powerful tool. Added in low amounts, it feeds the yeast and speeds up fermentation. Added in high amounts, it dehydrates yeast cells and potentially stops fermentation altogether. Added in just the right amount, the yeast still thrive, but the bacteria suffer. 10-15% sugar in a recipe or levain creates something called “osmotic stress.” This stress to the bacteria limits their ability to reproduce, which limits acid buildup, thereby limiting overall sourness coming from the starter.
Temperature
In order to favor the yeast, I aim to keep this levain between 70-75 F (21-24 C) and use it when it has approximately tripled in size. Yeast produce most abundantly in these temperatures, while the bacteria in your starter (there are two types – lactic and acetic) favor temperatures both higher and lower than this. This specific temperature helps provide balance to the starter, which translates to how efficiently the starter ferments the bread and how mild the overall sour flavor is.
Optional Kneading
Have you ever heard of developing gluten in your starter? While it is not essential, kneading this starter for just a few minutes will help trap air, introducing oxygen and stimulating yeast growth. It also provides structure (by creating a slightly more elastic gluten network), which helps the levain rise and maintain peak more efficiently.
The “Why” Behind The Dough and Process
Bread Flour
Bread flour increases the strength (elasticity) of the gluten network, which is helpful for enriched doughs containing butter, sugar, and (in this case) beets (ingredients that can interfere with gluten). Bread flour also helps the dough come together more efficiently when kneading, reducing the total amount of necessary mixing time. I have tested this recipe with both King Arthur Bread Flour, protein content about 12.7%, and Bob’s Red Mill Artisan Bread Flour, protein content 12.5%, both with great results.
Sugar
The amount of sugar in this recipe is relatively low, only 14%, which is the perfect amount to create osmotic stress without significantly affecting fermentation or dough quality, or creating an overly sweet dough. The purpose, in this case, is to work with the sweet stiff starter to reduce overall sourness coming from the bacteria during fermentation.
Salt
Salt is so very important to bringing out all the flavors in a recipe. It is a tightening agent, which helps create a more elastic (strong) dough. While it does slow fermentation, as well as gluten development, these are things already accounted for in the recipe because we cannot have a recipe without salt. It is important to use just the right amount, enough to bring out the flavor, but not so much that the loaf cannot ferment or come together. I use the standard – 2% salt – in all my recipes, unless otherwise noted.
Vitamin C (Ascorbic Acid)
Hello, secret ingredient! Vitamin C, also called ascorbic acid, is the secret ingredient to keeping the vibrant color of beets! You see, beets are very temperamental, sensitive to pH, oxygen, and heat. Without this ingredient, there’s a good chance your rolls will just be brown.
I can’t say for sure why the acids from the sourdough starter don’t also help to retain color. Maybe it’s not enough acid, or not enough acid at the start of fermentation when the beets need it. However, I can say for sure that this ingredient is the best hack for creating a beautiful pink hue that will keep even through baking.
Now, the flavor isn’t noticeable when fermentation goes well, but certain factors can cause these rolls to become too sour. A fermentation that is too long or too cold will create sourness that may not be desirable. For this reason, I do not recommend refrigerating this dough. In my opinion, an overnight method is best, unless you have the ability to do a speedy warm fermentation.
Beets
I originally planned to make this recipe with beetroot powder; however, I realized the color was just not vibrant enough for my preference. Instead, I turned to fresh beets, which ended up enhancing more than just the color. In fact, I was able to remove tangzhong from the recipe, as the rolls were plenty plush without it. And the flavor? Down to earth.
Now, there are so many ways to color dough, but I had to pick one for this recipe. Because of this, I stuck with beets, which seemed to be the most accessible of all the options (besides the fact that they need the vitamin C). Other coloring options will require a complete recipe rewrite, so I don’t recommend making any swaps for this ingredient. Instead, let me know what you’d like to see in the comments and I will add it to my list!
Milk
Milk is a must here for several reasons. The simplest reason is taste; milk adds a creamier flavor that pairs well with the rest of the ingredients. More importantly, though, milk affects the dough. It’s a tightening agent, making the gluten network stiffer and stronger. Sometimes, a stiffer gluten network might be undesirable for its effect on fermentation; however, for this recipe, the quantity of milk gives the dough the exact qualities we need. The resulting stiffer network helps to reduce overall stickiness, which helps make shaping much easier, especially since we are not refrigerating this dough.
Butter
Butter is a tenderizer; it makes the dough fragile and keeps it soft. The amount of butter here is only 15% of the total weight of the flour, small enough to not interfere with the gluten network (too much), but large enough to help keep the bread soft during baking.
Mixing
This dough is easy to mix/knead by hand or by mixer. While I almost always choose to use my Ankarsrum mixer whenever possible, any kind of mixer will do the job.
The goal is to take this dough from a shaggy mess to a smooth mass. This recipe includes ingredients like butter, sugar, and beets that can interfere with the dough’s natural ability to come together, but by putting in a few minutes of kneading time up front, any potential problems with gluten are bypassed.
The dough will show clear signs gluten development when it has been kneaded enough. Visually, the dough will appear smooth and will hold together all in one lump. It should have formed a ball around the dough hook (if a stand mixer was used) and should no longer be sticking to the sides of the mixer or the countertop (if kneaded by hand). You should be able to pick it up with one hand, and it should remove cleanly from the bowl or countertop. If you try to tear it, it should fight back, not wanting to give up a part of its whole.
Because this is a sourdough recipe, time will finish any remaining necessary gluten development. All we really need at this step is a good kickstart, and some developed elasticity (which will help with shaping later). All that to say, don’t fret if you are struggling to read your dough. If you are unsure if your dough is ready, you can stop kneading after about ten minutes and move on without worry.
Bulk Fermentation
Letting the dough rise as much as possible, but not too much, contributes to the airiest of loaves. In an attempt to favor the yeast and reduce sourness, I recommend keeping the dough temperature between 70-75 F (21-24 C). Because I give this dough a long final proof and prefer to skip any time in the fridge, I find it most convenient to let bulk fermentation happen overnight, which for me is about ten hours at 70 F (21 C). At the minimum, this dough should double in size, but you can let it triple if it was developed well in the stand mixer. Use your knowledge of your environment to bulk ferment this dough appropriately; it should take about 8-10 hours in the low-mid 70s F.
Shaping
Shaping is probably the hardest part of this entire recipe. I played with many shaping techniques and landed on this one, which I felt was the easiest and lended the best results.
If you used milk (a tightening agent) and developed the dough well, there should be enough tension to reduce stickiness and help these rolls roll out easier. Plus, this dough is fairly stiff (not too stiff though, or else the petals would be difficult to form), which should help as well. Even still, I like to be generous (not too generous) with flouring just to make everything goes smooth. For the quickest and most efficient shaping, you don’t want any of the pieces to stick to anything.
This recipe makes twelve roses, but from six sections of dough. So, the dough will be divided into six sections, which are then each divided again into six sections (which are the petals of the roses). Each rose petal will be rolled out and lined up, overlapping the previous rose petal by 1/2 to 1 inch. After the six rose petals are in line, we will add our jam, roll up the petals, and cut the section down the middle to make two roses.
The Filling
Any jam, jelly, or spread works great in this recipe. The two things to consider are: taste and heat. If the taste does not pair with the earthy notes of beets, maybe try something else. Additionally, if the spread cannot handle the heat of the oven, it won’t work for this recipe. I’ve tested this recipe with cherry preserves (the best one!), fig spread, and strawberry jelly, all with great results. The fig was not my favorite flavor combination, but it still worked. I’ve also tested this recipe with a concoction of cream cheese, sugar, and cherries which did not work like I wanted to. I imagine cream cheese with bits of fruit might work, but adding the sugar made it sort of dissipate in the oven.
Final Proof
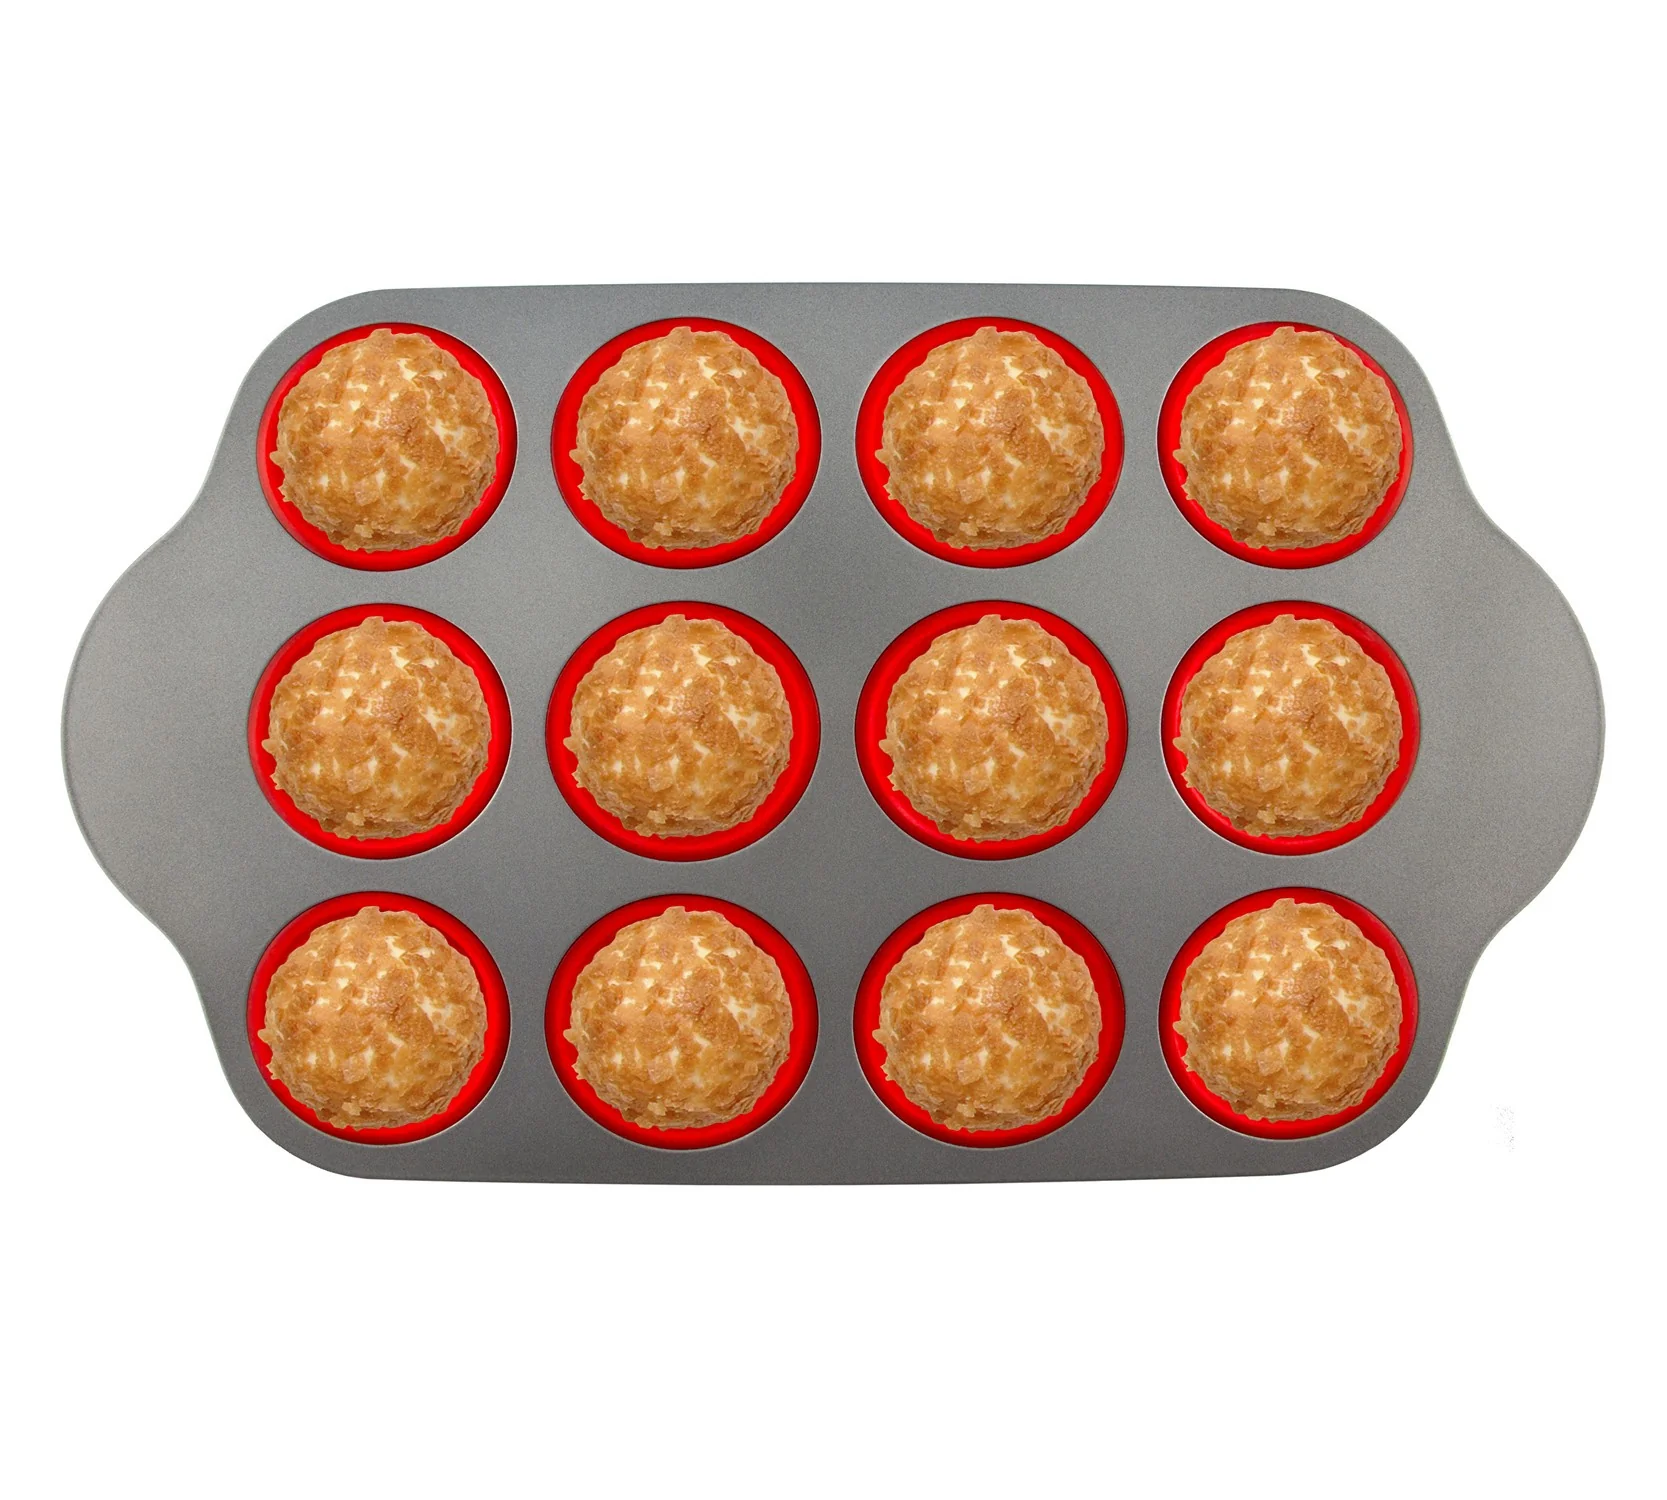
I proof these rolls in a muffin pan, which helps trap the jam and empowers the petals of the roses to expand up and out. Without the muffin pan, the shaping method would have to be completely changed to keep the filling from spilling out.
Baking
These rolls are simple to bake, as they do not require the preparation of steam or a wash. Milk, sugar, and a good fermentation will cause perfect browning in the oven. I bake my milk breads (like this one) at a lower temperature than my water-based breads: 350 F (175 C). This “low and slow” temperature prevents over-browning and over-baking. A final internal temperature of 185 F (85 C) cooks these rolls until they are just done, leaving you with the softest and fluffiest end result.
The Glaze
The final touch and perfect garnish. The glaze gives the rolls a shiny top and hint of sweetness. Though you don’t have to have it, I wouldn’t skip it. Be sure to brush the glaze on while the rolls are very hot, otherwise the mixture will apply more like icing than a glaze. I like to brush the glaze generously on the rolls while they are still in the muffin pan, before taking them out to cool.
Suggested Timeline
Suggested Timeline
DAY 1
9:00 a.m.
- Make the sweet stiff starter.
8:00 p.m.
- Cook the beets.
9:00 p.m.
- Process the beets.
- Mix and knead the dough.
9:30 p.m.
- Begin bulk fermentation.
DAY 2
8:00 a.m.
- Shape the rolls.
2:00 p.m.
- Bake the rolls.
2:30 p.m.
- Glaze and enjoy!

📌 Quick Tip: Read the recipe in its entirety before you start cooking. This will help you understand the ingredients, steps, and timing involved, and allow you to prepare any necessary equipment or ingredients beforehand.
Rose Jam Rolls


Ingredients
For The Sweet Stiff Starter
For The Dough
For The Filling
For The Glaze
Instructions
-
Make the sweet stiff starter.
Mix together all ingredients for the sweet stiff starter. Rest about 12 hours (triple in size) before incorporating into the dough.
I ferment my sweet stiff starter around 74 F (23 C). -
Prepare the beets.
To prepare the beets, first rinse off the dirt, then chop off the ends. Boil them in water with a splash of white vinegar or lemon juice (to help retain their color) for about 45 minutes, or until they are just fork tender. Transfer them to a bowl of ice water to stop the cooking, then peel off the skins. Process with just enough water to make a puree. Reserve 130 g of beet puree for the dough.
It's best to use the beets as fresh as possible for the most vibrant color. Heat, oxygen, and acidity all affect the color of beets. For bread dough, you can end up with any range of color from vibrant pink to brown. Be sure to take the right precautions (follow this recipe) when preparing both the beets and the bread dough. -
Mix the dough.
Add all ingredients for the dough to the bowl of a stand mixer (or to a mixing bowl if mixing/kneading by hand).
- For an Ankarsrum mixer, use the dough roller attachment. Knead at a low speed, speed 1-2 o'clock, until the dough comes together. Then, set the timer for 12 minutes and knead the dough at speed 2 o'clock until it forms into a ball in the mixer, is smooth, and can be lifted from the bowl with one hand without sticking to the bottom or tearing.
- For a KitchenAid, use the dough hook attachment. Knead at a low speed, speed 2, until the dough forms a ball around the dough hook, no longer clings to the sides of the bowl, and resists tearing when pulled, about 10 minutes.
-
Rest until double, or triple, in size.
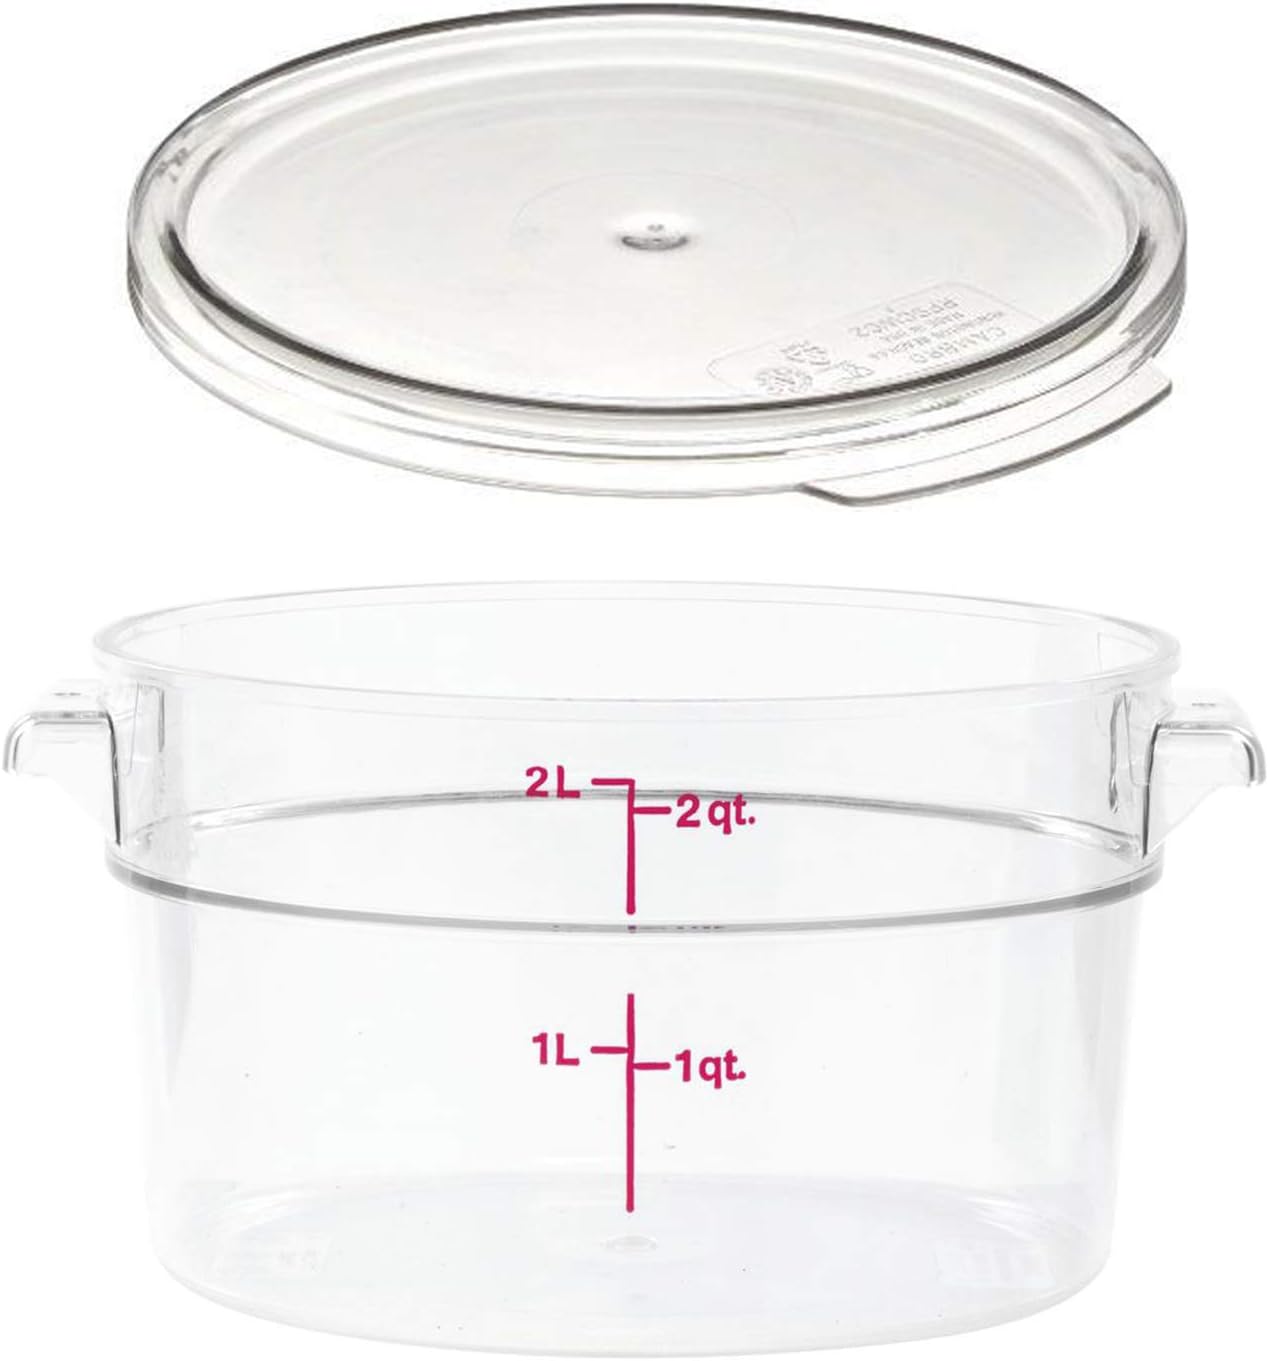
Let the dough bulk ferment in a 2 qt container. The dough should completely fill the container when bulk fermentation is complete.
I prefer to ferment this dough overnight at about 70 F (21 C), which takes about 10 hours.
-
Shape the rolls.
Turn the dough out onto a lightly floured surface and divide into six sections. Each section will form two roses.
Divide each section into six pieces, which are the petals of your roses. Roll each piece into an oval, about 4 inches long. Line the pieces up so that they overlap on the long ends by 1/2 to 1 inch.
Place a line of your favorite jam or jelly down the middle, and spread it out so that it covers the center third.
Roll everything up into a log, then cut the log in half. Place each half, flat side down, into a greased muffin pan.
See 2:40 in the video for visuals. -
Final rest.
Let the rolls rest again in the muffin pan until they are very puffy and spilling over the edges of their cups.
Since this recipe includes tightening agents like milk and beets, you can push fermentation longer than you think. I usually let these rolls rest for around 5 hours at about 70 F before baking.
-
Bake the rolls.
Bake at 350 F (175 C) for about 30 minutes (until the internal temperature reaches at least 185 F).
-
Make the glaze.
Meanwhile, make the glaze by whisking together the powdered sugar and milk until smooth.
-
Glaze and enjoy!
Brush the glaze all over the rolls as soon as they come out of the oven. I like to glaze the rolls while they are still in the muffin pan.
Cool for 5 minutes in the muffin pan, then transfer to a cooling rack and enjoy!

You might need...


Affiliate Disclosure: This post contains Amazon affiliate links. This means when you buy a product using one of my links, I may receive a small commission at no cost to you. Thank you, in advance, for supporting my work.
Nutrition Facts
Servings 12
- Amount Per Serving
- Calories 201.61kcal
- % Daily Value *
- Total Fat 4.99g8%
- Saturated Fat 2.83g15%
- Cholesterol 12mg4%
- Sodium 171.5mg8%
- Potassium 86.71mg3%
- Total Carbohydrate 34.65g12%
- Dietary Fiber 1.11g5%
- Sugars 10.57g
- Protein 4.43g9%
- Vitamin A 40.16 IU
- Vitamin C 0.53 mg
- Calcium 22.74 mg
- Iron 1.32 mg
- Vitamin D 0.16 IU
- Vitamin E 0.23 IU
- Vitamin K 0.51 mcg
- Thiamin 0.22 mg
- Riboflavin 0.16 mg
- Niacin 2.08 mg
- Vitamin B6 0.02 mg
- Folate 23.26 mcg
- Vitamin B12 0.06 mcg
- Phosphorus 48.79 mg
- Magnesium 11.99 mg
- Zinc 0.36 mg
* Nutrition values are auto-calculated and should be used as an approximation only.
Notes
- Storage: Store on the counter in a Ziploc bag for three to five days. Alternatively, flash-freeze the rolls on a sheet pan, then store in the freezer. Reheat in a low oven, or in the microwave.


