Autolyse is a transformative technique used in the artisan bread-making world. This simple step in the bread-making process can help improve overall gluten development, resulting in a more extensible (stretchy) dough and enhancing overall bread quality.
In this article, I attempt to approach autolyse from the most unbiased standpoint I possibly can. I want to be as informative as possible, while still being blunt about its effects and if they are achievable without autolyse. While this is not a technique I generally use in my published recipes, I do adore it and think it can be very valuable in certain situations.
In this article:
- What is autolyse?
- Autolyse versus fermentolyse
- A brief history of autolyse
- Potential benefits and drawbacks of autolyse
- The science behind autolyse
- Elasticity verses Extensibility: If gluten is already developed, why do I need to continue working the dough?
- Is autolyse necessary to develop proper extensibility in my dough?
- What kind of bread should be autolysed?
- Is a longer autolyse better?
- A comparison: An autolysed bread versus a non-Autolysed One
- Notes and observations on comparison loaves
- How to add autolyse to your favorite bread recipe
- Do I have to autolyse?
- Is autolyse the open-crumb secret?
- What questions do you still have?
- Join the Email list
What is autolyse?
Autolyse is a process used in bread-making where flour and water are mixed together and allowed to rest for a period of time before other ingredients, such as sourdough starter and salt, are added. Some bakers autolyse for thirty to sixty minutes, others a few hours, and still others overnight. This is different from fermentolyse, where water, flour, and sourdough starter are mixed together and allowed to rest before adding salt.
During autolyse, a few important processes occur:
Hydration of Flour: During autolyse, water is absorbed by the flour, which activates the enzymes present in the flour. This means the flour is fully hydrated before fermentation begins, making the dough easier to work with (less sticky) and developing the gluten network more efficiently.
Gluten Development: The rest period allows gluten to start developing naturally. Gluten, the network of proteins that gives bread its structure, begins to form during autolyse, which reduces the amount of kneading (generally by machine) needed later.
Enzyme Activity: During autolyse, two enzymes (protease and amylase) begin working. Protease begins breaking down proteins, while amylase begins converting starch to sugar (which the yeast will consume when added). This allows the dough to become more extensible (stretchy) before the remaining ingredients (which can have tightening effects on the dough) are added.
Improved Dough Consistency: The dough becomes more extensible and less sticky, making it easier to shape and handle.
Enhanced Flavor and Texture: Autolyse can improve the flavor and texture of the final bread. The extended hydration and enzyme activity can result in a more flavorful and aromatic loaf with a better crumb structure.
Autolyse versus Fermentolyse
Autolyse
- Flour and water are mixed together and allowed to rest for a period of time before other ingredients are added.
- Benefits include –
- Hydration: Ensures thorough hydration of the flour.
- Gluten development: Starts the gluten formation process, reducing kneading time.
- Enzyme activity: Activates enzymes that improve dough texture and flavor.
- Improved handling: Makes dough more extensible and less sticky.
Fermentolyse
- Also known as “fermentation autolyse.”
- Flour, water, and sourdough starter are mixed together and allowed to rest for a period of time before other ingredients, namely salt, are added.
- Combines the aspects of both autolyse and fermentation.
- Benefits include –
- Early fermentation: Fermentation begins during the resting period, which can develop more complex flavors.
- Gluten development: Similar to autolyse, but the presence of yeast can slightly accelerate the process.
- Improved dough consistency: Like autolyse, fermentolyse helps in achieving better dough texture and handling.
Key differences
- Ingredients –
- Autolyse: Only flour and water are mixed initially.
- Fermentolyse: Flour, water, and sourdough starter are mixed initially.
- Fermentation –
- Autolyse: Fermentation begins after the initial rest period when sourdough starter is added.
- Fermentolyse: Fermentation starts during the initial rest period.
Choosing between autolyse and fermentolyse
- Autolyse is often preferred for its simplicity and is particularly effective for doughs that require strong gluten development without the early fermentation influence.
- Fermentolyse might be chosen when a baker wants to initiate fermentation early, leading to potentially deeper flavors and slightly different dough characteristics due to the ongoing yeast activity during the resting period.
Both techniques can significantly improve the quality of bread, and the choice between them depends on the desired outcome and specific characteristics of the bread being baked.
A brief history of autolyse
Autolyse was developed and popularized by a French baker, professor, and biochemist named Raymond Calvel as part of his broader contributions to the field of bread science and artisanal baking. He developed this technique after observing a decline in the quality of French bread, which he attributed to the adoption of industrial baking methods that prioritized speed and efficiency over flavor and texture. In other words, the use of stand mixers to knead bread dough at fast and aggressive speeds led to a bread that was lighter in color and lacking in flavor and texture. Though the method was quicker and more efficient for bakers, he felt bread quality was declining and set out to do something about it. In his quest to restore the traditional qualities of French bread, Calvel conducted research on dough development and fermentation processes. Through his experiments, he discovered that allowing the flour and water to rest together before adding other ingredients could significantly improve the dough’s quality.
Calvel introduced the concept of autolyse in his book, “Le Goût du Pain” (The Taste of Bread), published in 1990. The term “autolyse” itself is derived from the Greek word “autolysis,” meaning self-digestion or self-breaking down. Calvel’s method involved mixing just flour and water and allowing the mixture to rest for a period before adding yeast and salt. This rest period allowed the dough to hydrate fully and enzymes to begin breaking down proteins and starches, leading to improved gluten development and dough handling.
Autolyse meant gluten proteins could start to align and form a network without the need for extensive kneading. The technique enhanced the dough’s extensibility and texture, resulting in a superior crumb structure and better flavor in the final bread. Bakers found that autolysed doughs were easier to work with, less sticky, and more manageable during shaping.
Because of this, the autolyse method quickly gained popularity among artisan bakers who were keen to improve the quality of their bread. It became a staple technique in the production of traditional French breads and other artisanal loaves.
Today, autolyse is widely used in both professional and home baking, appreciated for its simplicity and the significant improvements it brings to dough and bread quality.
Potential Benefits and Drawbacks of autolyse
Potential benefits of autolyse –
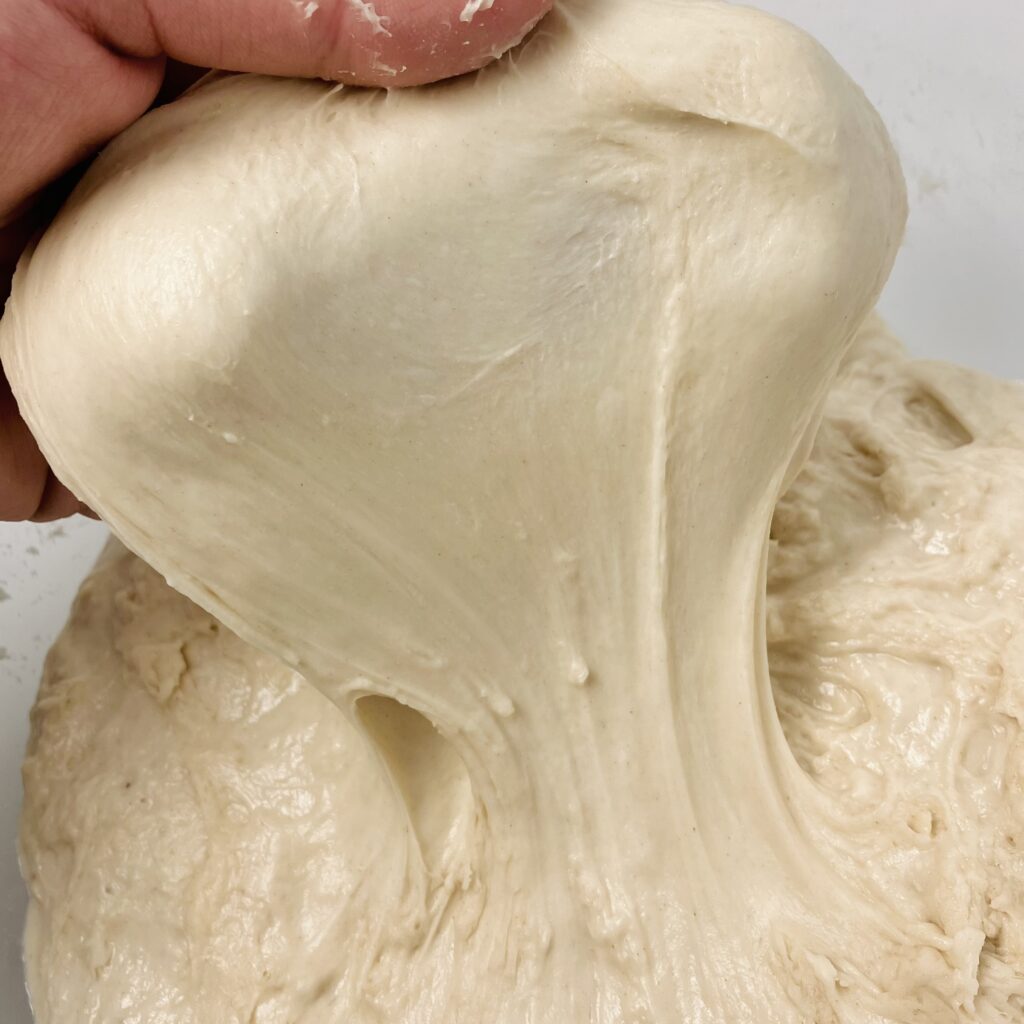
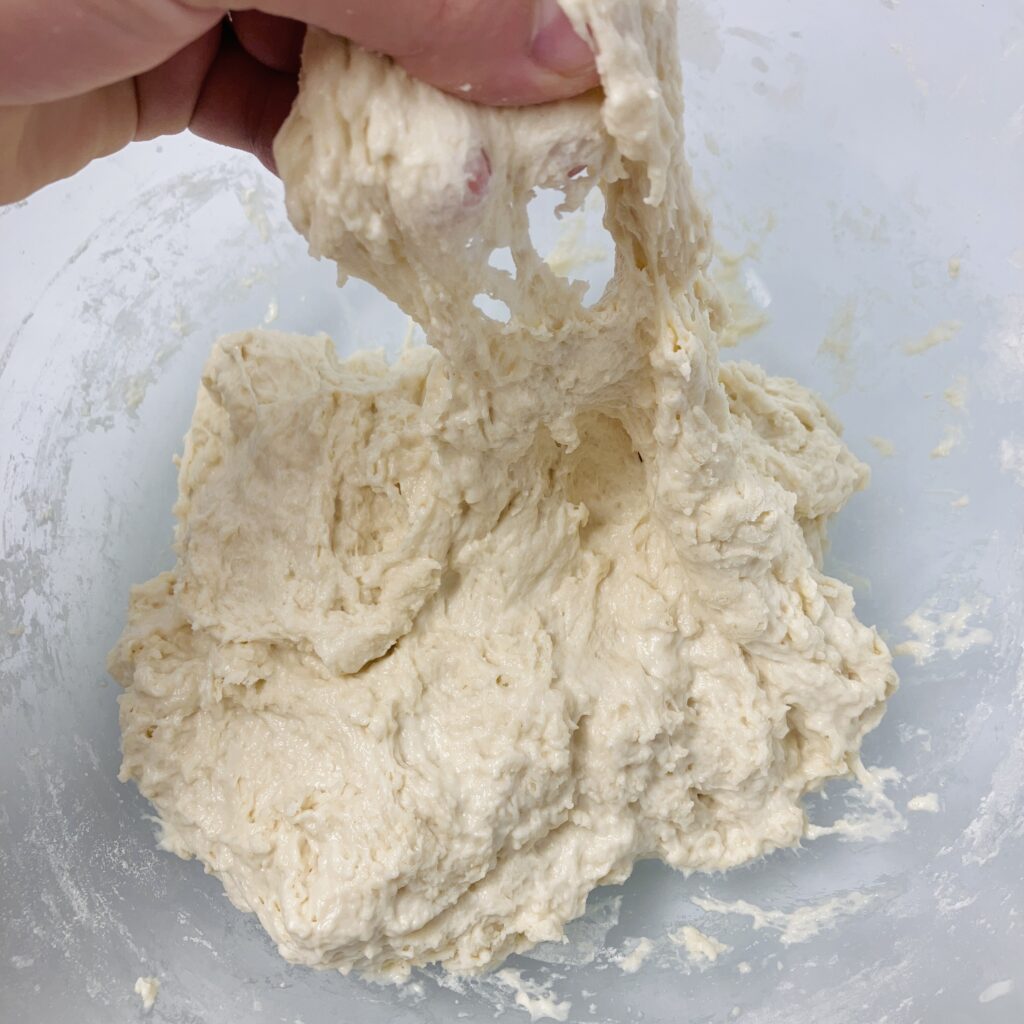
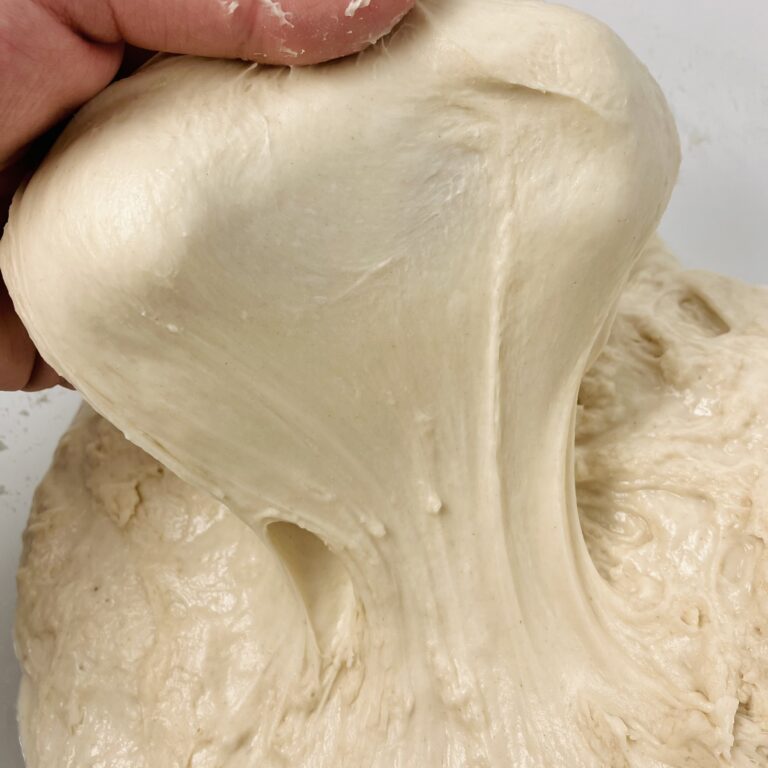
- Improved Gluten Development: The autolyse method promotes the natural development of gluten without extensive kneading. This gluten development creates extensibility, or the dough’s ability to stretch and hold in air bubbles. A windowpane test can easily be passed with no work or effort on the part of the baker. When the baker works the gluten through folds, the gluten network becomes strong and elastic, rather than just extensible. This improved gluten development leads to a loaf that is easier to shape, rises tall in the oven (with an excellent oven spring), and holds in air bubbles beautifully.
- Better Flavor and Aroma: The autolyse period activates enzymes in the flour, namely amylase and protease, which break down starches into sugars and proteins into peptides. These smaller molecules contribute to better fermentation and result in improved flavor and aroma in the finished bread.
- Reduced Kneading Time: This applies only if dough is being mixed in a mechanical mixer. Since gluten has already begun developing, less mixing time is needed to build dough strength. This can save time and reduce the risk of overworking the dough, which can lead to a denser crumb.
- Improved Fermentation Ability: Because gluten is well-developed and strong, the dough will more readily hold in air bubbles. A loaf that has been autolysed can be fermented for an exponential amount of time longer than a loaf that has not been autolysed, with a significantly decreased risk of becoming sticky, soupy, or falling flat in the oven. Upon baking, a well-fermented loaf will be taller and more voluminous than a lesser-fermented loaf without autolyse.
Potential drawbacks of autolyse –
- Extended Preparation Time: Autolyse adds an extra step to the bread-making process. This can create a scheduling complexity for some with tight or busy schedules. It adds at least twenty minutes to the preparation time, but even up to multiple hours depending on the recipe and recipe goals.
- Hard To Incorporate Ingredients: This applies to dough being mixed by hand. Once the flour and water have been mixed and allowed to rest, it becomes more difficult for the sourdough starter and salt to be mixed in. Each takes about five minutes or so to incorporate into the dough, which can be frustrating and a potential burden to some. (On the other hand, this extra mixing time by hand only improves gluten strength.)
- Inconsistent Results With Different Flours: Different types of flour can react differently during autolyse, and some may not be suitable for autolyse at all. For example, whole grain flours may require a different autolyse time compared to white bread flours. Bakers may need to adjust the autolyse time based on the specific flour used, which can require experimentation.
- Complexity For Beginners: For novice bakers, adding an autolyse step can complicate the bread-making process. It requires an understanding of how dough should feel and behave, which may be challenging for those just starting out.
- Potential For Over-Autolyse: If the autolyse period is too long, the reverse of all the potential benefits may occur. The dough can become overly extensible, slack, and sticky, making it difficult to shape and handle, leading to a loss of structure and a flat loaf.
The Science Behind autolyse
During autolyse, the flour fully hydrates as water is absorbed by the proteins (glutenin and gliadin) and starches in the flour. As the dough rests, glutenin and gliadin begin to interact and form gluten naturally, without the need for extensive kneading. This gluten network is essential for trapping gas produced by yeast during fermentation, giving the bread its structure and texture.
Meanwhile, two enzymes, amylase and protease, are activated. Amylase breaks down starches in the flour into simpler sugars. These sugars are important because they feed the yeast during fermentation, leading to better fermentation activity and improved flavor. Protease breaks down proteins in the flour into smaller peptides and amino acids. This process helps to soften the dough and makes it more extensible, facilitating better gluten development.
A well-developed gluten network from the autolyse period is better at retaining the carbon dioxide produced during fermentation, which can lead to a higher rise and better crumb structure.
Because of the enzymatic activity and fermentation efficiency developed through autolyse, the flavor and aroma of bread can be better developed. The enzymes active during autolyse (amylase and protease) contribute to the development of flavor precursors. These precursors are then metabolized by yeast during fermentation, enhancing the bread’s flavor and aroma.
Elasticity verses Extensibility: If gluten is already developed, why do I need to continue working the dough?
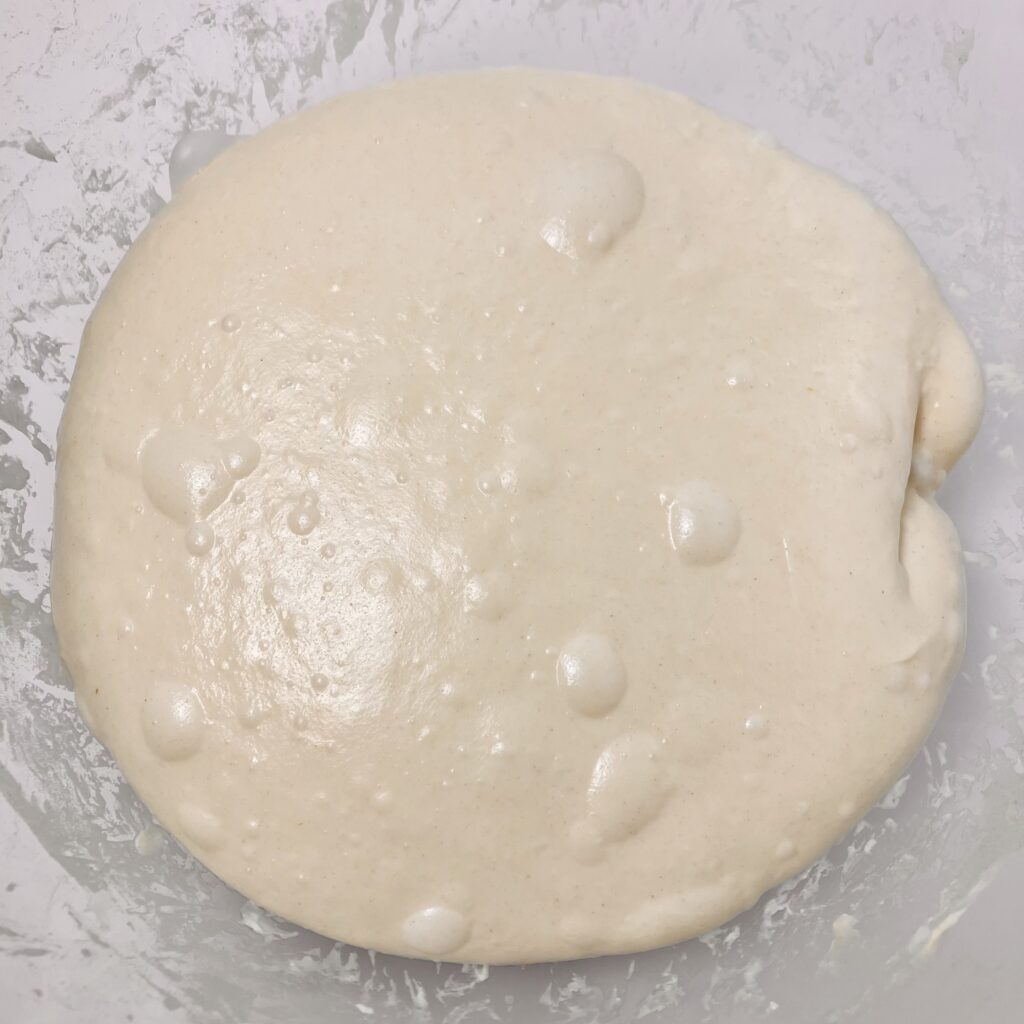
During autolyse, the dough becomes what is called “extensible.” This simply means “stretchy.” The longer the autolyse, the more extensible the dough becomes. This extensibility is incredibly important to helping the dough hold in air bubbles and expand without collapsing. But, without working the dough (think folds or kneading), there is an important component missing called “elasticity.” Elasticity is the dough’s ability to pull back and hold itself together.
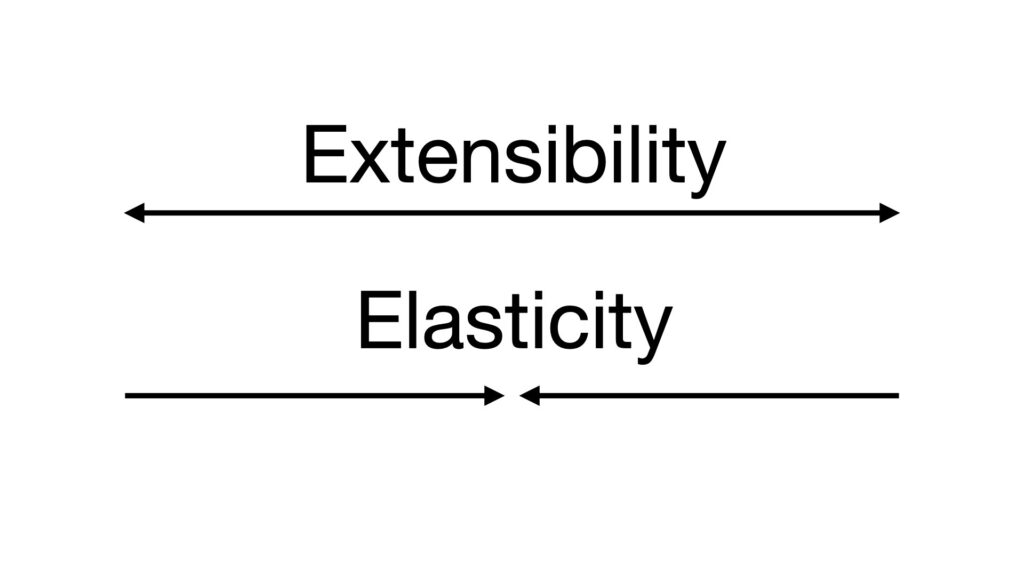
Without elasticity, the dough would simply fall flat. Both extensibility and elasticity work together to hold in air as the dough ferments, keep the loaf from falling flat, build a tall, well-structured loaf, and help the dough expand wide where is has been scored.
Altogether, autolyse improves extensibility before fermentation begins, but without working or strengthening the dough through folds or kneading, elasticity is not developed. Both are needed in order for the loaf to properly ferment, rise, and hold itself together.
Is autolyse necessary to develop proper extensibility in my dough?
The answer to this may greatly disappoint autolyse proponents, but the truth is: autolyse is not necessary to developing extensibility. While autolyse gives the dough a head start on gluten-development and extensibility, extensibility develops through the dough’s resting periods (in between folds and during bulk fermentation), whether the dough was autolysed or not.
The longer the autolyse, the more extensible the dough becomes before fermentation begins. This means that by the time the sourdough starter is added, the dough has the potential to be extraordinarily stretchy and ready to hold in air bubbles, and the dough is ready to take in the strengthening/elasticity development process with open arms.
When dough is not autolysed and starter is added right away, the fermentation process does not start out with extensibility. Instead the dough will be shaggy and will tear easily when pulled. Because of this, strengthening/elasticity development in these early stages is not as beneficial, since the dough has not become extensible enough to properly stretch and strengthen. This can lead to loaves that are not properly developed or do not rise as tall in the oven without the proper adjustments.
To fix this issue without autolyse, a longer resting period can be applied before the first set of folds begins. This gives a chance for extensibility to develop so that strengthening measures are more beneficial. Thirty minutes, especially in a warm environment, is typically enough, but an hour of rest before strengthening begins is even better.
What kind of bread should be autolysed?
Arguably, it is not essential for any bread to be autolysed for a desirable outcome. Despite this, autolyse can be greatly beneficial, especially to those who are struggling with proper strengthening on their loaves.
Autolyse is best used for artisanal breads. While the word “artisanal” can be vague and have a variety of interpretations, here it is meant as any bread made by hand, generally consisting of a hydration of at least 70%. These breads typically consist of only four ingredients: flour, water, sourdough starter, and salt, though they may also sometimes include oil, a small amount of sweetener, or other flavoring ingredients. Artisanal breads do not include dough enhancers and are not made in factories, rather by small bakeries or home bakers. Many artisanal breads require folding as a primary method of strengthening, and can do so due to having a higher hydration (wetter dough) and minimal enrichments. Additionally, many artisanal breads are baked in a hot oven with sufficient steam during the first portion of baking to help with rise and expansion before heat sets the bake. Examples of artisanal breads include: country bread, baguettes, and focaccia. (NOTE: The recipes linked here do NOT include autolyse, as this is not a technique I generally include in my published recipes.)
It is not a good idea to use autolyse for breads that are lower in hydration (less than 70%). When flour and water are allowed to sit and become extensible, additional ingredients become more difficult to incorporate. With a wetter dough, this incorporation is moderately difficult, but still manageable. Conversely, with a stiffer dough, this incorporation is unnecessarily difficult and nearly impossible to do by hand. For low hydration doughs, stick with mixing the ingredients all at once.
It may not be a good idea to autolyse doughs with a high percentage of flours that are highly extensible, such as spelt. Because the flour is already extensible, it’s not necessary to add the extra step to make it even more extensible. There is a potential for over-autolyse here, where the gluten actually begins to break down and the effects of autolyse are reverse what the intention was.
Is a longer autolyse better?
The answer to this completely depends on personal preference, the environment, and the type of flour being used. The longer the autolyse, the more the gluten develops and the more extensible the dough becomes. This can be incredibly beneficial in the right conditions.
It is best to perform a longer autolyse in cooler temperatures (70 F or below). Warmer temperatures can accelerate enzymatic activity, which can lead to over-autolyse if left too long. A long autolyse can be done in the refrigerator, if desired.
A longer autolyse can be magical when using the right flour. For example, a high protein bread flour, such as King Arthur Bread Flour, would do well with an overnight, twelve-hour, autolyse in cooler temperatures (70 F or below). Meanwhile, flours that are highly extensible (ex – spelt) or contain increased enzymatic activity (ex – rye) may not benefit from a longer autolyse, potentially resulting in a sticky, unmanageable dough.
Altogether, the answer to this is not set in stone. The desired duration of autolyse can vary depending on flour choice, strengthening goals, and even environment. Shorter autolyse periods (fifteen to thirty minutes) can still provide benefits, while longer autolyse periods (up to an hour or more) can further enhance dough properties. However, too long an autolyse can result in a slack dough that is difficult to handle. Experimentation may be required to determine what is best in your own home with the flours and methods you prefer to use.
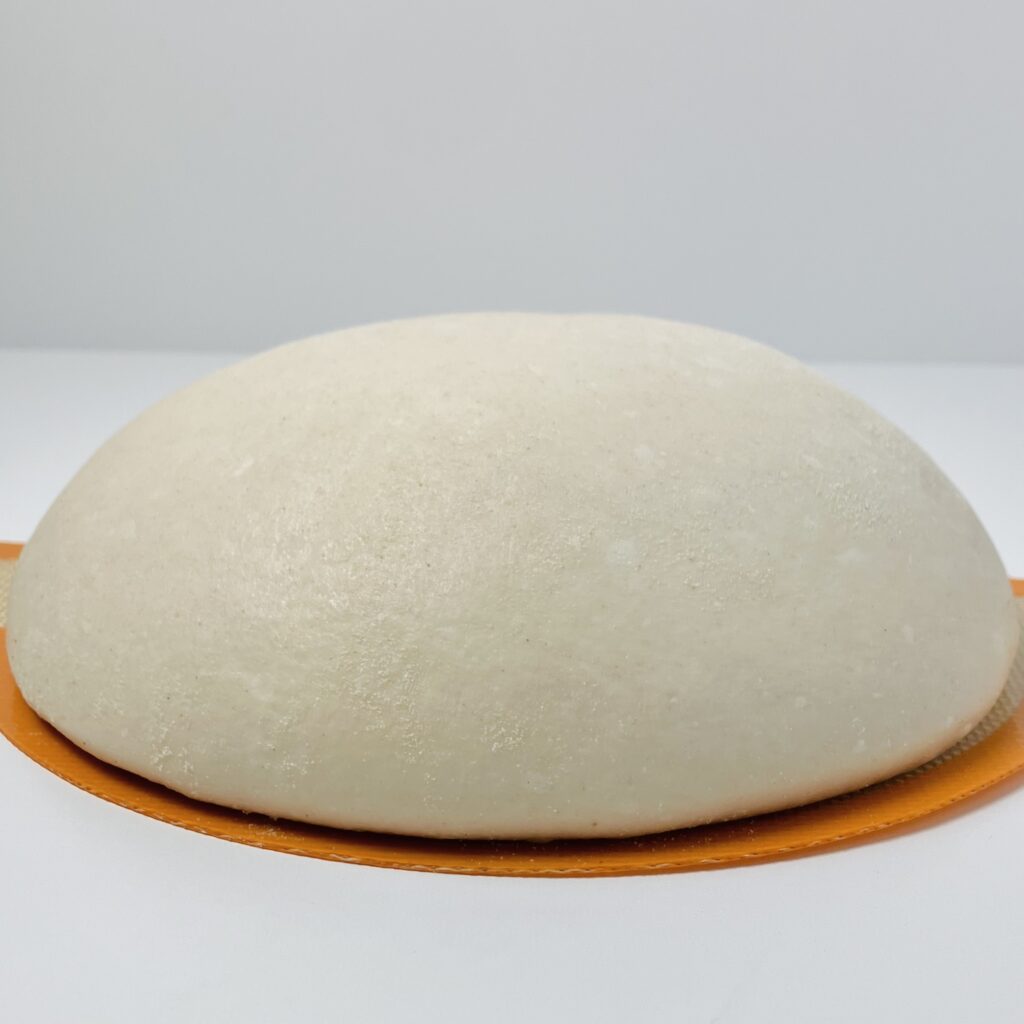
A comparison: An autolysed bread versus a non-Autolysed One
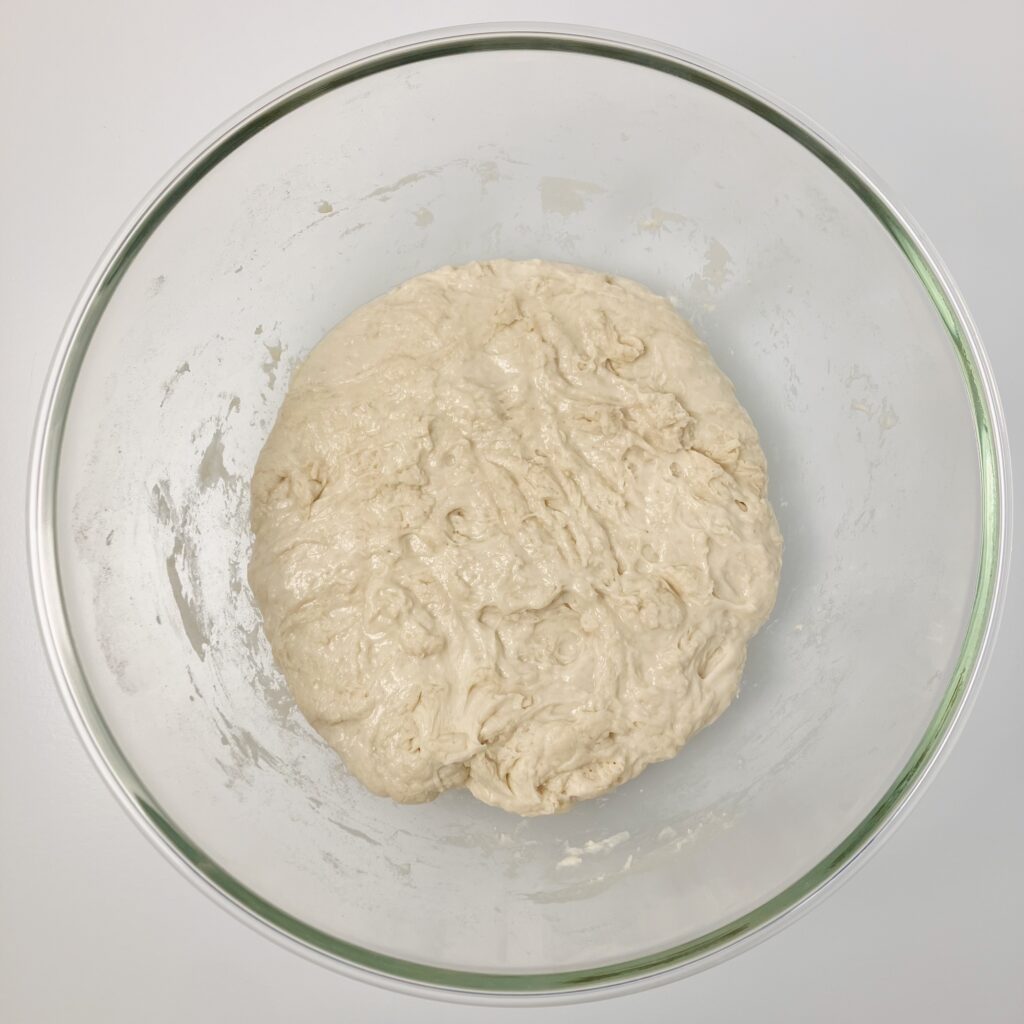
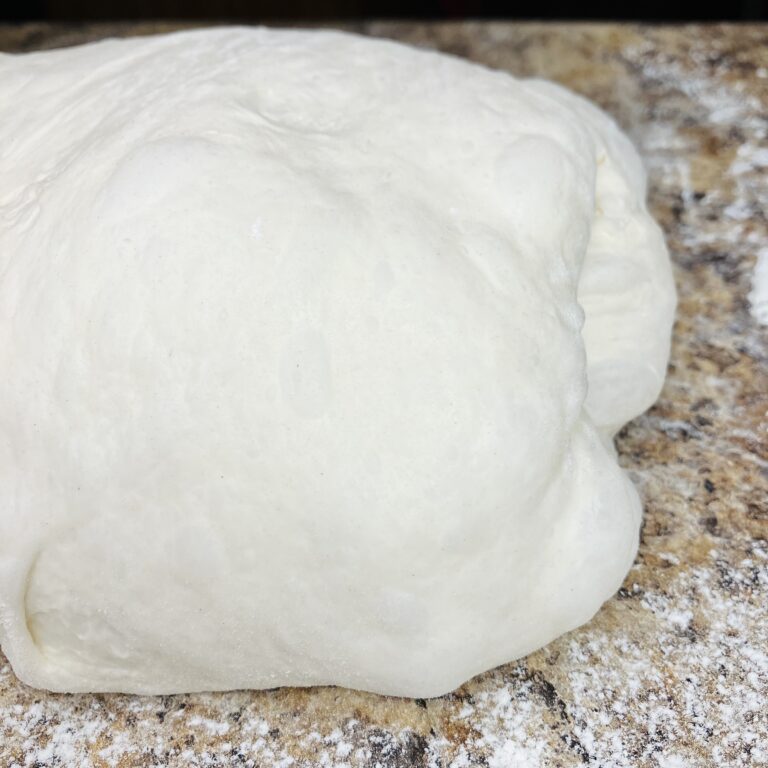
Autolysed bread dough during second set of stretch and folds.
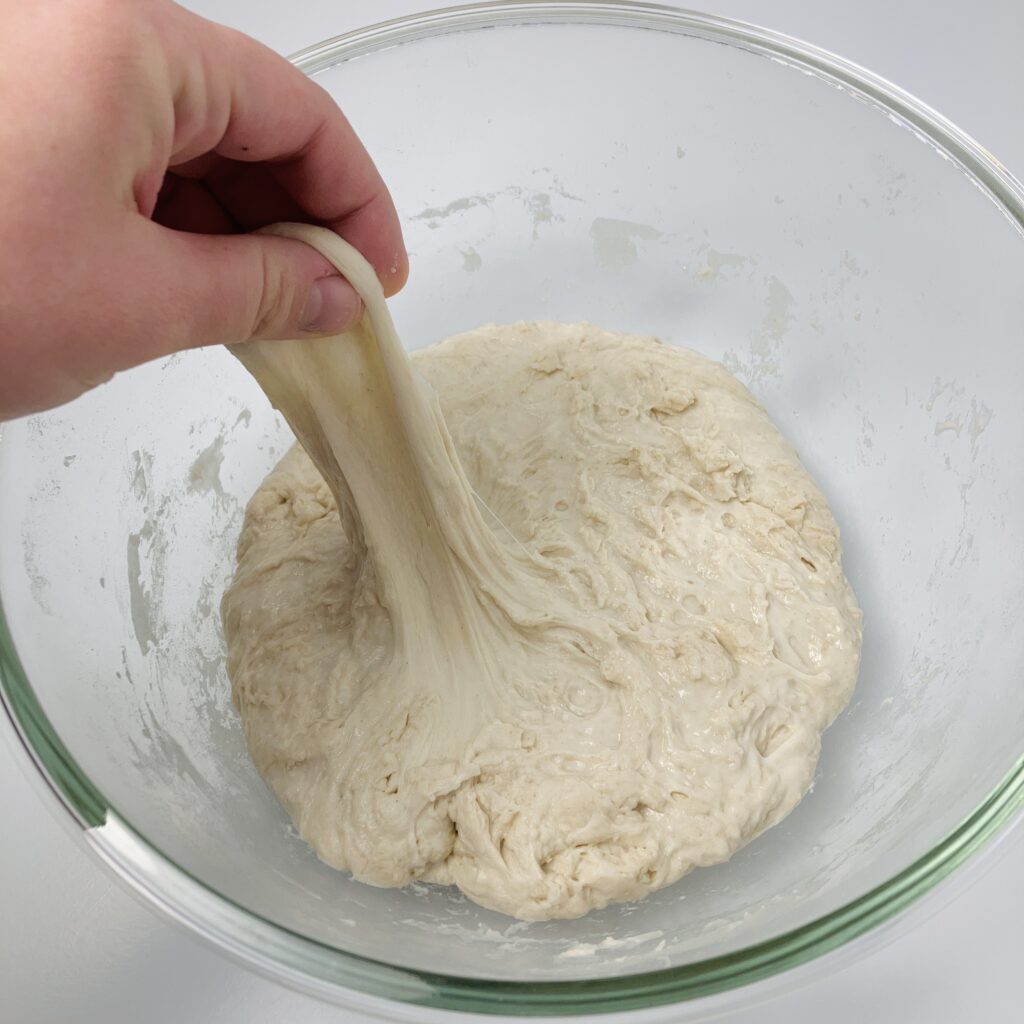
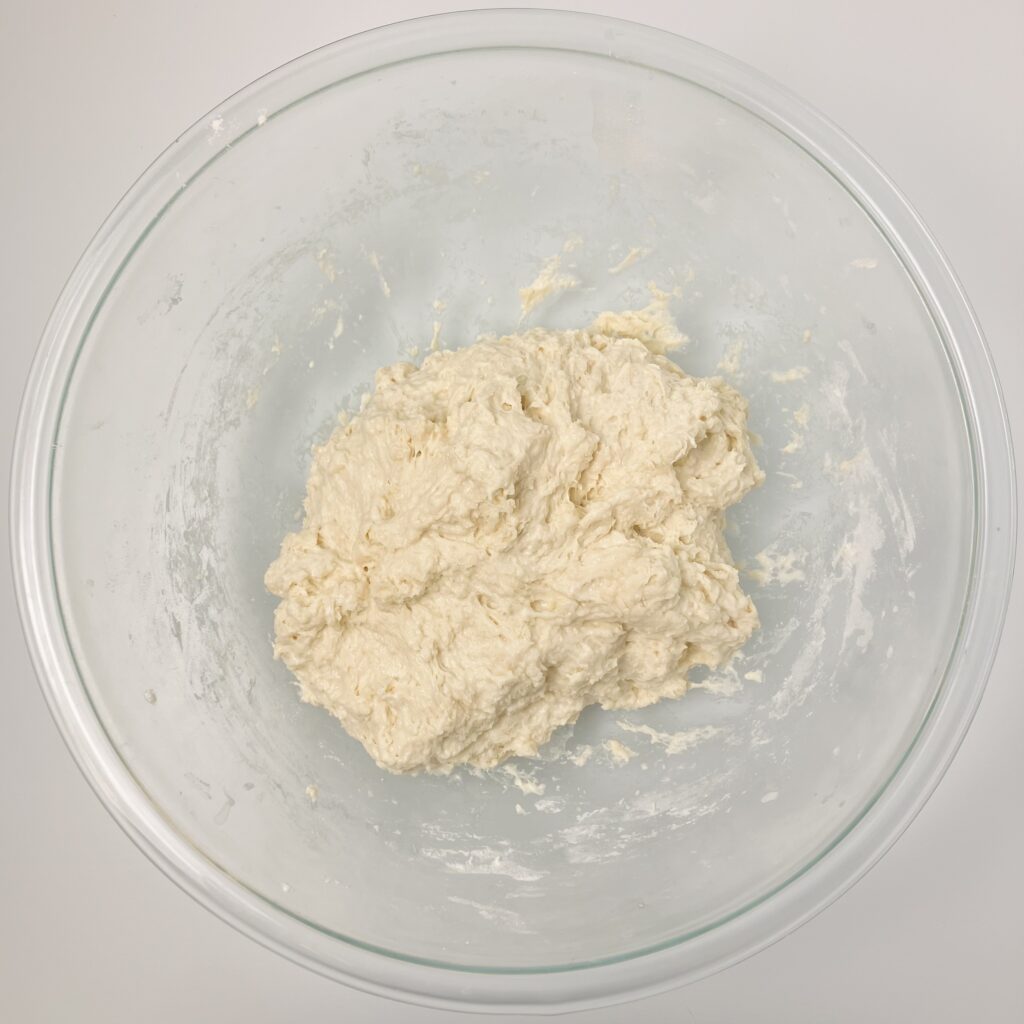
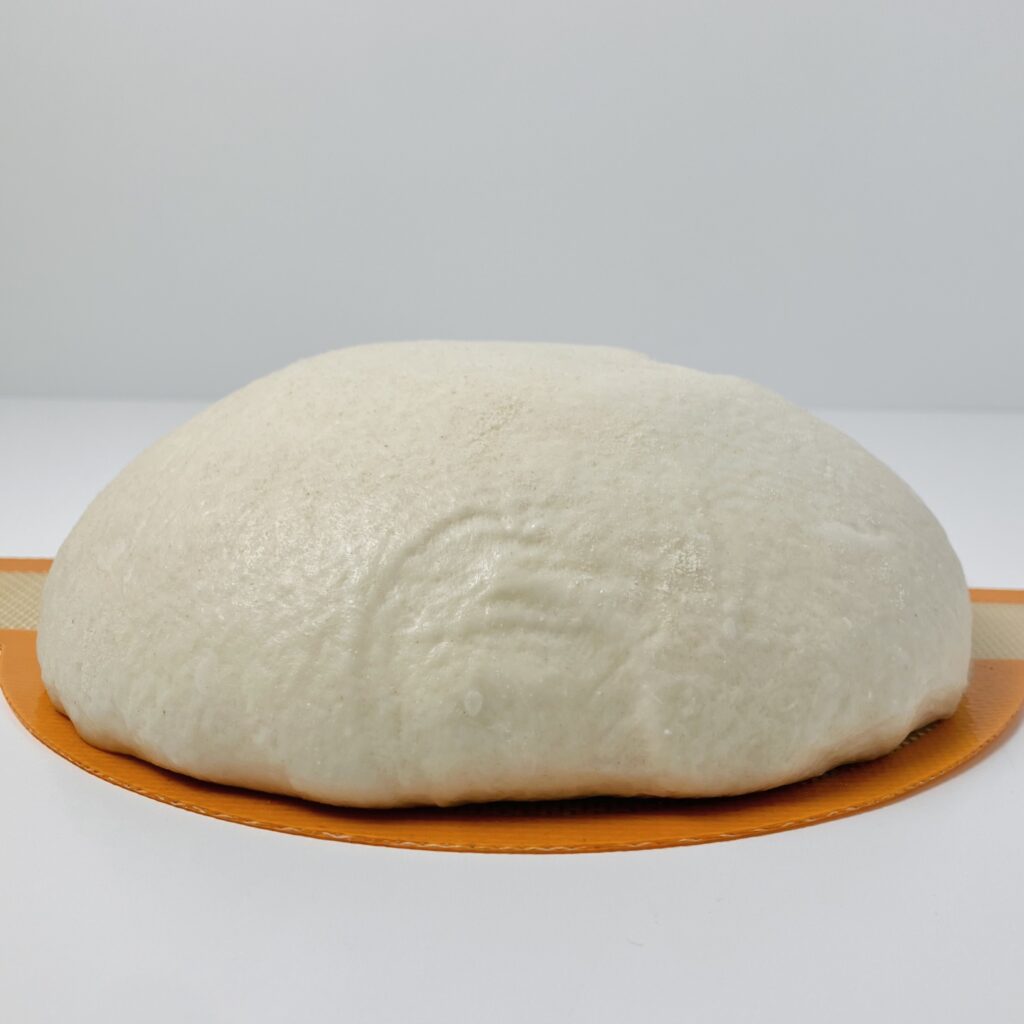
Non-autolysed bread dough during second set of stretch and folds. This dough is noticeably stickier than the autolysed bread dough.

Notes and observations on comparison loaves
Notes:
- The autolysed loaf and the non-autolysed loaf had their gluten developed slightly differently. While I used kneading in the autolyse loaf, I only performed folds on the non-autolyse loaf, since I had nothing to knead into the dough.
- For the autolyse loaf, I kneaded in the sourdough starter directly after taking the first photo (at the same time I mixed all the ingredients for the non-autolysed loaf), the salt thirty minutes later, then performed four sets of folds.
- For the non-autolyse loaf, I mixed the dough and let it rest for forty-five minutes. Then, I performed six sets of folds.
- The autolysed loaf and the non-autolysed loaf were bulk fermented for the exact same amount of time. I have been playing around with bulk fermentation a lot lately, just to see how far I can push it and how my crumb might be affected. For these loaves I did not push bulk fermentation. I stopped bulk fermentation a little under double in size.
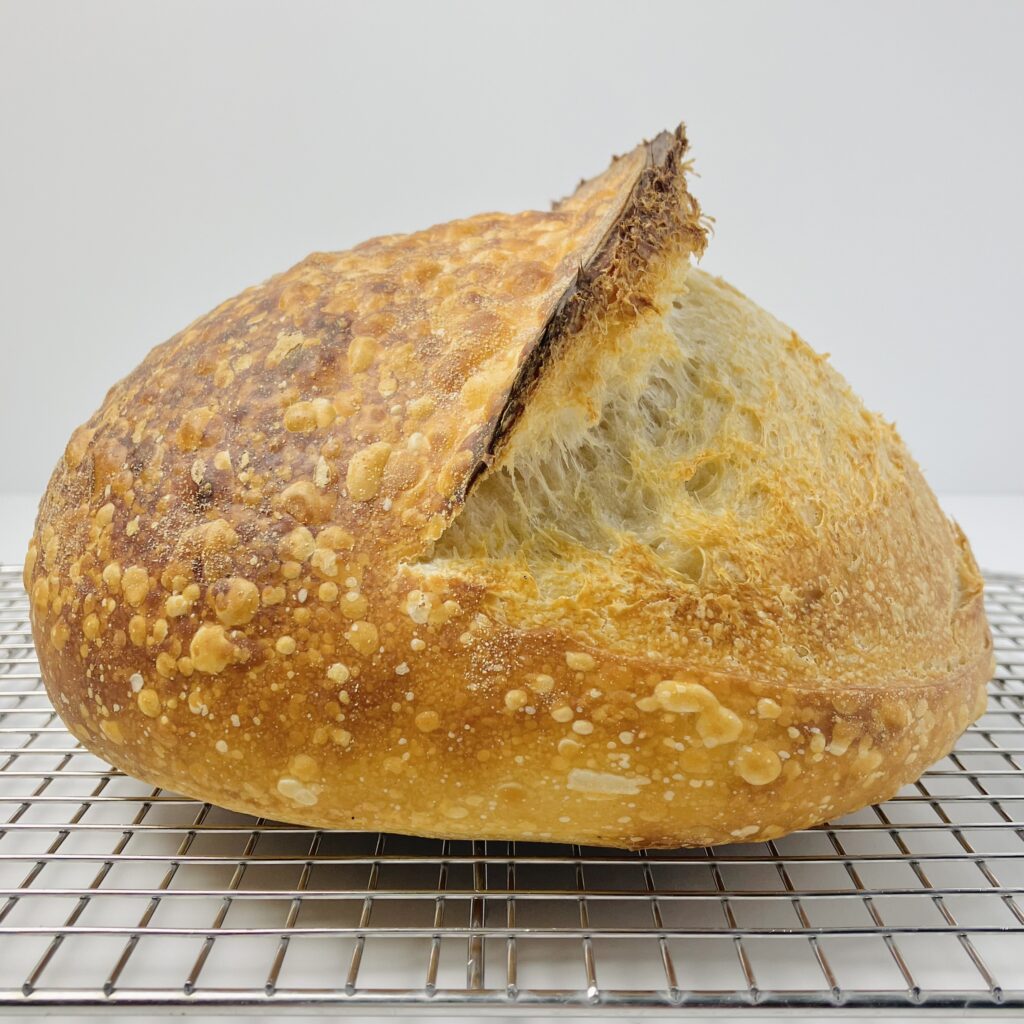
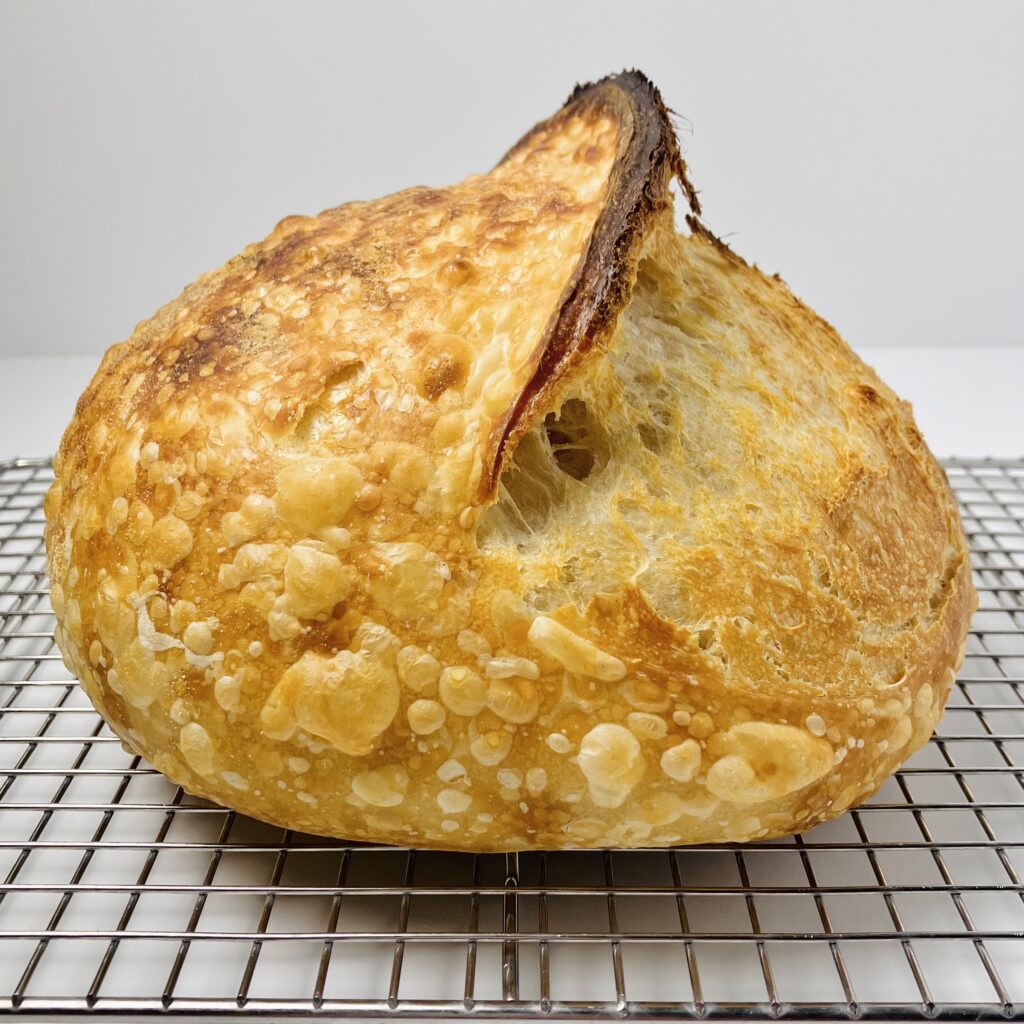
Observations:
- With the autolysed loaf, I have to work in the starter and the salt for about five minutes each when they are added. This is tiring, but it helps my confidence in knowing the gluten will be well-developed.
- It was easier to fold the autolysed loaf because of its extensibility and because it was much less sticky.
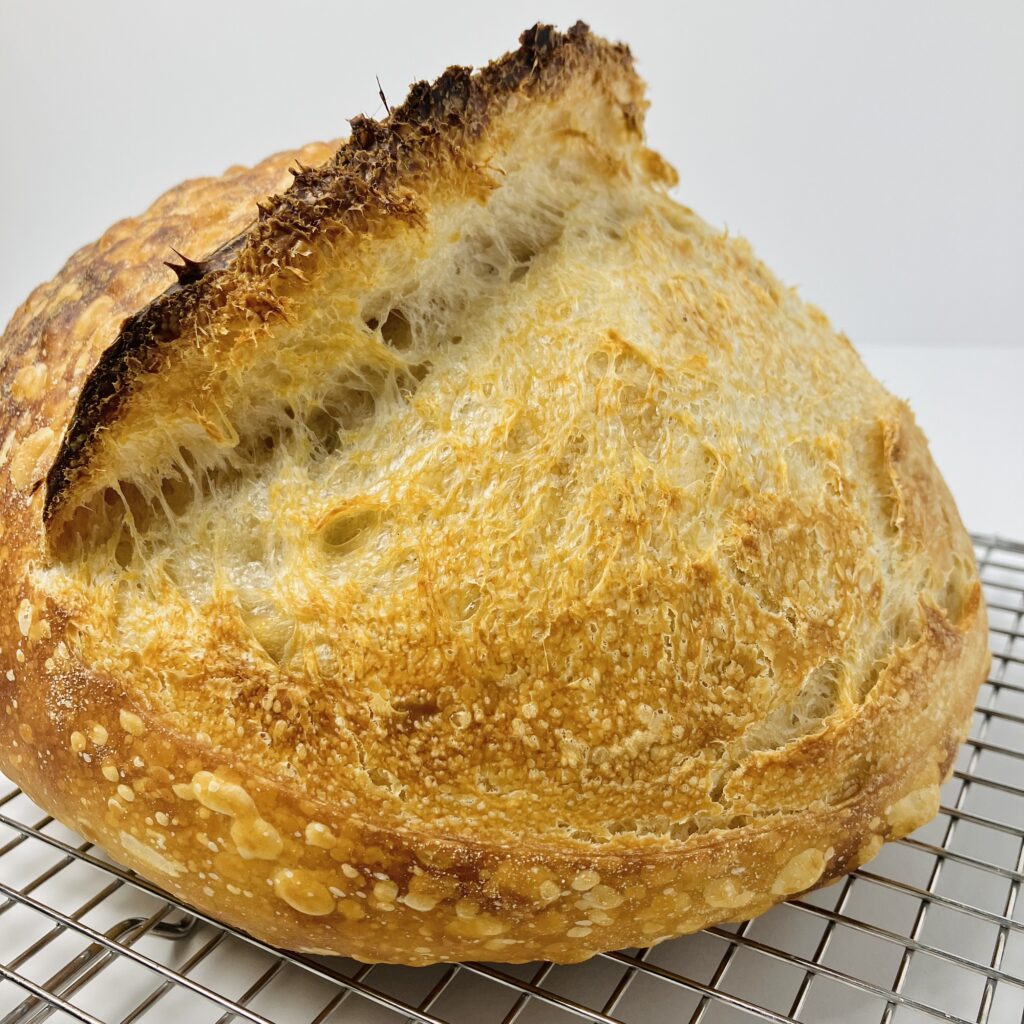
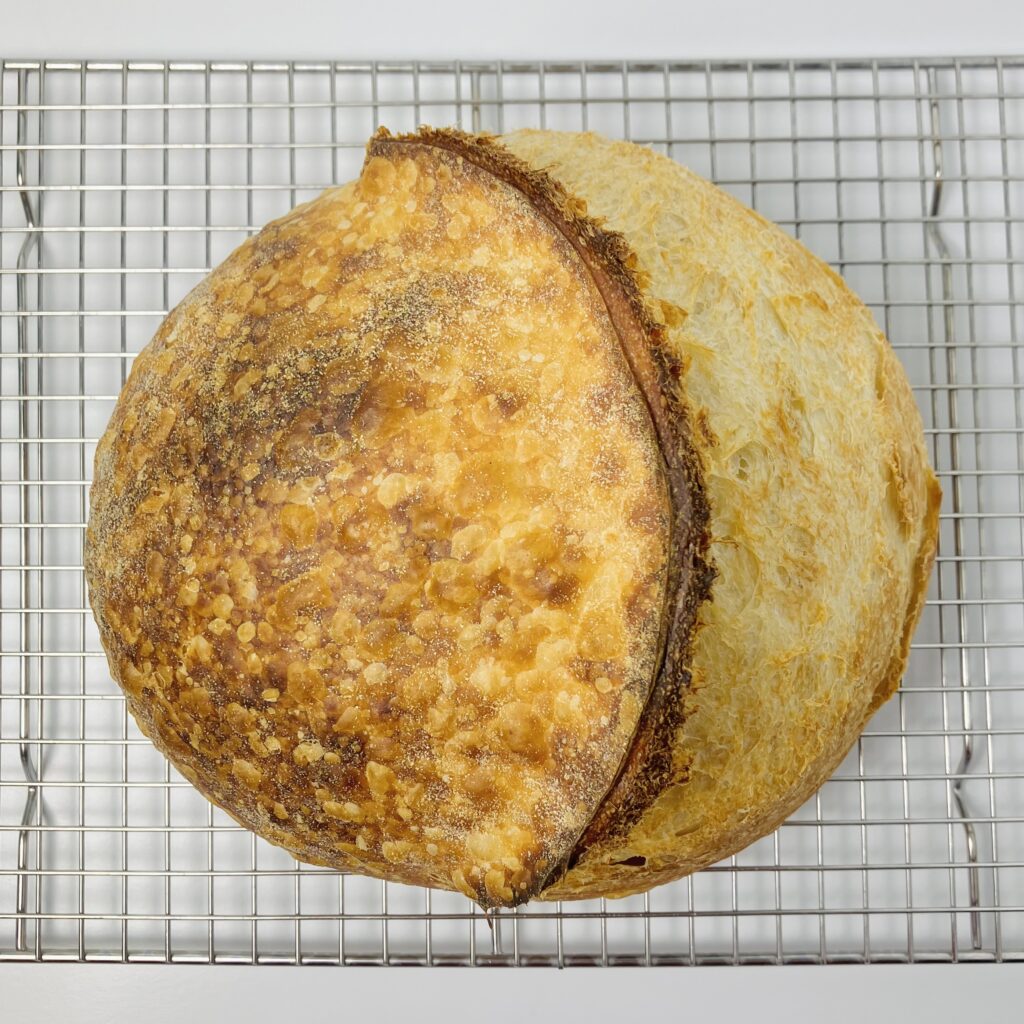
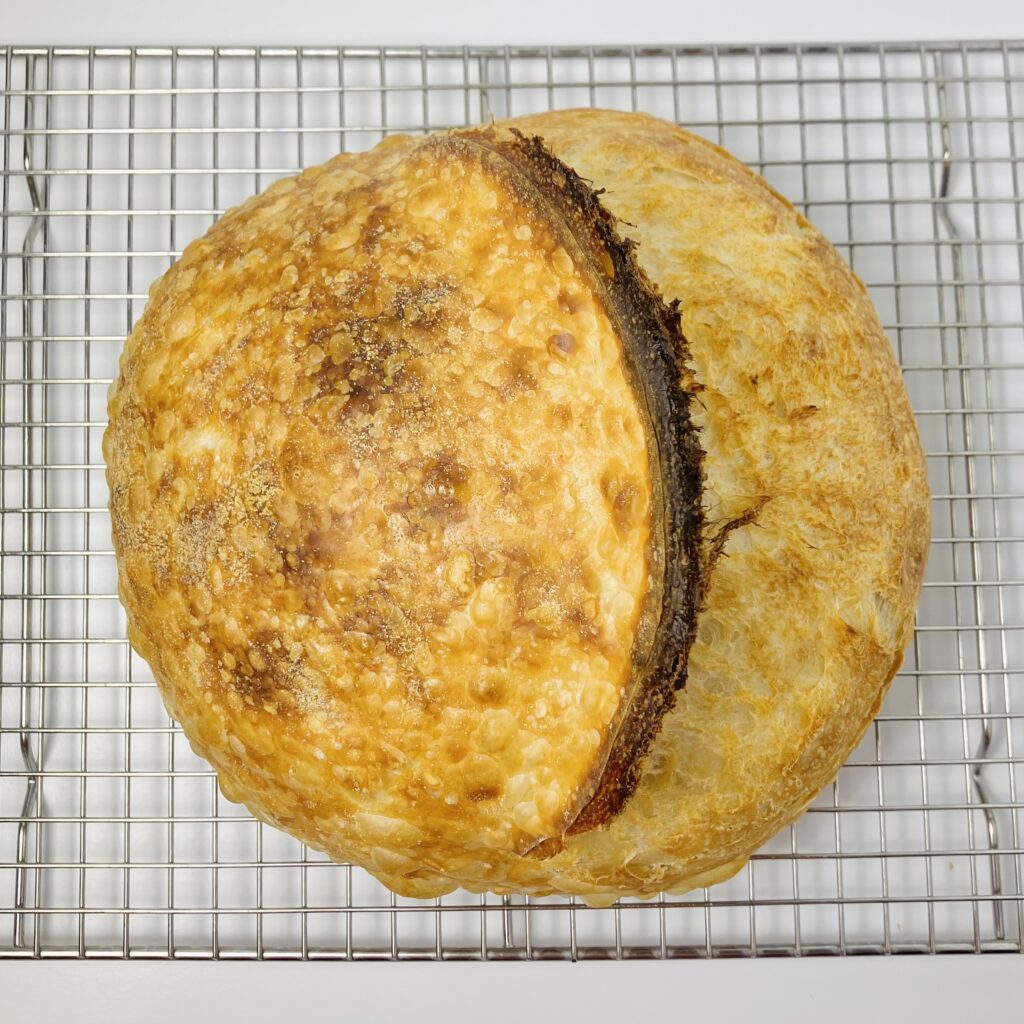
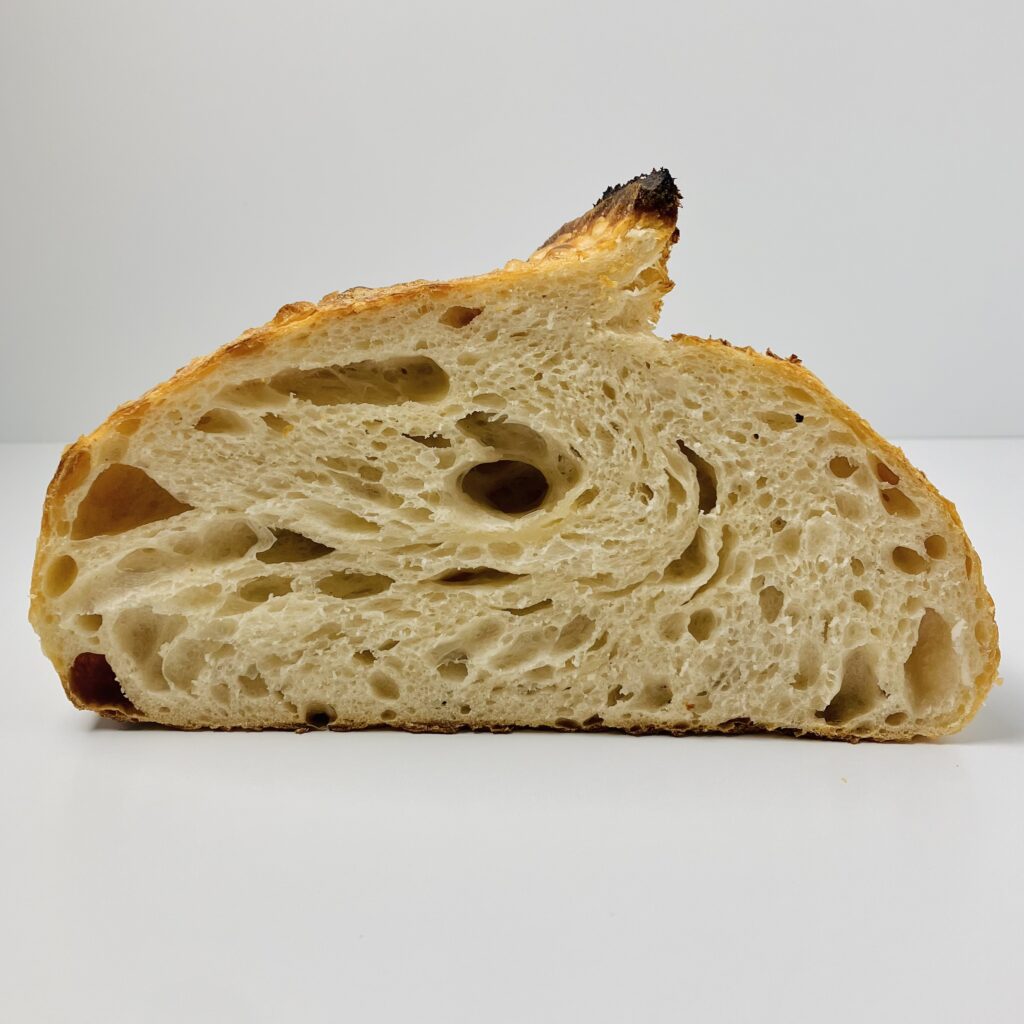
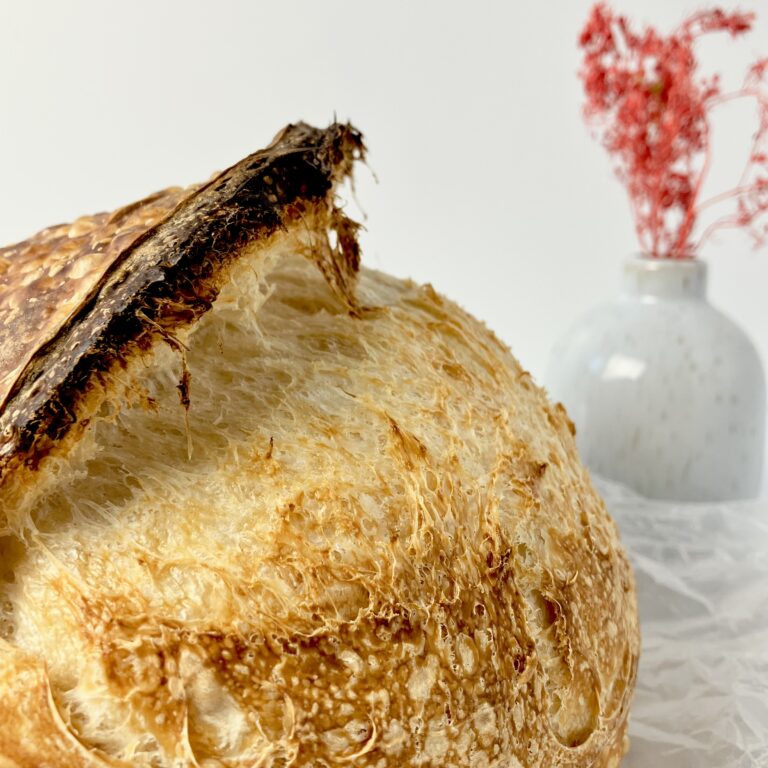
- The autolysed loaf had a darker crust and much less blistering compared to the non-autolysed loaf.
- The autolysed loaf was comparable in size and shape to the non-autolysed loaf.
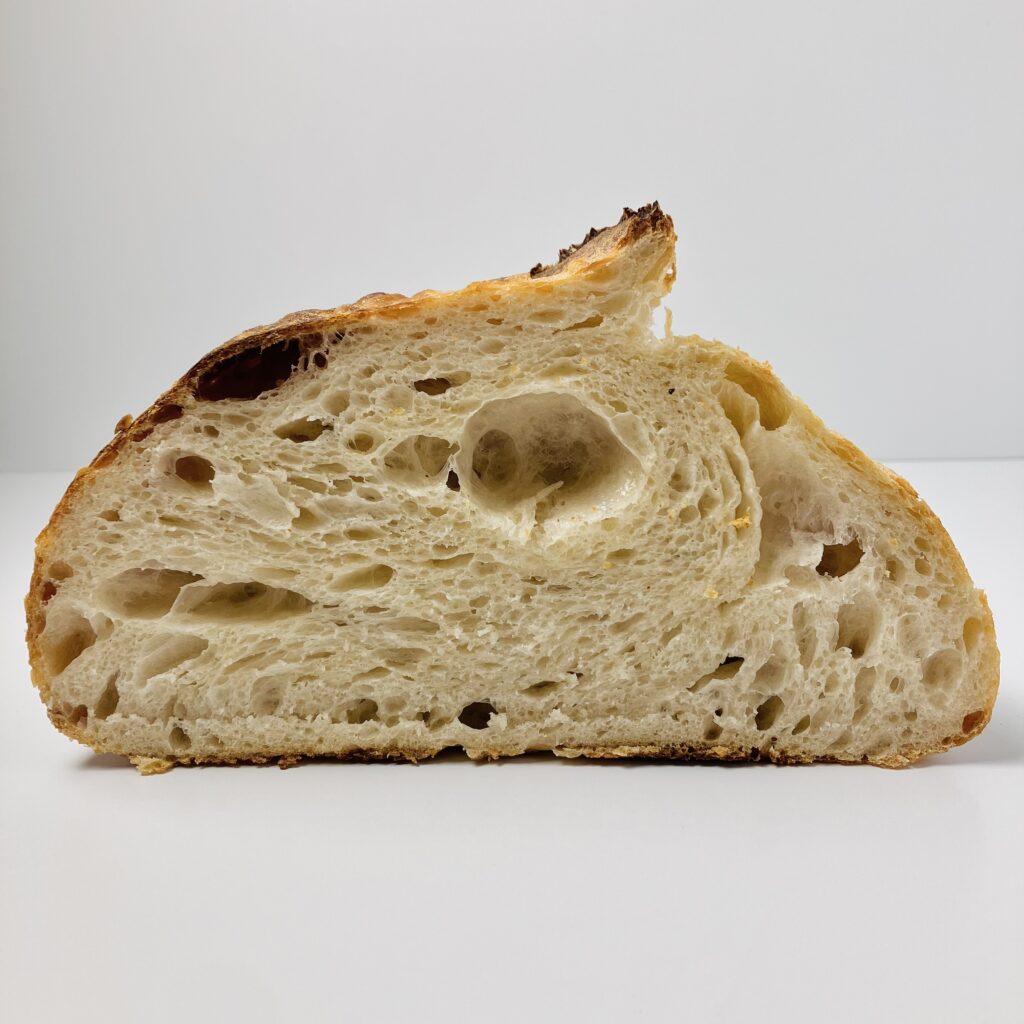
- The crumb on each loaf was comparable, though I actually preferred the non-autolysed crumb more for this round of experimentation.
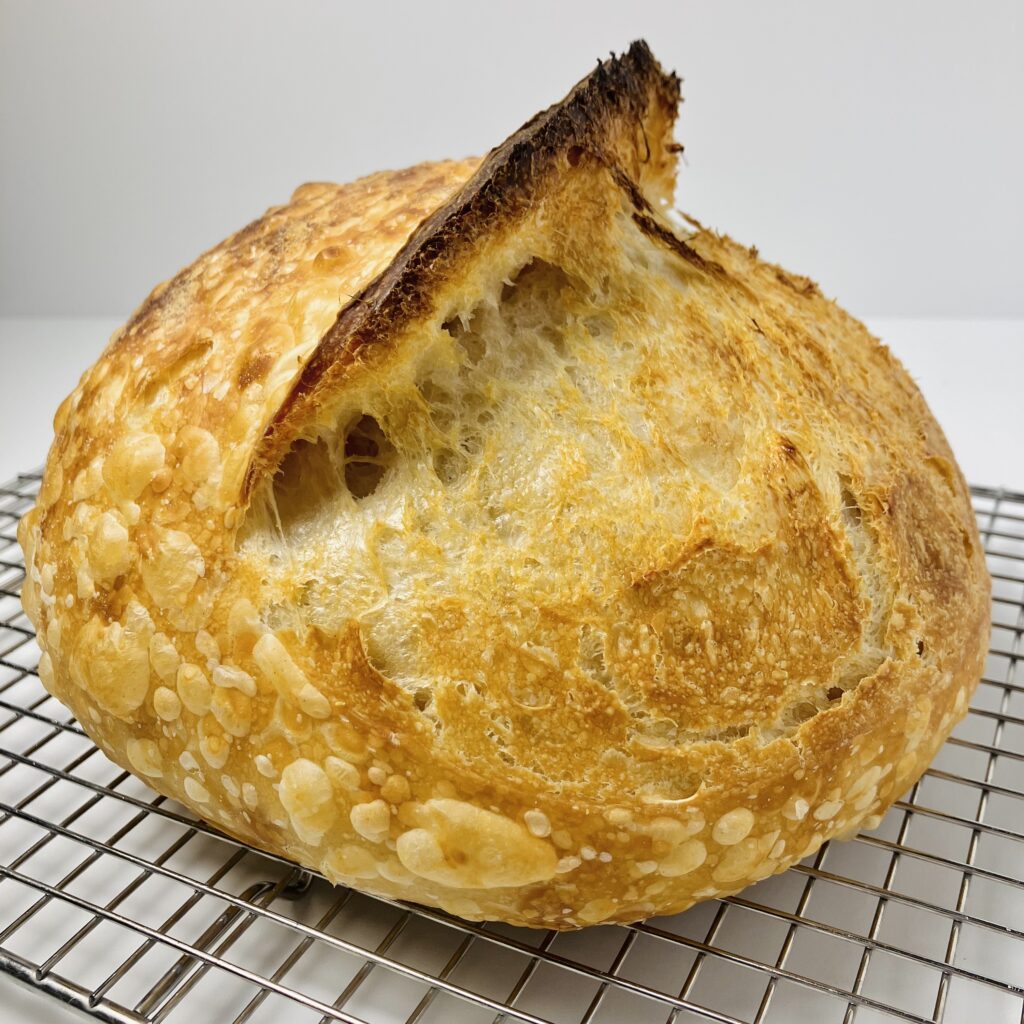
- I thought it was kind of funny that these loaves had twin craters. Oh well!
How to add autolyse to your favorite bread recipe
Adding autolyse to your favorite bread recipe is simple. To demonstrate, let me first walk you through a sample recipe that does not use autolyse.
Original recipe:
- 350 g water
- 100 g active starter
- 500 g bread flour
- 10 g salt
- Mix all ingredients together in a mixing bowl. Cover and rest 30 to 60 minutes.
- Over the next 2-3 hours, perform four to six sets of folds, spaced about 30 minutes apart.
- Let the dough rest until it has doubled in size.
- Shape the dough.
- Let the dough rest on the counter 1-3 more hours, or place in the refrigerator overnight.
- Bake at 450 F in a Dutch oven for 25 minutes with the lid on, 20 minutes with the lid off.
- Cool at least 30 minutes before slicing.
- Enjoy!
To add autolyse to this recipe, we will only change steps one and two.
You will also notice that I changed the order of ingredients in the ingredient list. When mixing the ingredients all at once, it is easier to mix the sourdough starter and water together before adding the flour and salt. When using the autolyse method, flour and water are mixed together and left to rest before sourdough starter and salt are added, thereby changing the order that the ingredients are added to the bowl.
Modified recipe:
- 500 g bread flour
- 350 g water
- 100 g active starter
- 10 g salt
- Mix together flour and water in a mixing bowl. Cover and rest for at least 30 minutes, or up to 2 hours. NOTE: It is possible to do an autolyse of up to 12 hours if your flour can handle it. I recommend starting with the shorter time (2 hours or less), then increasing your time as you become experienced and get a feel for your flour. A longer autolyse should be done in cooler temperatures (70 F or less). You can utilize the refrigerator for this process, if desired.
- After the flour and water have autolysed and formed a windowpane, add the sourdough starter. Work in the starter for five to six minutes, until well incorporated. Cover and let the dough rest for 30 minutes. NOTE: It is possible to add sourdough starter and salt at the same time. This is completely personal preference. If you want to add them in the same go, I recommend working in the starter for 2-3 minutes on its own before adding the salt. Then, work in the salt and starter together for the remaining time.
- After 30 minutes, add the salt. Work in the salt for another three to four minutes. Cover and let the dough rest for 45 minutes. NOTE: At this point, your dough should have a strong windowpane (the dough should be fully extensible). If for some reason it does not, continue working the dough until one is achieved. This will help the folds you are about to do go further, benefitting your dough more. In more technical terms, the next few folds are meant to develop elasticity, or the dough’s ability to “bounce back” and hold it’s shape.
- Perform three sets of folds, either stretch-and-folds or coil folds. Perform four to eight folds in each set, at least one fold in each cardinal direction. You will know you have created enough tension when the dough becomes resistant to being stretched. Cover the dough and rest 45 minutes between each set. NOTE: After the third set of folds, evaluate the dough. If the dough is tense and resistant to stretching early in the folding process, no more folds are needed. If the dough is still stretching a lot and it is taking more than four folds to build tension during a set of folds, continue adding sets of folds, one at a time, until the dough becomes more resistant to being stretched.
After folds are finished, continue with the remainder of the recipe as you normally would.
Do I have to autolyse?
Now that you have been able to see the differences above, I think it the answer to this is pretty obvious. Autolyse is not necessary to obtaining a good loaf of sourdough bread. It can provide great benefits to the dough, final product, and process, but great bread can still be made without it. The main benefits of autolyse come from the head-start in gluten development and extensibility. Both of these things (proper gluten development and extensibility) can be achieved without autolyse.
A loaf made without autolyse will require a slightly different process. The dough will need a longer resting period up front to allow extensibility to develop before folding occurs to work elasticity. In addition, a couple extra sets of folds may need to be performed, to make up for the lack of kneading that occurs when adding the starter and salt to an autolysed dough.
Last, there will be slight differences in the dough and in the bread’s final appearance and taste. Altogether, the choice to autolyse or not is completely a personal preference. A great loaf of bread can be achieved either way.
Is autolyse the "open-crumb" sourdough secret?
While autolyse has many great benefits for sourdough bread, it is not the “open crumb” secret. Do not get me wrong here – autolyse paired with proper strengthening does have benefits to the crumb. Not only does it have the potential to improve the crumb’s stucture and texture, since autolyse generally creates a taller loaf, it can lift and open the crumb mildly.
Despite this, for someone who does not autolyse, adding autolyse to the baking timeline is not going to be the magic trick to obtaining “open crumb” sourdough. The benefits of autolyse include improvements in gluten (and also flavor) development. Autolyse gives the dough extensibility before tightening agents – sourdough starter and salt – are added. This improved extensibility can be helpful in many ways, though with minimal, noticeable effects on the openness of the crumb. For someone struggling with obtaining proper dough strength (think flat loaves with minimal oven spring), autolyse may be a helpful tool to significantly improve the overall quality of their bread, but not to change their crumb from a closed one to an open one.
What questions do you still have?
Is there anything I missed when covering this information? Or, anything you are still confused about or that could be explained better? Please let me know in the comments! I’ll be happy to answer your questions and even update this article, if needed.
Happy baking!
Join the email list
Join the email list to be notified when a new recipe or blog post comes out. No spam, just sourdough. Unsubscribe at any time.
Recent POSTS
Pingback: COUNTRY BREAD - The Sourdough Baker
Pingback: GLUTEN DEVELOPMENT - The Sourdough Baker