Dough hydration is a fundamental concept in the world of baking, and it plays a crucial role in how the dough feels, stretches, and tastes. Simply put, dough hydration refers to the proportion of water relative to flour in a bread recipe, expressed as a percentage. This seemingly simple mix has a profound impact on the how the dough behaves and how the bread turns out.
Understanding dough hydration involves delving into the delicate balance between flour and water, striving to achieve the perfect consistency for the type of bread that is being made. Whether crafting artisanal loaves with an open crumb or aiming for a more compact and tender sandwich bread, manipulating hydration levels is a key skill for bakers seeking to master the art and science of bread-making.
In this article:
- What is hydration?
- Why should I care about hydration?
- A general classification of hydration
- low hydration doughs (65% and below)
- Moderate hydration doughs (65-80%)
- High hydration doughs (80% and above)
- High Hydration doughs and flour choice
- How do I calculate the hydration of a recipe?
- Do different ingredients have an impact on hydration?
- How do I change the hydration of a recipe?
- What questions do you still have about dough hydration?
- Join the Email list
What is hydration?
Hydration refers to the ratio of water to flour in a bread recipe, which is expressed as a percentage.
It is a critical factor in bread making, as it significantly influences the texture, structure, and final outcome of the baked product.
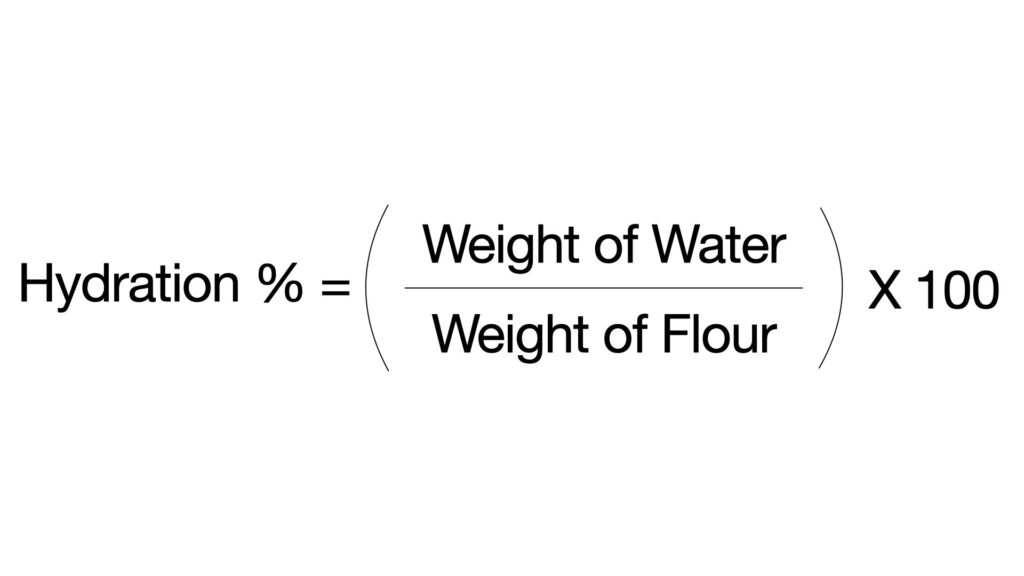
The hydration percentage is calculated by dividing the weight of the water in the recipe by the weight of the flour, then multiplying by 100 to express it as a percentage.
The formula is: Hydration % = (Weight of Water/Weight of Flour) × 100
Why should I care about hydration?
Hydration has an effect on every aspect of the bread-making process. Though it’s not essential to understand it to make great bread, knowledge of its effects can improve the quality and consistency of your loaves. Hydration affects –
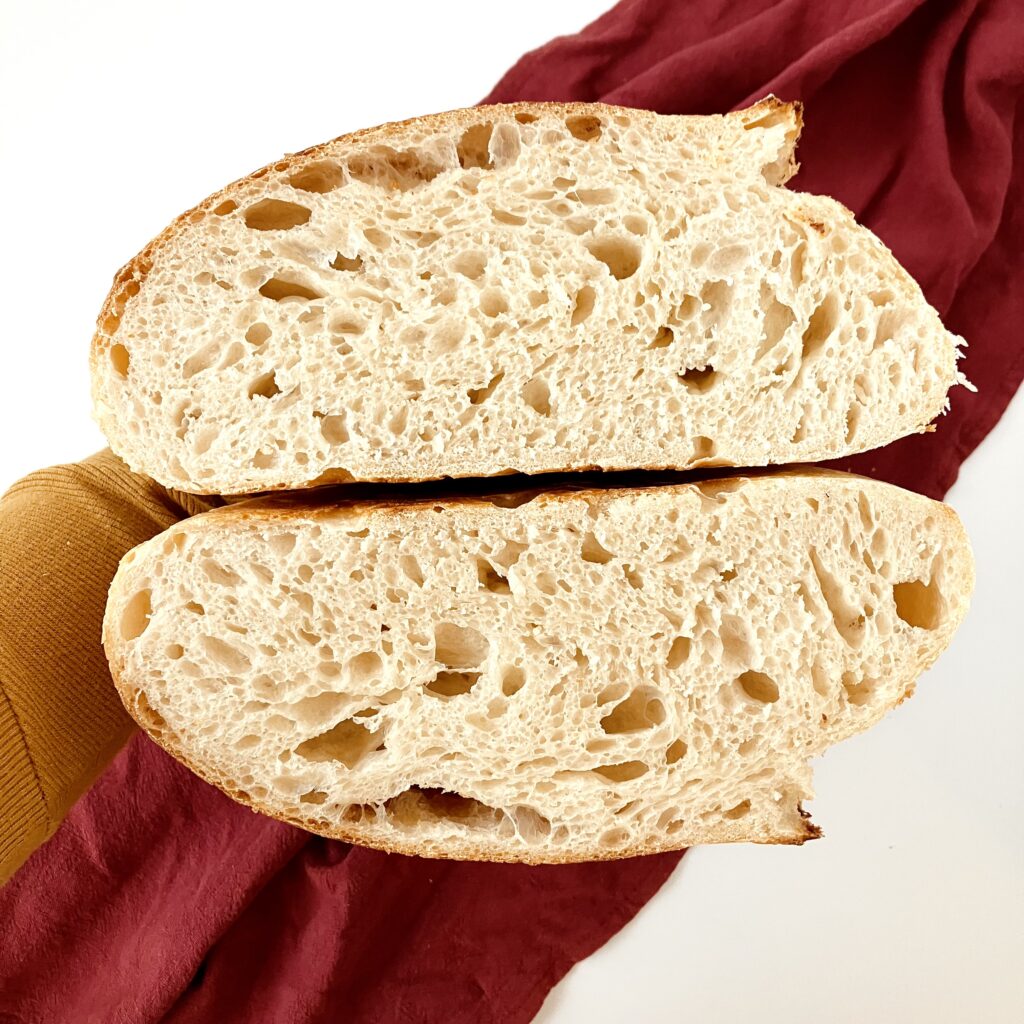
Texture and Crumb Structure: Higher hydration levels generally result in a more open and irregular crumb, creating a chewier and artisanal texture. On the other hand, lower hydration leads to a tighter crumb structure, suitable for softer bread varieties like sandwich loaves.
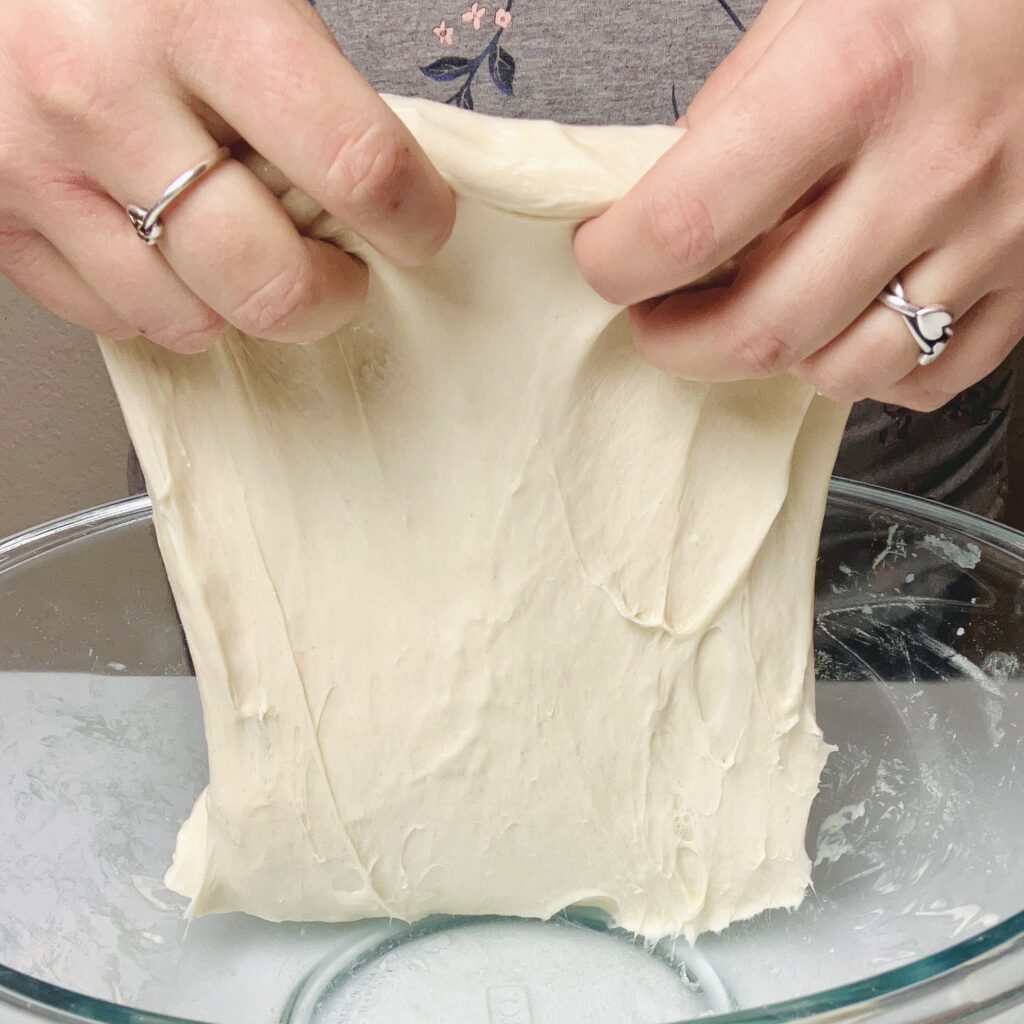
Handling and Workability: High hydration doughs are more extensible, meaning the dough is able to stretch much easier. This makes gluten-developing techniques, such as stretch-and-fold, optimal choice for these doughs. In addition, higher hydration doughs are stickier, and may require flour, water, or oil to aid in shaping. Meanwhile, lower hydration doughs tend to be firmer and more manageable. These doughs are easily kneaded in a stand mixer or by hand in one sitting to develop the gluten and are suitable for simple or complicated shapes.
Fermentation and Flavor Development: A higher hydration allows for more enzymatic activity and microbial fermentation, contributing to complex flavors in the bread. This is often desirable in artisanal bread. Conversely, lower hydration doughs may result in a milder flavor profile.
Crust Development: High hydration doughs often produce a crisp and blistered crust, while lower hydration doughs yield a softer and thinner crust.
Flour Types and Varieties: Different types of flour absorb water differently. Understanding hydration helps in adjusting recipes based on the specific flour used, whether it’s all-purpose, bread, whole wheat, or others. Hydration awareness allows for flexibility in adapting recipes to different flours.
Consistency and Reproducibility: Monitoring and adjusting hydration levels help achieve a consistent dough consistency and, subsequently, a repeatable and reliable baking outcome.
A general classification of hydration:
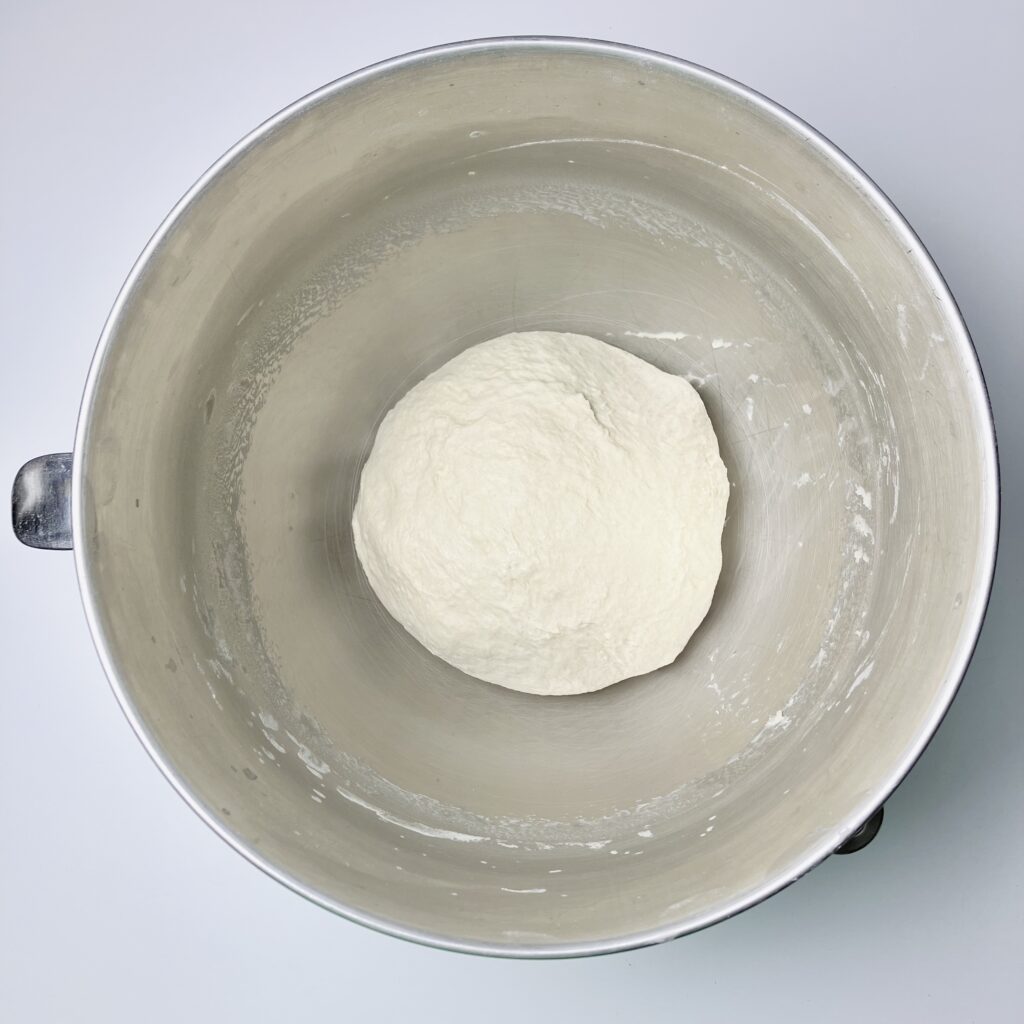
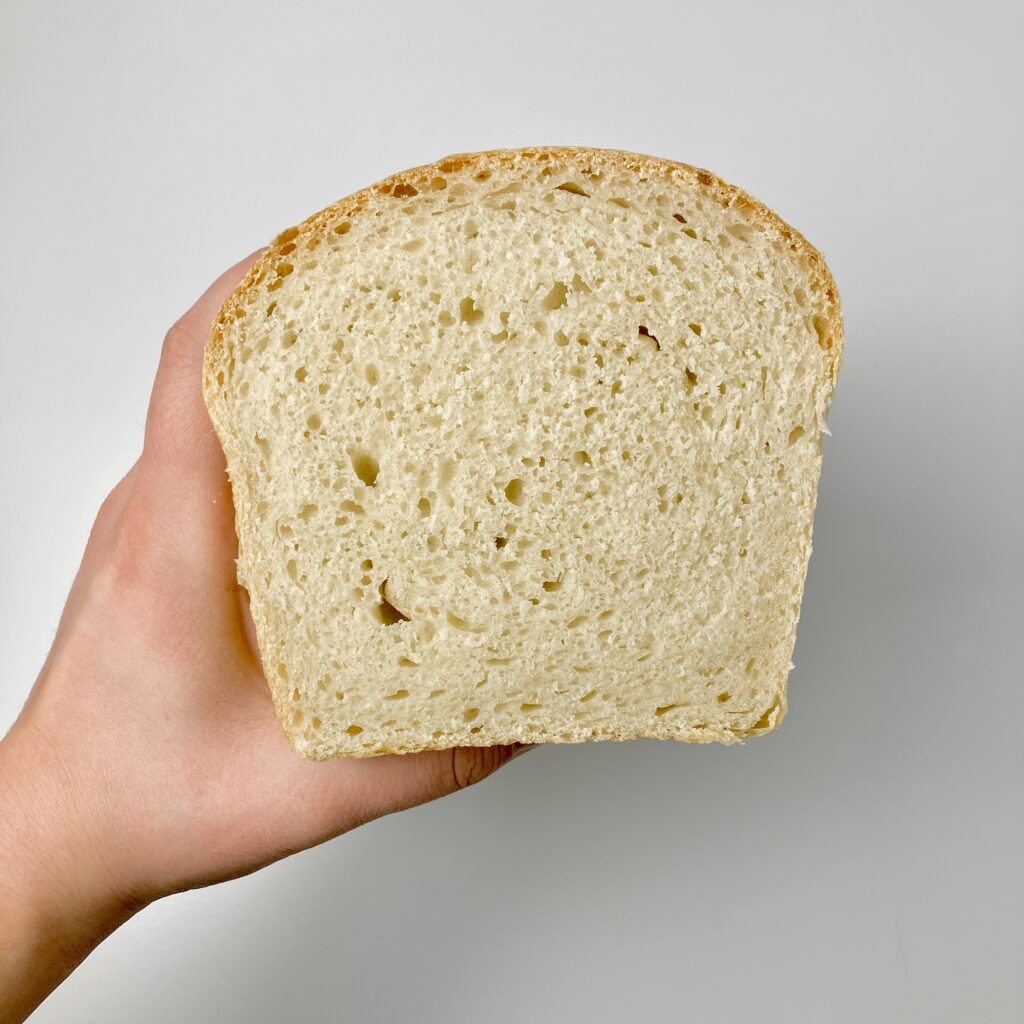
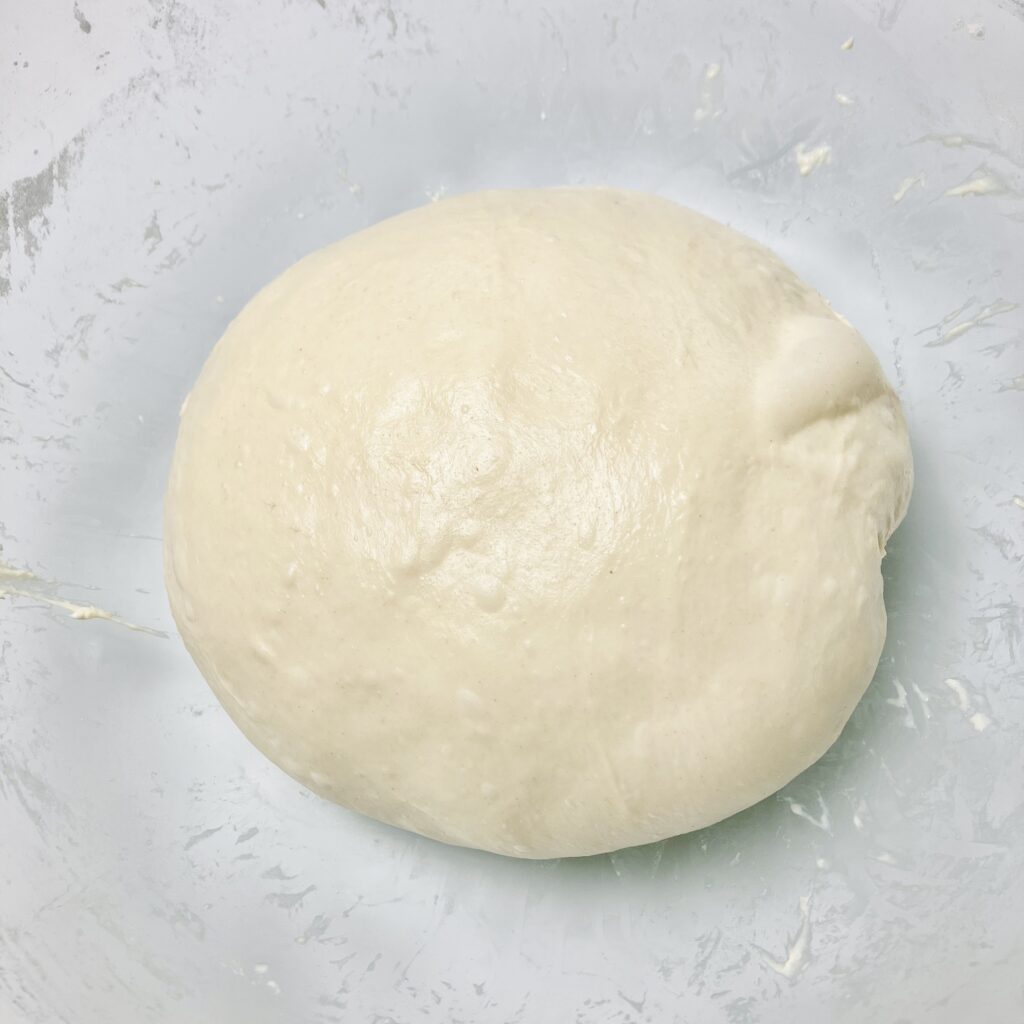
Low Hydration (65% and below): Doughs with lower hydration levels tend to be firmer and less sticky, producing a softer and denser crumb. They are easier to handle and shape, great for beginners or for making complex shapes.
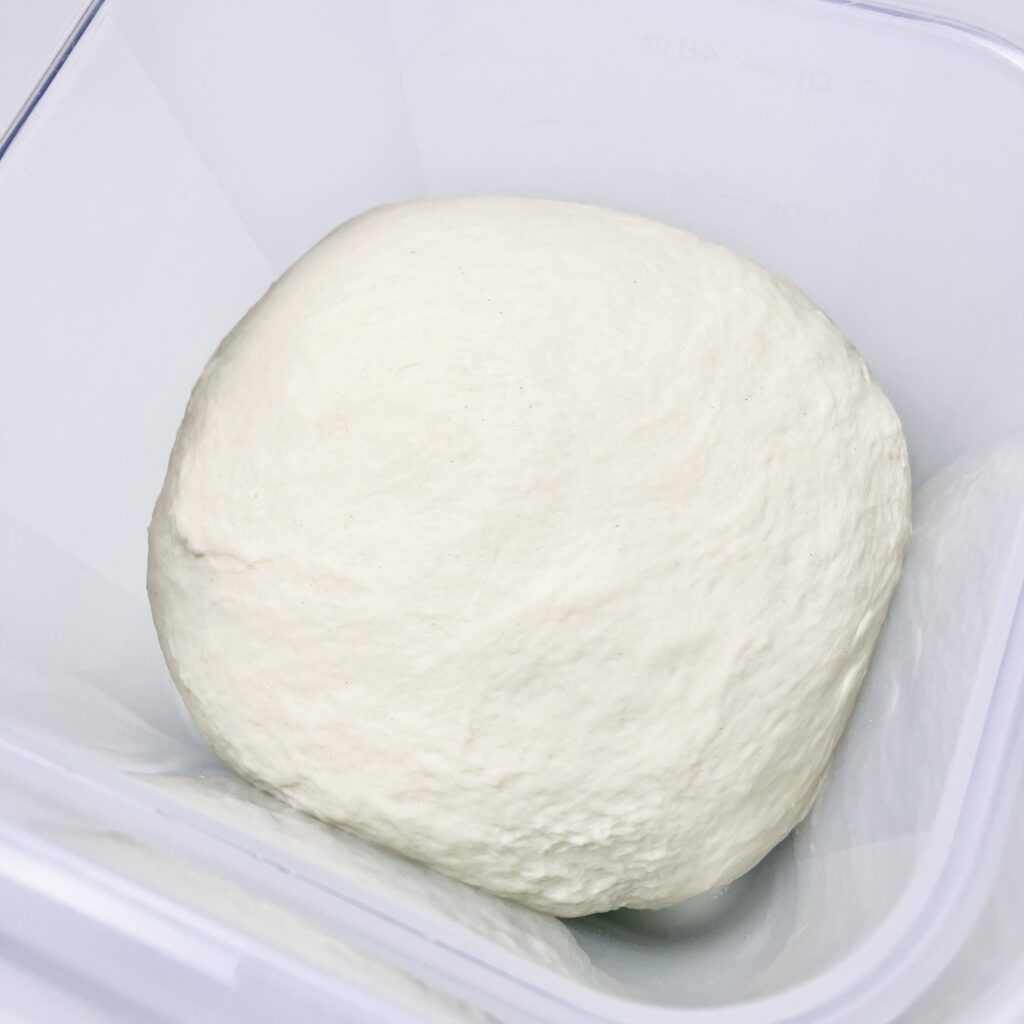
Moderate Hydration (65-80%): This range is common for a variety of bread types. It allows for a good balance between workability and the development of gluten structure. These doughs are stickier, but still manageable, and produce a lighter, airier crumb than their low hydration counterparts.
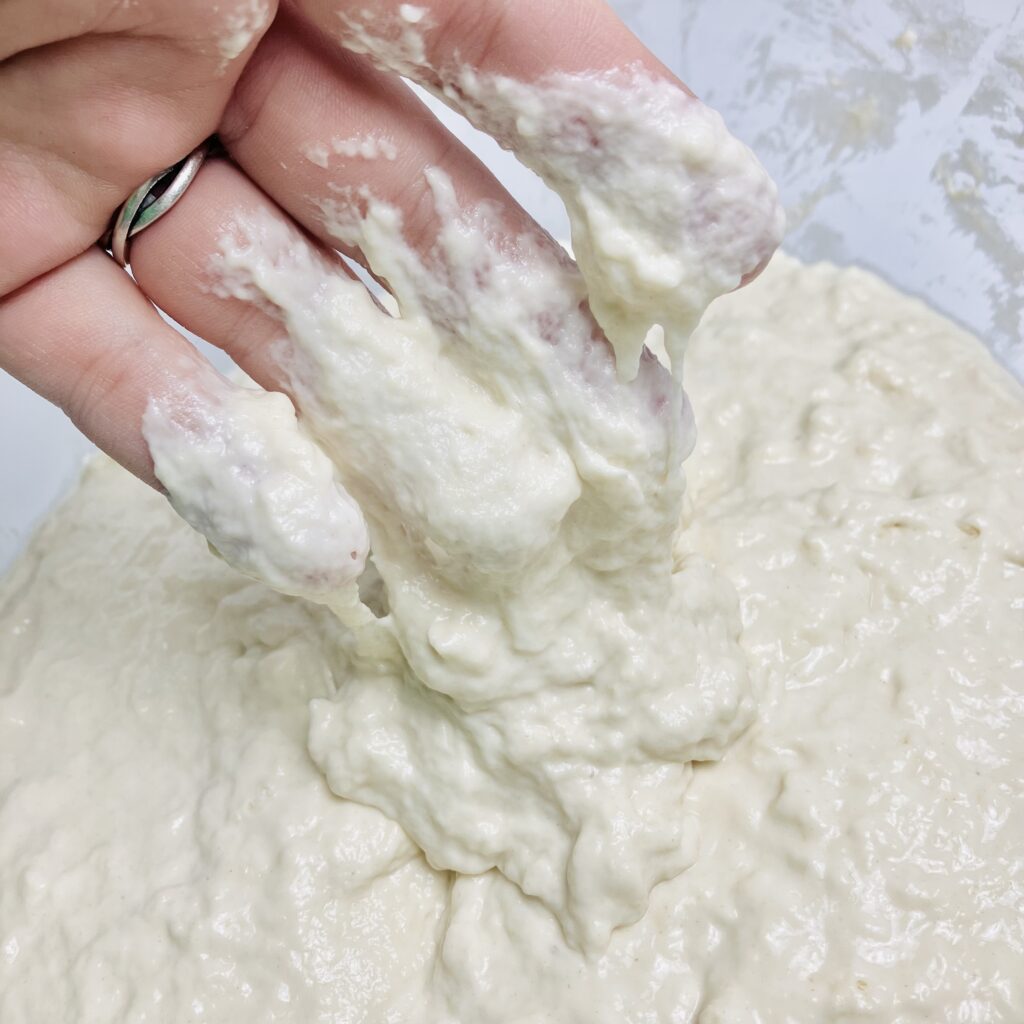
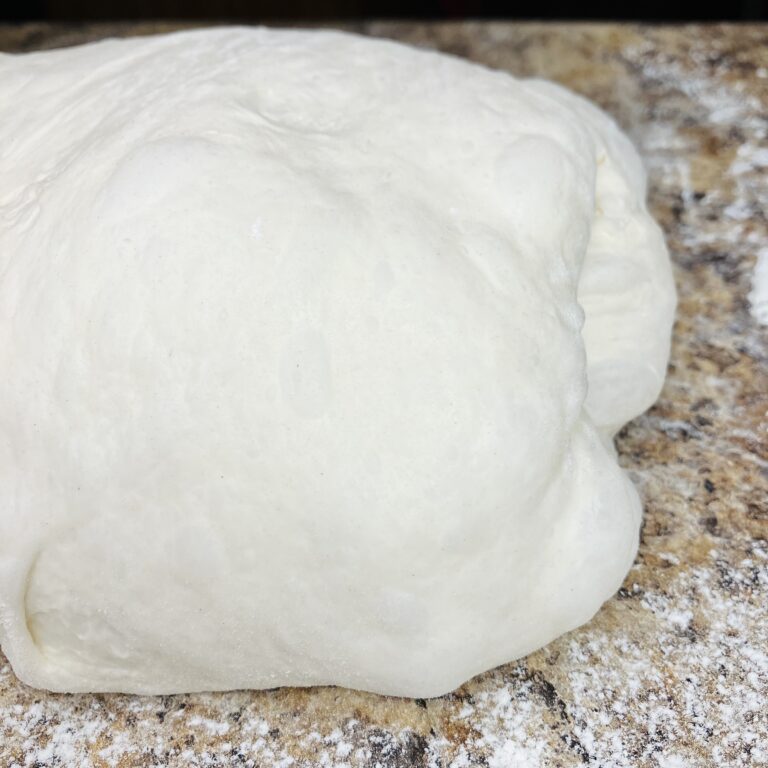
High Hydration (80% and above): Doughs with higher hydration levels become stickier, wetter, and more challenging to handle. These doughs are characteristic of artisanal and rustic breads, producing a more open crumb structure and a chewier end result.
Low hydration Doughs (65% and below):
Low hydration doughs are characterized by their low water to flour ratio, which is generally 65% or less (using the formula provided above). These doughs tend to be firmer, less sticky, and easier to handle compared to their higher hydration counterparts. They are perfect for making fun shapes, such as soft pretzels, are simple and quick to throw together and develop, and are more flexible when it comes to proofing. In my opinion, low hydration doughs are great for beginners due to their flexibility and ease of handling.
Characteristics of low hydration doughs:
- Firmness: Low hydration doughs are firmer and less extensible (stretchy). The gluten network is less hydrated, resulting in a dough that is easier to shape and mold.
- Easier Handling: These doughs are generally less sticky, making them more manageable during shaping and forming. Bakers have more control over the dough, which can be advantageous for creating specific shapes, especially for traditional loaf styles.
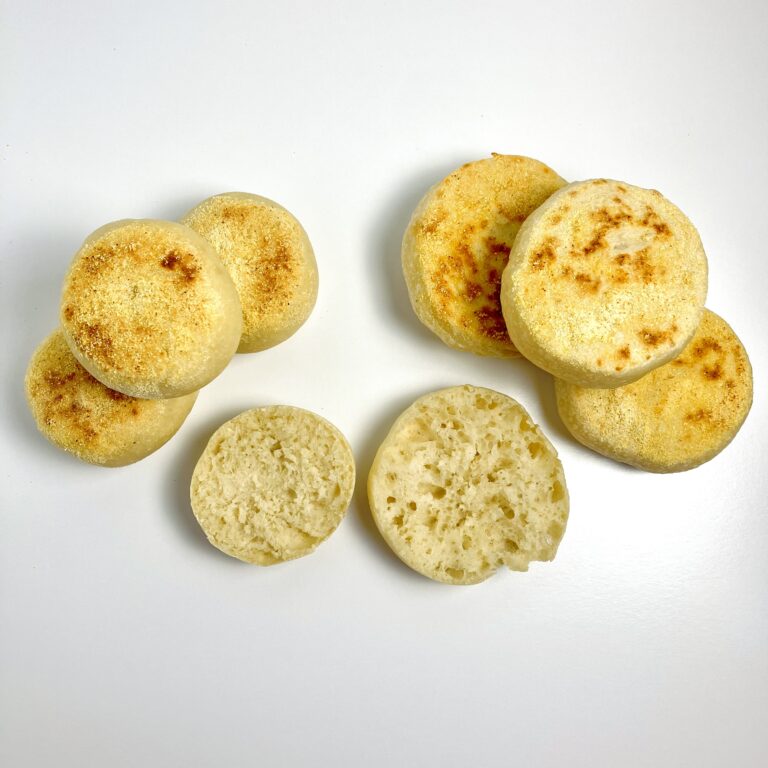
- Uniform Crumb: Low hydration doughs often produce a more uniform crumb structure with smaller and more evenly distributed air pockets. This can result in a softer, denser texture in the final baked product.
Examples of low hydration doughs:

Developing gluten in low hydration doughs:
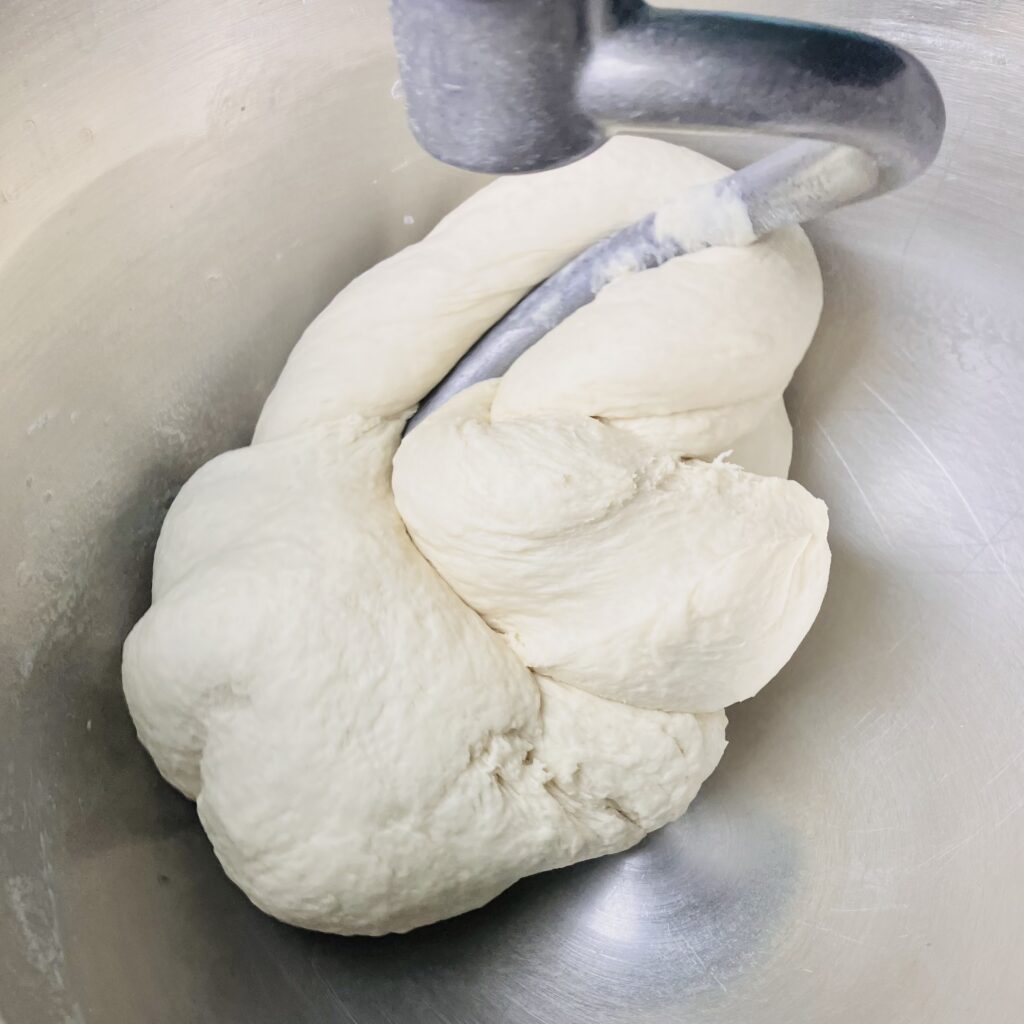
Gluten is easily developed by hand or in a stand mixer. By hand, gluten can be developed by simply working the dough on the counter for about fifteen minutes. In a stand mixer, gluten can be developed by using the dough hook attachment (or dough roller for an Ankarsrum) and kneading at a low speed (speed 2 on a KitchenAid) for about ten minutes.
Fermenting low hydration doughs:
Breads with lower hydration typically have a more flexible fermenting schedule, due to the increased amount of flour (which is food for the starter). Some low hydration doughs have the potential to triple or quadruple in size before they overproof, though it can still happen. It is not necessary to ferment a low hydration dough to its maximum point for excellent results in the recipe, but it is good to keep in mind that going a little bit over what the recipe calls for on fermentation will not be the end-all for your bread.
Shaping low hydration doughs:
Low hydration doughs are the easiest to shape for the same reason they have a more flexible fermenting schedule: increased flour. They typically do not require an extra sprinkling of flour on the counter to keep them from sticking, as they are generally minimally sticky or not sticky at all. They can be easily divided and maneuvered to the baker’s intent.
Moderate hydration doughs (65-80%):
Moderate hydration doughs, falling in the range of 65-80% (using the formula provided above), offer a balanced compromise between the ease of handling seen in low hydration doughs and the extensibility and open crumb structure of high hydration doughs. Working with moderate hydration doughs requires attention to key factors to achieve optimal gluten development, fermentation, and shaping.
Characteristics of moderate hydration doughs:
- Balanced Texture: Moderate hydration doughs strike a balance between firmness and extensibility. The gluten network is adequately hydrated, resulting in a dough that is both workable and capable of producing a variety of bread textures.
- Versatility: These doughs are versatile and can be used for a wide range of bread types, from traditional loaves to artisanal bread with some open crumb structure.
- Reasonable Handling: While slightly stickier than low hydration doughs, moderate hydration doughs are generally manageable during shaping and forming.
Examples of moderate hydration doughs:
Developing gluten in moderate hydration doughs:
Gluten can be developed by stand mixer or by hand, though the techniques used will look different from low hydration doughs.
By hand, gluten can be developed by working the dough for five to eight minutes in two to three intervals. Alternatively, the dough can be developed by hand using intervaled stretch-and-fold techniques, such as: the classic stretch-and-fold, coil fold, slap-and-fold, bench fold, and more. (More on these techniques coming soon.)
In a stand mixer, gluten can be developed by using the dough hook attachment and kneading at a medium speed (speeds 4-6 on a KitchenAid, depending on the recipe) for ten to twenty minutes. The general rule of thumb when kneading dough like this with a stand mixer is: the higher the hydration, the faster and longer kneading time becomes. Some stand mixers cannot take the speeds necessary to develop doughs of moderate or high hydration, so it is always important to watch your stand mixer carefully or stick to the company’s recommendations (to be on the safe side).
Fermenting moderate hydration doughs:
Breads with moderate hydration are less flexible in their fermenting schedule than low hydration doughs, due to having less flour and more moisture than their lower hydration counterparts. Yeast thrive in moisture and feed on flour, meaning having less food in a more ideal climate leads to faster fermentation. A moderate hydration dough can double, maybe even triple, in size, but fermentation is not usually pushed far past that point.
Shaping moderate hydration doughs:
Moderate hydration doughs are still manageable to shape, though sticker than their lower hydration counterparts. Some use flour when shaping, while for others a little bit of moisture (water) or oil will prevent the dough from becoming unmanageable. They may lose their shape or form slightly if left to rest too long after shaping without some sort of aid, such as a banneton or loaf pan, to hold them accountable.
High Hydration doughs (80% and above):
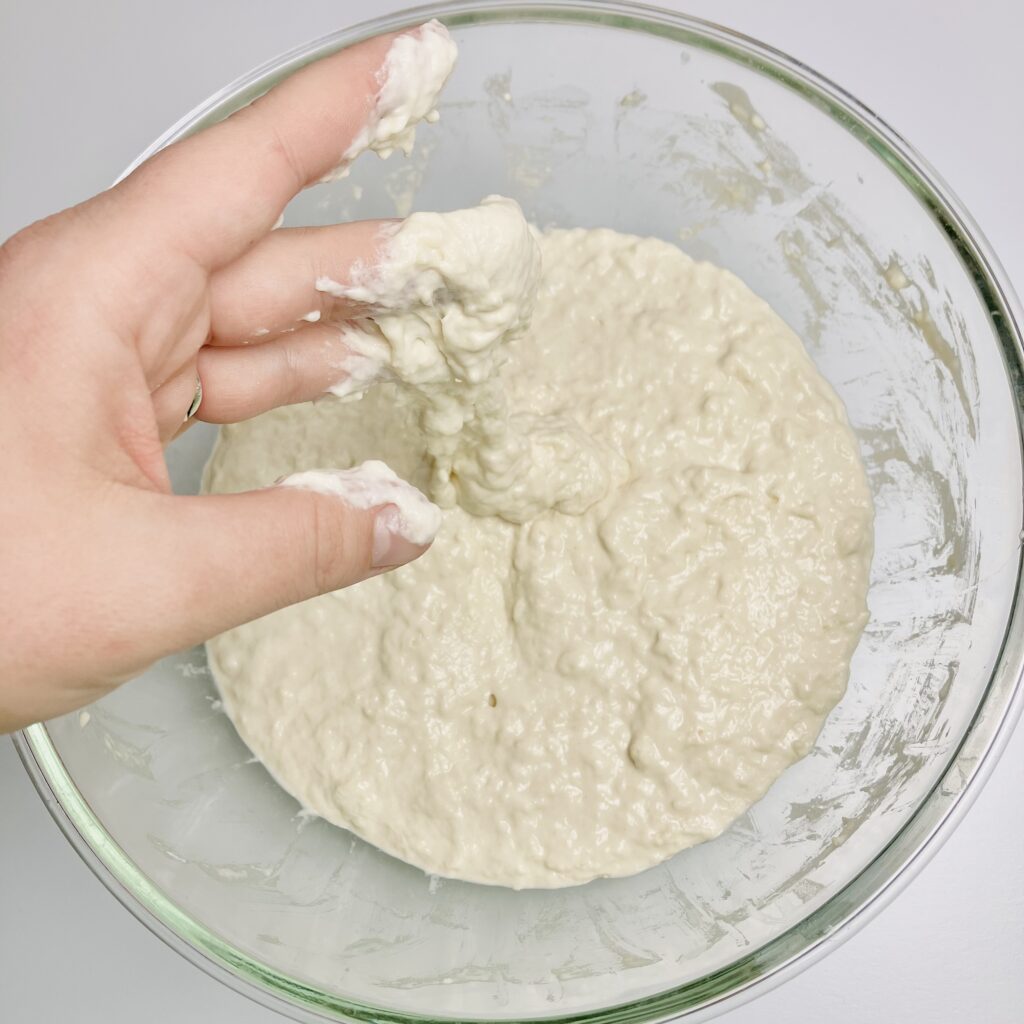
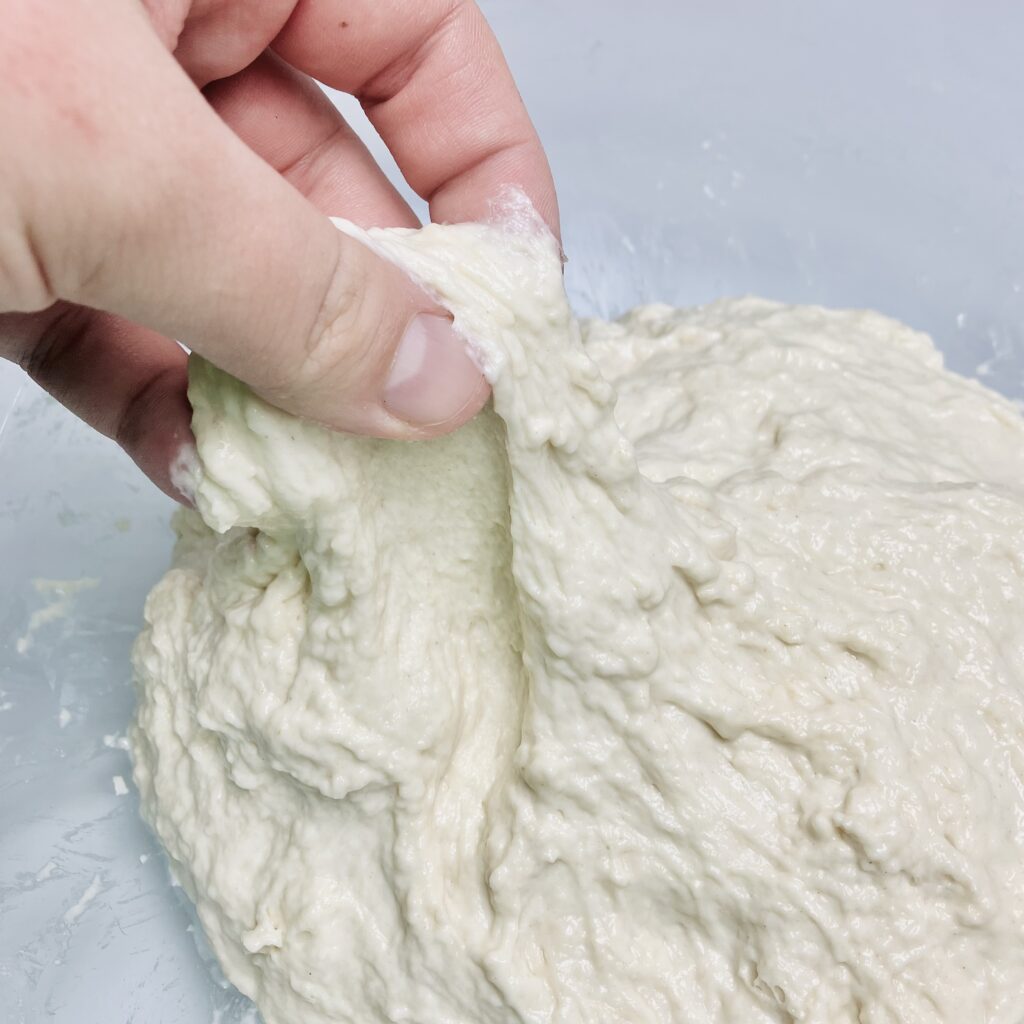
High hydration doughs, typically defined as those with hydration levels above 80% (using the formula provided above), are characterized by a higher ratio of water to flour. These doughs are known for their wet and sticky consistency, resulting in bread with an open crumb structure and a chewy texture. Working with high hydration doughs requires specific techniques and considerations to handle the wet and slack nature of the dough while achieving the desired results.
Characteristics of High Hydration Doughs:
- Wet and Sticky: High hydration doughs are wetter and stickier, making them more challenging to handle compared to lower hydration doughs.
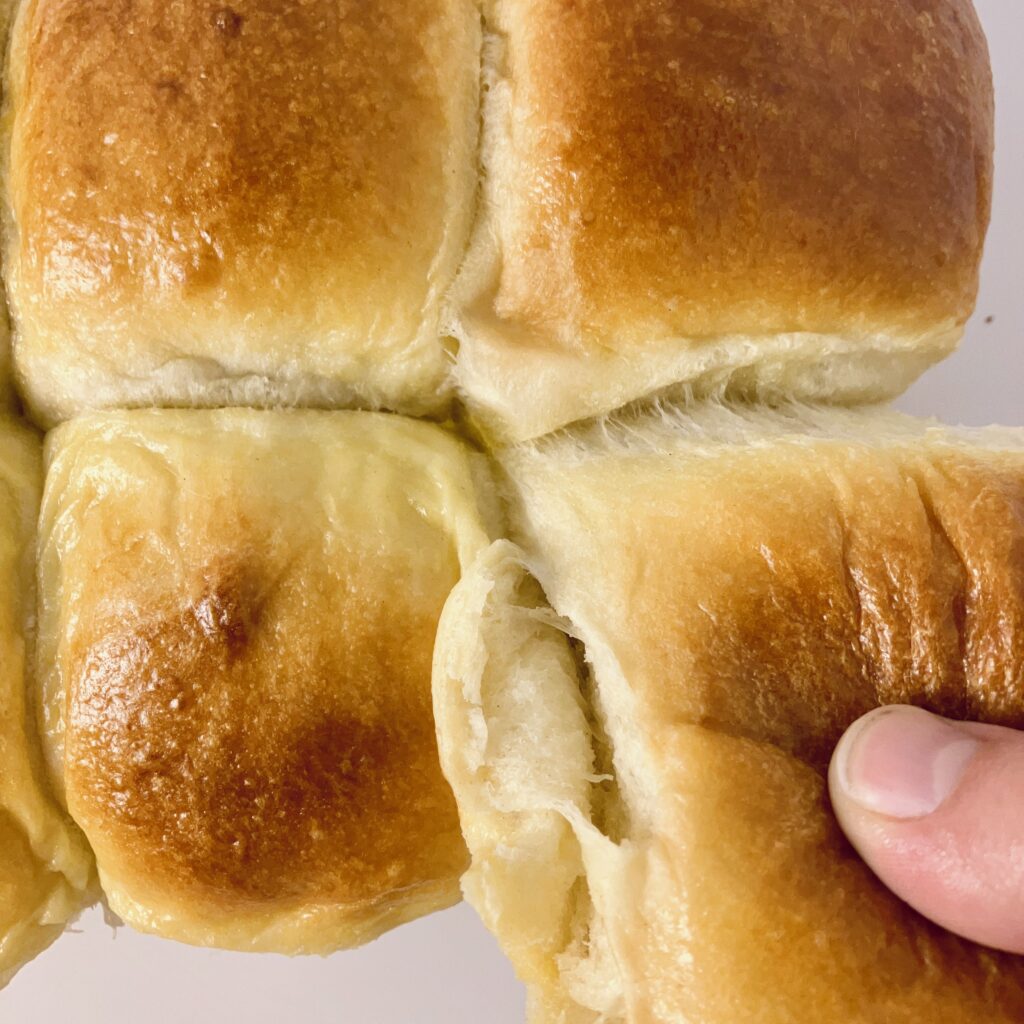
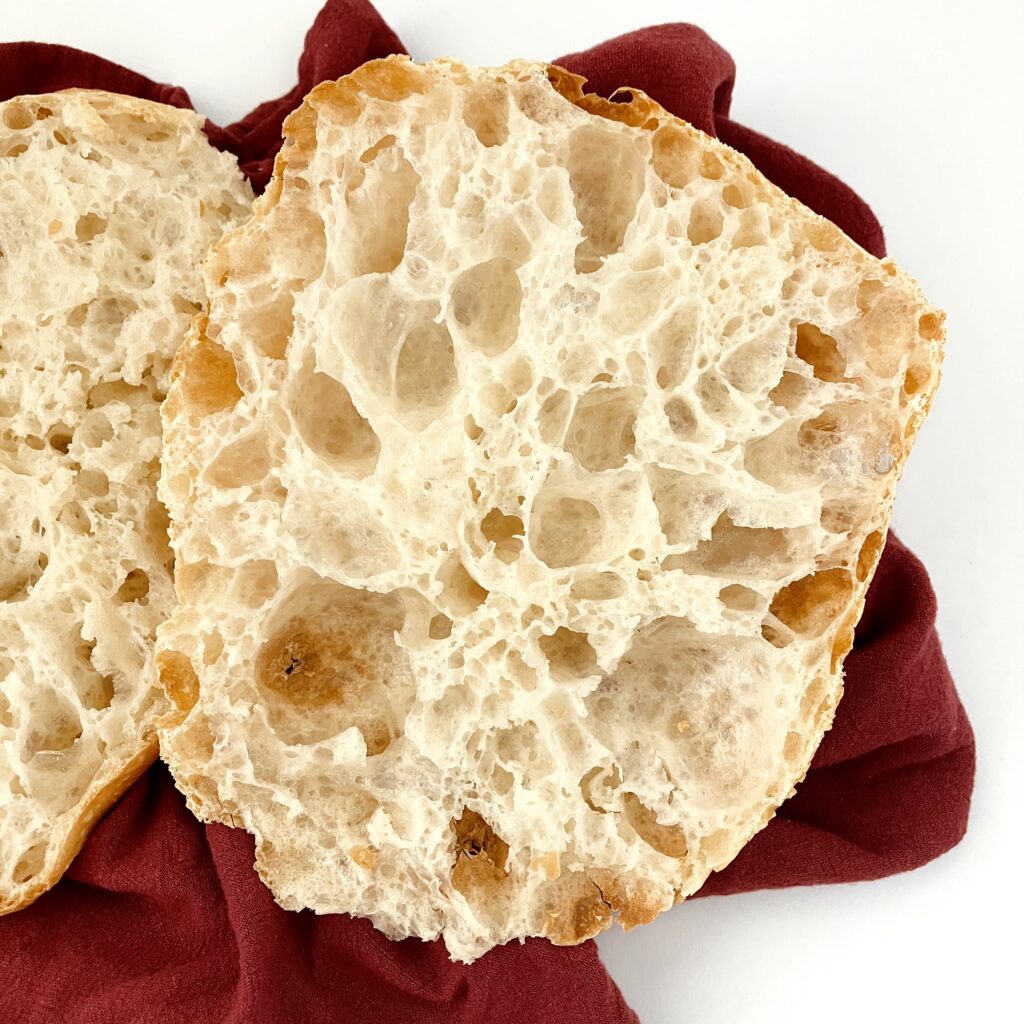
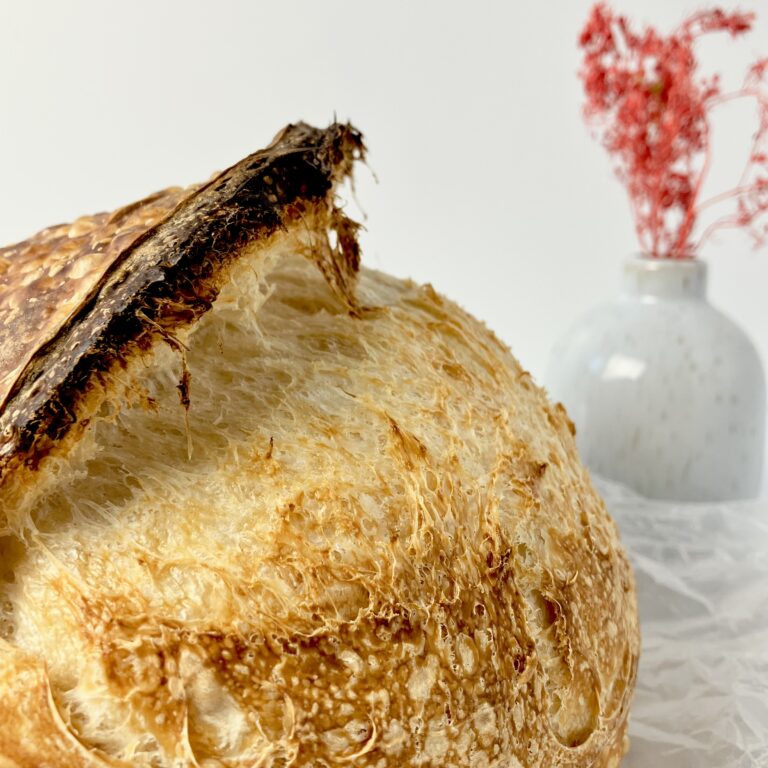
- Open Crumb Structure: The increased water content contributes to the development of larger and more irregular air pockets in the bread, resulting in an open and airy crumb.
- Chewy Texture: The higher hydration level contributes to a chewier texture in the final baked product.
Examples of high hydration doughs:
Developing gluten in high hydration doughs:
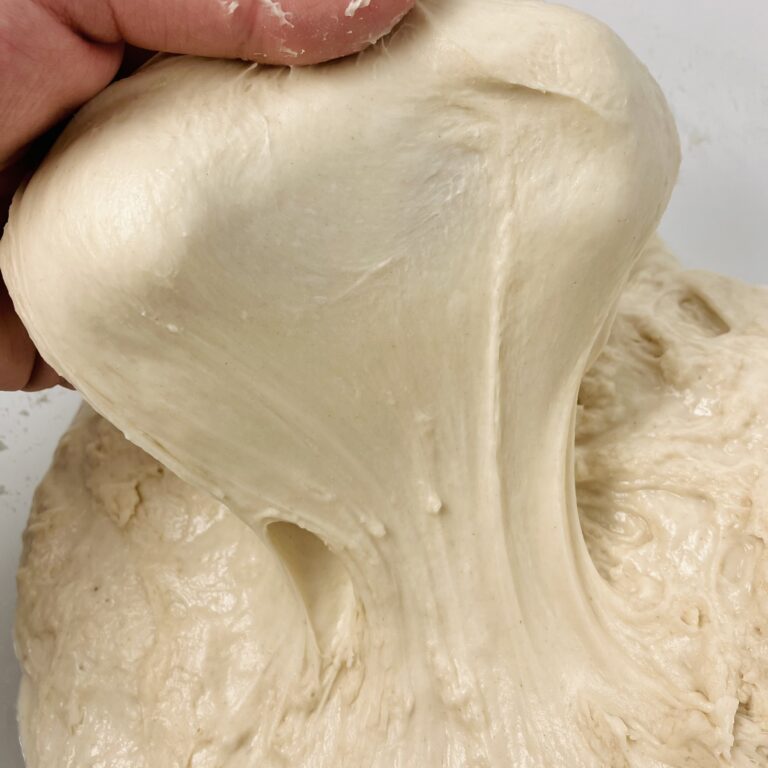
Gluten can be developed by hand or by stand mixer, but it is much more common for gluten to be developed by hand. Flour choice is also very important for gluten development in high hydration doughs.
By hand, gluten can be developed using intervaled stretch-and-fold techniques specific to working with high hydration doughs, such as coil fold or slap-and-fold. (More on these techniques coming soon.)

In a stand mixer, gluten can be developed by using the dough hook attachment and kneading at a high speed (speeds 6-10 on a KitchenAid, depending on the recipe) for twenty to thirty minutes. The general rule of thumb when kneading dough like this with a stand mixer is: the higher the hydration, the faster and longer kneading time becomes. Many stand mixers cannot take the speeds necessary to develop high hydration doughs, so it is always important to watch your stand mixer carefully or stick to the company’s recommendations (to be on the safe side).
Flour choice is important to consider, as doughs with hydrations of over 80% typically require a strong bread flour to hold them together. In other words, a flour with a protein content of over 12% is essential. Without this, the dough may not be able to hold itself together or develop gluten properly. It may never come together through stretch-and-folds, or pick itself up off the sides of the bowl when kneading in a stand mixer.
Fermenting high hydration doughs:
High hydration breads are the least flexible in their fermenting schedule, due to having less flour and more moisture than their lower hydration counterparts. Yeast thrive in moisture and feed on flour, a recipe for fast fermentation. High hydration doughs can usually double in size at their maximum, but do not have to be pushed to this point.
Shaping high hydration doughs:
High hydration doughs can be incredibly difficult to shape, as they are the stickiest and loosest of all the doughs. A heavy dusting of flour is typically used when shaping the dough, and they are usually shaped or cut with a bench scraper into simple squares (think ciabatta) or other loose shapes.
High Hydration Doughs and Flour Choice
Some doughs would technically be considered high hydration, yet they would not display any of the characteristics of high hydration doughs listed above. The dough may not be incredibly sticky or extensible, and the end result may not have an open crumb or be chewy in texture, despite the dough having a calculated hydration percentage of 80% or more.
Flour choice has a major part to play. Some flours absorb significantly more water than others, leading to different dough feels and varying baked results. Having knowledge of the flour being used and the hydration needed for best results can significantly impact the final bake.
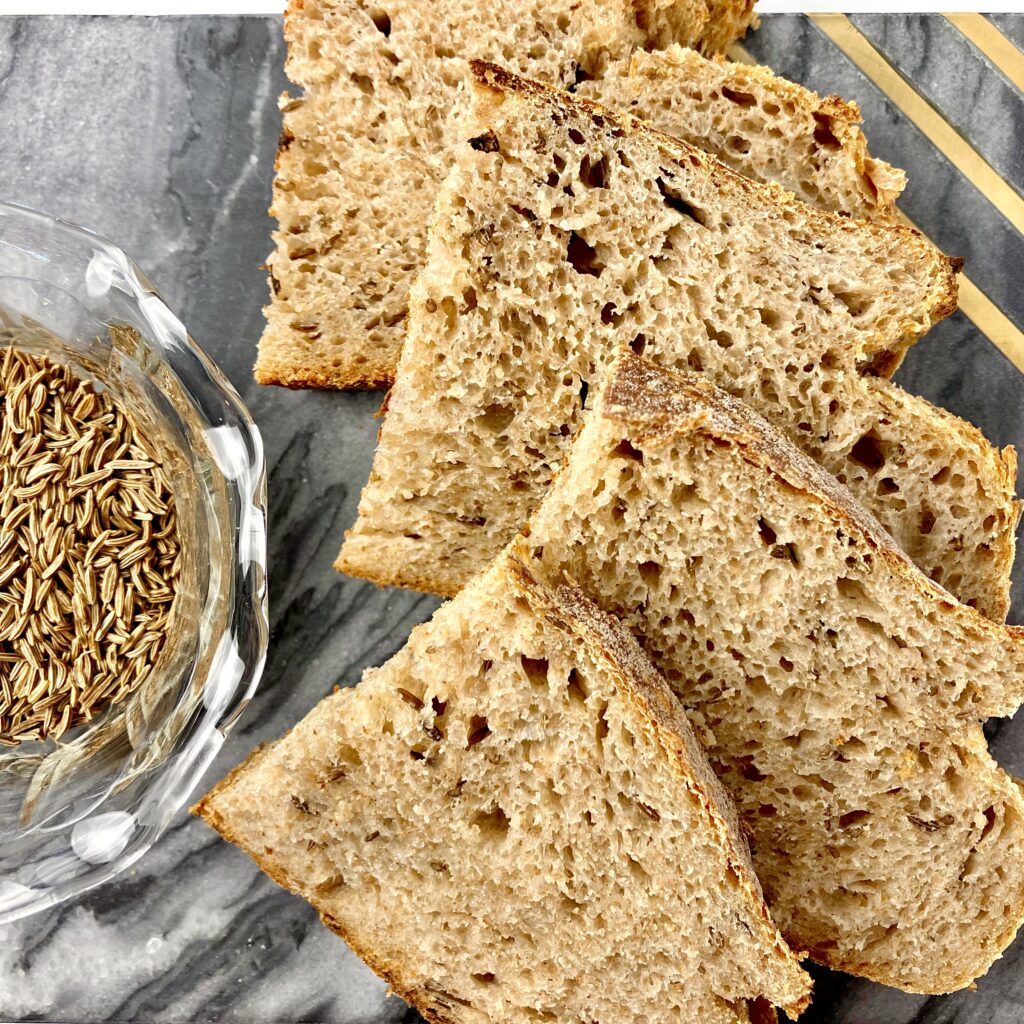
The rye bread recipe below (featuring a hydration of 85%) is still considered high hydration, even though it looks and functions like a moderate hydration dough and bread. Hydration is defined as (weight of water/weight of flour) × 100. Other ingredients, in this case rye flour, may affect the texture, feel, and workability of the dough and the outcome of the bread, but they do not affect hydration calculation. In this case, extra water has been included in the recipe to compensate for the amount of water absorbed by the rye flour.
How do I calculate the hydration of a recipe?
There are two ways to calculate hydration: the simple way and the technical way. The simple way will suffice for approximating hydration, while the technical way will give the baker a more accurate representation of the hydration of a recipe.
To calculate hydration, use the formula: Hydration % = (Weight of Water/Weight of Flour) × 100
Let’s calculate the hydration of a simple, four ingredient bread recipe:
- 500 g bread flour
- 350 g water
- 100 g active sourdough starter
- 10 g salt
Simple Method:
To calculate hydration the simple way, take the amount of water (350 g) and divide it by the amount of flour (500 g).
350 / 500 = .70
Now, multiply this by 100 to express hydration as a percentage.
.70 X 100 = 70
So, using the simple method of calculating hydration, this recipe has a hydration of approximately 70%.
Technical Method:
When calculating hydration the technical way, it is essential to include all flour/water added to the recipe, including flour/water added from different ingredients. In the case of this four ingredient bread recipe, the starter must be included, since it consists of flour and water.
My sourdough starter is 100% hydration, meaning it is made up of equal parts flour and water. This means, in my case, 100 g of sourdough starter would be made up of 50 g flour + 50 g water.
This amount of flour and water needs to be added to the amounts in the recipe in order to calculate the actual hydration.
500 g bread flour + 50 g flour from the sourdough starter = 550 total grams of flour.
350 g water + 50 g water from the sourdough starter = 400 total grams of water.
Now, divide the total amount of water by the total amount of flour.
400 / 550 = .73
Last, multiply this number by 100 to express hydration as a percentage.
.73 X 100 = 73
So, using the technical method of calculating hydration, this recipe has an actual hydration of 73%.
What ingredients besides flour and water count toward hydration?
In regards to water: any liquid, such as milk, tea, coffee, juice, or alcohol (such as wine or beer) can be substituted as, or added to, the total amount of water when calculating hydration. While it is true that the quantities of solids and subcomponents (such as milk solids, tea or coffee granules, juice pulp, or alcohol) varies in each example, each contains enough water to count toward hydration.
Eggs contain around 75% water and can be counted toward hydration, if desired. The total amount of eggs by weight should be multiplied by .75 to determine the water content, and thereby impact on hydration.
Other ingredients that include varied water percentages include: butter (approximately 18% water content) and fresh fruit. While these will affect the overall hydration of the recipe, they are not necessary to included in hydration calculation.
In regards to flour: hydration calculation does not change with flour types. Any type of flour (milled grain product) can, and should, be included in hydration calculation. A bread made with 500 g of flour and 350 g of water still has a hydration of 70%, whether the flour used was all-purpose, bread, whole wheat, rye, spelt, or even gluten-free.
This being said, some flours absorb more water than others, giving the dough a different feel and texture. A dough at 70% hydration made with bread flour will feel and function much different than a bread at 70% hydration made with whole wheat flour.
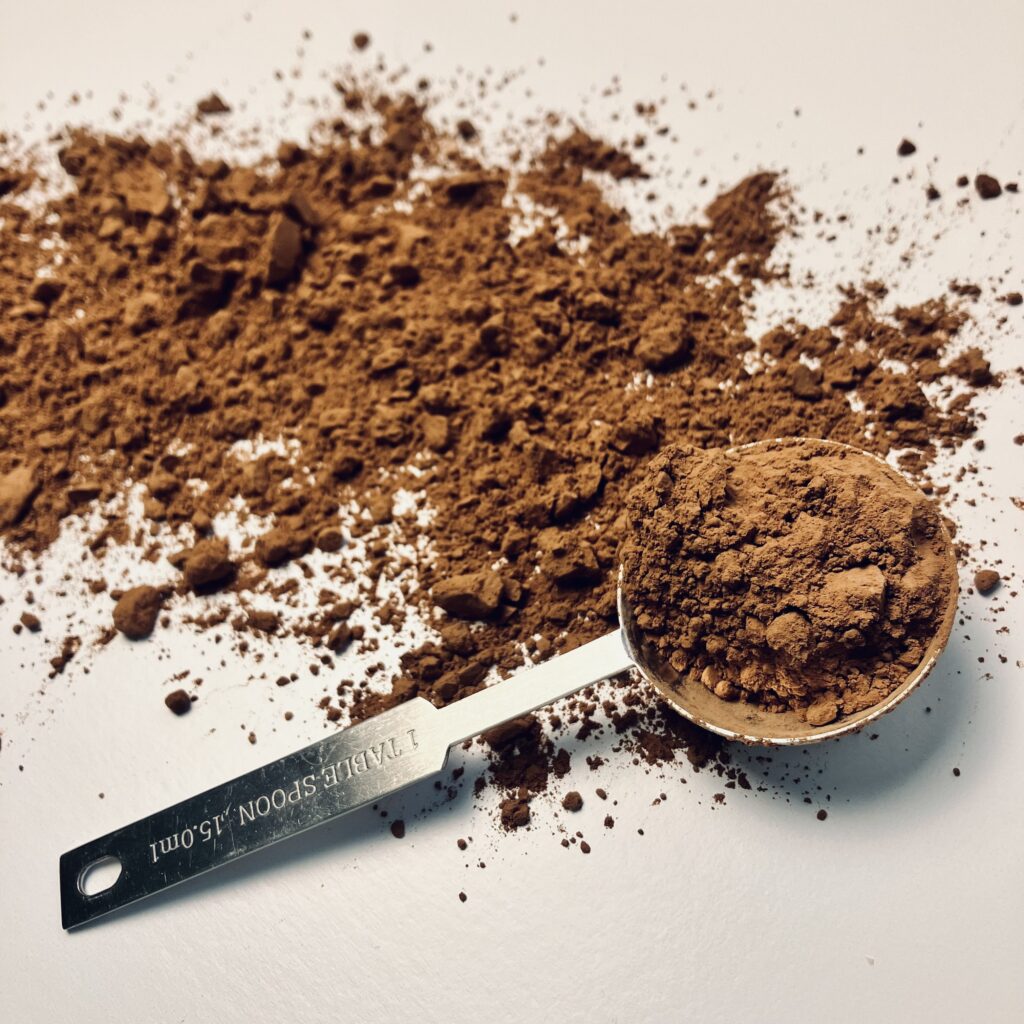
Ingredients such as cocoa powder, dried fruit powders, and dry milk powder do not count toward hydration, even though they do absorb water and have varying impacts on the recipe. Only milled grain products count toward hydration calculation.
Do different ingredients have an impact on hydration?
Nearly every single ingredient added to a recipe will have an impact on hydration. While certain ingredients may significantly impact the dough, making it wetter or dryer, those same ingredients would not be included in hydration calculation.
For example, cocoa powder absorbs a lot of moisture from the dough, leading to a dough that is more dry than a dough without it, though cocoa powder is not included in hydration calculation.
Eggs add significant moisture to dough, but may or may not be included in hydration calculation.
While varying ingredients may not be considered part of hydration calculation, it is important to consider their functional impact on the recipe. Every ingredient added to a recipe has an impact on the overall texture, feel, and workability of the dough, and the end bread product made from it.
How do I change the hydration of a recipe?
Changing the hydration of a recipe is easy, requiring only simple math. To change the hydration, take the total amount of flour in the recipe and multiply it by the percent hydration you would like to change the recipe to. Let’s look at our previous example:
- 500 g bread flour
- 350 g water
- 100 g active sourdough starter
- 10 g salt
Simple Method:
In the previous section, “How Do I Calculate The Hydration Of A Recipe,” it was determined that the approximate hydration of this recipe was 70%. Let’s say we want it to be approximately 80%. Take the amount of flour in the recipe and multiply it by the percent hydration you would like to change the recipe to:
500 X .80 = 400
So, for this example, we would use 400 g of water (instead of 350 g) to make our recipe.
Technical Method:
In the previous section, “How Do I Calculate The Hydration Of A Recipe,” it was determined that the actual hydration of this recipe was 73%. Let’s say we want it to be 80%. Using this method, it is important to include water and flour found in the sourdough starter. (Step-by-step directions for how to figure this out are in the above section, linked here.)
Total flour = 550 g
550 X .80 = 440
So, we need to have a total of 440 g of water in the recipe. Let’s not forget to subtract the amount of water from the sourdough starter:
440 – 50 = 390
So, for this example, we would use 390 g of water (instead of 350 g) to make our recipe.
What questions do you still have about dough hydration?
Is there anything I missed when covering this information? Or, anything you are still confused about or that could be explained better? Please let me know in the comments! I’ll be happy to answer your questions and even update this article, if needed.
Happy baking!
Join the email list
Join the email list to be notified when a new recipe or blog post comes out. No spam, just sourdough. Unsubscribe at any time.
Recent POSTS
Pingback: Tangzhong – The sourdough Baker
Pingback: BIALY - The Sourdough Baker
Pingback: SOFT PRETZELS - The Sourdough Baker
Pingback: DOUBLE CHOCOLATE COUNTRY BREAD WITH STRAWBERRIES - The Sourdough Baker
Pingback: COUNTRY BREAD - The Sourdough Baker
Pingback: HIGH PROTEIN COTTAGE CHEESE SANDWICH BREAD - The Sourdough Baker
Pingback: FOCACCIA - The Sourdough Baker
Pingback: MILK VERSUS WATER IN ENGLISH MUFFINS - The Sourdough Baker
Pingback: DUTCH CRUNCH BREAD - The Sourdough Baker
Pingback: SWEET STIFF STARTER - The Sourdough Baker
Pingback: STAND MIXER SOURDOUGH - The Sourdough Baker
Pingback: LOW HYDRATION PIZZA CRUST - The Sourdough Baker
Pingback: WHITE SANDWICH BREAD - The Sourdough Baker
Pingback: PAN DE CRISTAL - The Sourdough Baker