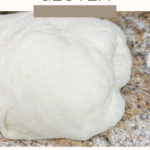
What if I told you that bulk fermentation isn’t your problem? Would you believe me? The truth is, so many people overthink bulk fermentation timing and percentage rise. So many people think they have over-fermented their dough, when, in reality, they just have not developed enough strength for it to ferment properly. So many people underestimate the power of properly kneading bread dough – whether it is just because they do not understand why it needs to be well-developed or because they do not want to put in the time it takes to get the dough to a properly-developed state. Let me explain to you why gluten is so important, how various factors affect the dough’s ability to develop gluten, and all your options for building proper dough strength.
In this article:
- What is gluten and why do I need it?
- Extensibility versus Elasticity
- What is protein content and why is it important?
- How is gluten different in various flour types?
- How does dough hydration affect gluten development?
- What other ingredients affect gluten development?
- What does sufficient dough strength look (and not look) like?
- Easy ways to fix underdeveloped dough
- Methods of gluten development
- For what reason might I need to perform folds if I already kneaded the dough to a windowpane by hand or stand mixer?
- What about autolyse?
- What questions do you still have about gluten development?
- Join the Email List
What is gluten and why do I need it?
Gluten is a group of proteins, including gliadin and glutenin, found in wheat and related grains, such as barley and rye. It gives dough its elasticity (strength), helps it rise and maintain its shape, and often gives the final product a chewy (rather than tender or crumbly) texture.
Gluten is as important in bread dough as rubber is on a balloon. When you mix flour and water to make bread dough, gluten proteins come together and form a network. Think of it like stretching a balloon before you blow it up. This makes the balloon flexible and ready to hold in air. As you knead the dough, the gluten network gets stronger and stretchier. When you stretch the balloon, you also make it stronger and stretchier, so it can hold more air without popping. Yeast in the dough produce gas bubbles, and the gluten traps these bubbles, making the dough rise and get bigger. When you blow air into a balloon, it expands and gets bigger because the rubber holds in the air. In the oven, the gluten keeps holding the gas bubbles, which makes the bread fluffy and gives it its shape. Just like how the balloon holds its shape when you tie it off, the gluten holds the shape of the bread as it bakes.
Altogether, gluten helps the dough stretch, hold gas bubbles, and rise to become delicious, fluffy bread. Without gluten, you would find yourself with a flat, cracked loaf containing a tight and dense crumb and texture.
Extensibility versus Elasticity
There are two important components of proper gluten development: extensibility and elasticity. In a nutshell, extensibility is the stretchiness of the rubber balloon, while elasticity is the strength of the rubber itself, the rubber’s ability to hold the balloon together and keep it from popping.
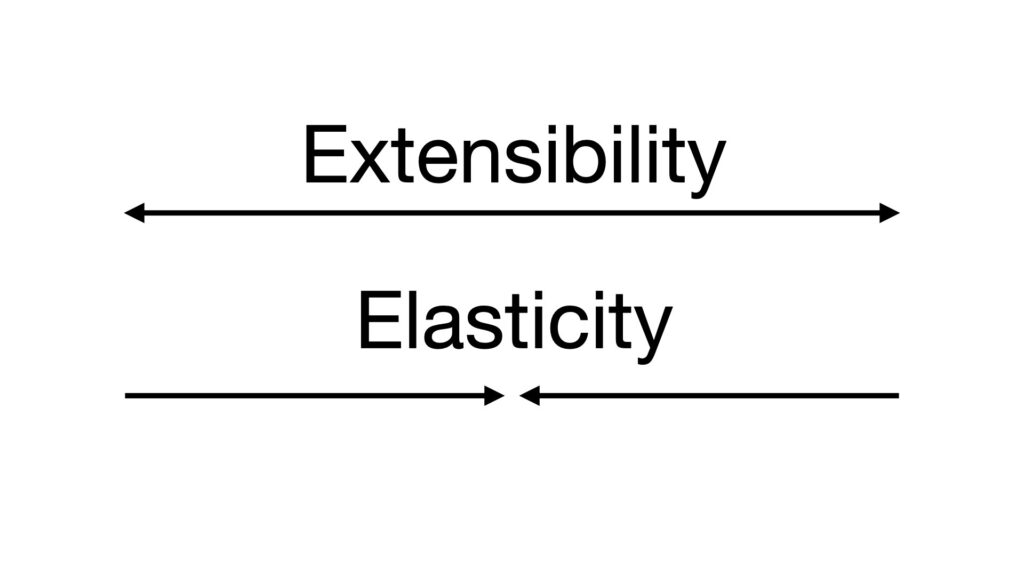
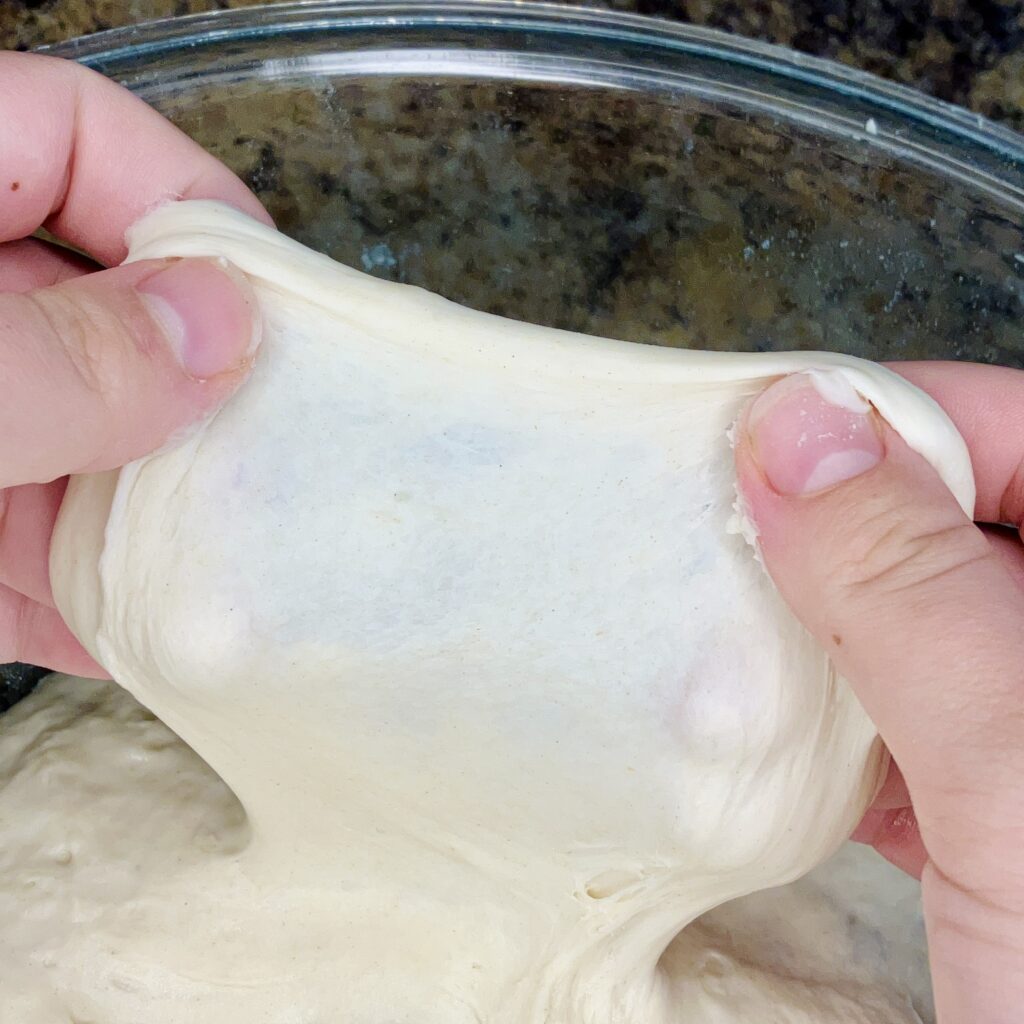
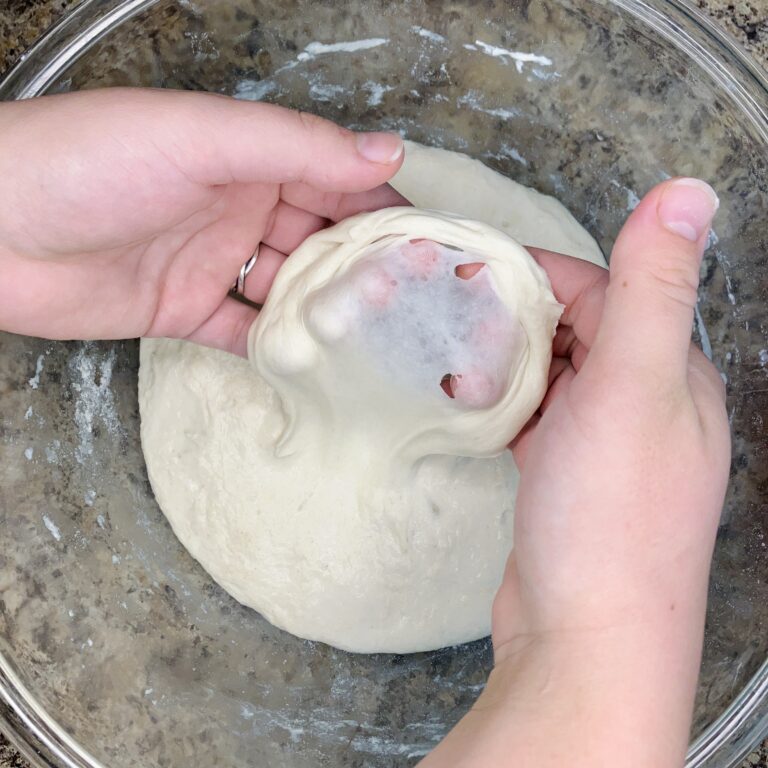
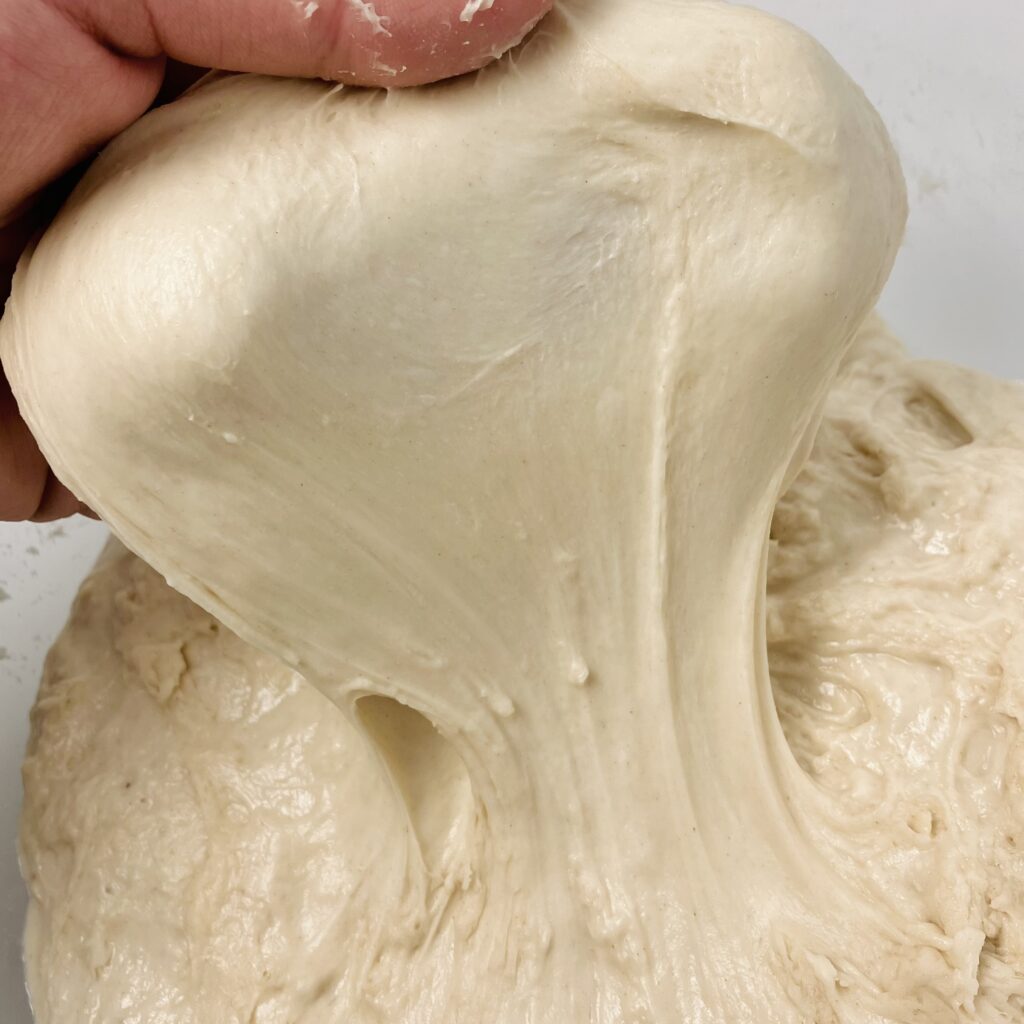
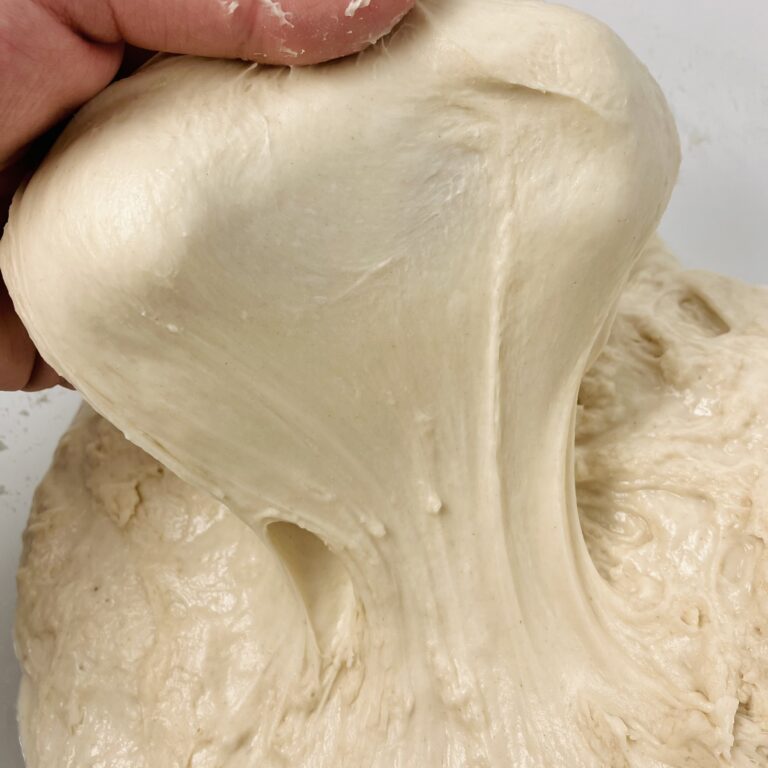
Extensibility is the dough’s ability to stretch. It can be visibly seen by the dough’s windowpane. The more see-through the windowpane, the more developed the dough’s extensibility. This windowpane indicates how ready the dough is to hold in air during fermentation. This is the stretchy rubber on a balloon. Without it, the air would escape and fermentation would not be able to properly occur.
Extensibility develops during the dough’s resting periods during bulk fermentation. It can also be developed upfront, along with elasticity, by kneading the dough or through the use of techniques like autolyse or fermentolyse (where the flour and water are given an initial rest period before tightening ingredients, such as salt, are added to the dough).
Elasticity is the part of gluten that is referenced when the dough is described as “strong” or “weak.” A “weak,” or inelastic, dough might have a windowpane, but it will appear relaxed and flat. Without elasticity, the dough would not be able to hold its shape. This can lead to flat hockey pucks in the oven.
Another side-effect of an inelastic dough is stickiness. When you turn the dough out of the proofing container for shaping, it should not struggle to remove itself from the bowl. As you are shaping the dough on a clean counter, it should not stick to the counter (though some of the dough may cling to the counter, it should pull itself up and remain attached to the mass of dough). Some mistake a sticky dough for an improperly fermented dough, generally describing the dough as “over-proofed.” In truth, the cause may vary. The dough may remain sticky throughout the process due to flour type, dough hydration, or, most notably, underdevelopment. A dough that does not have enough elasticity will remain sticky and will not maintain shape, two effects most often attributed to over-proofing bread dough.
While extensibility is the dough’s ability to stretch, elasticity is the dough’s ability to pull back and hold itself together. These two things work together to create a strong network and a fabulous, well-structured bread.
What is protein content and why is it important?
The term “protein content” in bread-making simply refers to how much protein is in the flour being used. The higher the protein content, the more potential for gluten development, leading to a stronger and chewier texture, ideal for bread.
Generally speaking, white flour can be divided into three categories:
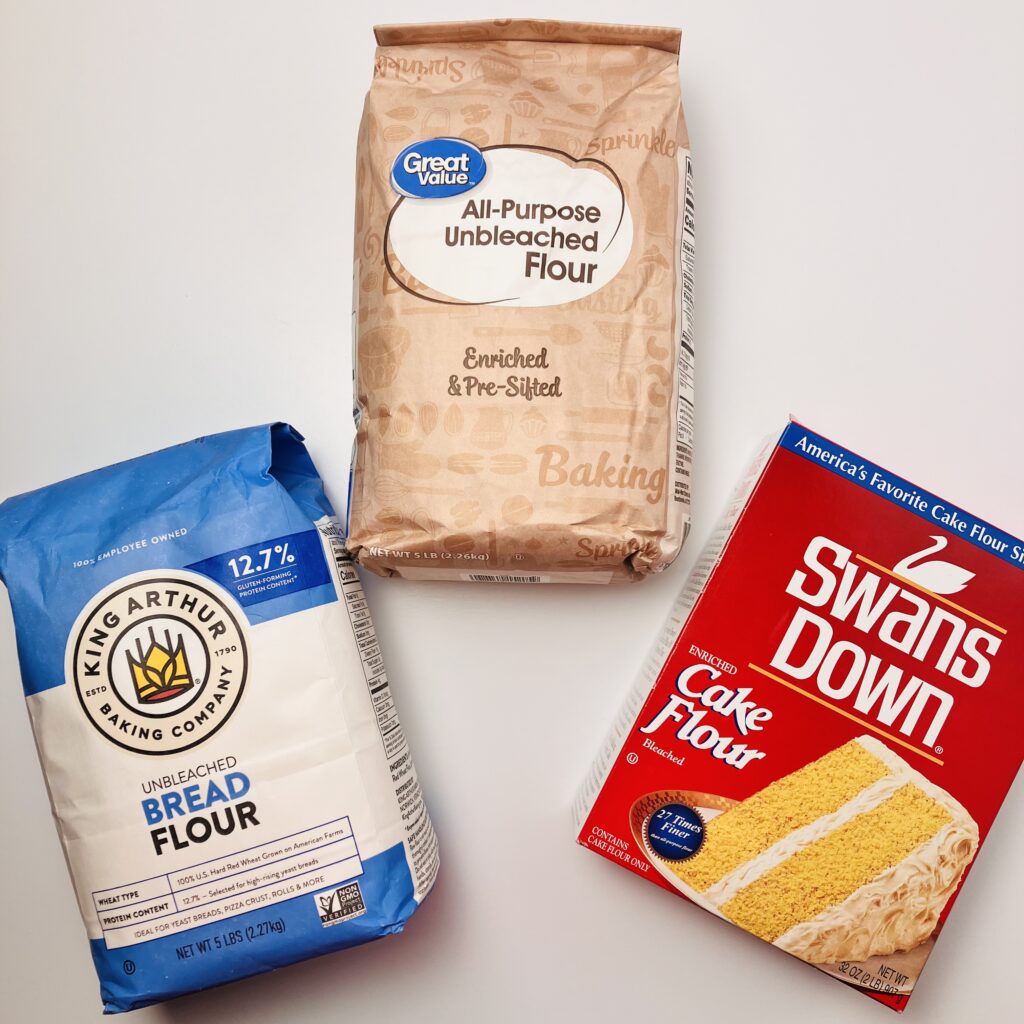
- Bread flour: Bread flour contains the highest amount of protein (12-14%), meaning it has the potential to develop the strongest gluten network, giving bread its chewy and elastic texture.
- All-purpose flour: All-purpose flour contains a moderate amount of protein (10-12%), making it versatile, suitable for a wide range of baked goods with balanced gluten development.
- Cake flour: Cake flour contains the lowest amount of protein (7-9%), meaning gluten development is minimal. This results in a tender and crumbly texture, perfect for cakes and pastries.
How is gluten different in various flour types?
Every type of flour has a different relation to gluten. This is why it is so important to work with a single flour type until mastery, rather than playing around with various flours. Because every type of flour has a different relation to gluten, the way the dough behaves and the way it needs to be handled is different. Let’s talk about a few common alternatives to modern white flour, their protein content, and their relationship to gluten below:
- Whole wheat flour: Whole wheat flour has a similar protein content to white wheat flour but includes the bran and germ, which can impact gluten development. The presence of bran and germ in whole wheat flour interferes with the formation of a strong gluten network. Bran can cut through gluten strands, resulting in a denser and coarser texture. Whole wheat flour also absorbs more water, which can affect dough hydration and gluten formation.
- Rye flour: Rye flour contains proteins that can form gluten, but these proteins are less efficient at creating the strong, elastic network seen in wheat flour. This is because rye has high levels of pentosans (complex carbohydrates) that interfere with gluten formation. The gluten network in rye dough is weaker and less elastic, resulting in denser and moister baked goods. Because of this, rye dough is stickier and less cohesive, absorbing a lot of water.
- Spelt flour: Spelt flour has a relatively high protein content, similar to or slightly higher than that of wheat flour, but its gluten structure is different. The gluten in spelt is more soluble and less elastic than the gluten found in modern wheat, which makes spelt dough more extensible (stretchy) but less stable. This means it can expand well during rising but may not hold its shape as well as wheat dough.
- Kamut flour: Kamut, also known as Khorasan wheat, has a high protein content, similar to, or even higher than, modern wheat. The proteins in Kamut can form gluten, but, similar to spelt flour, the nature of the gluten is different. The gluten formed in Kamut dough tends to be more fragile and less elastic compared to modern wheat. While Kamut can produce a strong gluten network, it can be more difficult to achieve the same elasticity and extensibility found in bread flour made from modern wheat. This can lead to a more tender and less chewy texture in baked goods.
- Einkorn flour: Einkorn is one of the oldest forms of cultivated wheat and has a protein content similar to or slightly lower than modern wheat. However, the gluten proteins in einkorn are quite different. The gluten in einkorn is weaker and less elastic than that found in modern wheat. Einkorn dough tends to be stickier and less cohesive, making it more challenging to work with. The resulting gluten network is delicate, leading to a more crumbly and tender texture in baked goods.
How does dough hydration affect gluten development?
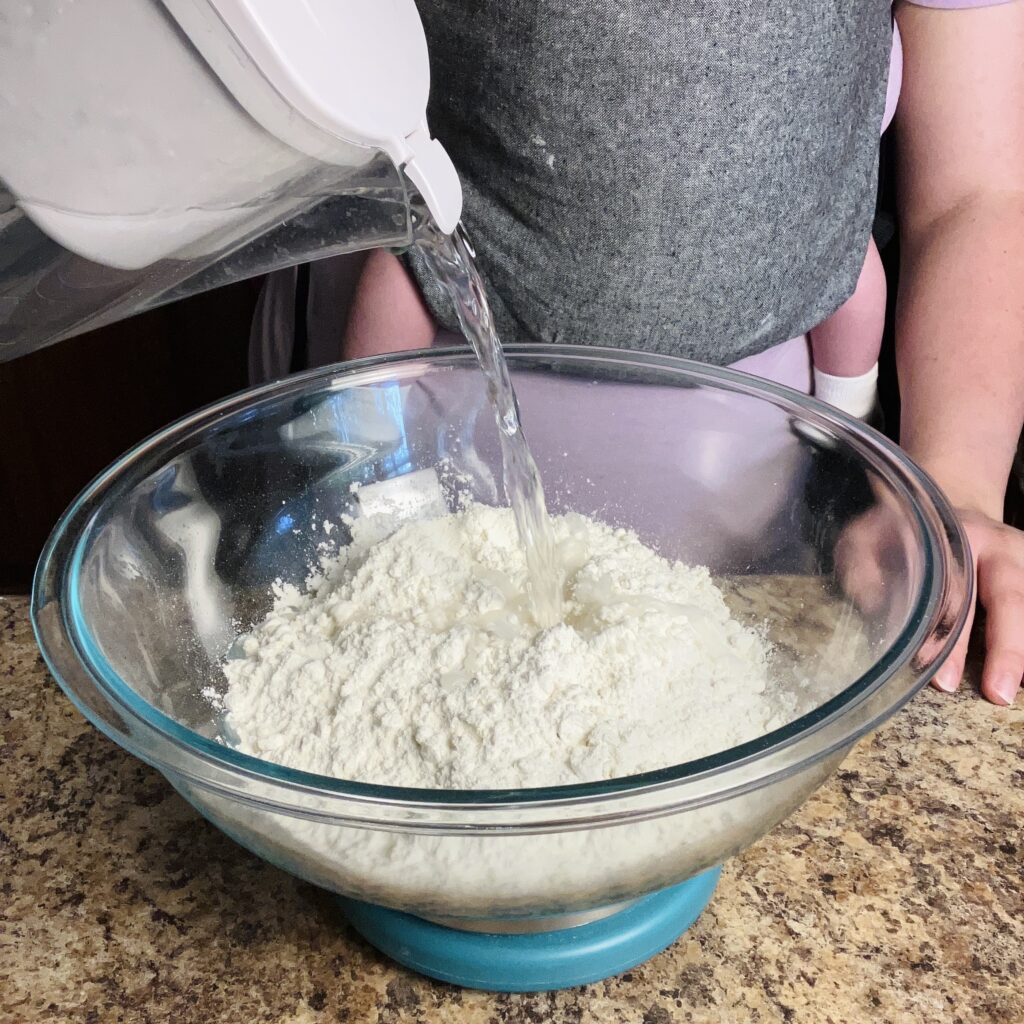
Hydration simply refers to how much water is added to the dough. Water is essential for hydrating the gluten proteins, allowing them to unfold and bond together. Without sufficient water, gluten cannot develop properly. Proper hydration ensures the dough can stretch and expand without tearing, which is crucial for trapping gas produced by yeast and creating a good rise.
In general, I classify my bread doughs into three hydration categories: low (65% and below), moderate (65-80%), and high (80% and above). In reality, these categories can look very different depending on the flour that is being worked with. A moderate hydration whole wheat bread will feel and function like a low hydration white bread. You can read more about dough hydration specifically, including how it is calculated, here. Adjusting hydration levels allows bakers to achieve different textures and structures in their baked goods. Regarding gluten formation, the hydration of the dough is going to affect how the dough can be worked with and how easy or difficult it is to develop the gluten.
Low hydration doughs give limited mobility to the gluten proteins. In other words, the absence of sufficient water hinders the formation of a strong gluten network. One might notice tearing in the dough during shaping (which means the “extensibility” part of gluten is not fully present). Though the lack of water limits gluten’s ability to develop, the additional flour works to help the dough hold its shape (making up for the “elastic” part of gluten development). The dough itself is stiffer and harder to knead, requiring more force and pressure to move around. Gluten development techniques are limited because of the dough’s lack of ability to stretch. This means all the kneading on low hydration doughs is generally completed up-front, and folds are rarely, if ever, performed. The resulting bread is usually denser and less chewy than breads made from higher hydrations.
Moderate hydration doughs have enough water for gluten proteins to interact and form a cohesive and elastic network, meaning the dough should be able to form the perfect gluten network. The dough is easier to knead and/or stretch and should develop and boast a beautiful windowpane. The dough itself may or may not be sticky, depending on the specific hydration percentage and the type of flour used. The resulting bread should have a more open crumb structure and chewy texture than a bread made from a low hydration dough.
High hydration doughs allow gluten proteins to move more freely and bond more extensively, creating a very stretchy dough that should boast a beautiful windowpane. However, these doughs can be more difficult to develop because they are stickier and harder to handle. It may take longer and more effort to give these doughs the elasticity they need, due to the extra water. Because of this, folding techniques are primarily used to build strength. The resulting dough is very chewy with the most open crumb of all the hydrations.
What other ingredients affect gluten development?
In the same way that every flour has a different relationship to gluten, and every hydration affects gluten’s ability to form, every ingredient added to bread dough can affect gluten development as well. Examples include: salt, fats, and enzymes.
Salt tightens the gluten network by strengthening the interactions between gluten proteins. It enhances the dough’s elasticity and structure, making it more cohesive and better able to trap gases during fermentation. Adding the right amount of salt (1.5-2% of the total flour content) is important, as too much salt will affect fermentation.
Fats, such as butter, oil, or shortening, can coat gluten proteins, preventing them from hydrating properly and bonding to form a strong network. It is important to develop doughs with high percentages of fat to a full windowpane during mixing (which can be much more difficult to achieve by hand) or else the gluten will struggle to properly develop.
Enzymes, such as proteases from malted barley flour, can break down gluten proteins into smaller fragments, affecting the dough’s strength and elasticity. Controlled enzyme activity can make the dough more extensible and easier to shape. This is an especially important pairing for freshly milled whole grain flours, which, on their own, produce a tighter dough.
What does sufficient dough strength look (and not look) like?
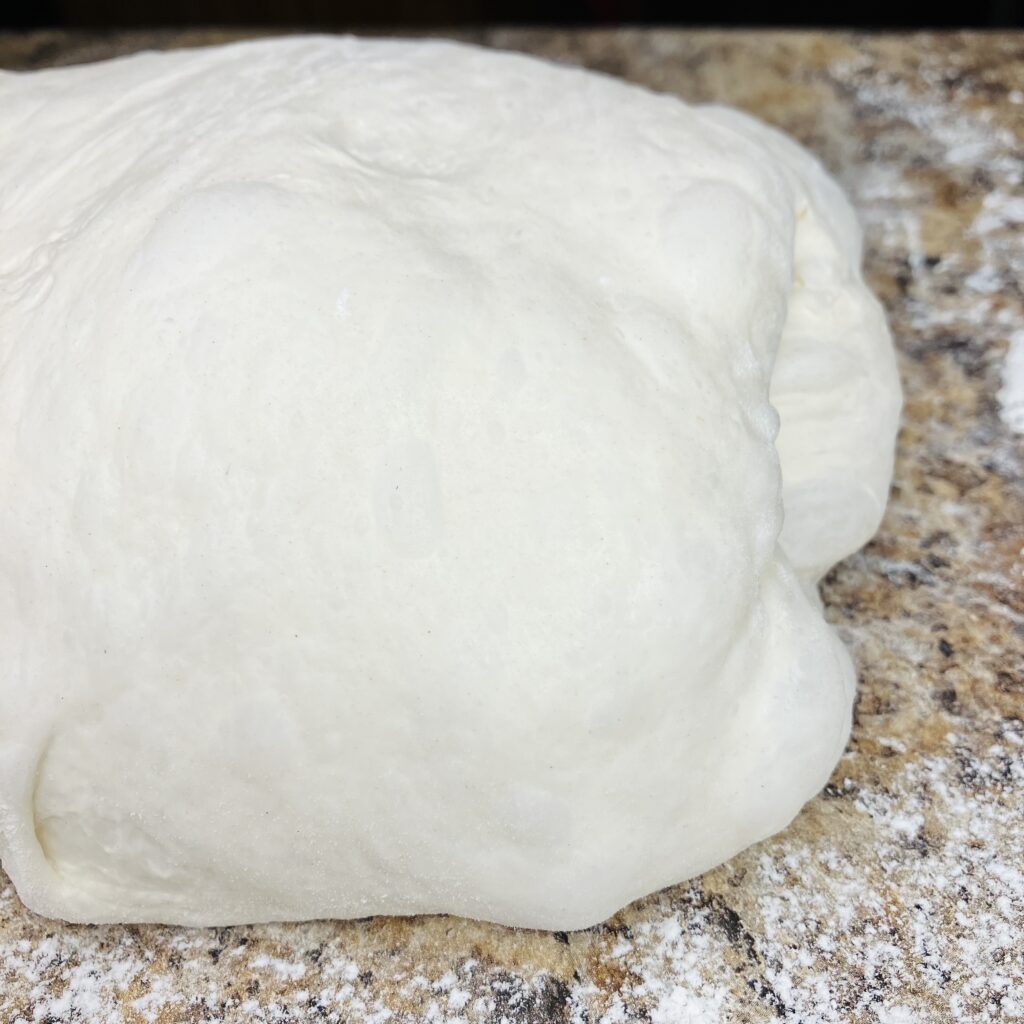
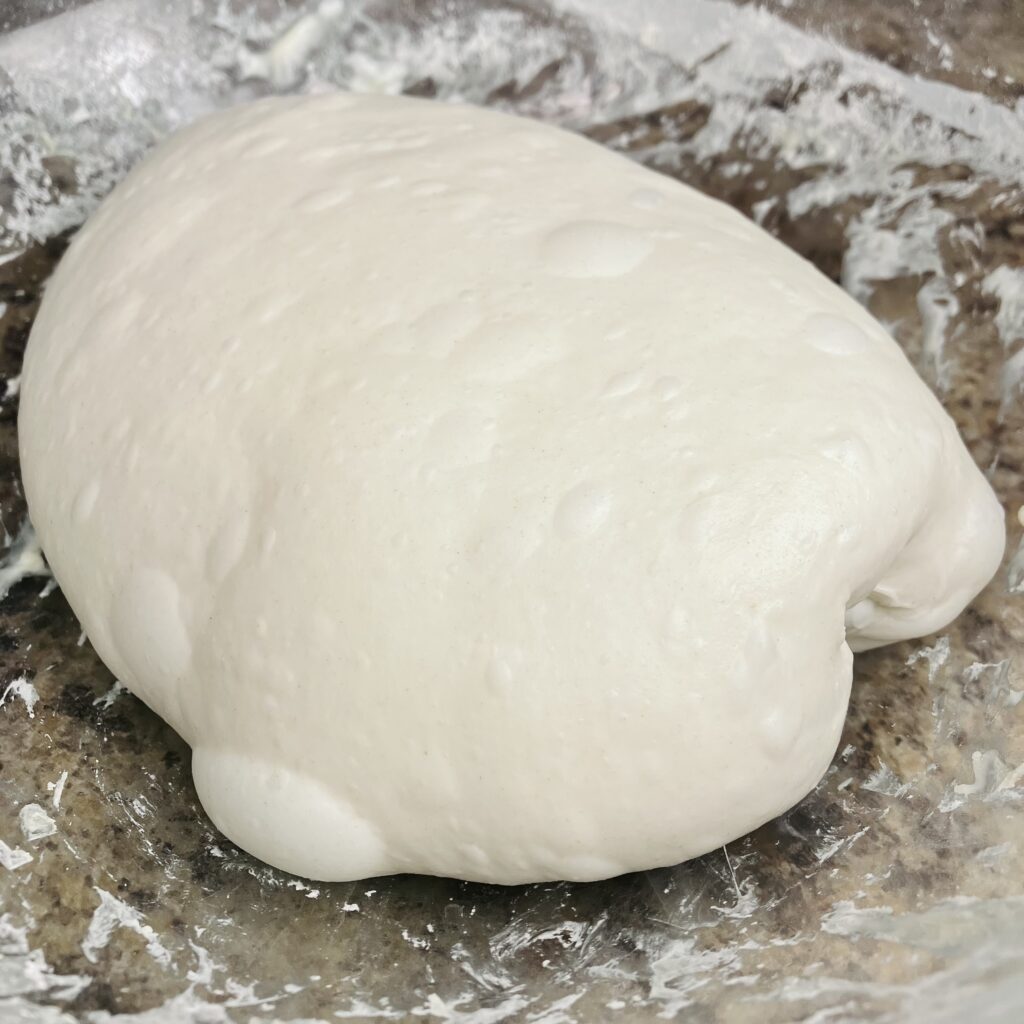
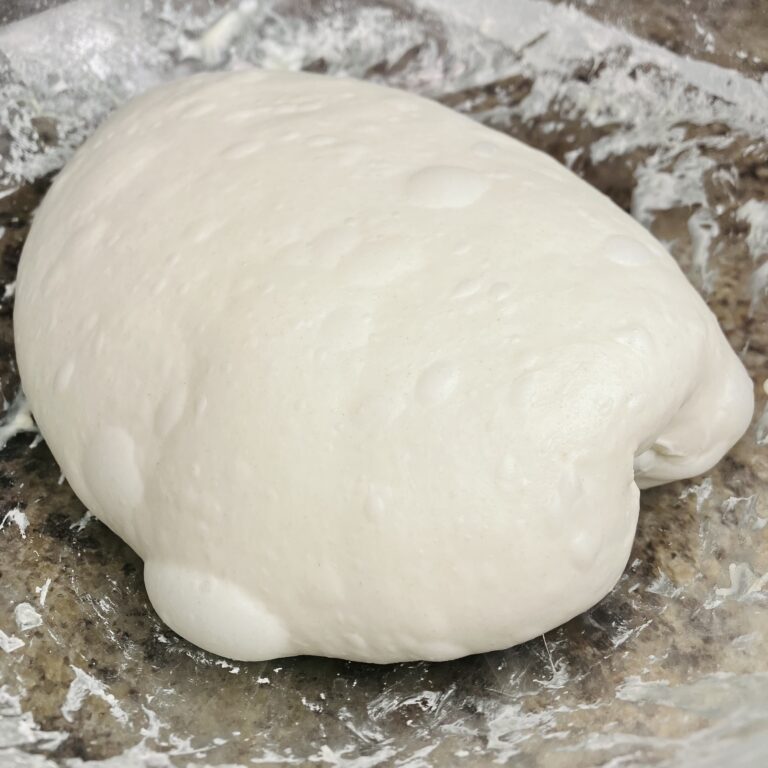
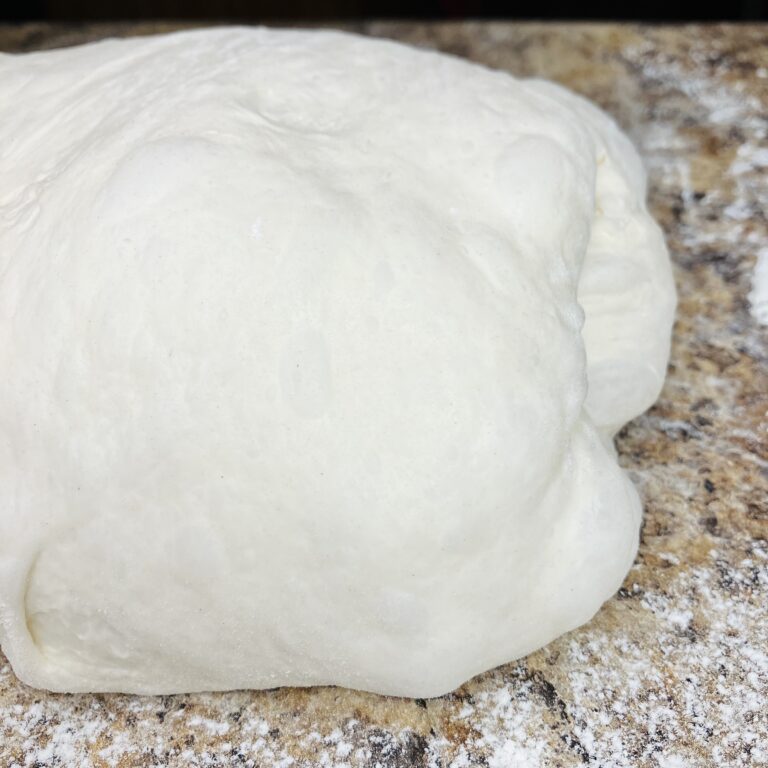
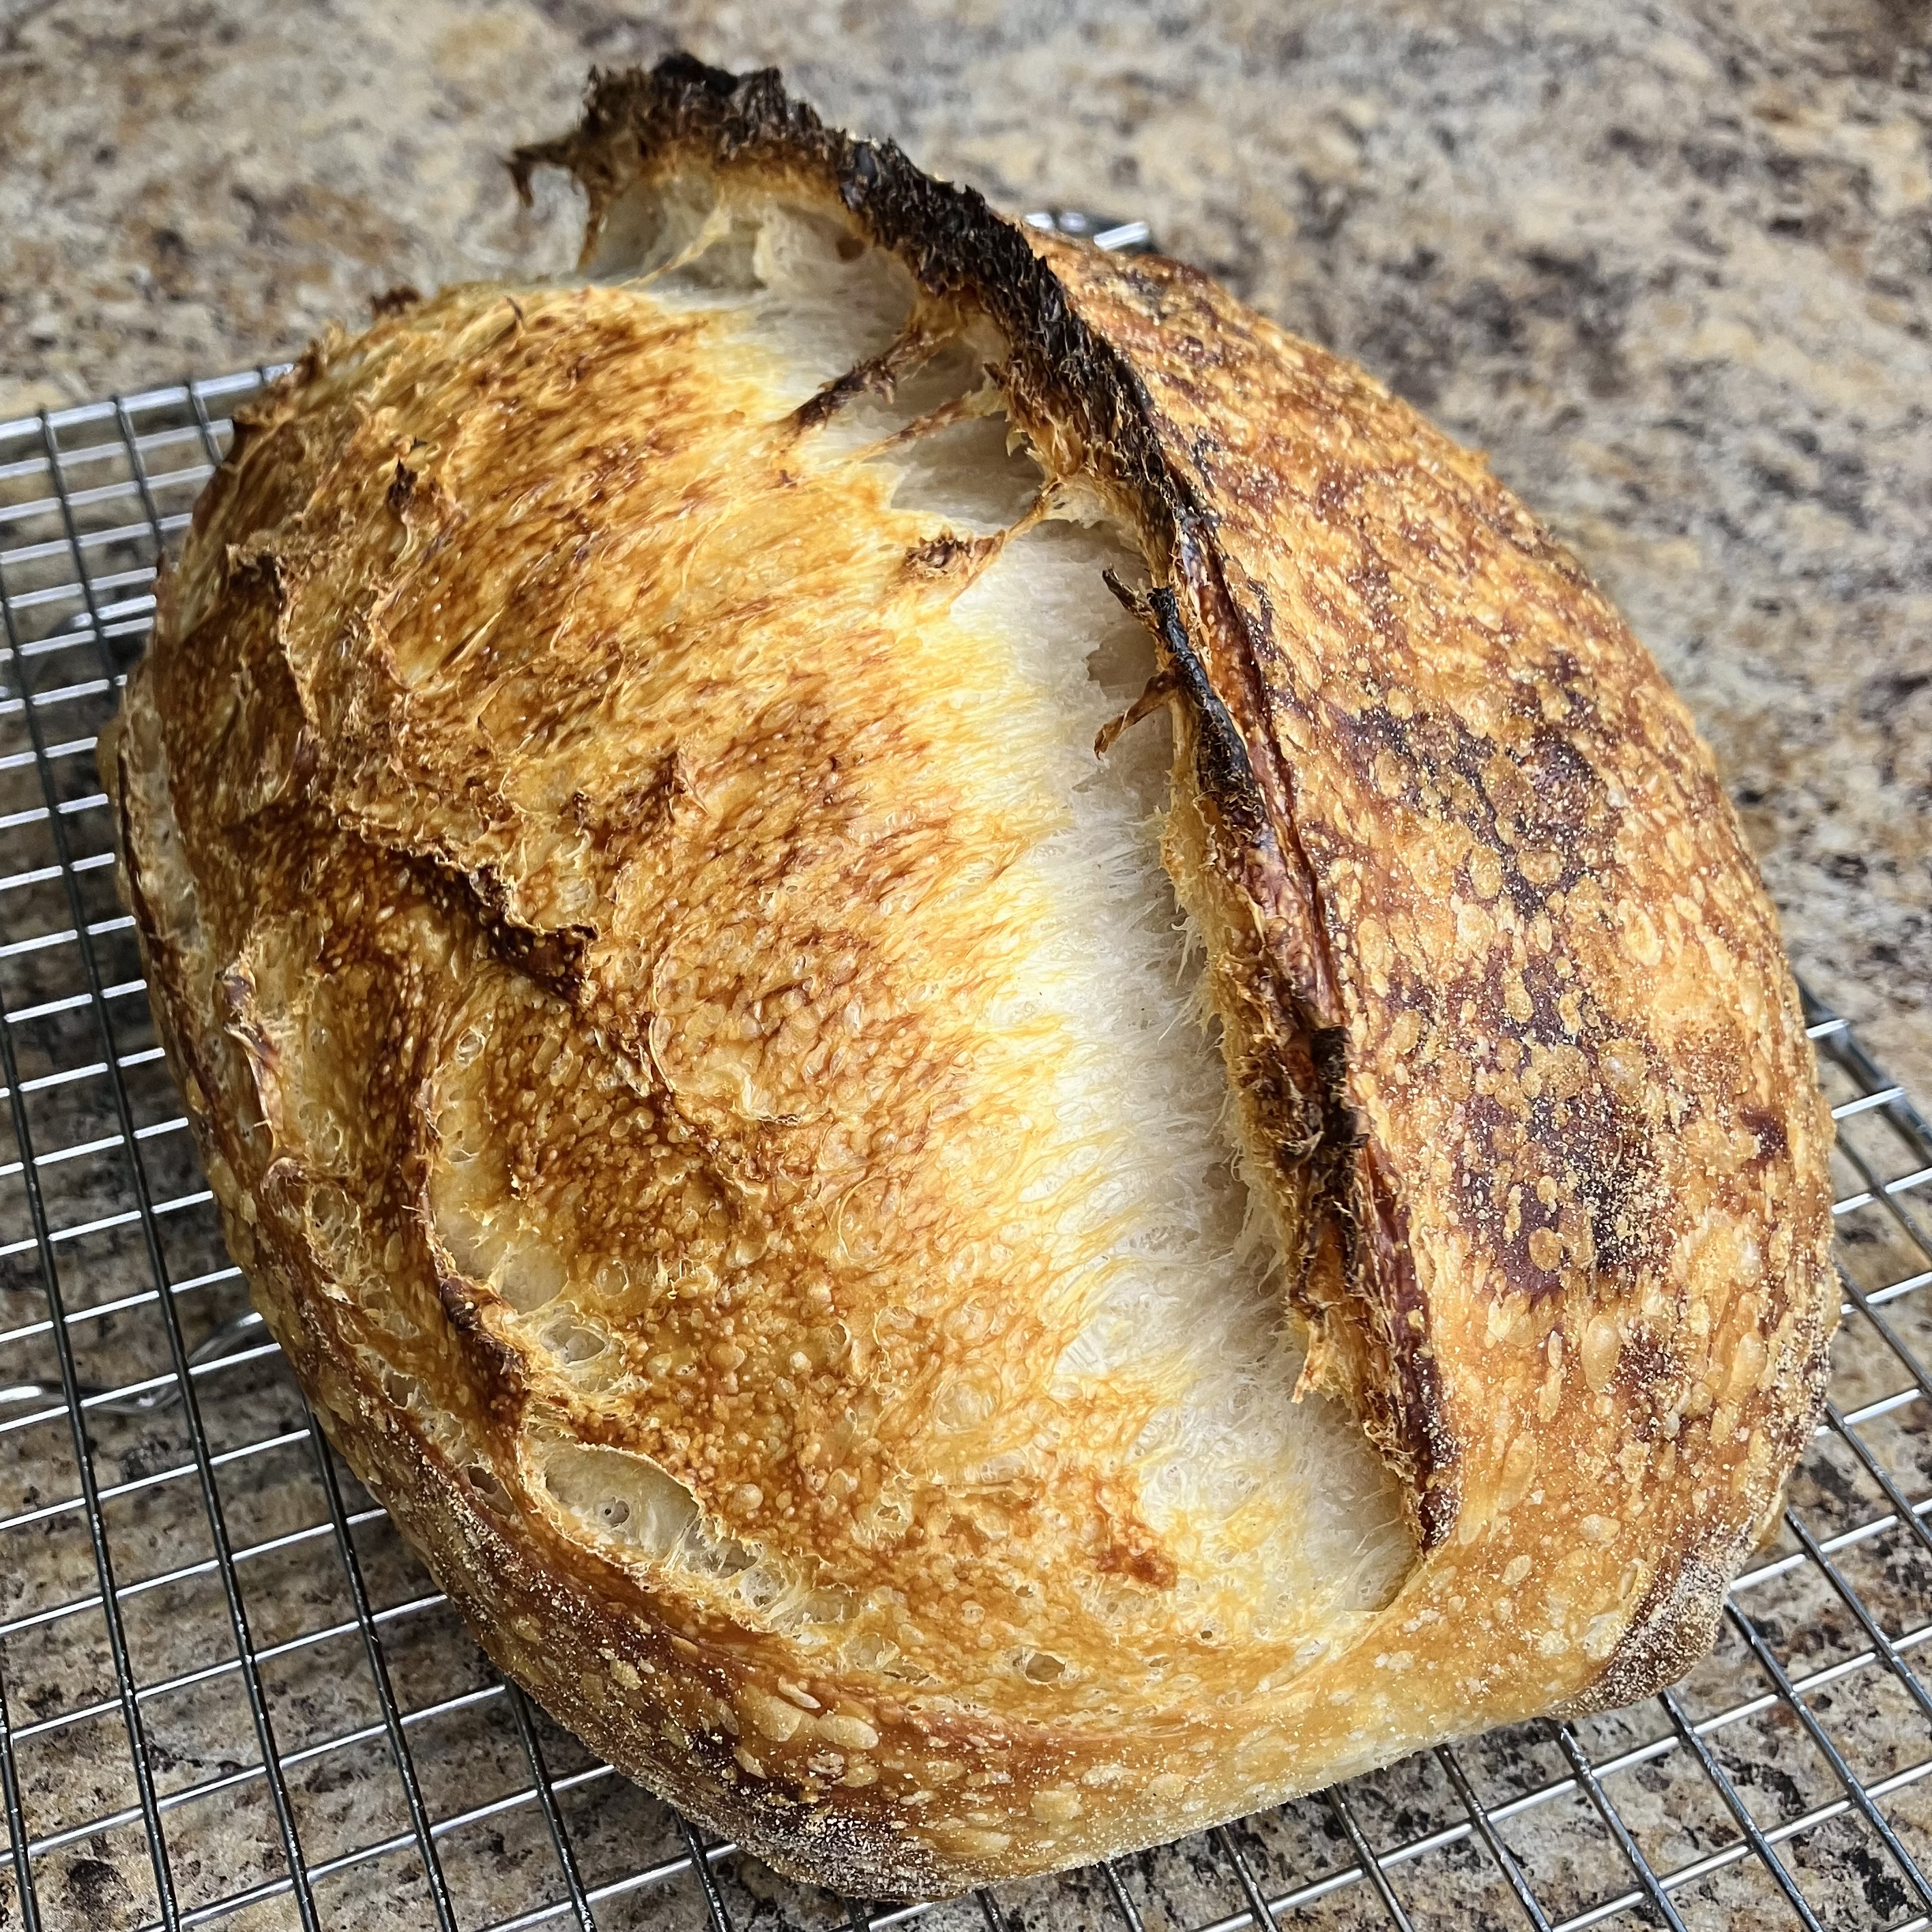
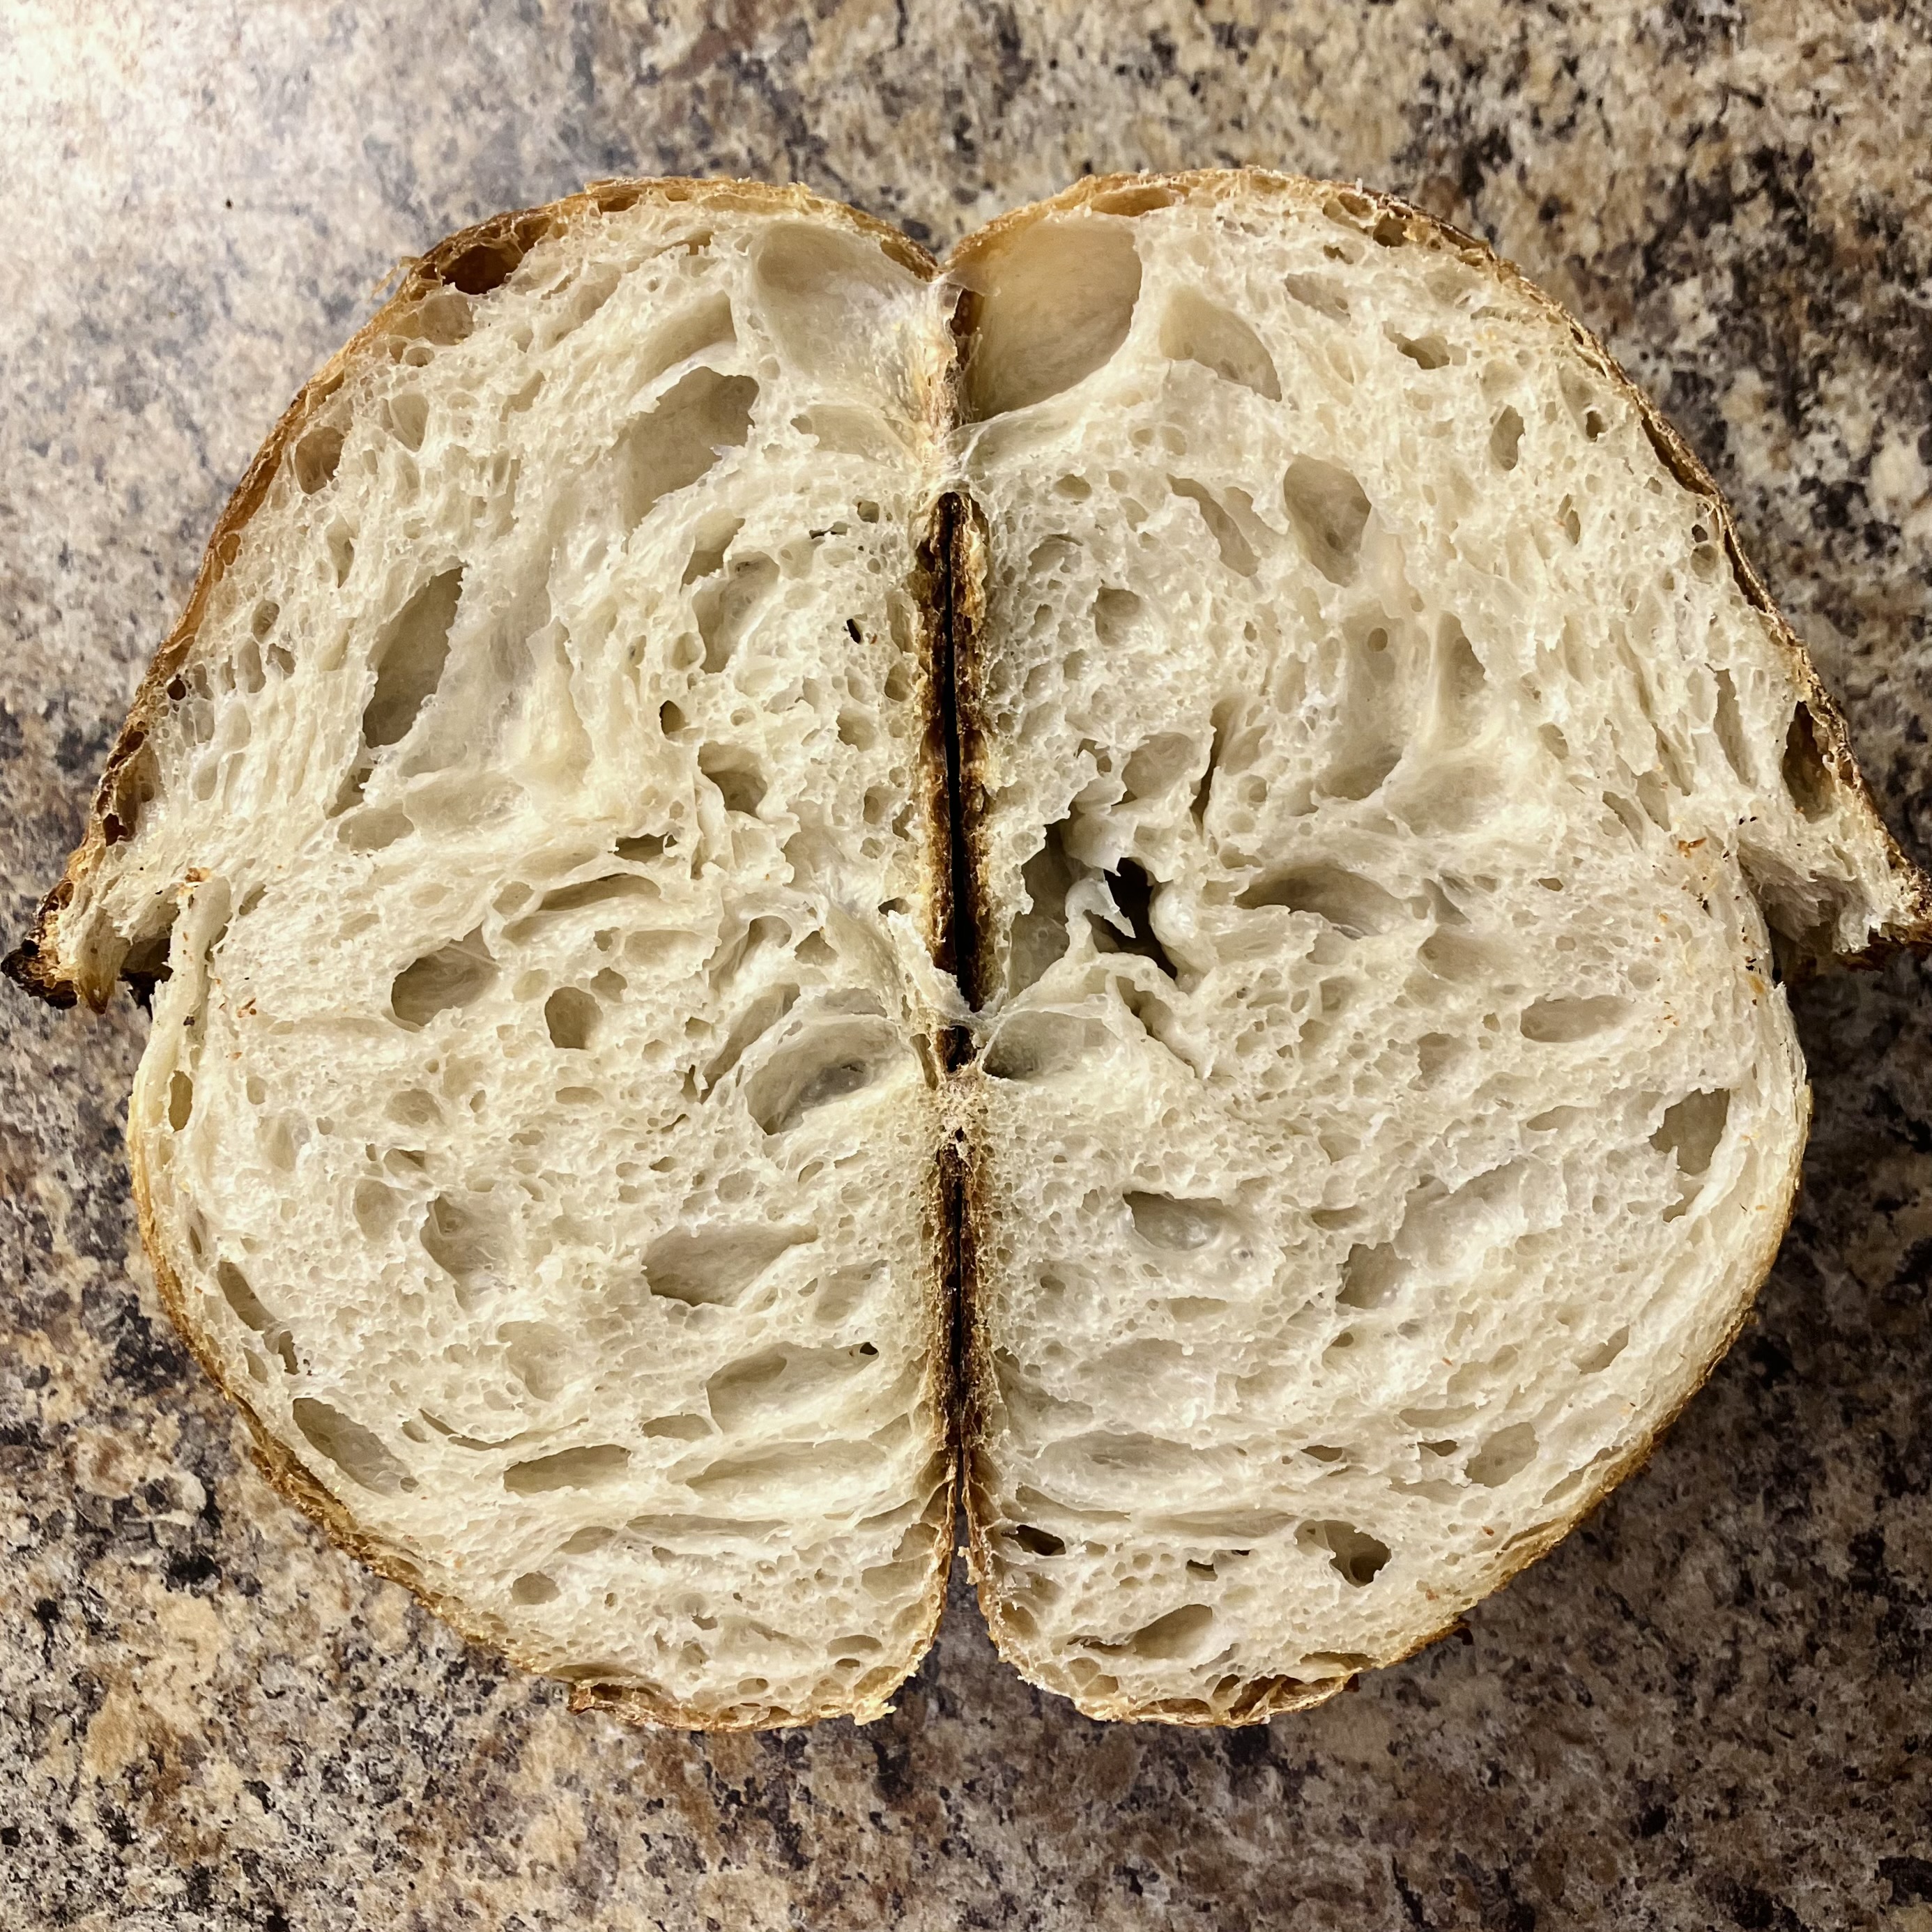
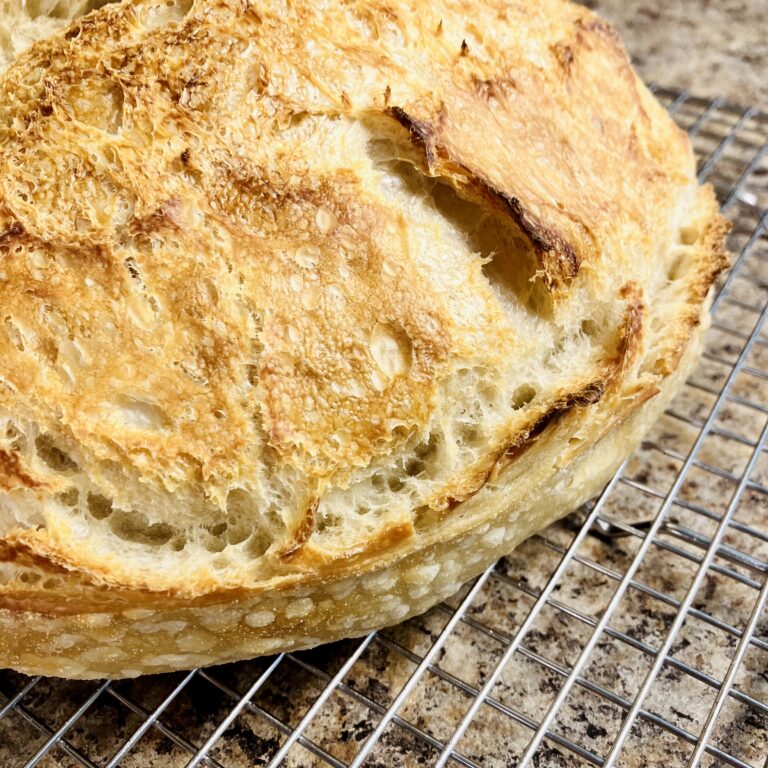
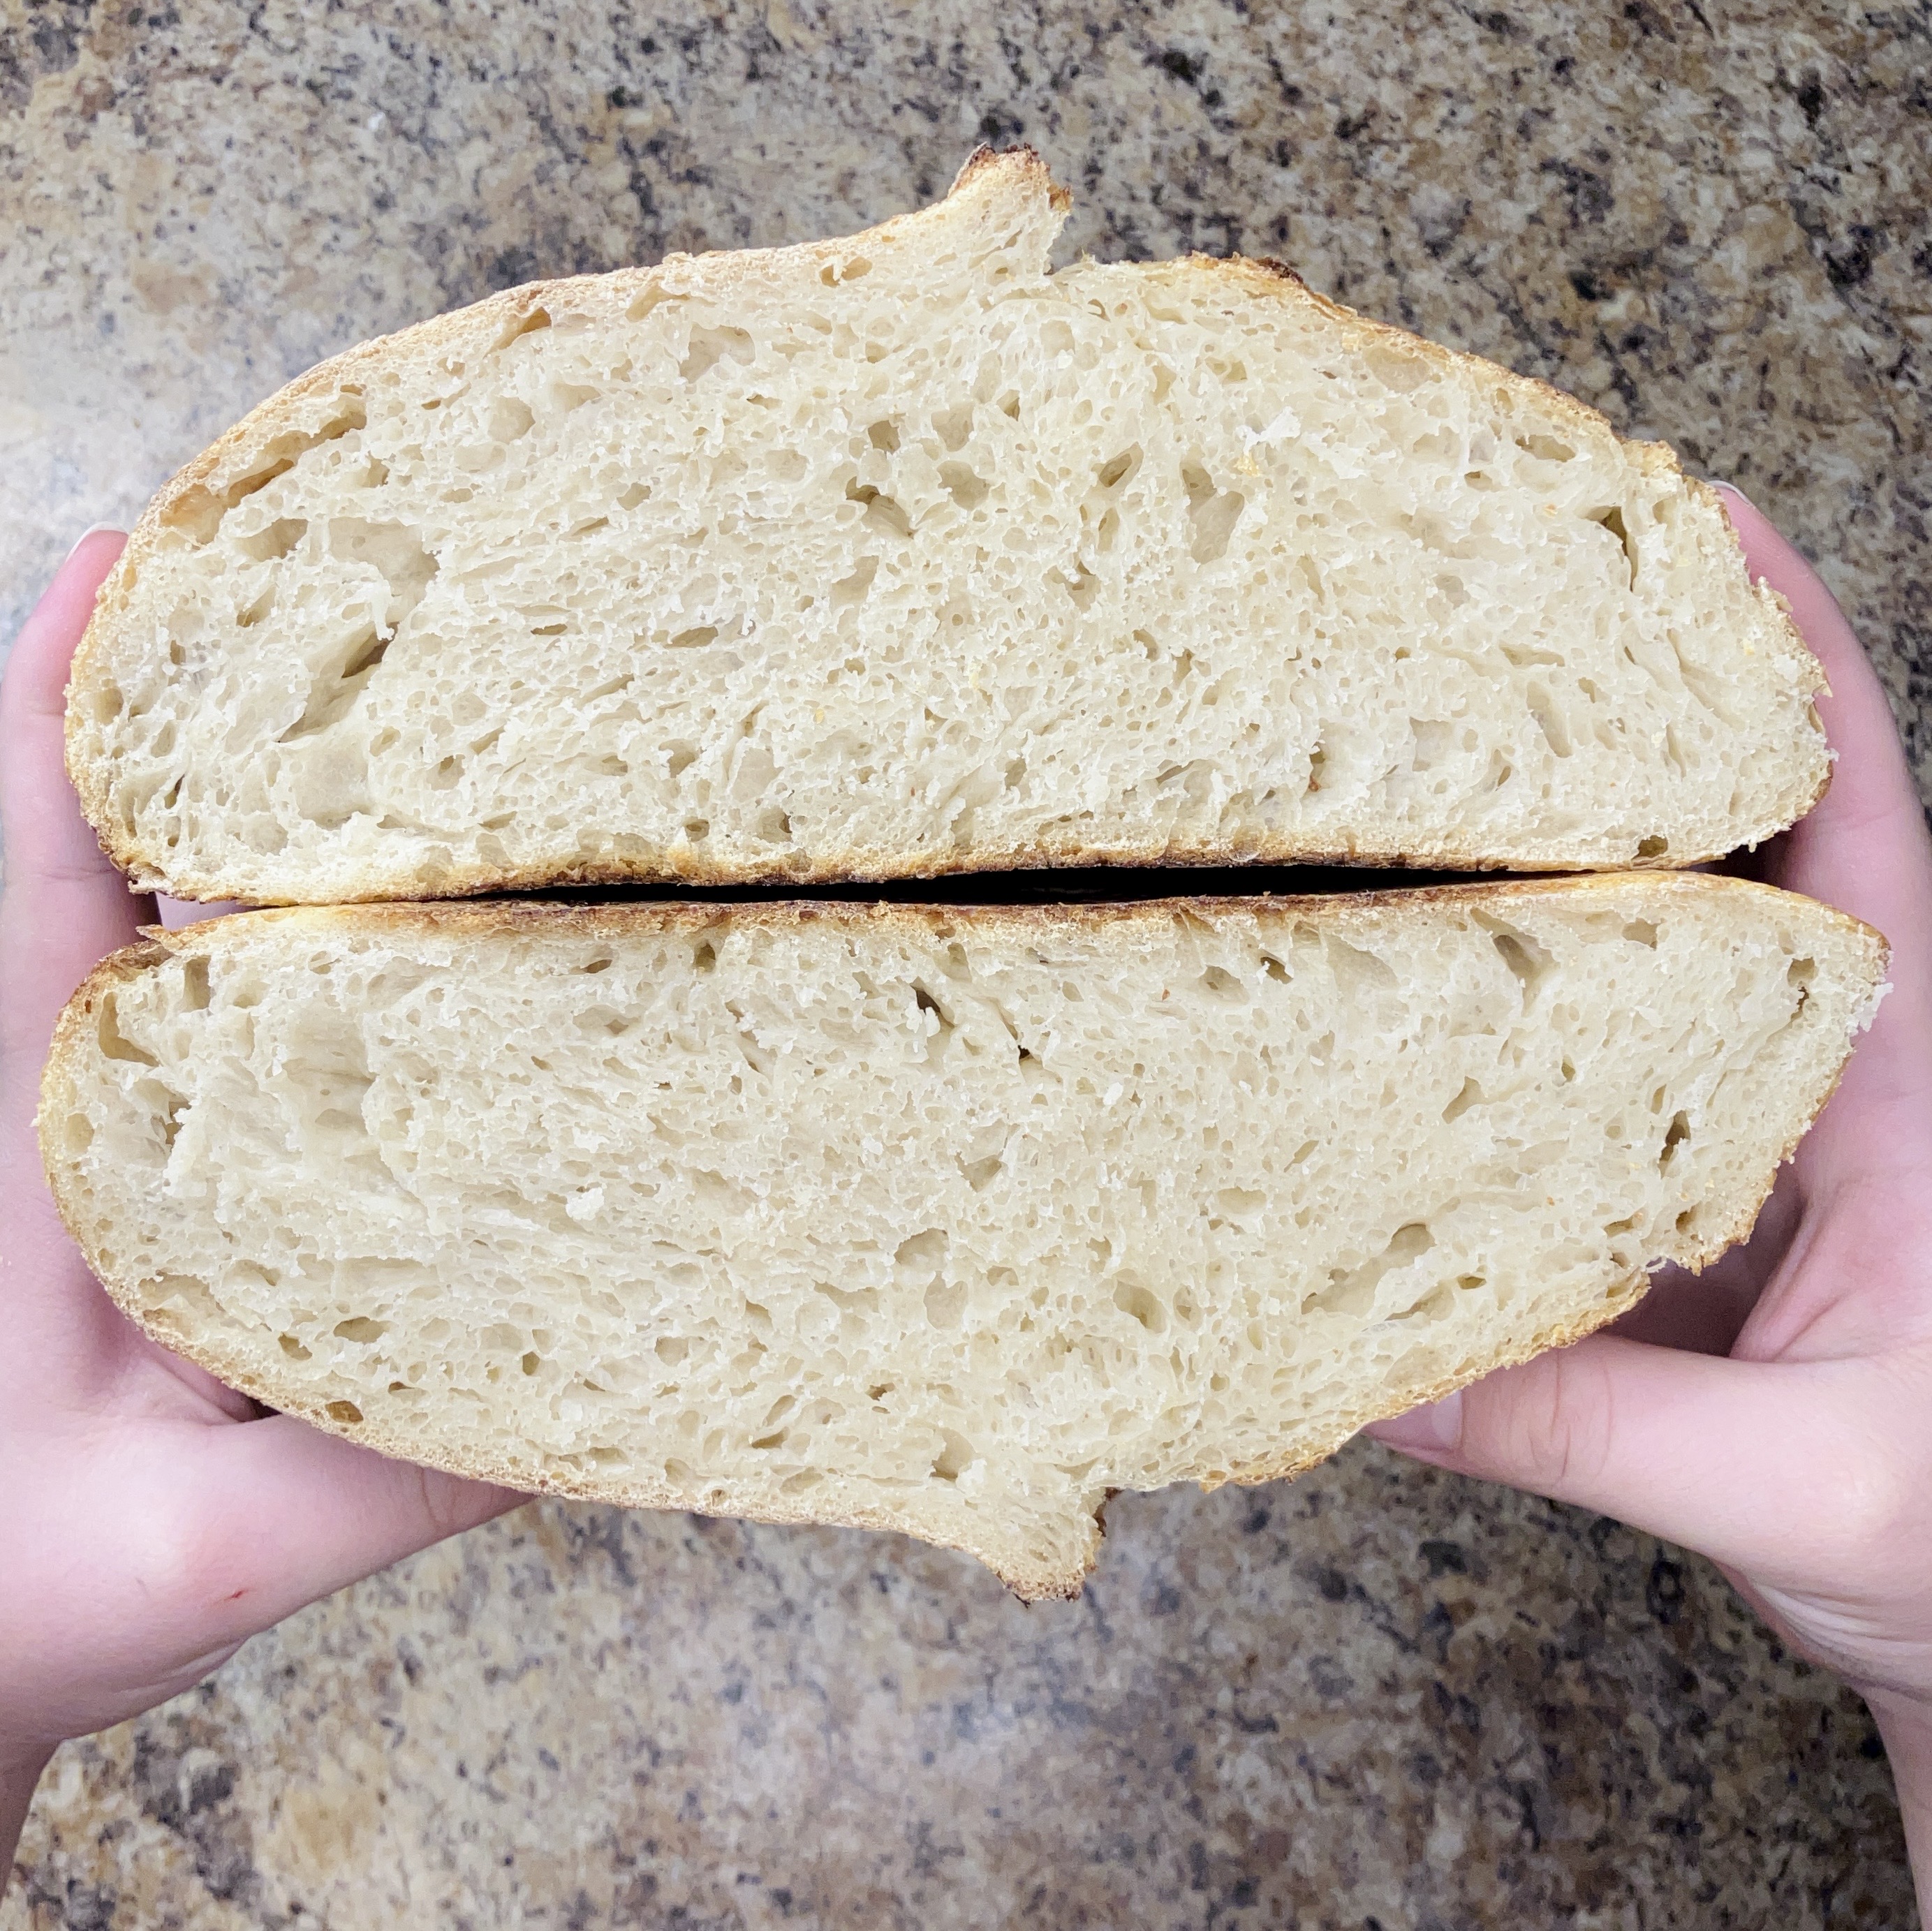
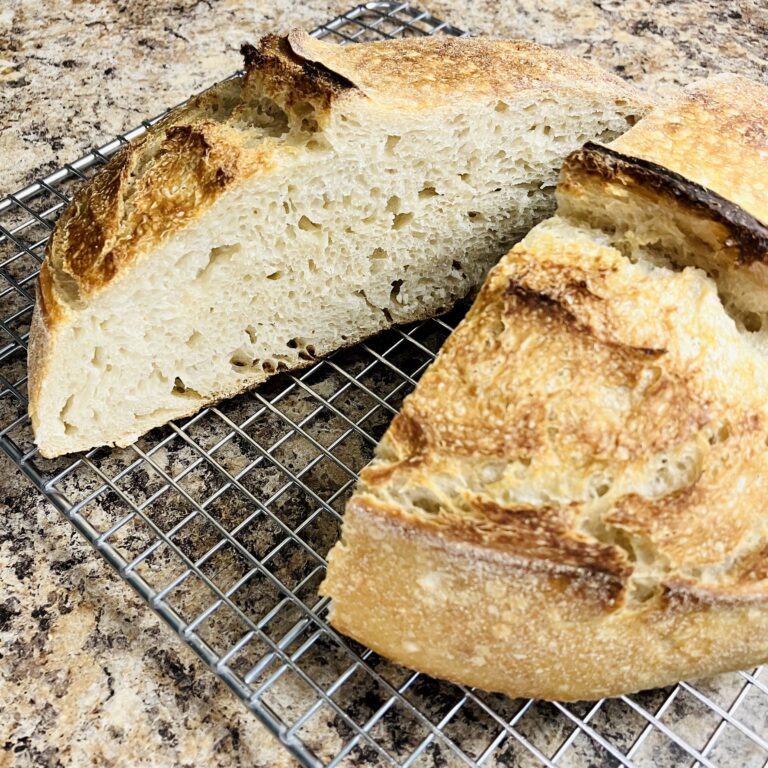
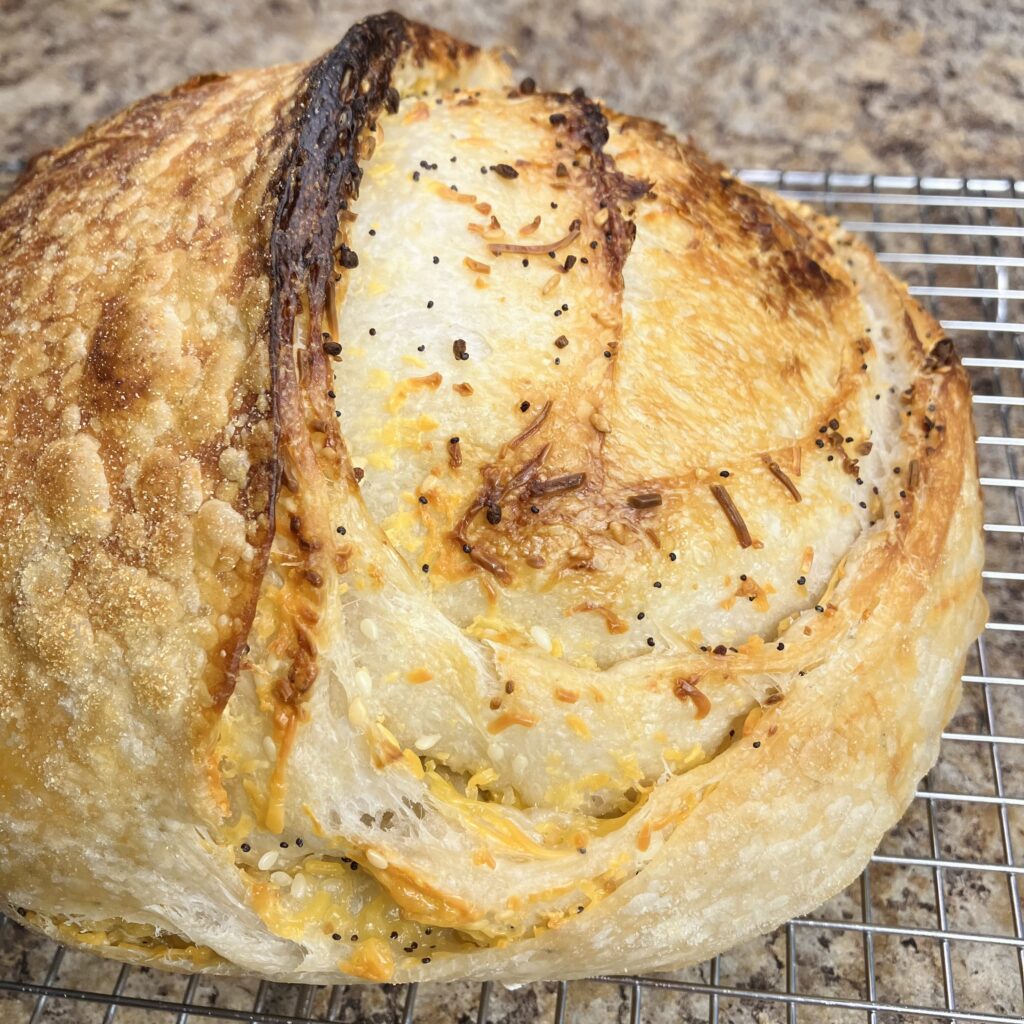
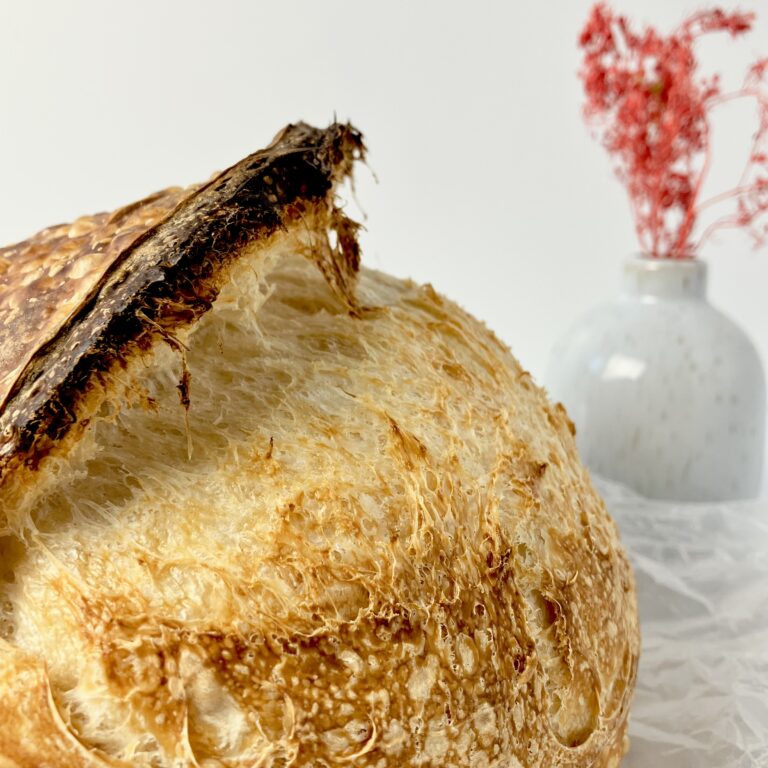
A dough that has developed sufficient strength will not fully relax/flatten in the proofing bowl; rather, it will be slightly rounded on the top where it is rising. By the end of bulk fermentation, it should still be slightly stretchy, but should not melt on the counter when turned out of the bowl. After shaping, it should hold its form perfectly, without collapsing, before being transferred to the banneton. When turned out of the banneton (just before scoring), the dough should stand tall and should not flatten excessively. You will know you have developed perfect dough strength by how much the loaf rises in the oven, the score expands, and how open and even the crumb is.
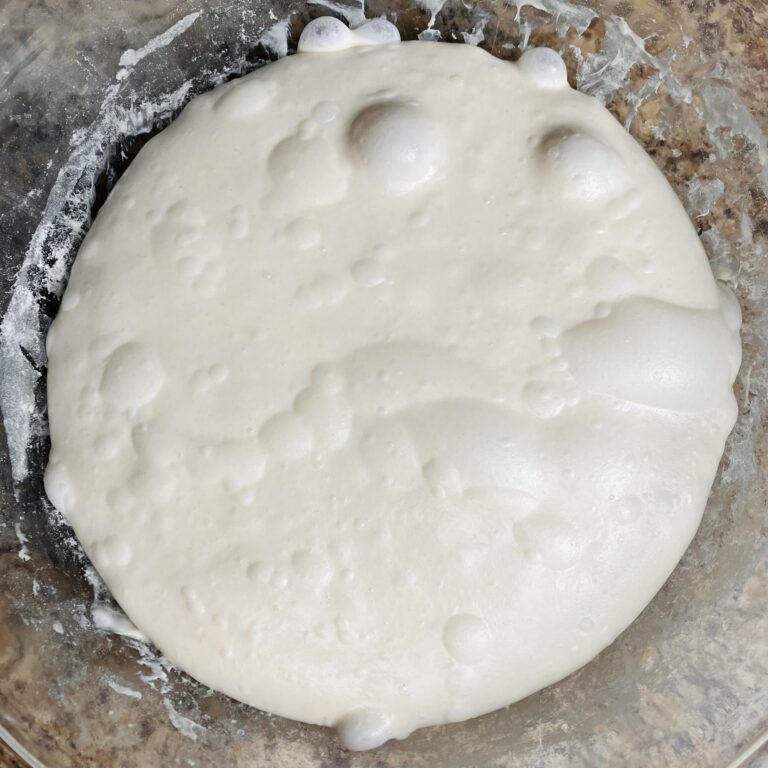
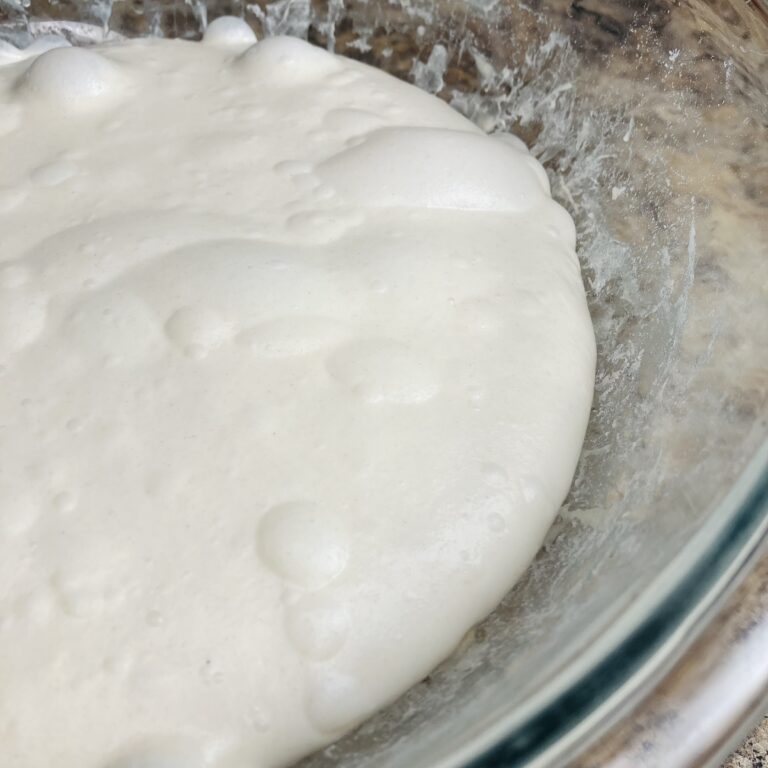
A dough without sufficient strength will do just the opposite, and will look and feel different, depending on what was underdeveloped. The dough may appear completely flat in the bowl, without a dome on top. The dough may tear during stretching or shaping, indicating extensibility (the windowpane) was never fully developed. When bulk fermentation is complete, the dough may seem over-fermented, and you may even feel or hear popping noises as you try to work with the dough – indicating the dough is losing air, rather than holding it tight. Maybe extensibility was developed, but elasticity was not, meaning the dough might be completly relaxed and loose, though stretchy, when turned out of the banneton. You might even notice your banneton is wet after the dough is removed; this is a clear indicator that something has gone wrong. Upon baking, the dough will not rise properly, maybe hardly at all, and the score will not pop. The exterior of the loaf will crack and the interior will have a more closed crumb.
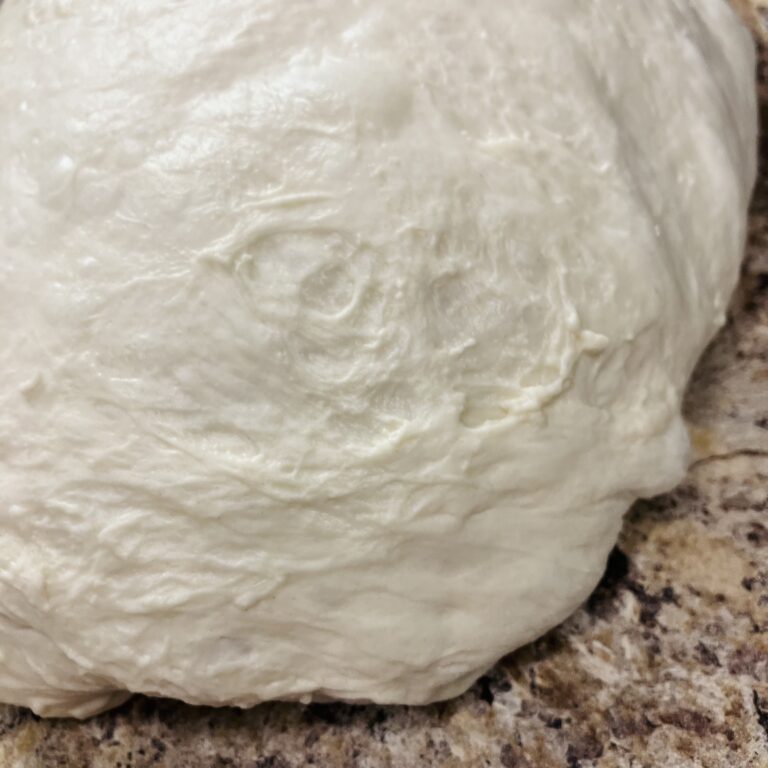
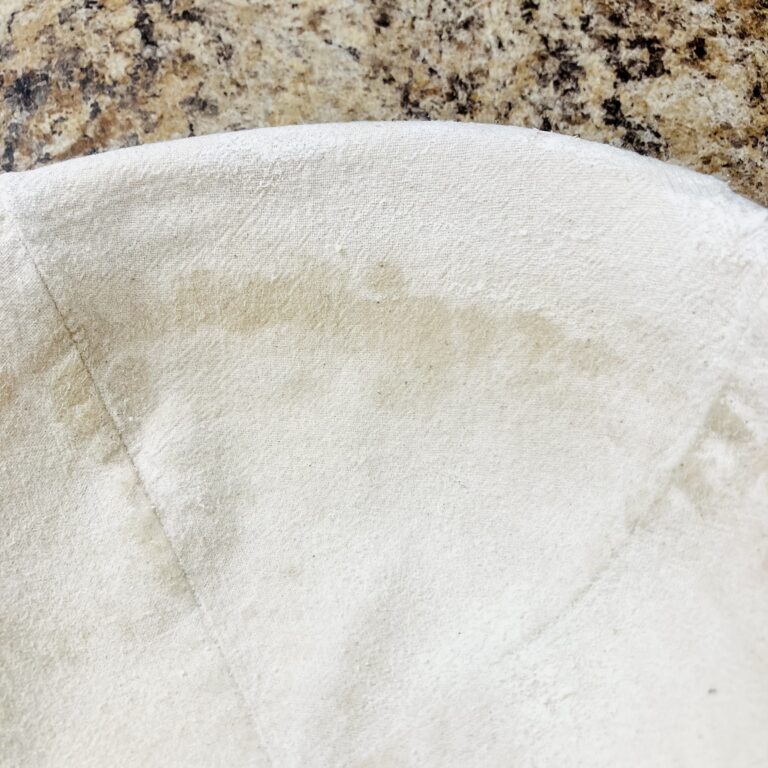

The above underdeveloped dough appears “over-proofed,” but, in reality, just needs more strength. Notice how the dough is extremely relaxed and will not except my tightening measures. If you look closely, you will notice air escaping the dough (bubbles popping). The resulting bread will be flat with a closed crumb.
A note about enriched doughs: Enriched doughs are doughs with (typically) heavy additions of butter and sugar, and sometimes milk and eggs. Extensibility does not develop easily on these doughs because the butter (fat) coats the gluten proteins and prevents them from bonding as they should. These doughs require kneading up front all the way to a windowpane in order for the dough to develop properly. Extensibility will have a tough time developing through the resting periods and folds will be ineffective since without extensibility, elasticity cannot develop, resulting in a bread that cannot hold in air or hold its shape properly. The resulting bread might have an odd crumb, more tender and flakey (like a biscuit).
Easy ways to fix underdeveloped dough
Though I’ve listed all the methods you can use for developing gluten below, I wanted to provide you some practical and simple changes you can make to your current recipe to get quick and easy results, without overthinking anything. Some quick-fixes include:
- Mix the dough for five minutes. Make sure no dry bits of flour remain in the bowl, then keep working and moving the dough (whatever way feels natural) for the rest of the time.
- Wait one hour after mixing before beginning folds. If your climate is hot, you only need 30-45 minutes. But, in cooler climates, an hour can be helpful. Essentially, this longer rest period can help increase the extensibility of your dough before you work the elasticity through folds. You should see a windowpane form before your first fold.
- Try autolyse. Mix just the flour and water until no dry bits remain in the bowl. Cover and rest for a minimum of twenty minutes (up to two hours), then add the starter and salt, kneading until fully incorporated. Proceed with the rest of your recipe as usual.
- Laminate your dough. Replace one set of folds with lamination.
- Knead the dough. Replace one set of folds with three to five minutes of kneading, using any method in the next section.
- Wait longer between folds. Make sure your dough is fully relaxed before folding. You can extend the rest time up to one hour. This will give you maximum benefit.
- Add folds. Add a set or two of folds to your recipe.
- Check your flour. If you are really struggling, be sure to use a high quality bread flour, such as King Arthur or Bob’s Red Mill. The protein content in the flour makes a huge difference in how easy or difficult it is to develop gluten.
- Try vital wheat gluten. If all else fails or you do not have access to a high quality bread flour, add a tablespoon or two of vital wheat gluten to your dough. Though it looks like flour, this is straight gluten and will help your dough develop better and more efficiently.
Methods of gluten Development
There are so many ways to develop gluten in bread dough. Anytime the dough is worked, whether through mixing, kneading, folds, or shaping, gluten is further developed. The method you choose to use will depend on the dough you are working with, particularly its hydration and ingredient list. While the techniques are varied and vast, they can be divided into four categories: folding, lamination, kneading by hand, and kneading by mixer.
Folding techniques are suitable for doughs that can stretch, meaning the hydration is at least 70% and the flour used does not tighten the dough too much. The dough must be evenly stretched on all sides to ensure even and thorough development. Folding may be used as the primary method of gluten development, or may be combined with another method, depending on the recipe and recipe goals.
Folds develop the gluten through time. The resting periods develop extensibility (seen via the windowpane), while the folds develop elasticity. The dough has been properly developed when it no longer wants to stretch more than one or two times since the last set (usually four to six sets). This method is the most gentle on the dough and preferred by many Artisan bakers.
Lamination is an excellent strength-building measure, a pair for doughs that can be developed through folds. The dough should already be developed to a windowpane for lamination to work and be effective. With this technique, the dough is stretched to a thin sheet, then folded and allowed to rest once more. By doing this, the gluten is stretched to its max, really working the elasticity of the dough. This technique is usually only performed once in the process and is almost always paired with other methods of gluten development.
Kneading by hand is a great way to develop gluten up front. This method can be used with doughs of all hydrations, though very high hydration doughs may be difficult to work. The only downside is that it requires a bit of muscle. This method is usually paired with a few folds (depending on dough type and hydration), as it can be difficult to fully develop the dough by hand. Developing the extensibility (windowpane) is reasonably achievable, but fully developing elasticity (strength) is the hard part.
When kneading by hand, the dough goes through several stages. First, the dough is tight and shaggy. As it is worked and all ingredients are incorporated, the dough becomes smooth yet loose. At this point it will still tear when stretched (no windowpane). As the dough continues to be kneaded, it becomes smooth and tight (elasticity developing) and will boast a windowpane. To fully develop the dough, it would need to be worked for about five minutes more after the windowpane has formed.
It is okay to knead the dough up front to partial development, and then finish with folds. This is one way to obtain proper strength without an excess of muscle and time straining over the dough.
Kneading by mixer can be a hot topic. Some would argue that it affects the crumb, flavor, and texture in a negative way. In truth, it depends on the dough type and technique.
Kneading by mechanical mixer does just what kneading by hand does: it develops gluten up front. Depending on the mixer’s design and dough type, kneading by mixer can be simple and efficient or difficult on the dough and mixer.
Kneading by mixer is incredibly handy for enriched doughs, as the butter coats the gluten proteins and makes gluten development a long process, one that is especially difficult by hand. It is also not a problem for low hydration doughs. Most mixers can handle these easily. The debate comes with unenriched, moderate hydration bread doughs. This is where your mixer’s design and your bread preferences will matter.
Mixers designed like a KitchenAid (hook turns, bowl stays still) will have a difficult time picking up a dough with more water. Higher, more aggressive speeds will need to be used, and the dough will be whipped around the bowl, “slapping” the sides. This is where the debate comes in: is this method too aggressive on the dough? Can the dough be overworked this way?
The answer: It really is not a problem, unless you do not like the final crumb and taste of your bread. If you do not mind a slightly more closed crumb (from the solid elasticity development, due to aggressive speeds) and slightly more bland taste, then it is not a problem.
And, no. Despite what some say, you will not overwork the dough this way. A dough that has been overdeveloped in a mixer will fall apart. You will know if you have done this. You could knead for thirty minutes at high speeds and your dough will still be fine. Do not worry about this.
Mixers designed like an Ankarsrum (bowl turns, hook stays still) do not have this issue. The method is more gentle on the dough, and it is possible to fully develop the dough without strain on the mixer or the dough.
Just like kneading by hand, you can choose how far to develop the dough by mixer. You might choose to only partially develop the dough and pair it with folds. Or you may choose to fully develop the dough. You will know the dough has not been developed enough if it relaxes too much during fermentation (completely flattens in the bowl). Check on it hourly for a few hours after kneading to be sure it is still looking solid and strong.
Let’s break down each of these methods further:
Folding Techniques
Stretch-and-fold variations
Classic Stretch-and-fold
About: This fold is well-known among Artisan sourdough bakers, and is one of the most popular types of folds used in sourdough recipes across the internet. It is used as a form of developing gluten by hand that requires much less effort than kneading the dough. The resting periods between folds develop extensibility, while each set of stretch-and-folds develops elasticity. It can be used as a primary gluten-development technique for Artisan doughs of moderate hydration, eliminating the need to knead the dough entirely. It can also be used as a supplementary gluten-enhancing technique alongside other gluten-developing methods, particularly in wet, enriched doughs or doughs kneaded in a stand mixer that have relaxed too much during bulk fermentation.
To perform: Using two hands, pull the dough up from one side as far as it will go without tearing, and then fold it completely over to the other side. Repeat four to eight times, performing at least one fold in each cardinal direction, until the dough will no longer stretch. Cover and rest at least thirty minutes before the next set of stretch-and-folds.
How many sets? Anywhere from four to six sets of stretch-and-folds is normal when using this technique as a primary method of gluten development, depending on the flour being used and the desired outcome of the bread being made. One to three sets of stretch-and-folds can be added to a dough that has already been developed in another form, but is looking too relaxed or is tearing during bulk fermentation.
Coil fold
About: A coil fold is a more gentle version of a stretch-and-fold, preferred by some for its ability to keep air bubbles intact. It is most commonly seen in three scenarios:
- In very high hydration doughs (above 80%) or doughs that are farther along in bulk fermentation, for its ease of workability and gentleness on the dough.
- In recipes utilizing autolyse, as it works well with the already-developed extensibility from the autolyse period.
- In home bakeries where large quantities of dough are being made, as the dough is easier to pull up from underneath than to stretch up and over.
To perform: Using two hands, pull the dough up from the center, stretching until the dough lifts from one side. Gently lower the dough, allowing the loosened end to fold under the center of the dough. Repeat at least once in each cardinal direction, or until the dough will no longer stretch. Cover and rest at least thirty minutes before performing another set of coil folds.
How many sets? Anywhere from three to five sets of coil folds is common in recipes that call for them. This technique is generally paired with other techniques, such as lamination, kneading by hand, or stretch-and-folds; therefore, less sets are usually performed.
Bench Light fold
About: This type of fold is a less commonly used form of stretch-and-fold, as it requires the dough to be turned out onto a working surface. Despite this, it is equivalent to a stretch-and-fold or coil fold in its value to the dough, and can be used in any recipe calling for the dough to be folded.
To perform: Turn the dough out onto a clean working surface sprayed lightly with water. Lift the dough up from one end, securing firmly with your thumbs. Flip the dough over, stretching it towards you as far as it will go before folding in half on top of itself. Repeat at least once in each cardinal direction, or until the dough will no longer stretch. Cover and rest at least thirty minutes before performing another set of bench light folds.
How many sets? Any recipe calling for “stretch-and-fold” can use a bench light fold in its place. Four to six sets of bench light folds is acceptable, depending on the recipe, when using this technique as a primary method of gluten development. The dough can be left on the counter between sets, remaining covered by the bowl (turned upside-down on top of the dough) the dough is being proofed in.
Letter fold
About: Similar to a bench light fold, letter folds are less commonly used, as they require the dough to be turned out onto a working surface. Despite this, it is equivalent to a stretch-and-fold, coil fold, or bench light fold in its value to the dough, and can be used in any recipe calling for the dough to be folded.
To perform: Turn the dough out onto a clean working surface sprayed lightly with water. Lift the dough up from one end, stretching out (horizontally) as far as it will go. Fold the dough over itself to the center third. Repeat on the other side of the dough, stretching out and folding again to the center third, so the dough rests in three layers. Turn the dough ninety-degrees, and perform two more letter folds, so that you have performed at least one fold in each cardinal direction. Continue rotating and folding the dough in this manner until the dough will no longer stretch. Cover and rest at least thirty minutes before performing another set of letter folds.
How many sets? Any recipe calling for “stretch-and-fold” can use a letter fold in its place. Four to six sets of letter folds is acceptable, depending on the recipe, when using this technique as a primary method of gluten development. The dough can be left on the counter between sets, remaining covered by the bowl (turned upside-down on top of the dough) the dough is being proofed in.
Lamination
About: Lamination is an excellent strengthening measure, said to have the effect of at least two sets of folds. In it, the dough is stretched to a thin sheet, which works gluten strands to their max. It can be used early in fermentation as a strengthening technique and/or to add inclusions, such as seeds, to the dough that have a minimal effect on fermentation. This technique is generally paired with doughs that stretch easily, but are not overly sticky or hydrated.
A more gentle form of lamination can also be used as a method of shaping to add additional, last effort, strength to the dough and/or to add inclusions, such as cheese or cinnamon-sugar, to the dough that do not hold up well during bulk fermentation. The dough is still stretched thin, but not quite to a thin sheet as would be done early in bulk fermentation.
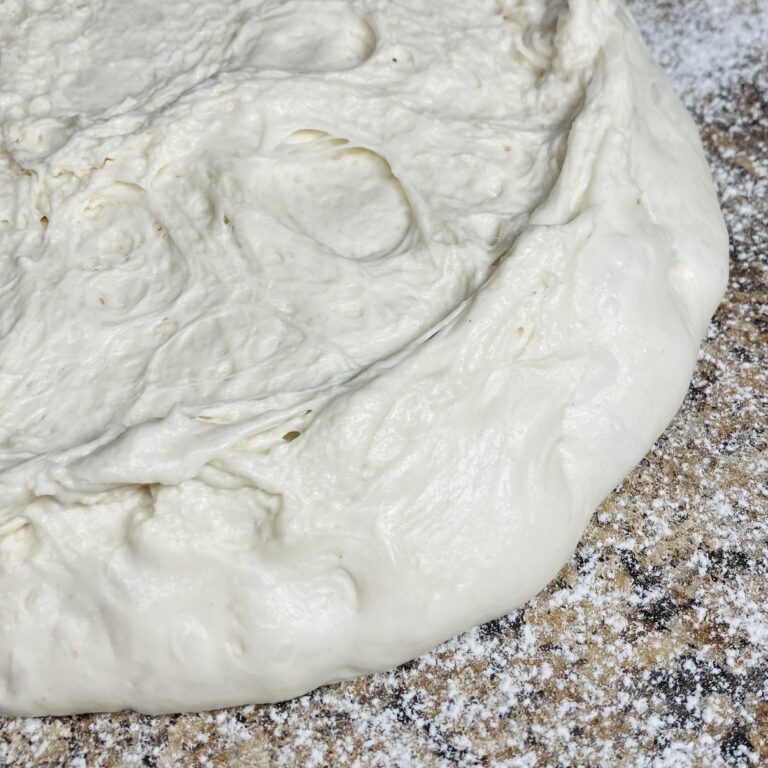
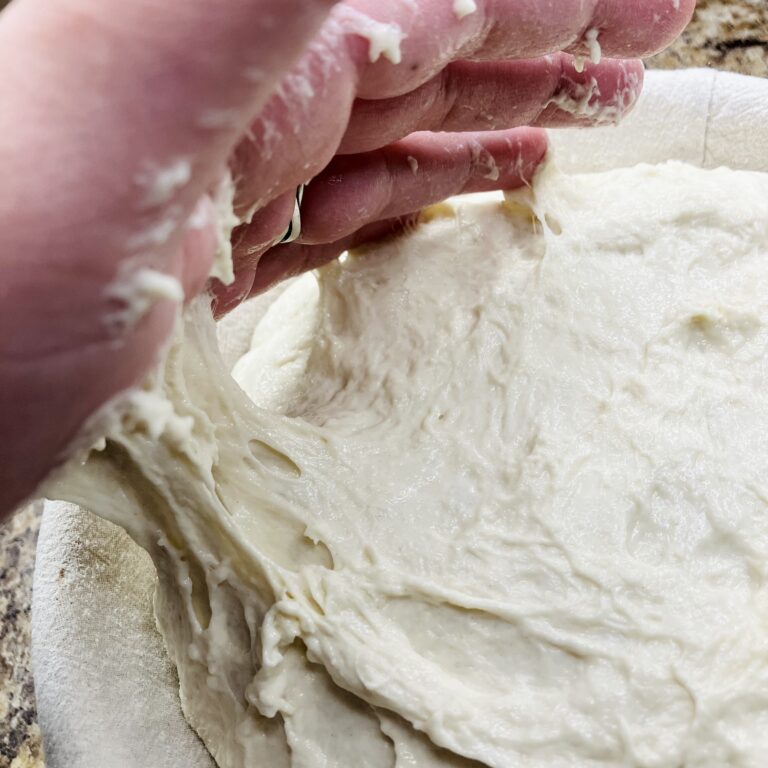
To perform during strengthening (beginning of bulk fermentation): Turn the dough out onto a large, clean working surface sprayed lightly with water. Working from the middle outward, stretch the dough out as far as it will go in every direction, until a very thin, see-through sheet of dough is formed. Optionally, add any desired inclusions (notably ones that will not affect fermentation or struggle with warm bulk fermentation temperatures) to the dough at this time. Fold the dough over itself, then roll it up to form a round. Cover and rest at least thirty minutes before performing any more strengthening measures.
To perform during shaping (end of bulk fermentation): Turn the dough out onto a clean or lightly floured counter. Stretch the dough out to form a large square, taking care not to be too aggressive with the dough. For lamination at the end of bulk fermentation, I do not stretch the dough out to a see-through consistency, as I do not want my inclusions to poke through the top when I put tension on the dough. Add any desired inclusions. Fold the dough into thirds, (left and right sides to the center, as with a letter fold), then, starting from the bottom, roll the dough up. Finish shaping by building tension on the top of the dough and, optionally, stitching the bottom of the dough after the dough is turned out into the banneton.
How many sets? Typically, only one lamination is performed during the bread-making process. It is usually paired with other strength-building measures, such as folds or kneading.
Here, you can see the layers that were formed after laminating my dough during shaping. Though sometimes necessary, I usually do not care to perform this technique during shaping because I would rather incorporate my ingredients a little more through additional folds.
Kneading by hand
Slap-and-fold
About: This technique is typically used for slack or wet and sticky doughs. It is incredibly efficient at incorporating strength into the dough, though it can also be messier than some prefer. It is essentially a more aggressive version of a bench light fold, except the dough is generally worked all the way to a windowpane.
To perform: Turn the dough out onto a clean working surface. Lift the dough up from one end, securing firmly with your thumbs. Flip the dough over, slapping the bottom of the dough onto the counter. Then, stretch the dough toward you as far as possible before dropping the top half of the dough onto the bottom half. Rotate the dough ninety degrees and repeat this pattern infinitely for about five to ten minutes time, or until the dough becomes a smooth, cohesive mass and passes a windowpane.
How many rounds? Generally, only one or two rounds of slap-and-folds are performed. One round might be used if all ingredients in the dough are added at once, while two rounds might be used if the recipe utilizes a technique like autolyse, where certain ingredient additions are delayed. This technique may be paired with folds, or could be used on its own.
Rubaud Mixing
About: This technique is popular for wet doughs where picking up and stretching the dough is more difficult. Like a coil fold, this method works the dough from underneath to develop the gluten.
To perform: Form your hand into a “C,” or cup shape. Reach underneath one side of the dough and grab a small portion. Lift and stretch the dough away from you, then drop it back down. Repeat this “scoop, stretch, drop” motion at a fairly quick pace for about eight to ten minutes, or until the dough becomes a smooth, cohesive mass and passes a windowpane.
How many rounds? Rubaud mixing/kneading is generally only done one time in the process (when the dough is being mixed). This technique may be paired with folds, or could be used on its own.
Bowl Folds
About: Bowl folds are a more aggressive form of stretch-and-fold, and could be considered a cross between the slap-and-fold and the Rubaud methods of kneading. This is my personal favorite kneading technique, the one I default to in many instances, for its straightforward workability and nature.
To perform: Grab a section of dough from one side of the bowl and stretch it up toward you. Then, fold it into the center of the bowl, pushing down slightly. Rotate the bowl and continue this working motion infinitely for about five to ten minutes, or until the dough becomes a smooth, cohesive mass and passes a windowpane.
How many rounds? Bowl folds are usually only performed once or twice. One round might be used if all ingredients in the dough are added at once, while two rounds might be used if the recipe utilizes a technique like autolyse, where certain ingredient additions are delayed. This technique may be paired with folds, or could be used on its own.
Bench kneading
About: Bench kneading is probably the most versatile kneading technique used to knead doughs of varying hydrations. This technique works well for moderate and low hydration doughs, though is slightly messier the higher the hydration.
To perform: Turn the dough out onto a clean working surface. Push the dough down and away from you using the heel of your palm. Rotate the dough ninety degrees, gathering everything back up by folding in half (bringing the top down to the bottom). Repeat the motion by pushing the dough down and away from you again, turning, and folding. Continue this pattern infinitely for five to ten minutes, or until the dough becomes a smooth, cohesive mass and passes a windowpane.
How many rounds? Bench kneading is generally only done one time in the process (when the dough is being mixed). This technique may be paired with folds (especially for a wet dough), or could be used on its own.
Kneading by Mixer
KitchenAid
About: KitchenAid mixers are popular and affordable home kitchen mixers that are incredibly versatile, but not always the best at kneading bread dough. Due to the design of the machine, including the weak motor, it is not recommended to knead above speed two when kneading bread. Being the daredevil I am, I break this rule all the time and have never had my mixer give out on me. While kneading low hydration doughs is simple, difficulty increases as water is added to the dough. The mixer cannot efficiently pick up and work the dough without more aggressive speeds. Because the hook spins (not the bowl), this causes the dough to eventually “slap” the sides of the bowl. In turn, the mixer may shake and bounce around, attempting to “jump” off the counter. Despite this, the KitchenAid mixer is a common item in many home kitchens and, for many, the only option for kneading bread dough by machine. Though risks are present (namely, burning out the machine), it is still possible to knead dough efficiently in this mixer.
To knead low hydration dough: Give all ingredients a rough mix before transferring to the stand mixer. Using the dough hook attachment, knead on speed 2 for about ten minutes, or until the dough forms a smooth round and springs back when poked.
To knead moderate to high hydration doughs: Give all ingredients a rough mix before transferring to the stand mixer. Using the dough hook attachment, knead on speed 6-8 for ten to fifteen minutes, or for the time specified in the recipe. Some doughs may come together after only five minutes on speed 6, and the mixer speed may need to be reduced to finish kneading. Some doughs may need the higher speed for longer, until the dough is able to fully pick itself up from the bottom of the bowl. Take care to watch the mixer. As the dough becomes stronger, it should “slap” the sides of the bowl, causing the mixer to “jump.” Do not let it “jump” off the counter! The dough is generally finished kneading when it forms a complete windowpane. If the dough was not kneaded quite enough, you may find it relaxes a bit too much during bulk fermentation. In this case, a set or two of folds may be added to supplement the lack of strength.
Ankarsrum - Dough Roller
About: Ankarsrum mixers are incredible for kneading bread dough. They are gentle on the dough, provide an extremely efficient knead, and are nearly impossible to overwork. Because the bowl spins (rather than the hook) the kneading process looks extremely different than many KitchenAid owners may be used to. The dough roller is the original device used to knead bread dough. It can efficiently knead doughs of all hydrations, though very low hydration doughs may struggle to get going, due to the design of the machine.
To knead low hydration dough: Give all ingredients a rough mix before transferring to the stand mixer. Using the dough roller and scraper attachments, knead on speed 2-3 for about twelve minutes, or until the dough forms a smooth round and springs back when poked. If necessary, use a spoon to help move the dough along (to help get it going) in the first three to five minutes of kneading.
To knead moderate to high hydration doughs: Give all ingredients a rough mix before transferring to the stand mixer. Using the dough roller attachment, knead on speed 5-6 for twelve to eighteen minutes, or for the time specified in the recipe. The dough is generally finished kneading when it forms a smooth round while moving about the bowl and passes a windowpane. If the dough was not kneaded quite enough, you may find it relaxes a bit too much during bulk fermentation. In this case, a set or two of folds may be added to supplement the lack of strength.
Ankarsrum - Dough Hook
About: According to Ankarsrum, the dough hook was developed “for an American audience.” Though this may have been the intention, the developers may not have understood how Americans are used to mixers functioning (think KitchenAid). The dough hook is a great option for kneading moderate to high hydration doughs, but does not do well for lower hydration, stiff doughs. It uses a “stretch-and-pull” method to knead the dough.
To knead moderate to high hydration doughs: Give all ingredients a rough mix before transferring to the stand mixer. Using the dough hook attachment, knead on speed 5-6 for twelve to eighteen minutes, or for the time specified in the recipe. The dough is generally finished kneading when it becomes strong enough to push the scraper away from the sides of the bowl, climb up the dough hook, and pass a windowpane. If the dough was not kneaded quite enough, you may find it relaxes a bit too much during bulk fermentation. In this case, a set or two of folds may be added to supplement the lack of strength.
For what reason might I need to perform folds if I already kneaded the dough to a windowpane by hand or stand mixer?
This has to do with extensibility and elasticity. If you are having to perform folds on a dough that has been kneaded to a full windowpane, it is likely because the dough did not fully develop elasticity, and has relaxed too much in the proofing container.
A dough boasting a windowpane has fully developed extensibility, but not necessarily elasticity. Sometimes, the dough needs to be kneaded longer for elasticity to fully develop.
This is why it is important to check on your dough. If you notice it has become too relaxed in the proofing container, it needs a set of folds to encourage elasticity.
What about autolyse?
Autolyse is a technique used to aid in gluten development. It was specifically developed to help bakers hand-develop gluten (no mixer) easier. In it, the flour and water are given a period of rest before sourdough starter and salt are added. During this initial rest period, the flour fully hydrates (absorbs all the water) and the dough becomes extensible (but not elastic). It is generally paired with kneading (to incorporate the starter and the salt) and folds (to finish developing elasticity). Find my full article on autolyse here.
What questions do you still have about gluten development?
Is there anything I missed when covering this information? Or, anything you are still confused about or that could be explained better? Please let me know in the comments! I’ll be happy to answer your questions and even update this article, if needed.
Happy baking!
Join the email list
Join the email list to be notified when a new recipe or blog post comes out. No spam, just sourdough. Unsubscribe at any time.
Recent POSTS
Pingback: BIALY - The Sourdough Baker
Hi Caitlin, I have been ordering a strong bread flour from Shipton Mill https://www.shipton-mill.com/products/canadian-strong-white-bread-flour?variant=44665135923457, so I feel the flour should be ok, don’t you think?
I have tried few shaping techniques. Which one do you recommend?
I saying that, I gave had good oven spring before, but not lately. Do you think it might be the starter? I keep it in the fridge and take it out 3 days before baking feeding it twice a day at 1:1:2 as it is a stiff starter. I have always used 90% strong bread and 10% organic dark rye bread to feed the starter.
I have baked for few years now, but less regularly lately due to work, so I wonder if the starter is weak as it spends a lot of the time in the fridge?
What do you think?
Everything you are saying here sounds great! It is a possibility that it could be the starter, but with six feedings before you use it – it should have plenty of time to replenish itself and be more than ready for bread. In addition, if your bread has good air pockets in the dough and is rising appropriately, this is an indicator that there is not an issue with the starter itself.
So, we are left with either a dough that needs more strength or a dough that is over-fermenting.
There is one more reason why you may not be getting the spring/crumb that you want, but I’m not sure how likely it is – and that’s baking method. If you’ve had a lot of experience and success in the past and are doing the same thing, I’m not sure this is the solution. But the key is to blast the dough with heat and steam. In the beginning to help it rise and “pop.” It can also help to start from a room temperature dough, rather than a refrigerated one.
Hi Caitlin,
I really appreciate your feedbacks. I have used a very good flour purchased straight from the mill https://www.shipton-mill.com/products/canadian-strong-white-bread-flour?variant=44665135923457. I can imagine it is not the flour. The crumb is full of air pockets but it looks like the crumb of an overproofed bread which I have seen pictures for. I noticed there are many different shaping techniques and I have tried few of them already. I have had nice results before, but lately the oven spring is weak. I keep my starter in the fridge and take it out 3 days before baking feeding it twice a day before baking. I always keep as a stiff starter, so 1:1:2 ratio. The starter is fed with 90% strong bread flour which I use for baking and 10% organic wholemeal rye flour. I have fed the starter this way for few years now. I was thinking it might also be the starter?
Pingback: PAN DE CRISTAL - The Sourdough Baker
Pingback: COUNTRY BREAD - The Sourdough Baker
I use stiff starter, so I dissolve it in water first, then add flour, mix and wait for an hour before adding salt and mixing again. I then wait for 30min before the final mixing at a higher speed of 4 for around 5min. I use the Kenwood Chef standing mixer.
I then move my dough to the bench, shape it and put in proof containers. After 30min, I start the coil folds and add my dices of cheese. I will then perform coils folds every 45min-1hour until the bulk fermentation seems completed. At this point, I shape the bread and put in the fridge for about 18hrs.
I feel the bread doesn’t rise as much when baking and the ears don’t pop out as much as I would like. Does my method seems to be having gluten development issues? What would you suggest I change? Should I incorporate the cheese at the end of the bulk or add lamination? Thank you
Great question! From what I was able to gather here, your method seems just fine. Especially if you’re using a good quality bread flour that’s above 12% in protein. I wonder if it could be the cheese. Sometimes inclusions mess with the dough’s final crumb and oven spring – cheese being one of them (not always, depends on the size of cut and how much). I would recommend doing a side by side comparison of the exact same recipe and process, one with the cheese and one without to determine for sure if this could be your issue. It won’t matter when the cheese is incorporated (lamination or during folds); the outcome will be nearly the same
Thank you Caitlin, I will give it a go.
I also noticed that the dough seems to spread a lot more after the overnight cold proof than the videos I see from various bakers, especially after scoring. I wonder if this has to do with the shaping or error in bulk fermentation (over proofing). I can imagine this might also be the cause of weak oven spring?
Spreading as you described is usually a strength error, but could also be that there is not enough tension built in shaping. Sometimes it is overproofing, but (with proper strength) the dough can go much longer than many believe before it actually overproofs. So now I’m curious as to what is really happening with your dough! Based on your first comment, it seems the dough is being strengthened well. I wonder if this could be a flour problem?
Wanted to also mention the oven spring – spreading is usually a sign of a weak dough or a dough that did not have enough tension built up during shaping. If it was the first (weak dough) the loaf would not have a great oven spring or ear. If it was the second (not enough tension during shaping) it is still possible that the dough could spring up nicely if it was strengthened well
Pingback: RUSTIC RYE BREAD - The Sourdough Baker