
Low Hydration Pizza Crust
Course: Breakfast, Lunch, Dinner, Snack, SideCuisine: ItalianDifficulty: Beginner15
minutes12
hours2
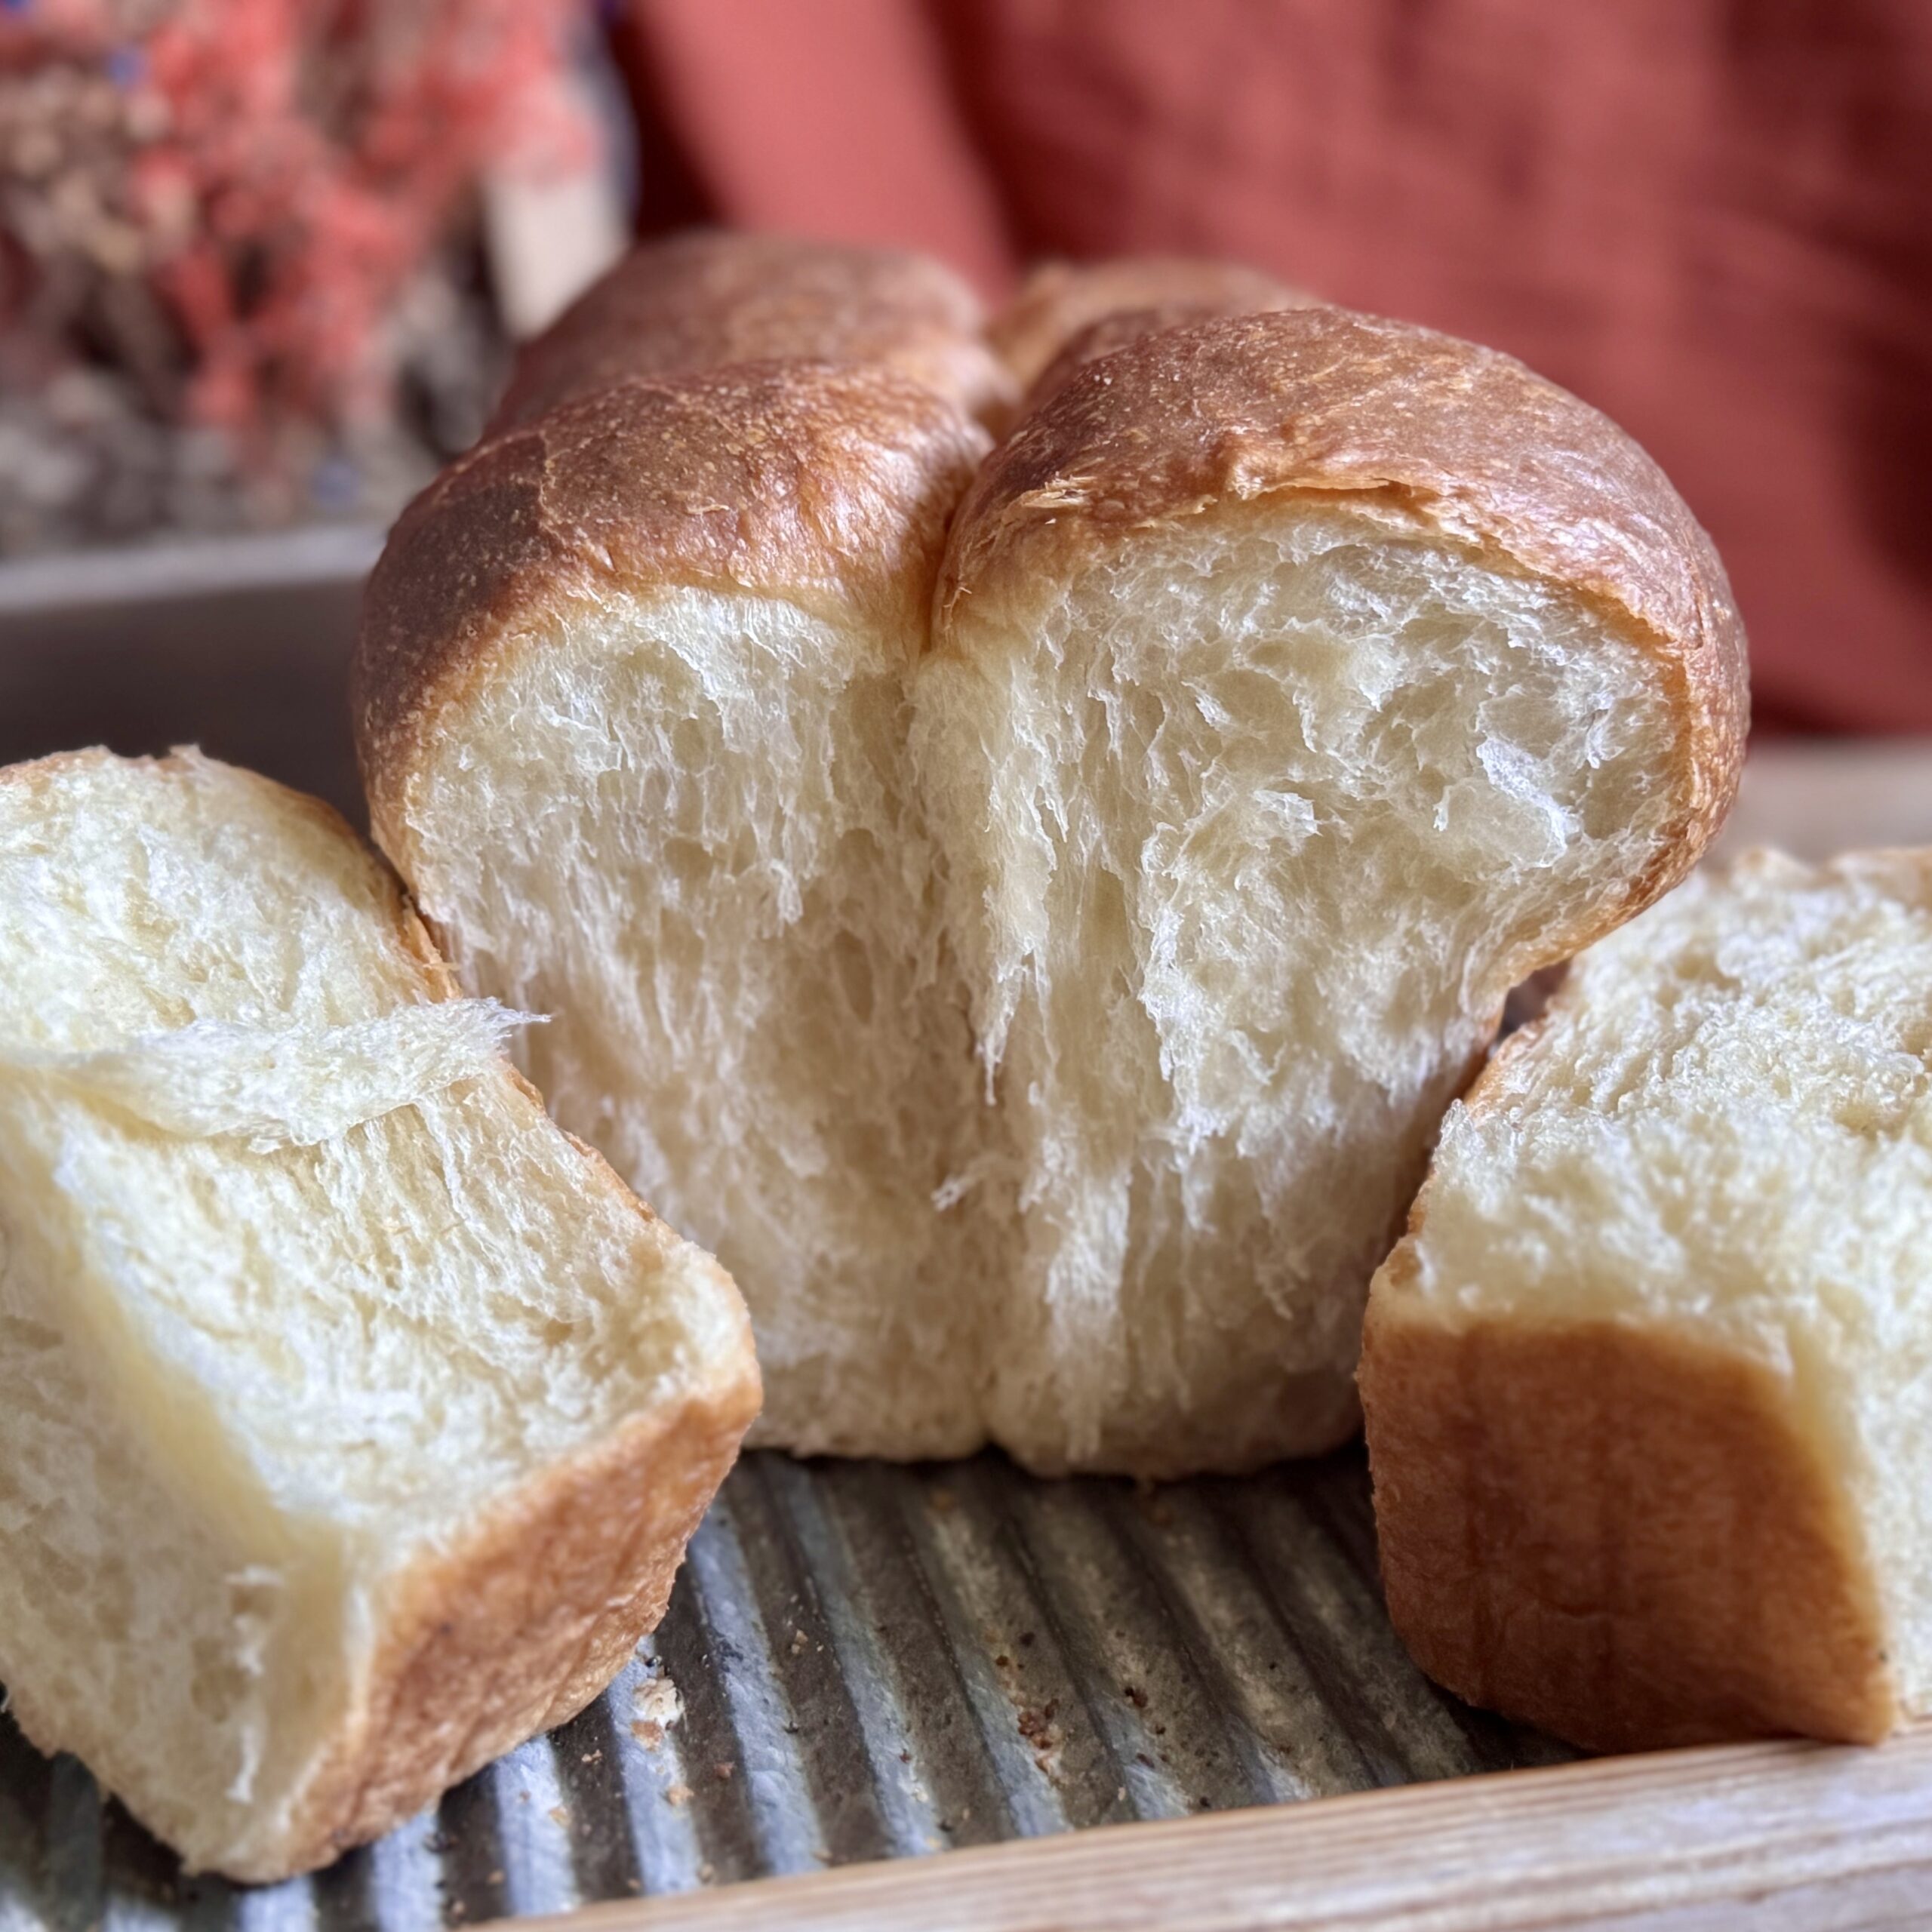
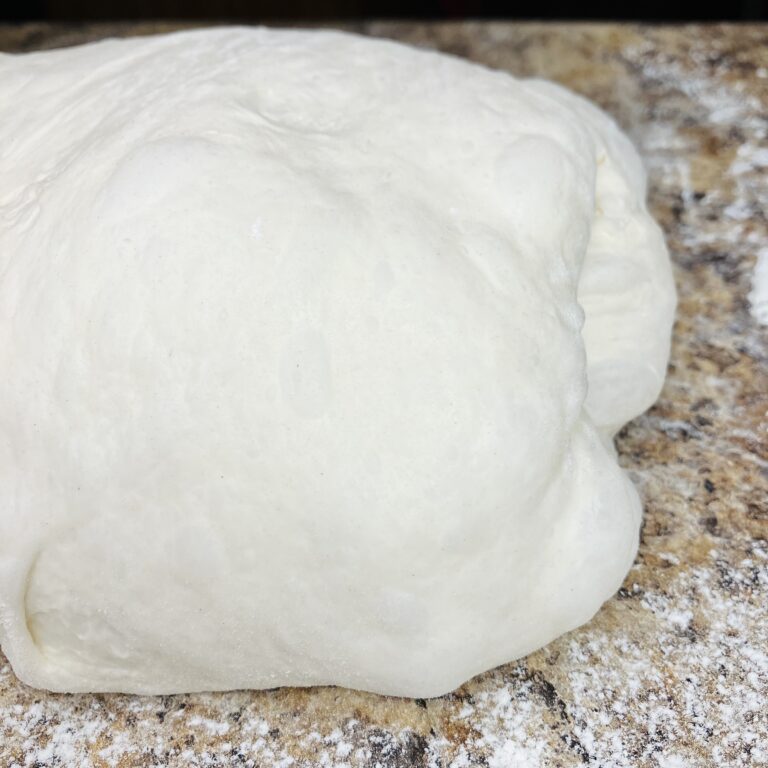
pizza crustsWhile high hydration is currently at peak popularity, there are incredible benefits to low hydration doughs in regards to flexibility. By low hydration, it is simply meant that there is less water in the dough. This stiff dough ball is simple to mix up and knead by hand or in a stand mixer in ten quick minutes. Its fermentation time is flexible, and the dough can reach more than double in size without resulting in any problems. Last, this dough can easily be maneuvered into any desired shape in any recipe calling for pizza dough, without frantic fights over sticky dough and without using excess amounts of flour.
Ingredients
575 g flour (4 3/4 cups; all-purpose or type 00)
375 g water (1 1/2 cups)
100 starter (1/2 cup; or up to 200 g, keeping in mind that the dough will ferment faster on the counter and in the fridge)
30 g olive oil (2 tbsp)
10 g salt (1 1/2 tsp)
Directions
- To make the dough
Add all ingredients to the bowl of a stand mixer and roughly mix to combine.
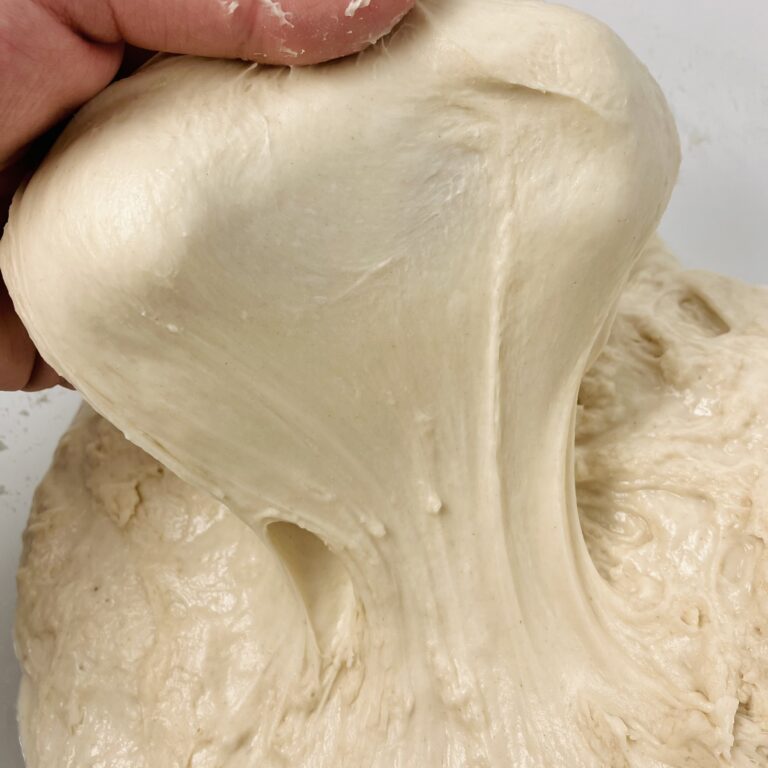
Knead on a low speed (speed 2 on KitchenAid) in a stand mixer fitted with a dough hook attachment for 8-10 minutes. The dough should completely remove itself from the sides and bottom of the bowl, and should be smooth, but not dry or sticky.
Let the dough rise to double (or more) in size. * [see note]
At this point, you can shape the dough right away or refrigerate 1-3 days (until you are ready to use it).
One to two hours before you plan to bake the dough, take it out of the refrigerator * [see note], divide the dough in half, and shape each half into a round by tucking all ends underneath.
Cover and let the dough rest for about an hour, until the dough relaxes/flattens and springs back slowly when poked.
At this point, the dough can be used in any recipe calling for “pizza dough.” The baking method is flexible and dependent on the recipe and on personal preference.
- My favorite way to make pizza for my family
Preheat the oven to 500 F.
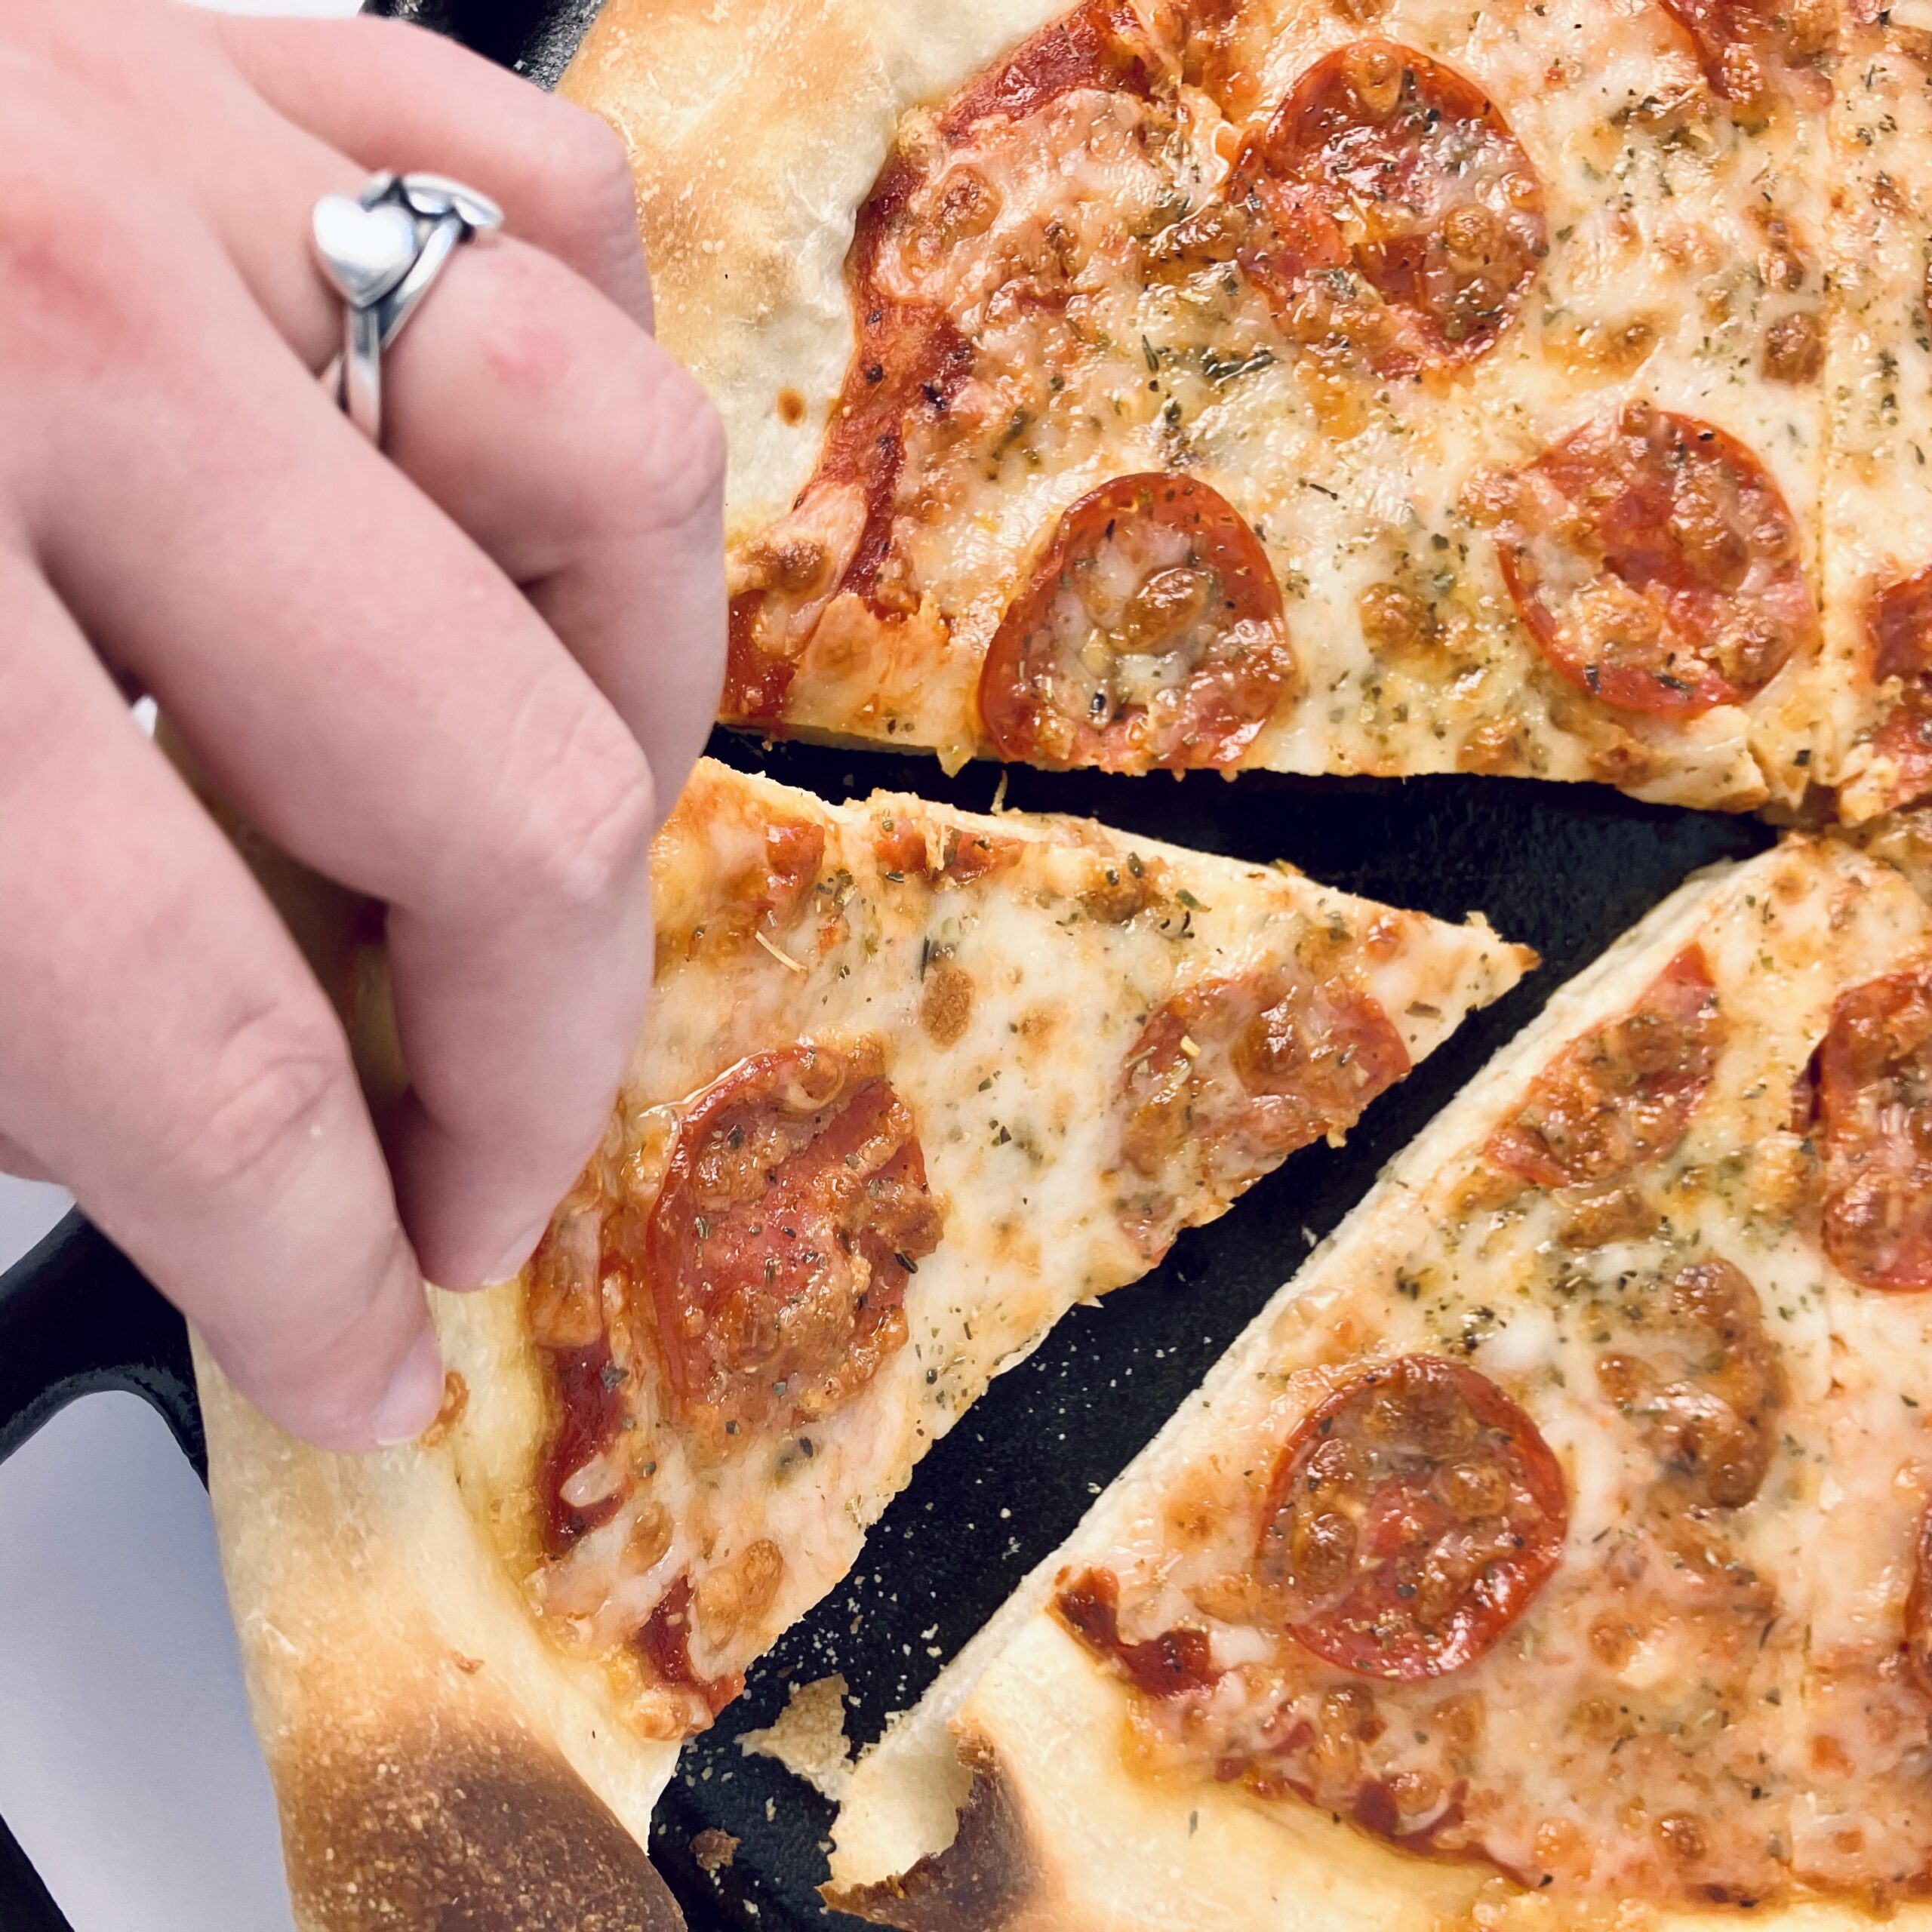
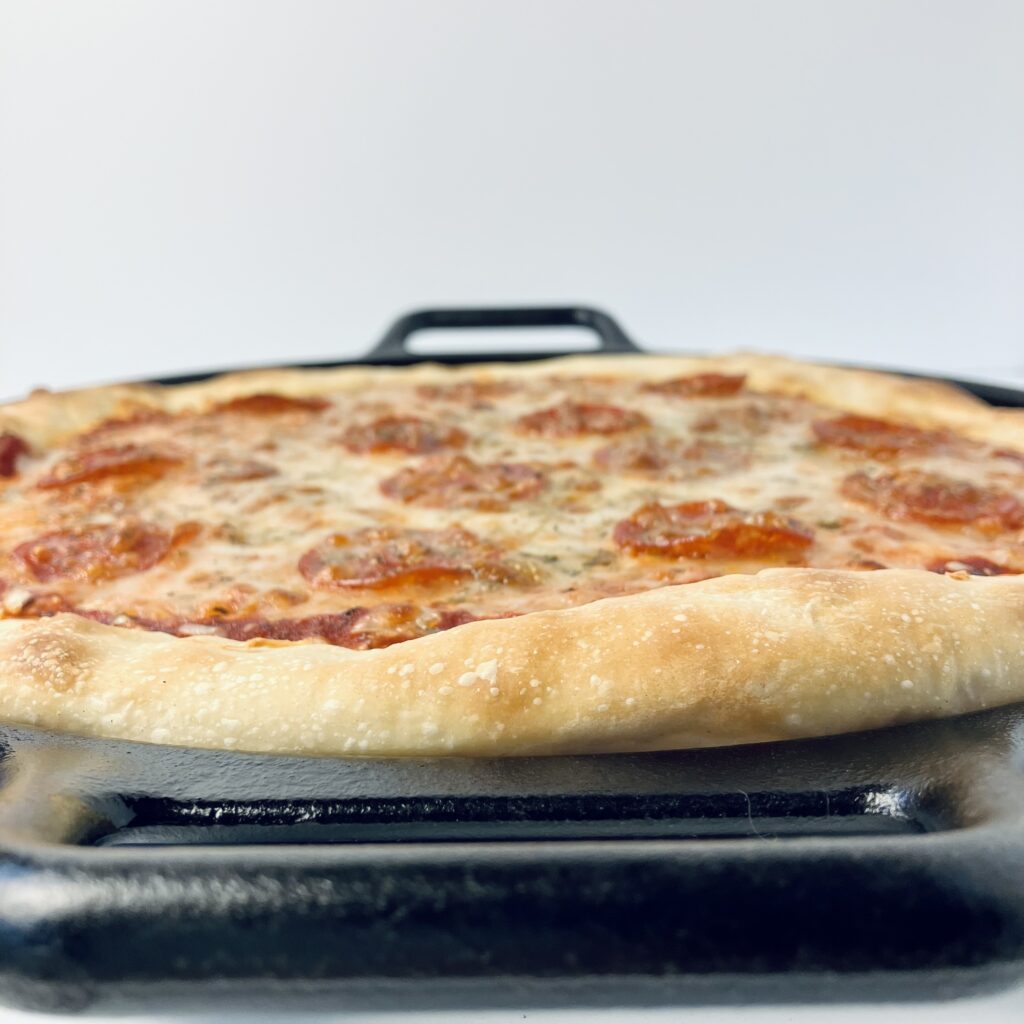
Use a cast iron pizza pan, or divide the dough in half and use a large cast iron skillet that has not been preheated.
Spray lightly with oil to prevent sticking.
Stretch the dough out so that it covers the bottom of the pan. Flip the dough as needed, as the oil may cause the dough to pull back, preventing it from stretching fully.
Poke the dough all over with a fork (otherwise it will puff up like a pita pocket in the hot oven).
Prebake the crust for 10 minutes.
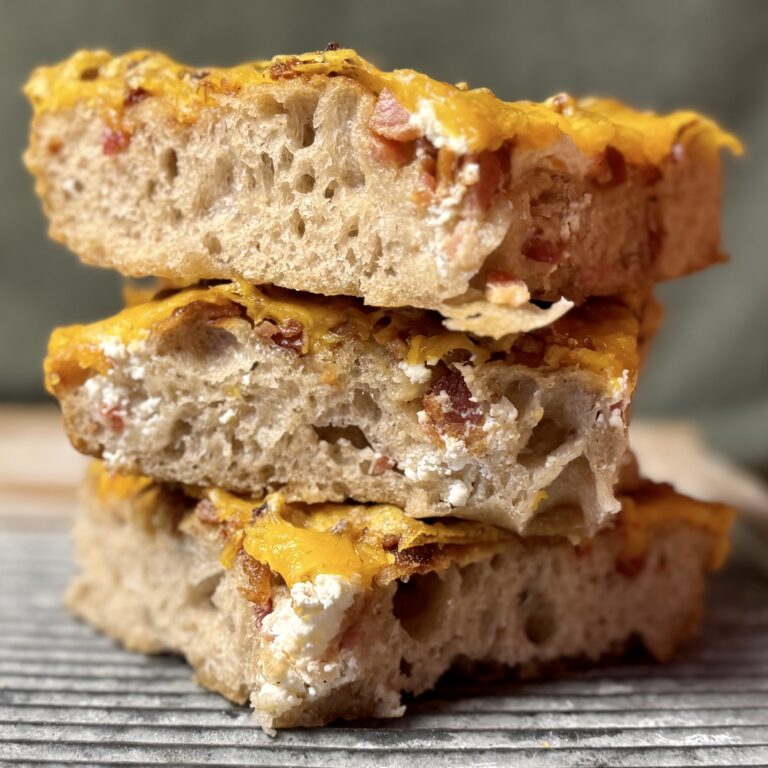
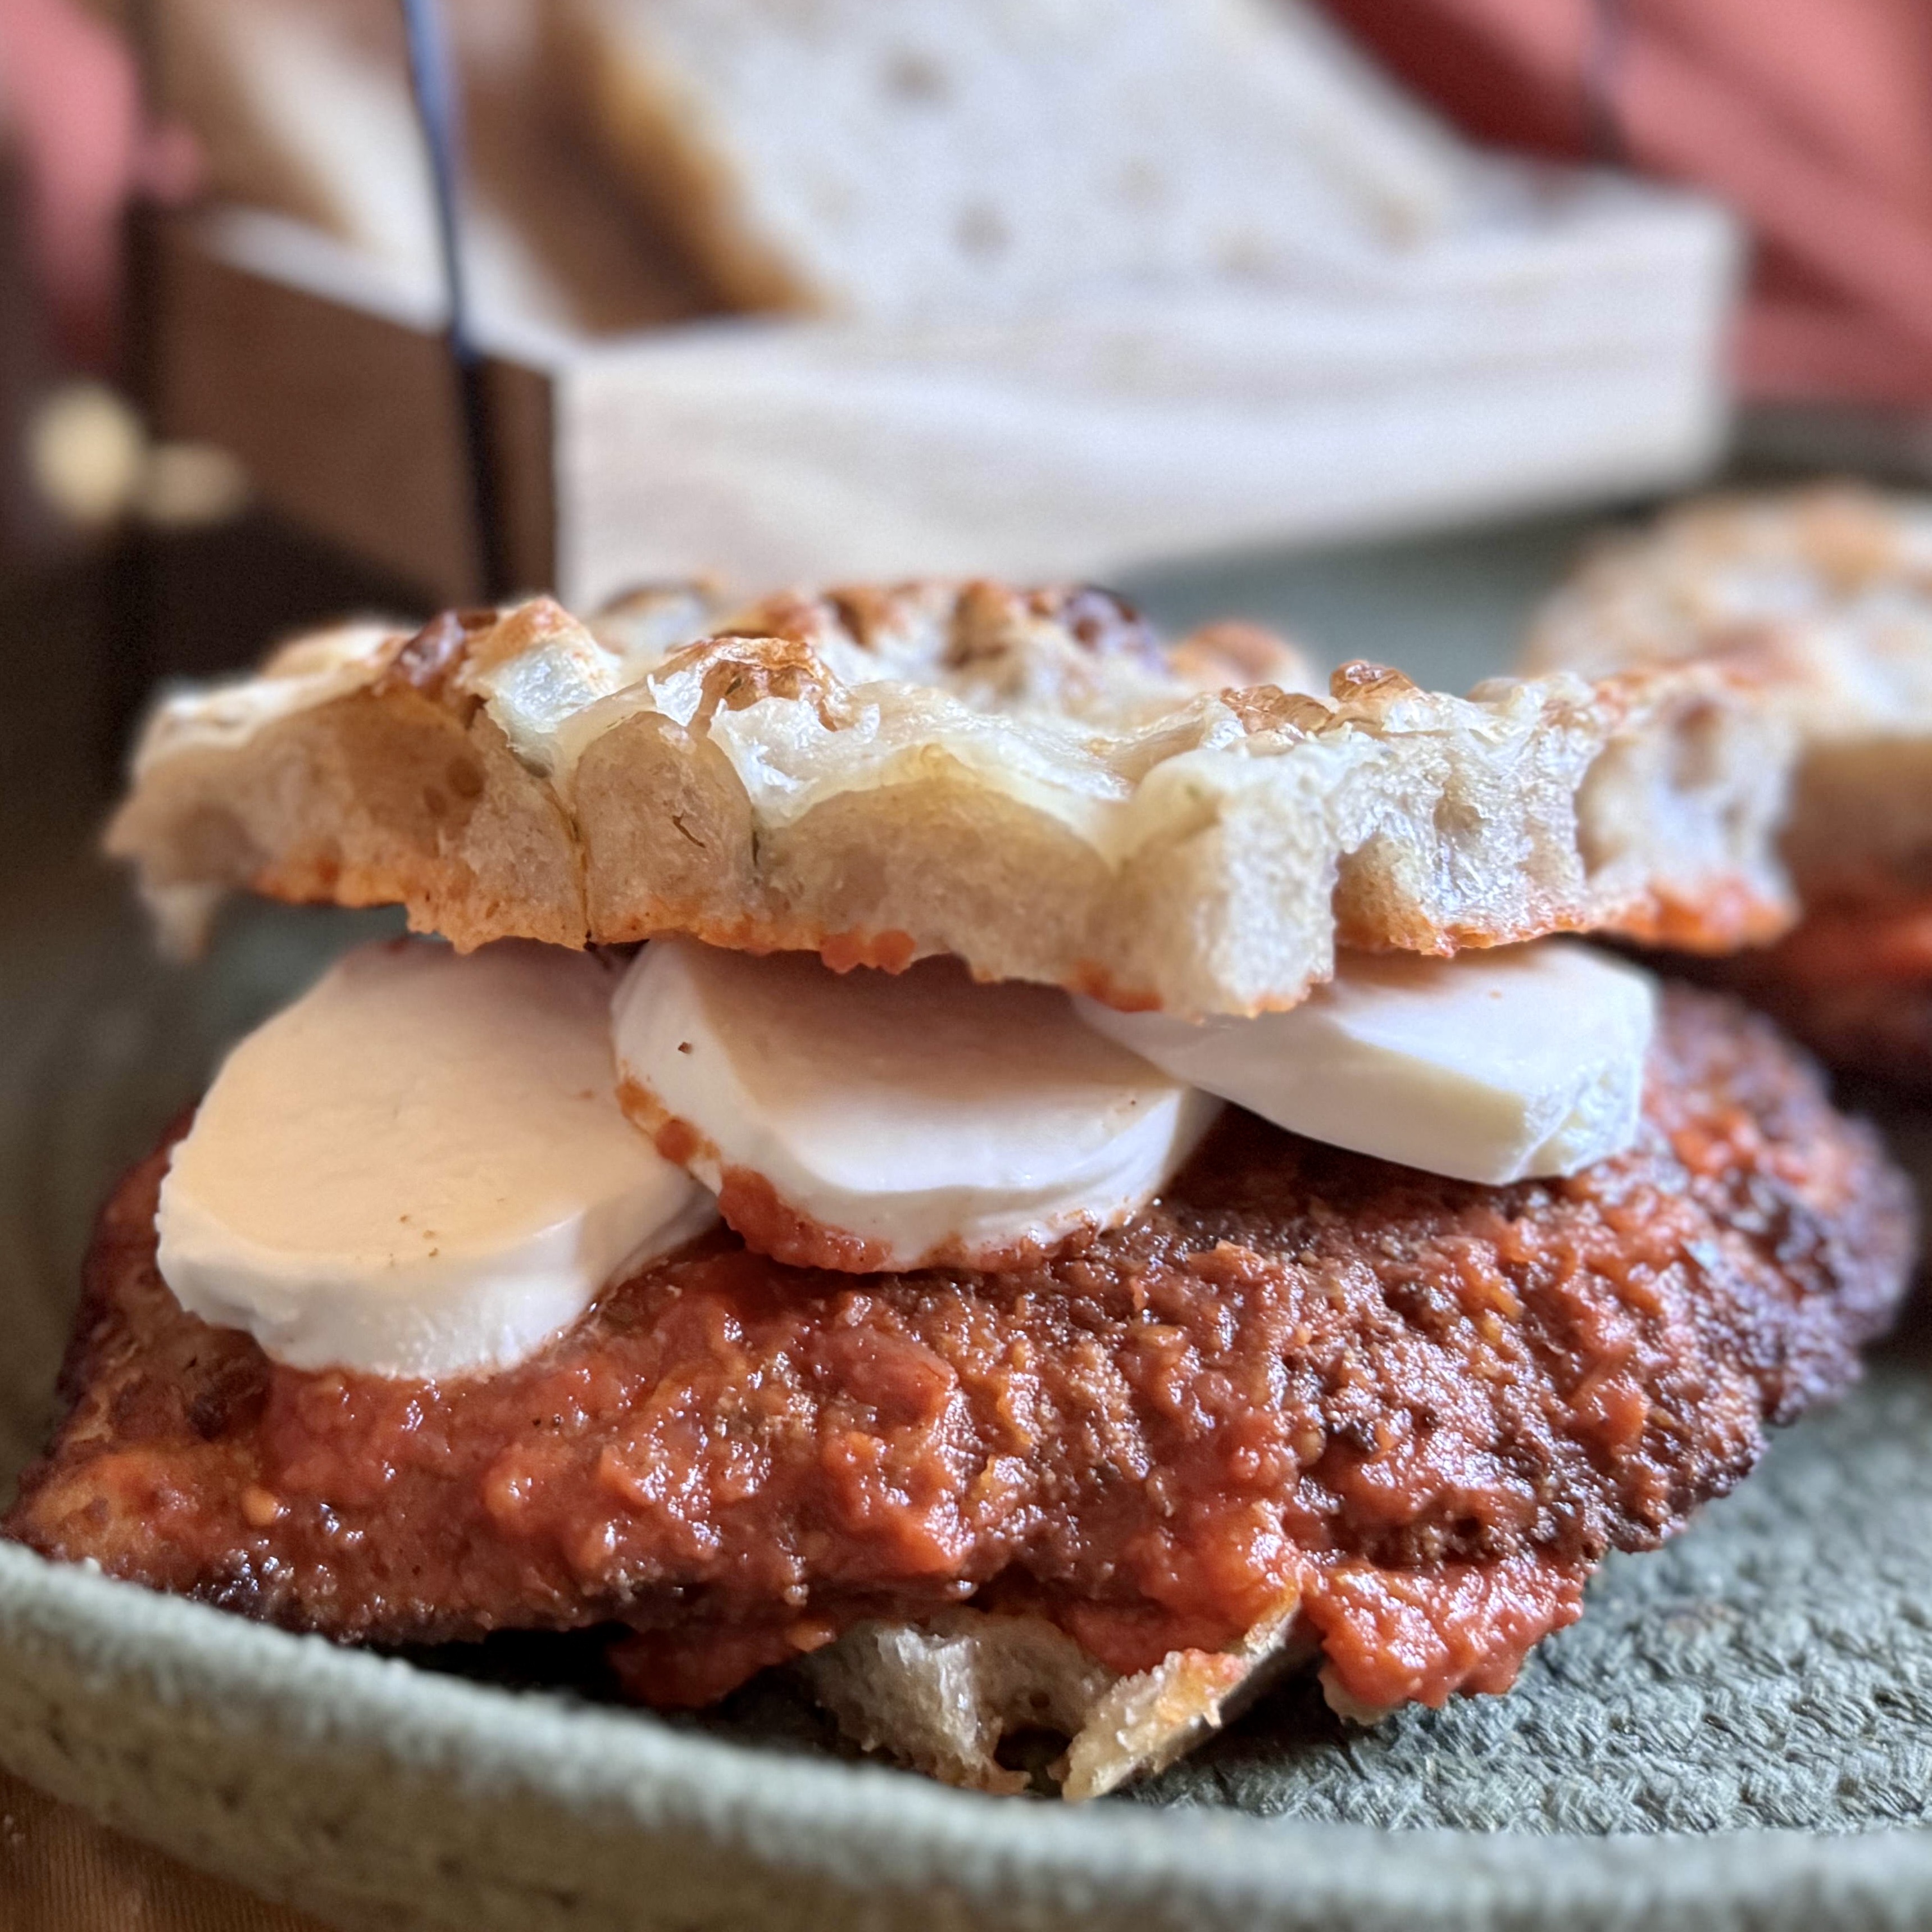
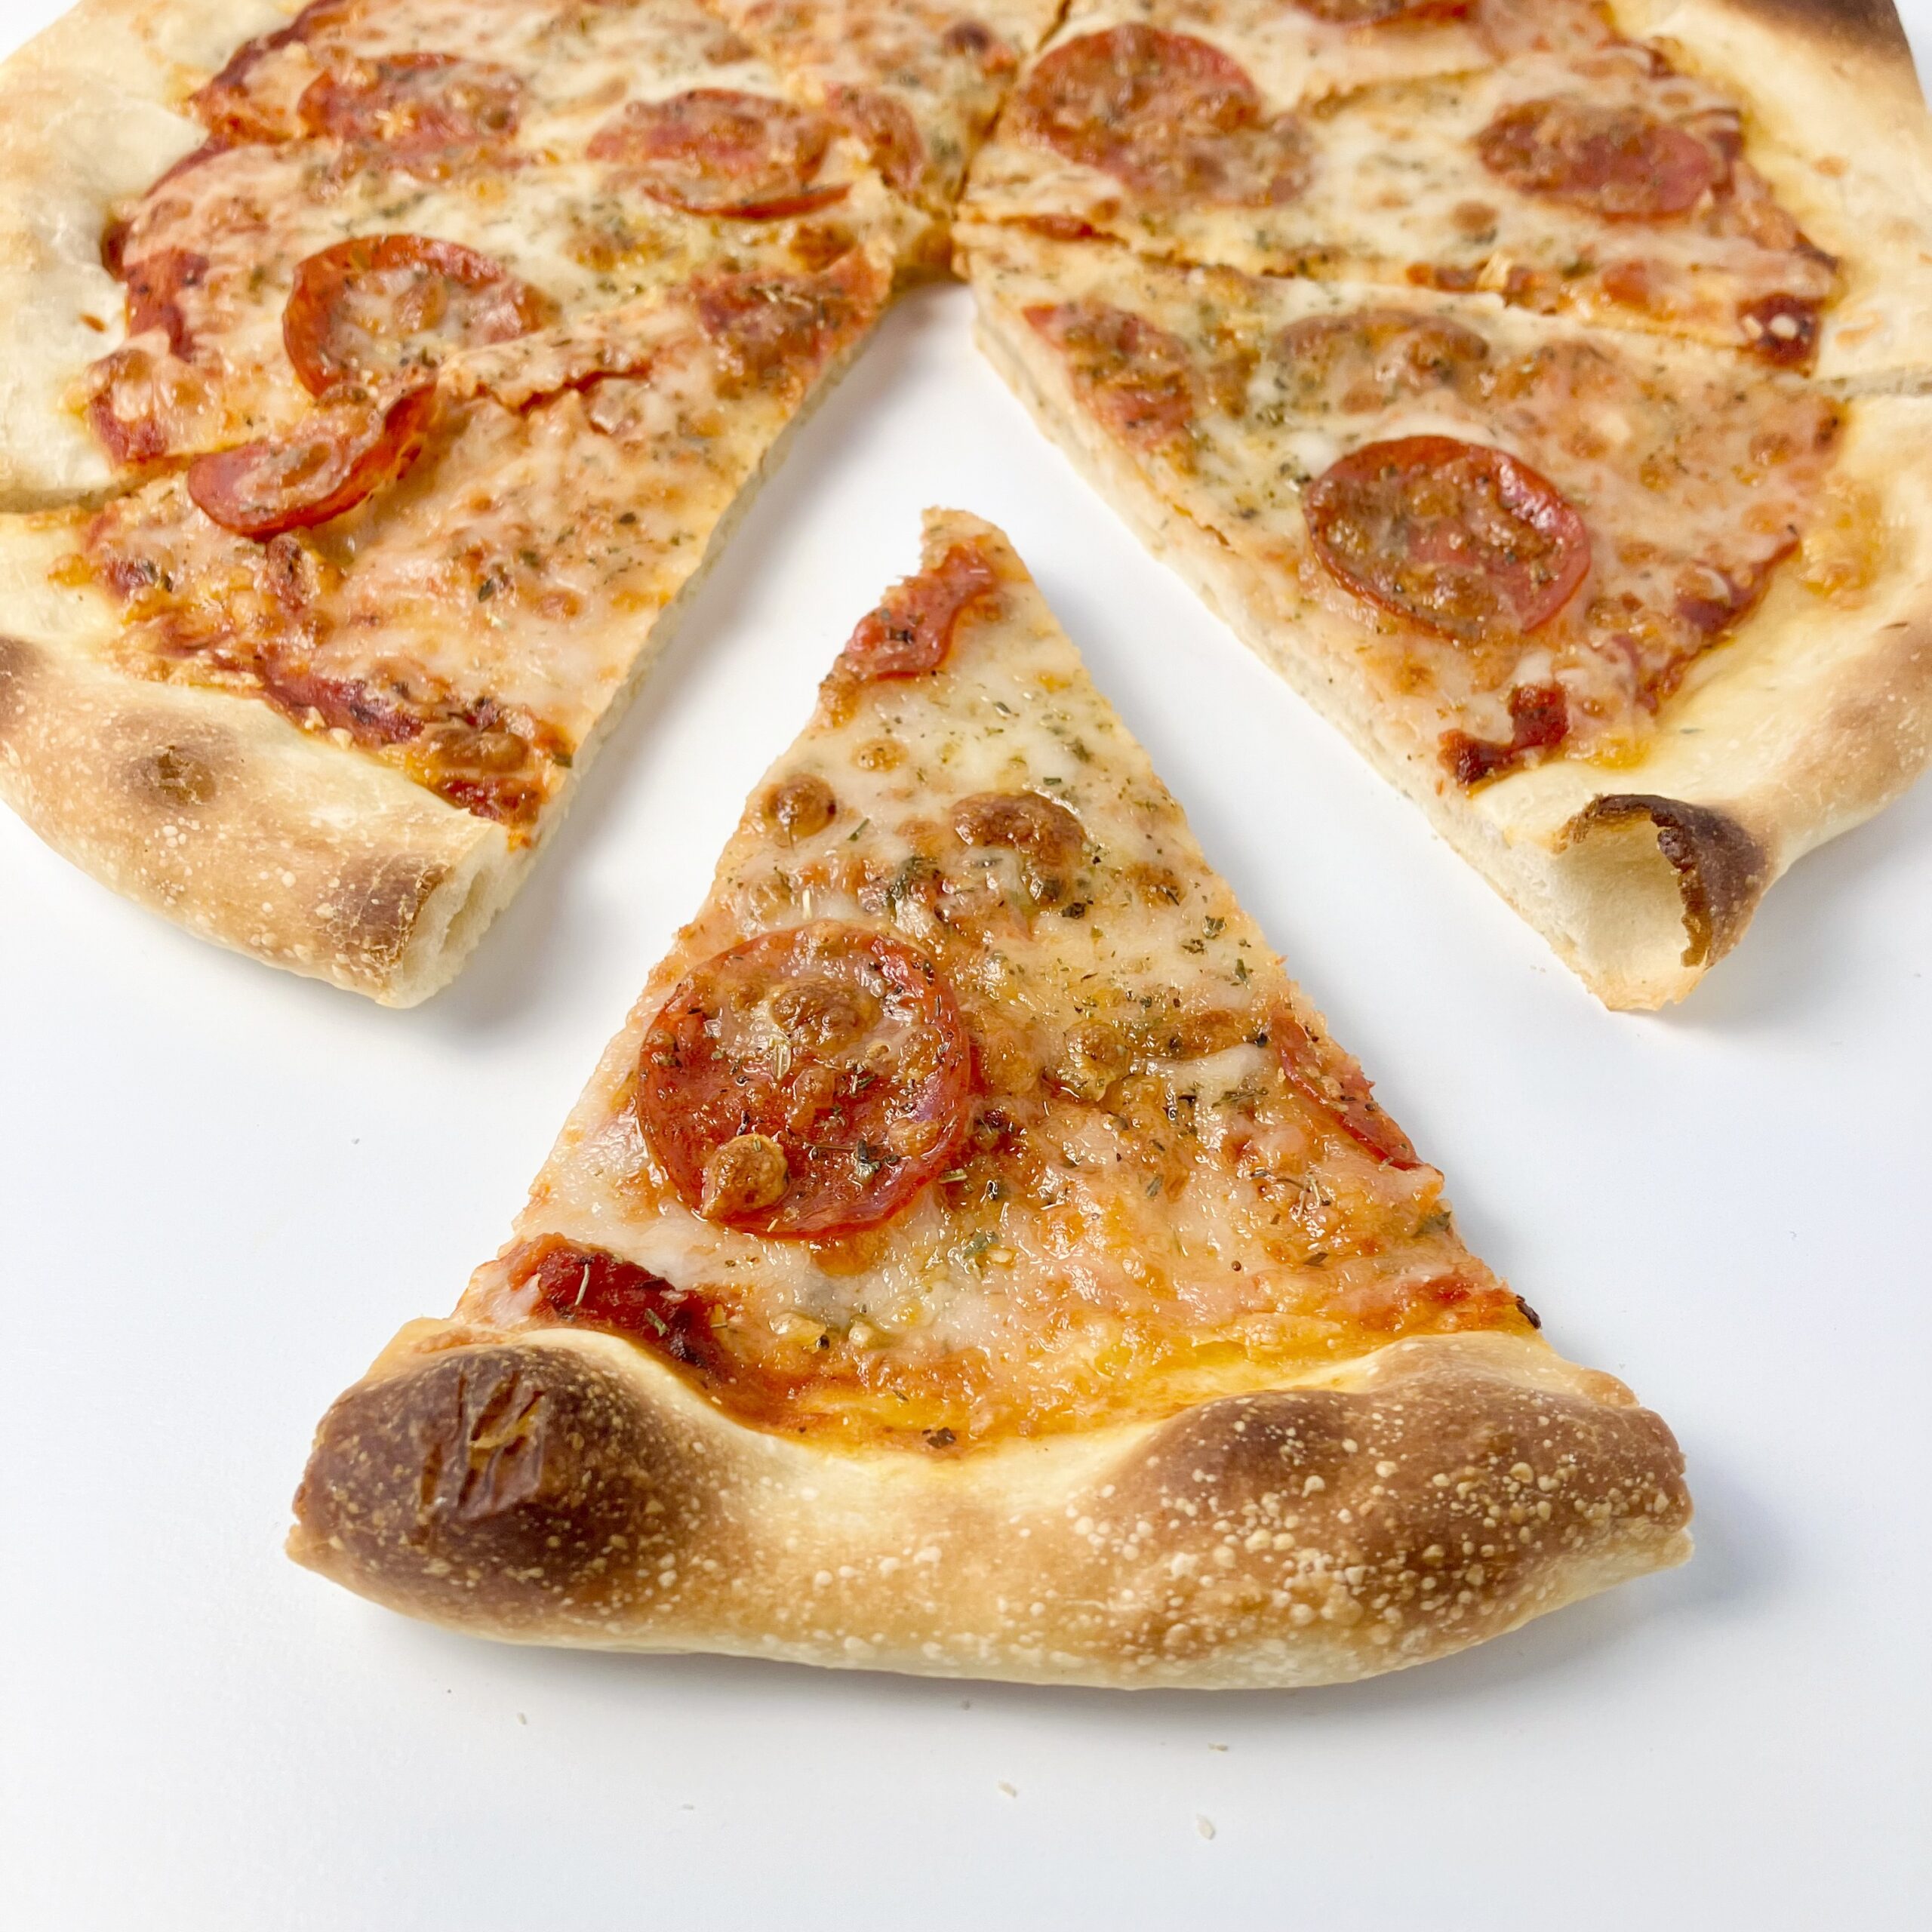
Remove crust from the oven and top with desired toppings. I used tomato sauce, mozzarella, pepperoni, and Italian herbs.
Bake 7-10 minutes more, until the cheese is completely melted and bubbly, and the crust is lightly browned.
Let the pizza continue to rest on the cast iron as it cools, to continue crisping up the crust.
Enjoy!
NOTE: I prefer this method of baking pizza for a few reasons. First, preheating my oven and baking stone for an hour or more (to ensure a hot stone) BEFORE baking the pizza just makes my house really hot and makes baking pizza feel like a chore. For this reason, I ditched the stone and use cast iron instead. Now, I could preheat the cast iron, but I prefer to shape the pizza dough on the pan. This means I don’t have to use extra flour to shape and I don't have to worry about transporting the dough from one surface to another. My family prefers a crispy pizza crust, which is why pre-baking the crust comes in handy. This prevents the cheese and any oil from the sauce from seeping through and creating a soggy crust. It also allows my crust to bake longer without worry of burning the toppings. After the pizza comes out of the oven, the cast iron retains heat, crisping up the bottom of the crust even more without worry of burning the toppings. There are so many ways to bake pizza, all dependent on personal preference; this just happens to be the favorite method for my family!
- Stromboli method
Preheat your oven to 400 F.
Line a 9X13 baking sheet with parchment paper or a silicone baking mat.
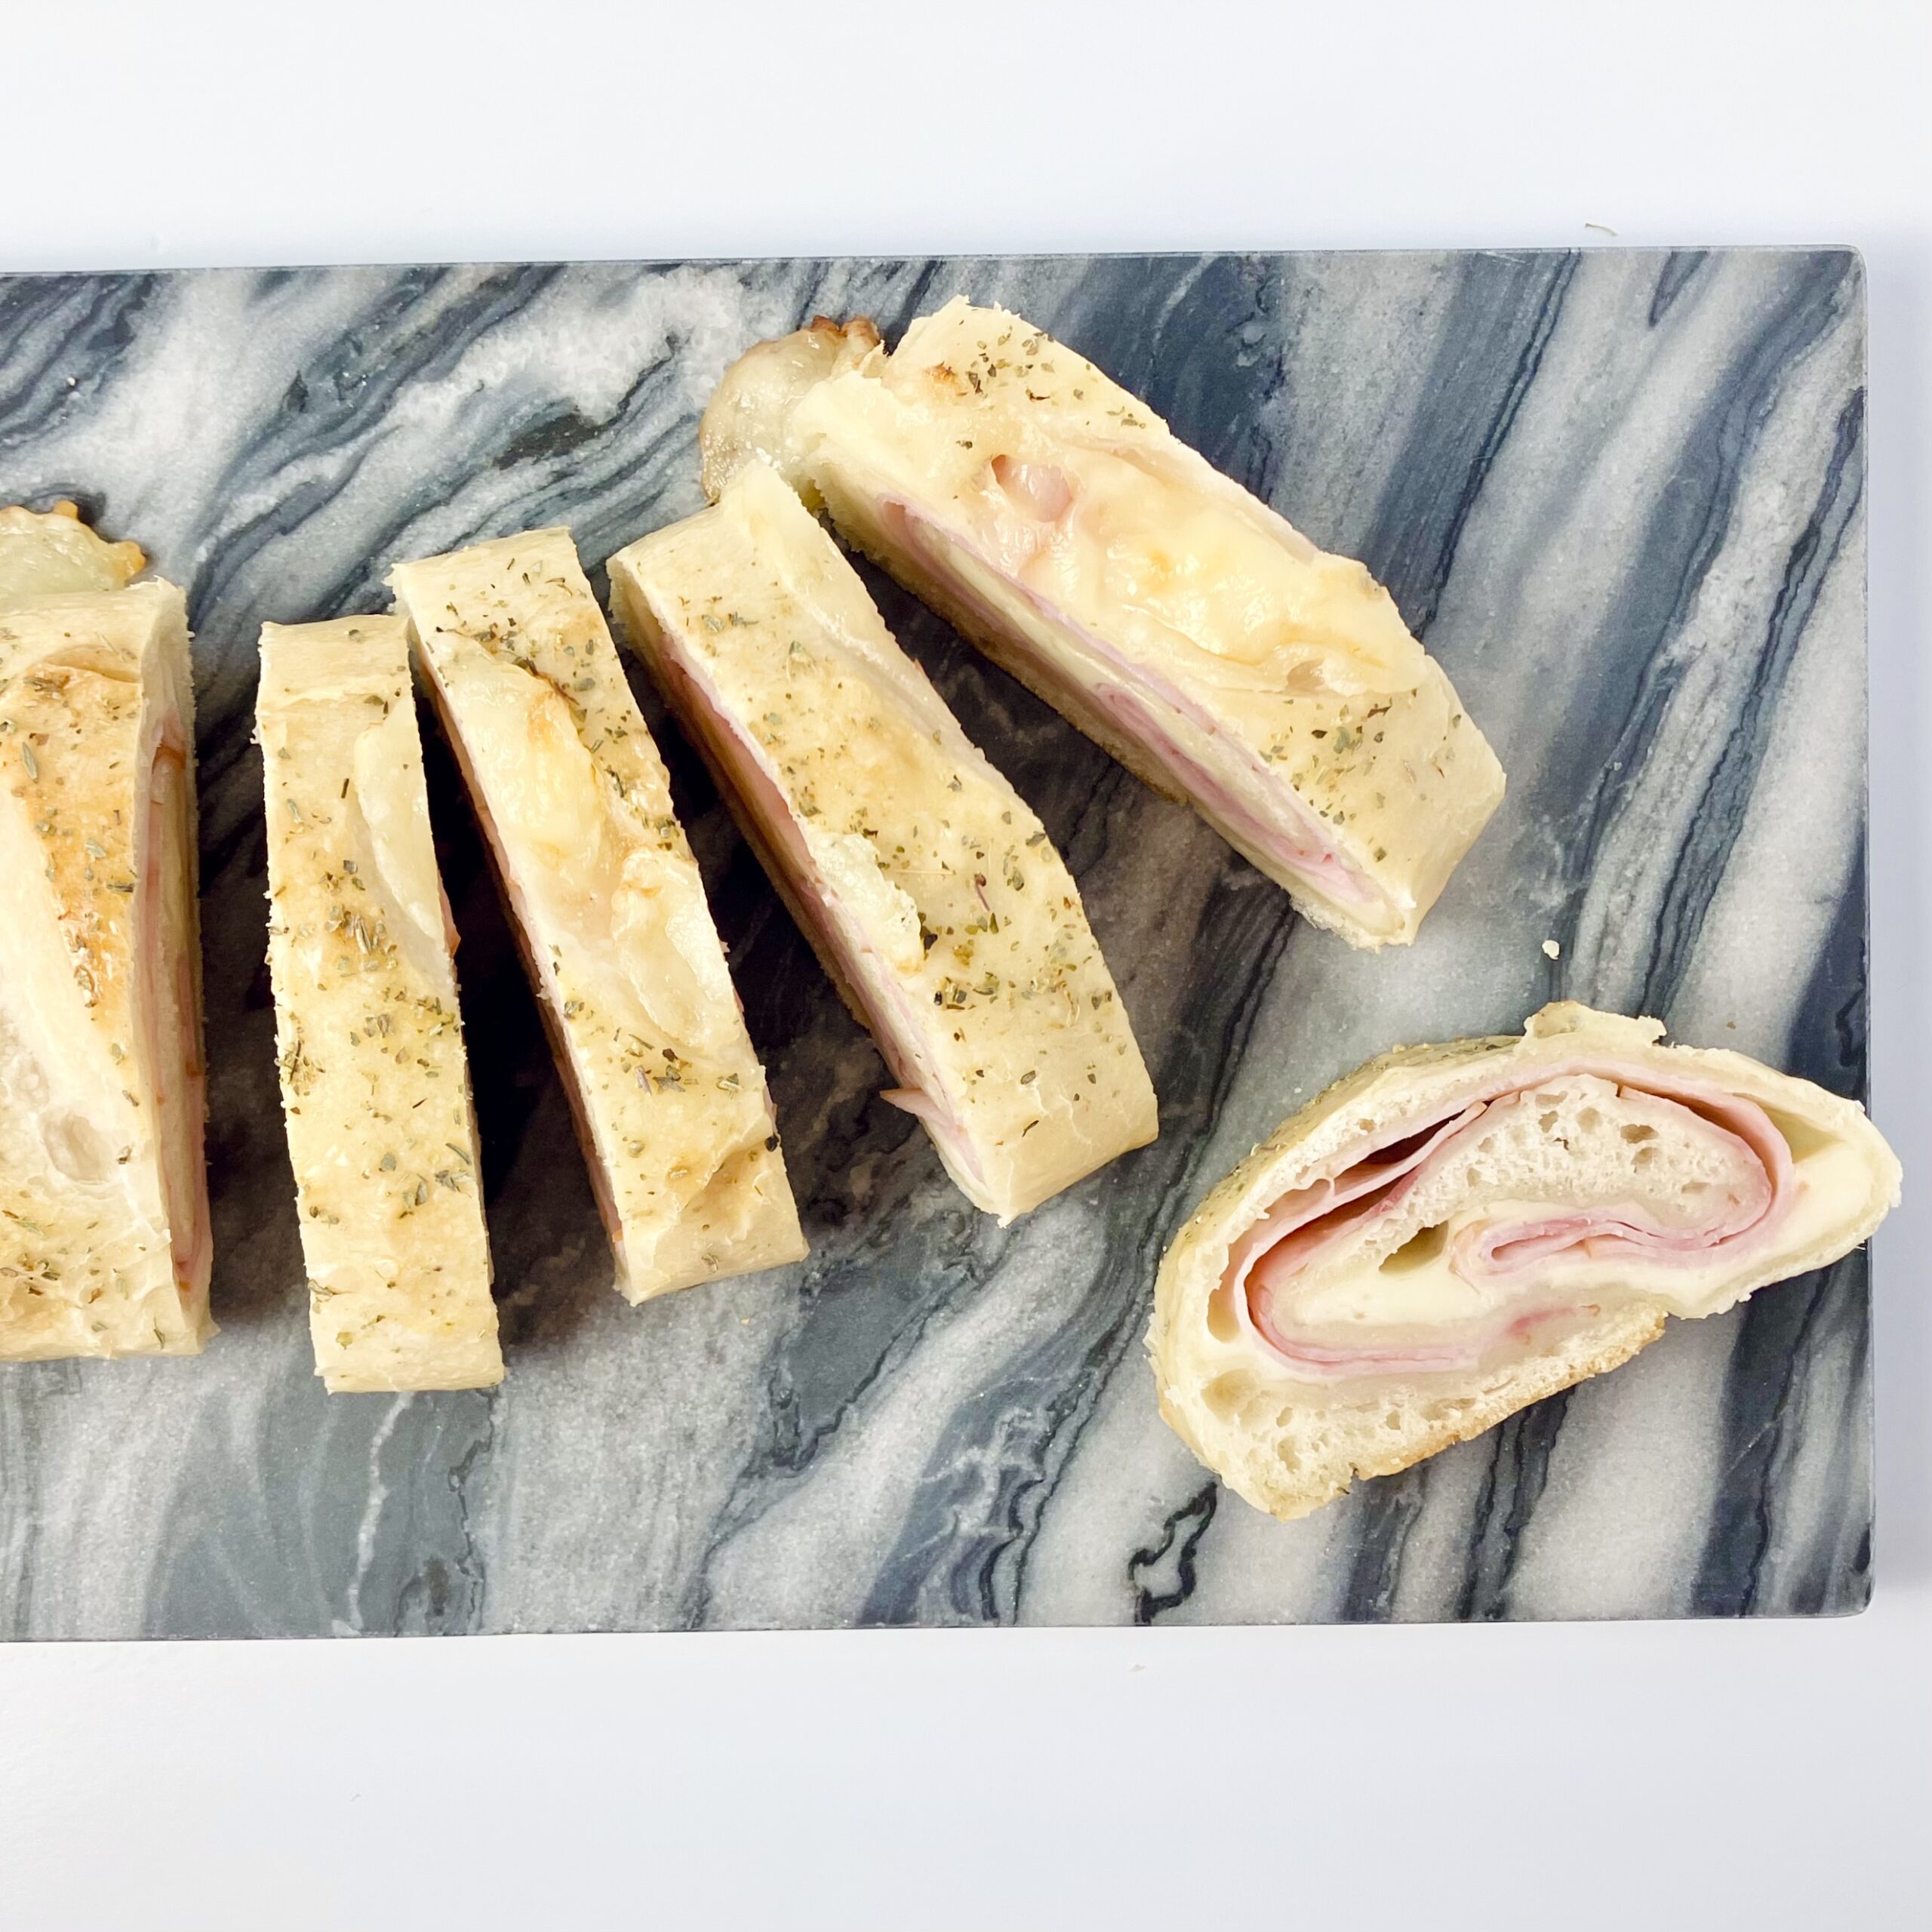
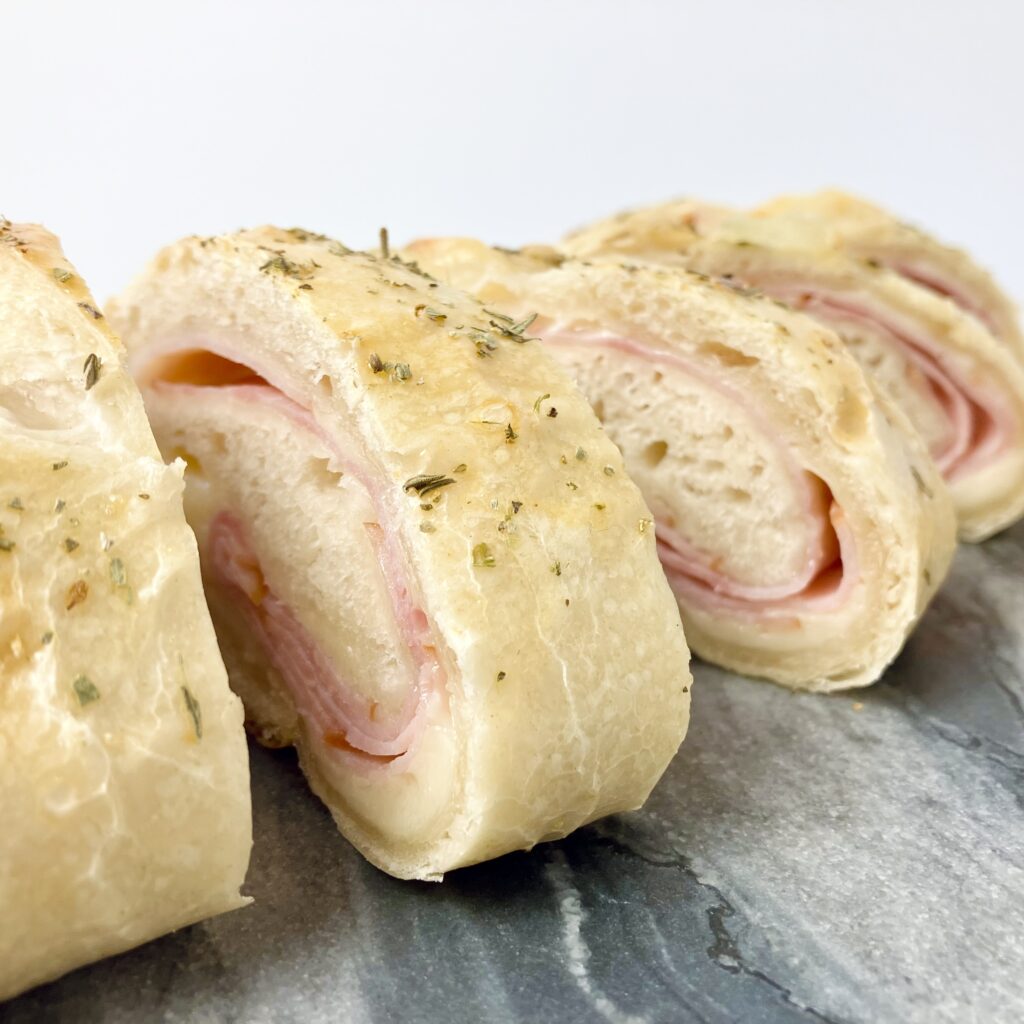
Stretch the dough into a rectangle that covers the surface of the baking sheet.
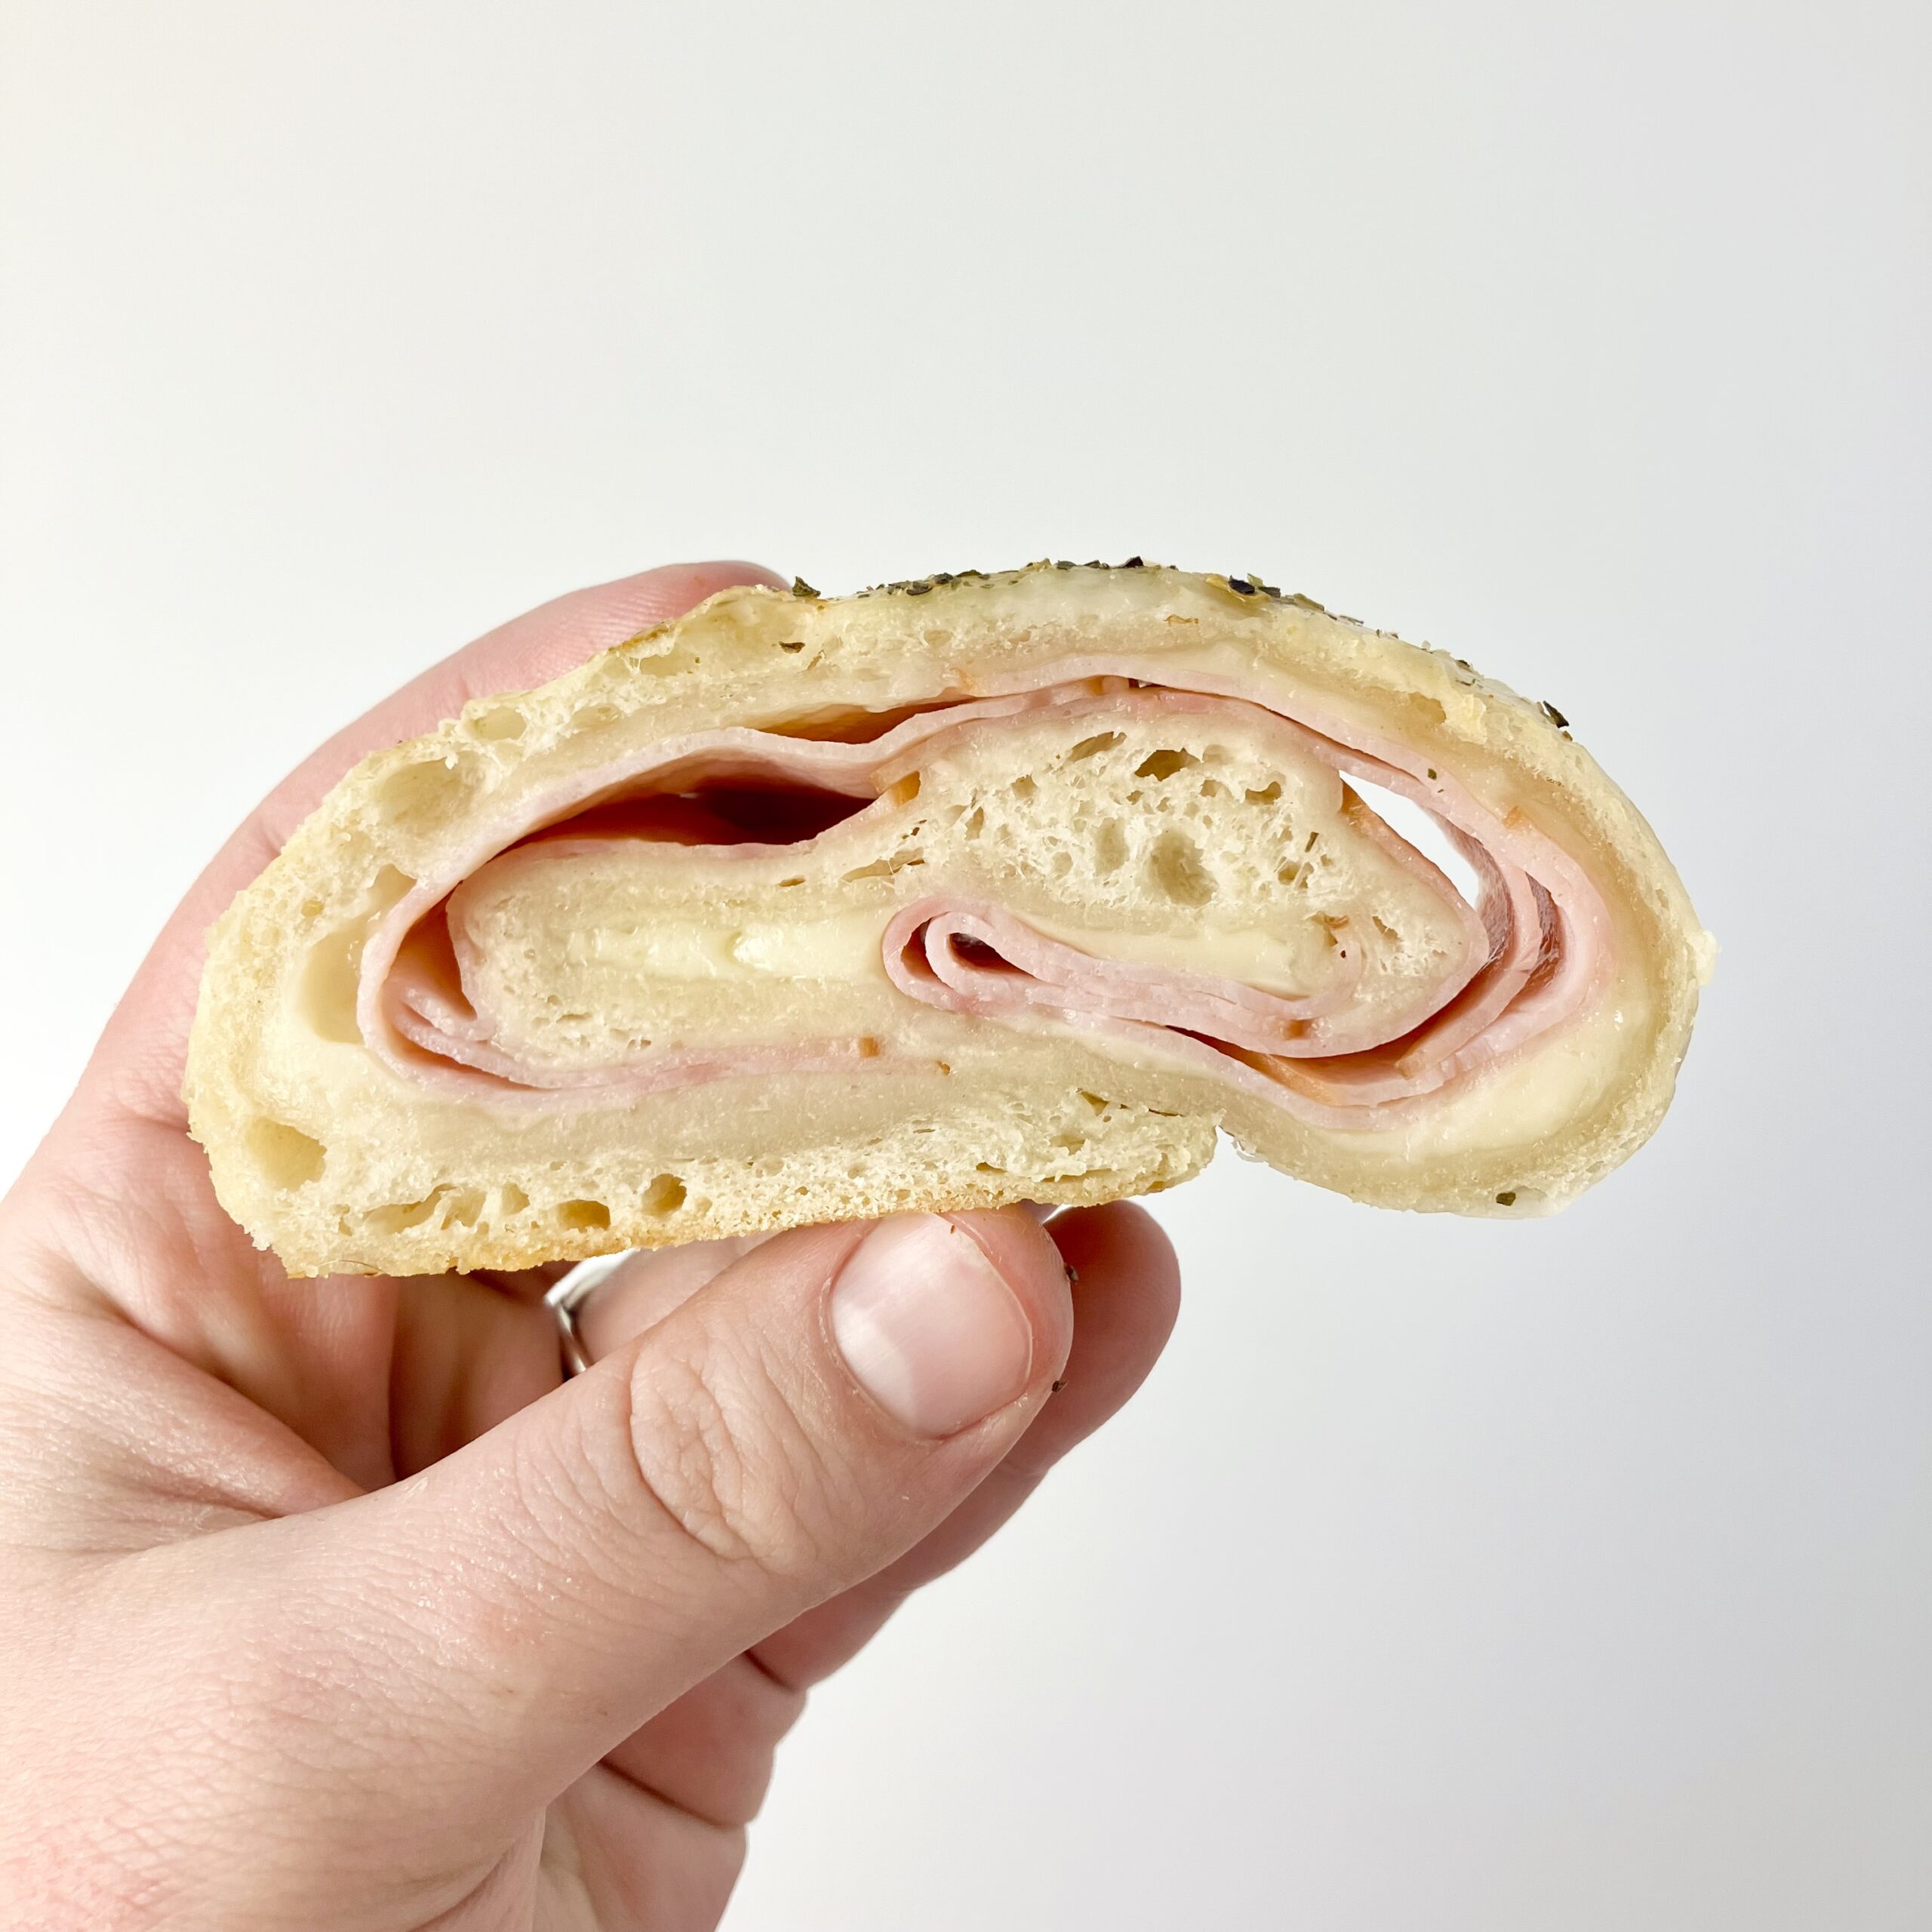
Top with your favorite stromboli fillings. In this video, I simply used ham and swiss cheese. More common filling options include: pizza sauce, mozzarella, varied meats: such as, pepperoni, salami, and ham, and seasoning: such as, Italian herbs.
Brush all over with an egg wash (one whole egg + 1 tbsp of water, whisked until smooth).
Optionally, top with more seasoning (such as Italian herbs) or seeds (such as poppy seeds or sesame seeds).
Slit the top several times to allow ventilation.
Bake for 25-30 minutes, until lightly golden.
Cool at least 5-10 minutes before slicing.
Enjoy!
Watch the Video
Notes
- Because this dough contains a lot of flour, there is plenty of food for your starter to feed on. You can let this dough get up to triple in size and still be okay, though I'd recommend sticking with double or just over. For 100 g of starter at a room temperature of approximately 70 F, this took 8-10 hours.
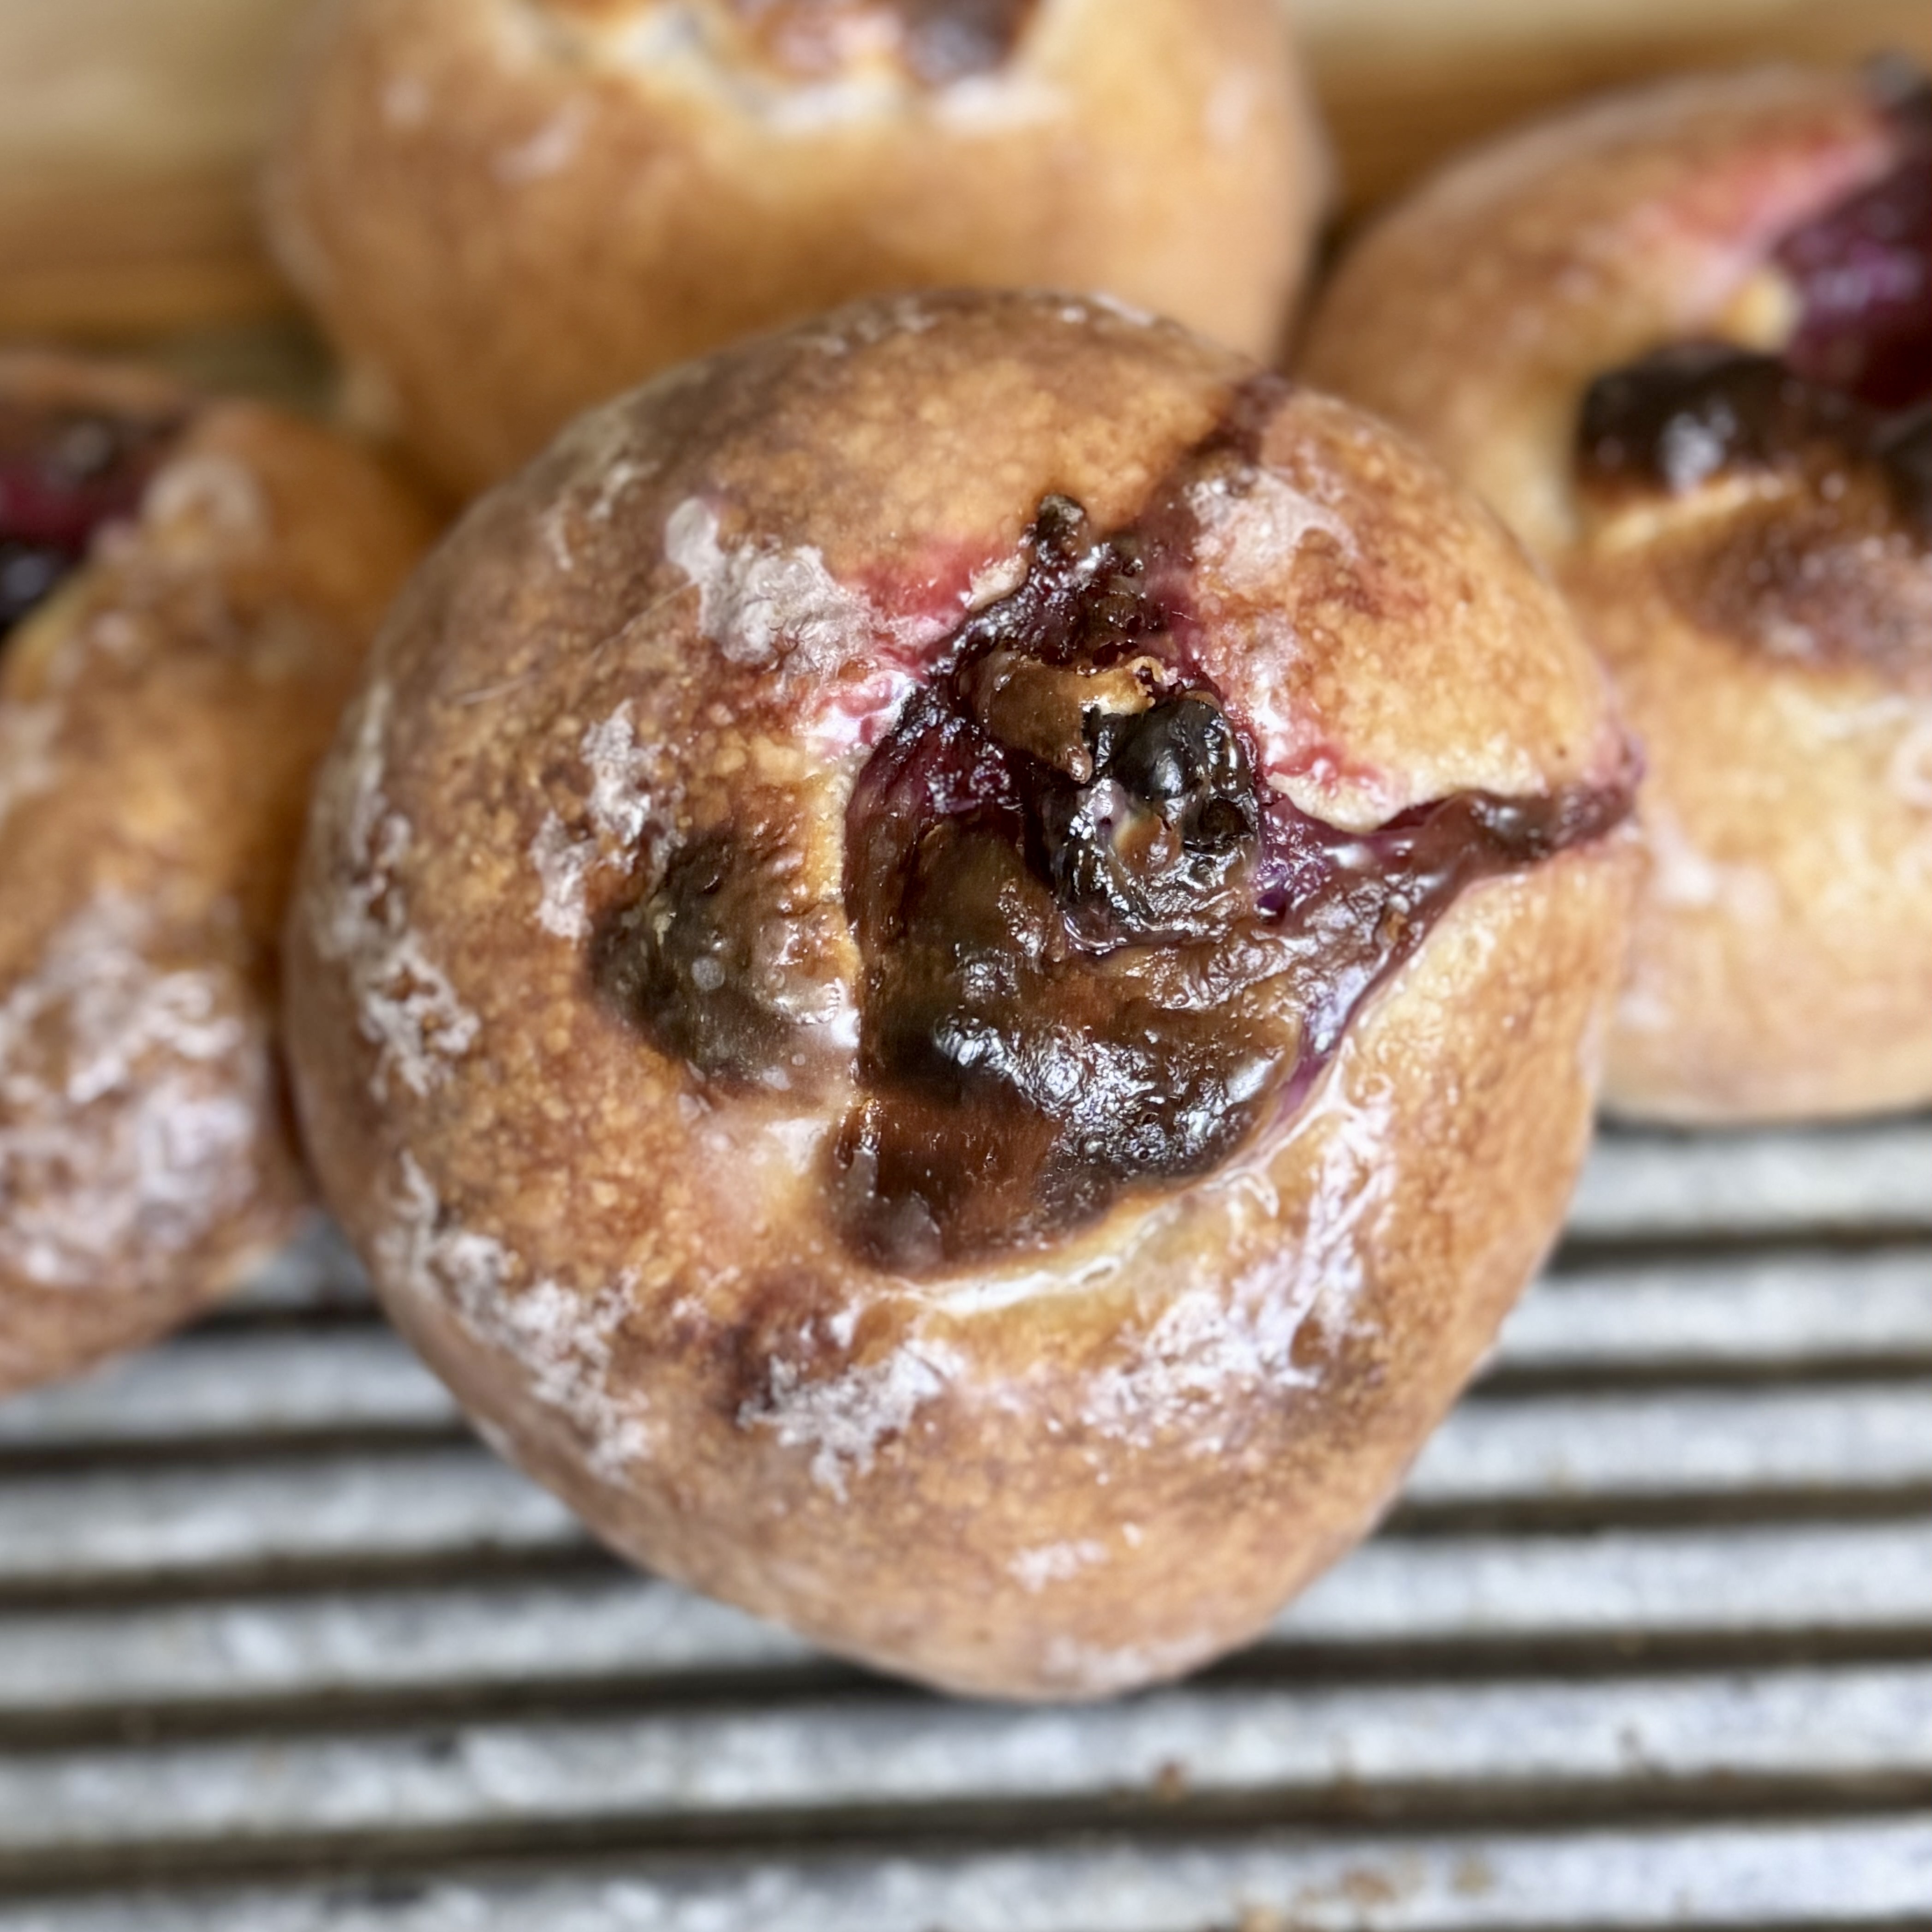
- You can see in the video that my pizza crust had dried a bit in one spot from its time in the refrigerator. This is because the dough continued to expand in the fridge, outgrowing its container. The part of the dough that was exposed to air dried out. I simply removed this before shaping, but you can leave it if it’s a small amount and it doesn’t bother you.