If you are looking to make your very own sourdough starter from scratch, everything you need is in this guide.
First, let us begin by setting our expectations straight: establishing a starter from scratch takes time. Though it is well advertised (at least on social media) that a starter can be made from scratch in just seven days, I have not found this to be true. If your environment is ideal, you may be able to get it done in two weeks. Otherwise, expect it to take at least a month. Maybe two if it is particularly cool.
If you are not able to put in the time and commitment it takes to establish a starter from scratch, purchasing an established starter is always an option. An established starter can be reactivated and ready to make bread in five to seven days. If this sounds like a better option for you, my starter is available for purchase here.
I highly recommend watching my video on this topic, making a starter from scratch. Though I have written detailed directions below, a huge part of establishing a starter requires an understanding of your starter’s needs. Being able to see what your starter should look like at every step of the process can be incredibly beneficial.
Last, I would like to note that any underlined content is a link. The underlined link may take you to another part of this article or to a separate webpage, depending on the context. I want to make sure you have as much information as possible, and I hope to answer most potential questions as you are going through this process. If you still have questions or confusions after completing this article, feel free to leave a comment below or contact me.
Without further ado, let’s get to it.
In this article:
- Print Version
- Equipment
- Temperature and your starter
- How to warm up your starter
- Getting started: day one
- The second feeding
- The third feeding and beyond
- First week expectations
- Discard
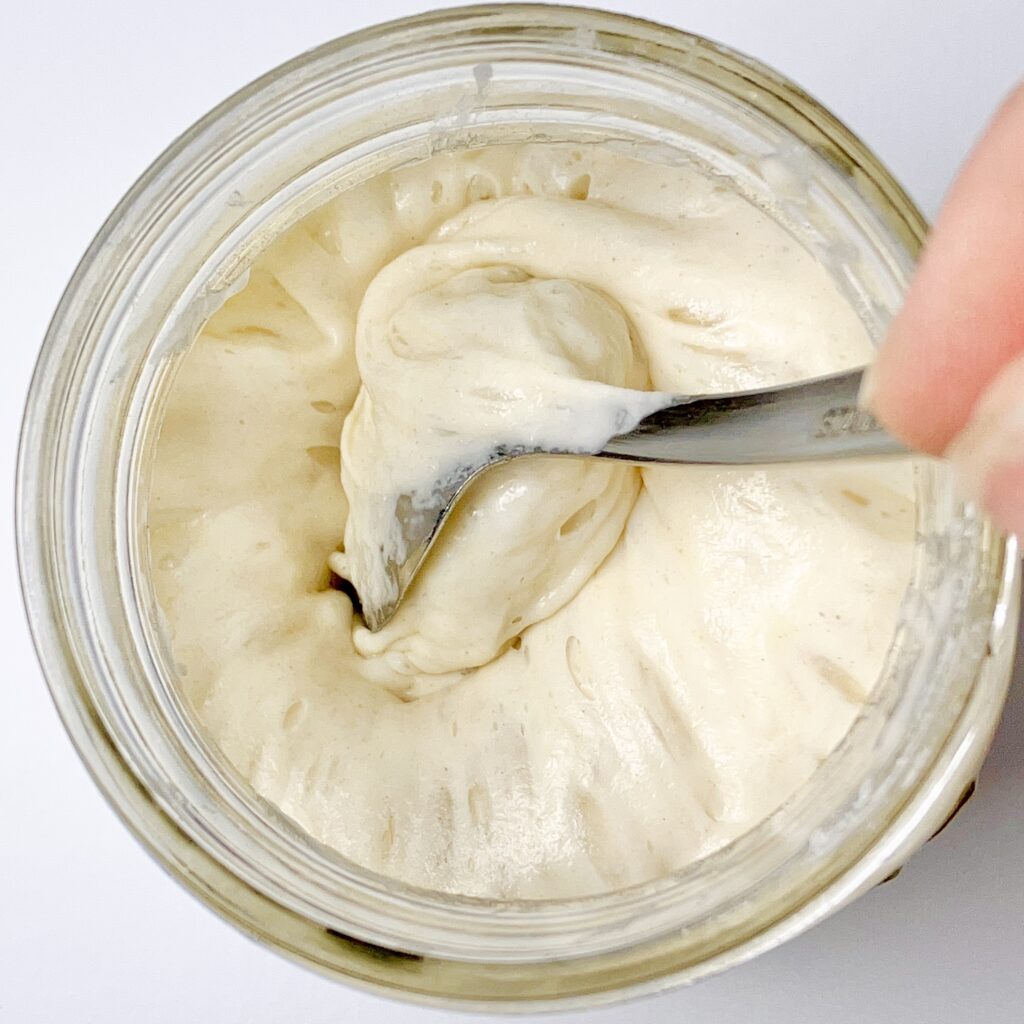
- When is my starter active, mature, and ready for bread?
- The Float Test
- Your First Bread Recipe
- How to maintain a starter after it is active, mature, and ready for bread
- How to adjust the amount of starter for a recipe
- Your second bread recipe
- A note on Gluten-free starters
- The video
- Congrats!
- Join the Email List
Print Version
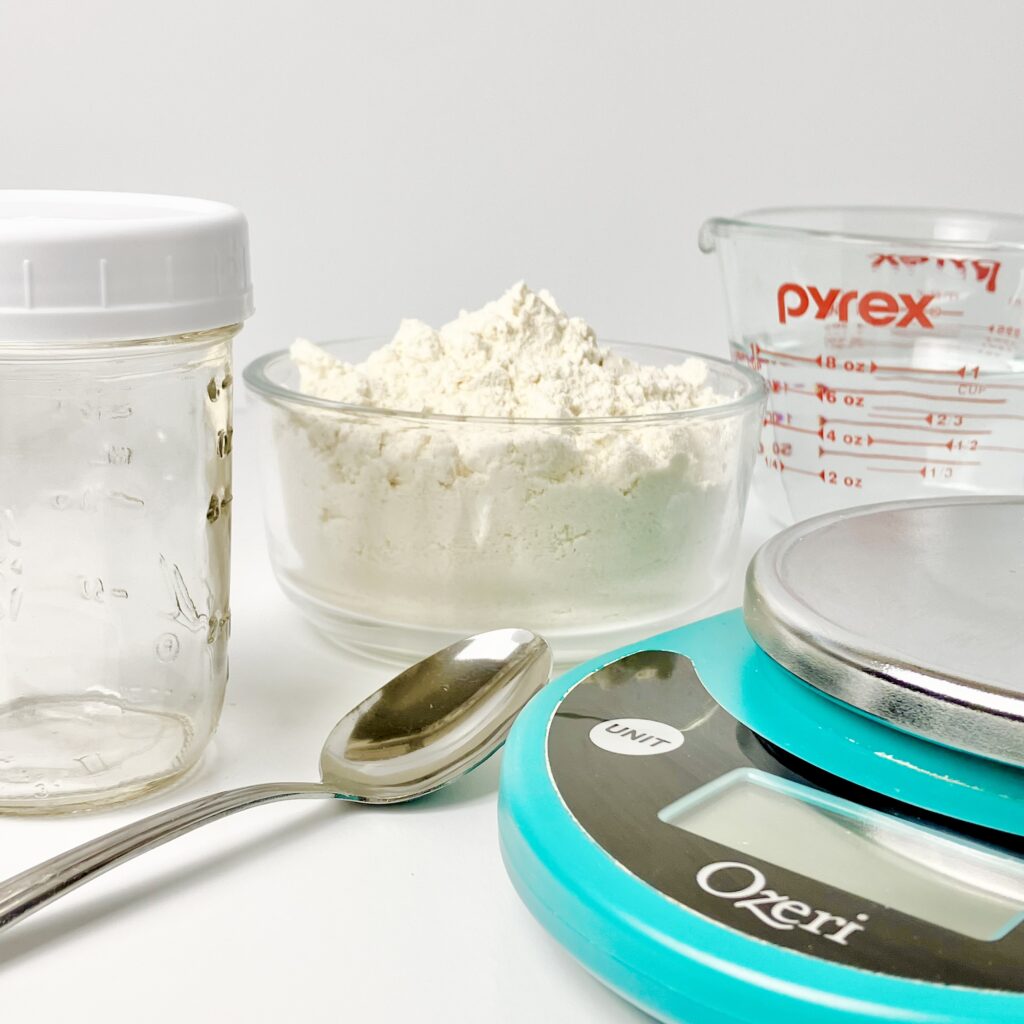
Equipment
- One to two 8 oz glass jars. Only one jar is necessary, but two jars will allow you to rotate for cleaning.
- Cover for the jar. This should be something that holds in moisture, but also allows for ventilation. Great options include: a loose lid, plastic cling wrap, damp paper towel or cloth with a rubber band, or beeswax wrap.
- Kitchen scale. This one is optional, but not really. I highly recommend purchasing a kitchen scale if you do not have one already, as you will use it a lot for sourdough bread. It should measure in grams. Here is the one I use. Though I have come to love and adore using a kitchen scale, a starter can be established without one. I’ll give you volume measurements throughout this article.
- Stirring utensil. A spoon is perfect for the job.
- Flour. A starter can be successfully made with any type of flour. I do not recommend bleached flour, but other than that, the options are endless. Many favor whole wheat or rye flour (on their own, or in combination with white flour) to give the starter a boost. Yeast favor these flours. Gluten-free flour is also an option, though the signs of readiness will not be the same (due to the absence of gluten). I am simply using generic all-purpose flour in the video.
- Water. Filtered is preferred, but not required. Tap water will work fine, as long as there is not an excess of chlorine. Well water is the best. Distilled water is not recommended, as it does not contain necessary nutrients to help build the cultures we are trying to establish.
Temperature and your starter
The temperature your starter is kept at is greatly going to affect the amount of activity present in the jar. Your starter’s favorite temperature is around 78 F, but will flourish anywhere from 75-80 F. A starter can be made in cooler temperatures as well, but activity will occur at a much slower rate. I do not recommend keeping your developing starter in temperatures below 65 F, though these temperatures won’t be an issue once your starter is established.
How to warm up your starter
If temperatures are cool and you are desiring a jumpstart, or if activity is incredibly slow and you are hoping to speed things up, here are some ways you can do so.
- Warm your water. You can do this by simply running the tap until it is fairly warm (but not scalding) to the touch. Water can also be heated on the stovetop or in the microwave. Try not to let the temperature of the water exceed 100 F.
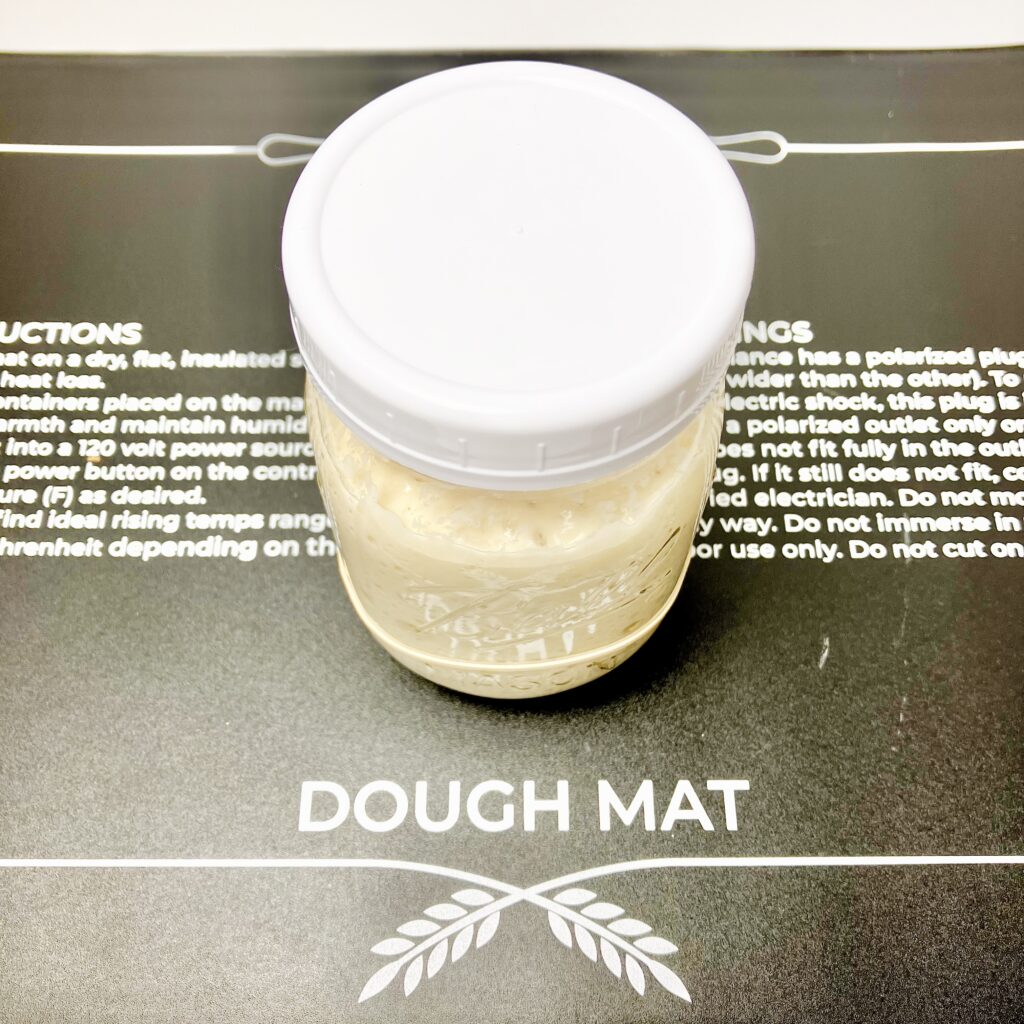
- Use a seedling mat or dough mat. You can place the jar directly on top of the mat, or wrap the mat around the jar. Condensation may become more noticeable inside the jar, but this is not an issue. Moisture and humidity will aid your starter’s development, as long as the jar is able to vent appropriately (we do not want mold!).
- Keep the jar in the oven with the light on. This can get warmer than you think! Make sure your oven is off and that it has not been heated at all. The light will provide plenty of warmth. Take care not to accidentally bake your starter.
- Keep the jar in the microwave with the door shut. This closed environment will provide warmth and shield from cooler temperatures of the home.
- Use a proofer. I use my toaster oven, simply because it can go all the way down to 50 F. Some ovens also have a proof setting, so check to see if yours does. Last, a proofing box is also an option. While it is an investment (and one I have never made) many sourdough bakers adore the consistency it provides in their bread making. Set the proofer to the desired temperature (75-78 F is perfect) and watch the magic happen!
Getting started: Day one
Using a kitchen scale:
Add 10 g of flour and 10 g of water to the jar. Stir well, then cover with your desired cover of choice that holds in moisture, but also allows for ventilation. Let it sit in a warm environment 24-48 hours, until bubbles become prominent on the surface.
The objective here is simple: we want to add equal parts by weight of flour and water to the jar. I like to keep only a small amount of starter while it is being established, in order to limit waste through the necessary discard that will come later. The actual amount of flour and water added to the jar does not matter, as long as the amount of flour is equal to the amount of water by weight. We will let this ferment until bubbles become obvious. Timing will vary depending on temperature, but bubbles should become prominent within 48 hours at the most. If they do not, add some warmth to the starter to help it along.
Using measuring spoons (no kitchen scale):
Add 2 tbsp of flour and 1 tbsp of water to the jar. Stir well, then cover with your desired cover of choice that holds in moisture, but also allows for ventilation. Let it sit in a warm environment 24-48 hours, until bubbles become prominent on the surface.
It is important to note that, by volume, different amounts of flour and water are added to the jar. This is because flour weighs half as much as water, so we need to add more of it by volume. Otherwise, depending on your flour choice, the flour will not be able to absorb all the liquid added, and the water may begin to separate, which will not create a healthy environment for your starter. I like to keep only a small amount of starter while it is being established, in order to limit waste through the necessary discard that will come later. The actual amount of flour and water added to the jar does not matter, as long as the amount of flour added to the jar is double the amount of water added to the jar by volume. We will let this ferment until bubbles become obvious. Timing will vary depending on temperature, but bubbles should become prominent within 48 hours at the most. If they do not, add some warmth to the starter to help it along.
The second feeding
After bubbles become prominent on the surface (24-48 hours after first mixing the flour and water) it is time to add more flour and water to the jar. For the second feeding, we will not discard anything; rather, we will simply add more flour and water to the jar. This will ensure the bacteria and yeast we are trying to raise are able to multiply to their maximum potential before the discarding process begins.
This time bubbles should appear much faster. The total time it takes will depend on the environment. Continue to look for bubbles on the surface before feeding, and do not feed the starter if you see less than ten bubbles on the surface. If this is taking an especially long time, add some warmth to the starter to help it along.
Using a kitchen scale:
Add 20 g of flour + 20 g of water to the jar. Stir well, then cover with your desired cover of choice that holds in moisture, but also allows for ventilation. Let it sit in a warm environment 12-24 hours, until bubbles become prominent on the surface.
During the initial mix, we added 10 g of flour + 10 g of water to the jar. This makes 20 g of starter. Therefore, we will continue to feed equal parts starter, flour, and water by adding 20 g of flour and 20 g of water to the jar. This is called a 1:1:1 feeding ratio.
Using measuring spoons (no kitchen scale):
Add 6 tbsp of flour + 3 tbsp of water to the jar. Stir well, then cover with your desired cover of choice that holds in moisture, but also allows for ventilation. Let it sit in a warm environment 12-24 hours, until bubbles become prominent on the surface.
During the initial mix, we added 2 tbsp of flour + 1 tbsp of water to the jar. This makes 3 tbsp of starter. When measuring by volume, we are going to aim for a 1:2:1 feeding ratio: one part starter to two parts flour to one part water. This feeding ratio is based on the varied weights of starter, flour, and water, and will create a consistency that will keep your starter healthy and strong.
The third feeding and beyond
At this point, a starter that has been kept in a warm environment (75-80 F) will need to be fed every twelve hours consistently. On the other hand, a starter kept in cooler temperatures (70 F or below) will still need continued observation for the first one to two weeks every twelve hours. Sometimes, you may feed it after twelve hours, other times, after twenty-four hours. This has to do with process described in the following section, “First Week Expectations.” Either way, from this point on, the feeding routine will be the same until the starter is active, mature, and ready to make bread.
Using a kitchen scale:
Discard all except for 20 g of starter. This can be done by removing 20 g of starter from the original jar and moving it to a new, clean jar for feeding, or by removing 40 g of starter from the original jar and feeding the starter in the same jar that has been used the previous two days.
Add 20 g of flour + 20 g of water to the jar. Stir well, then cover with your desired cover of choice that holds in moisture, but also allows for ventilation. Let it sit in a warm environment for approximately 12 hours, or until bubbles become prominent on the surface.
Using measuring spoons (no kitchen scale):
Discard all except for 2 tbsp of starter. This can be done by removing 2 tbsp of starter from the original jar and moving it to a new, clean jar for feeding, or by removing all except for 2 tbsp of starter from the original jar and feeding the starter in the same jar that has been used the previous two days.
Add 1/4 cup of flour + 2 tbsp of water to the jar. Stir well, then cover with your desired cover of choice that holds in moisture, but also allows for ventilation. Let it sit in a warm environment for approximately 12 hours, or until bubbles become prominent on the surface.
First Week Expectations
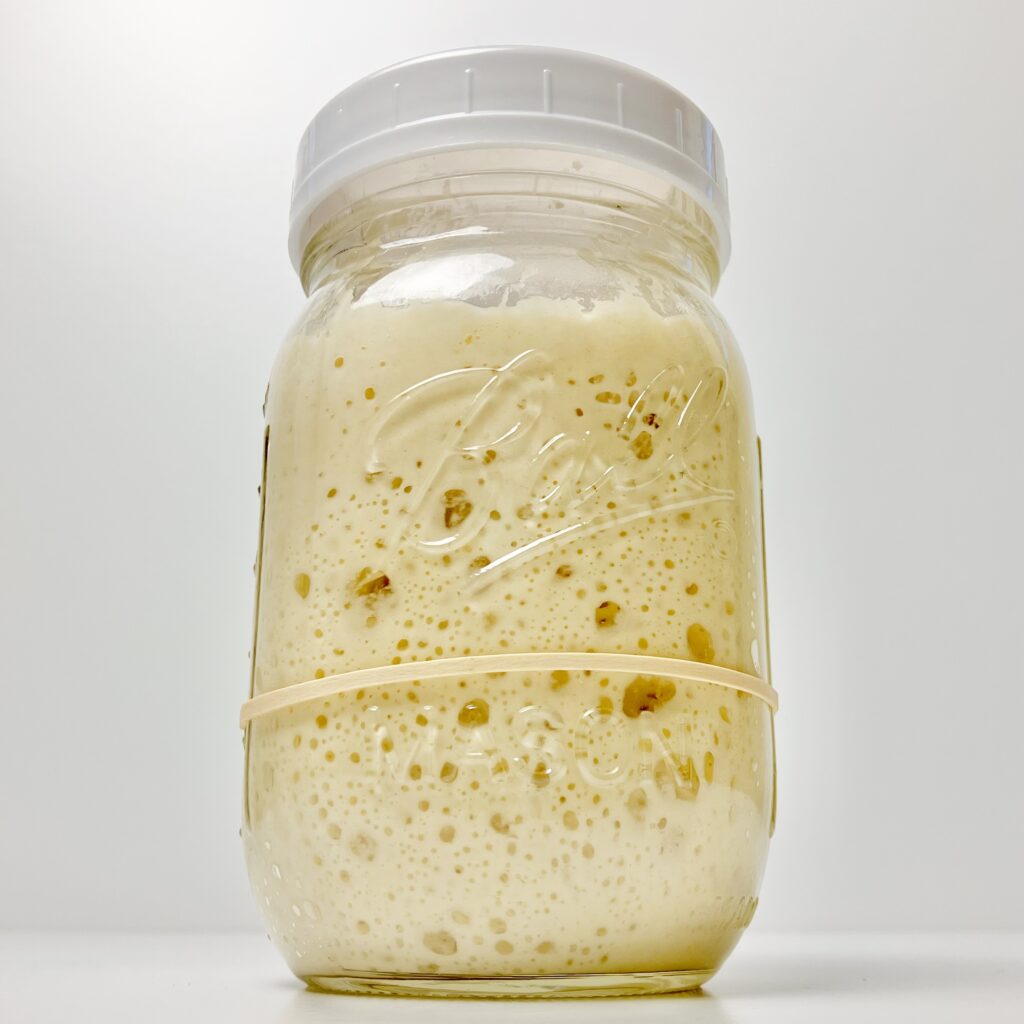
Your starter will double in size sometime between days three to seven (depending on temperature and environment). It may double in size for one or two days. Then, the activity will die down again. After that, the activity will slowly increase until the starter is active, mature, and ready for bread.
What’s going on during this time? Essentially, a fight. I like to call this the fight between good and evil. In the end, good should win. (If it doesn’t, the starter will become moldy.) As the starter begins to ferment for the first time, a variety of bacteria and yeast colonies begin multiplying in the jar. As they fight, a lot of activity is seen. The first “doubling in size” is a surge of this activity. But, this surge will die down, as good overcomes evil. Then, the good guys will slowly begin multiplying until they are strong and sufficient for leavening bread.
A smell may also become present during this time. For the first week (or two, depending on your environment) a neutral or unpleasant smell may be present in the jar. After the initial surge of activity, any unpleasant smell should disappear, and the starter should evolve from smelling neutral (just like a flour/water paste) to pleasant and “yeasty” (as I describe it so often). Other ways to describe the good smell we are looking for might be like stout beer or alcohol.
Last, you may notice a liquid appear on either the top or bottom of your starter sometime between days three and seven. It is easy for the newcomer to mistake this liquid for hooch, but it is actually liquid separation. Hooch appears in a mature starter when it has gone too long between feedings and is hungry. A starter in its first week is not mature, and has not developed the kind of activity necessary to produce hooch. I am not sure why this liquid separation occurs, but it almost always occurs directly after the initial surge of activity.
To fix it, simply feed your starter slightly more flour than usual. I demonstrate this in my video on day four. This may only happen for one feeding, but in rare circumstances (likely, cooler temperatures), it may occur for two or three feedings.
Discard
When it comes to discard, I like to wait until the starter begins smelling good before I begin saving it. This means, for the first week or two, just throw it in the trash. (This is why I like to keep only a small amount of starter while first establishing – in order to limit wastefulness.) Of course, you can save discard before the pleasant smell begins to appear, but who knows what is going on in that concoction. By the time the starter begins smelling “yeasty,” you know good things are happening and it is safe to save.
When you begin to save discard, you can simply keep it in the fridge. All discard (from multiple days, or even weeks) can be piled into one jar. Seal the jar tightly with a lid.
As discard sits in the fridge, it may develop a layer of black-ish liquid on top. This layer of liquid is called “hooch,” and it will get thicker the longer the jar sits in the fridge. Do not remove the hooch until you are ready to use the discard. The hooch protects the starter underneath, and will help keep it from going bad.
When is my starter active, mature, and ready for bread?
Your starter is active, mature, and ready for bread when:
- It is doubling (or more) in size consistently between feedings.
- It can double (or more) in size between feedings at room temperature, without added warmth.
- It passes a float test at its highest point (or, directly before a feeding)
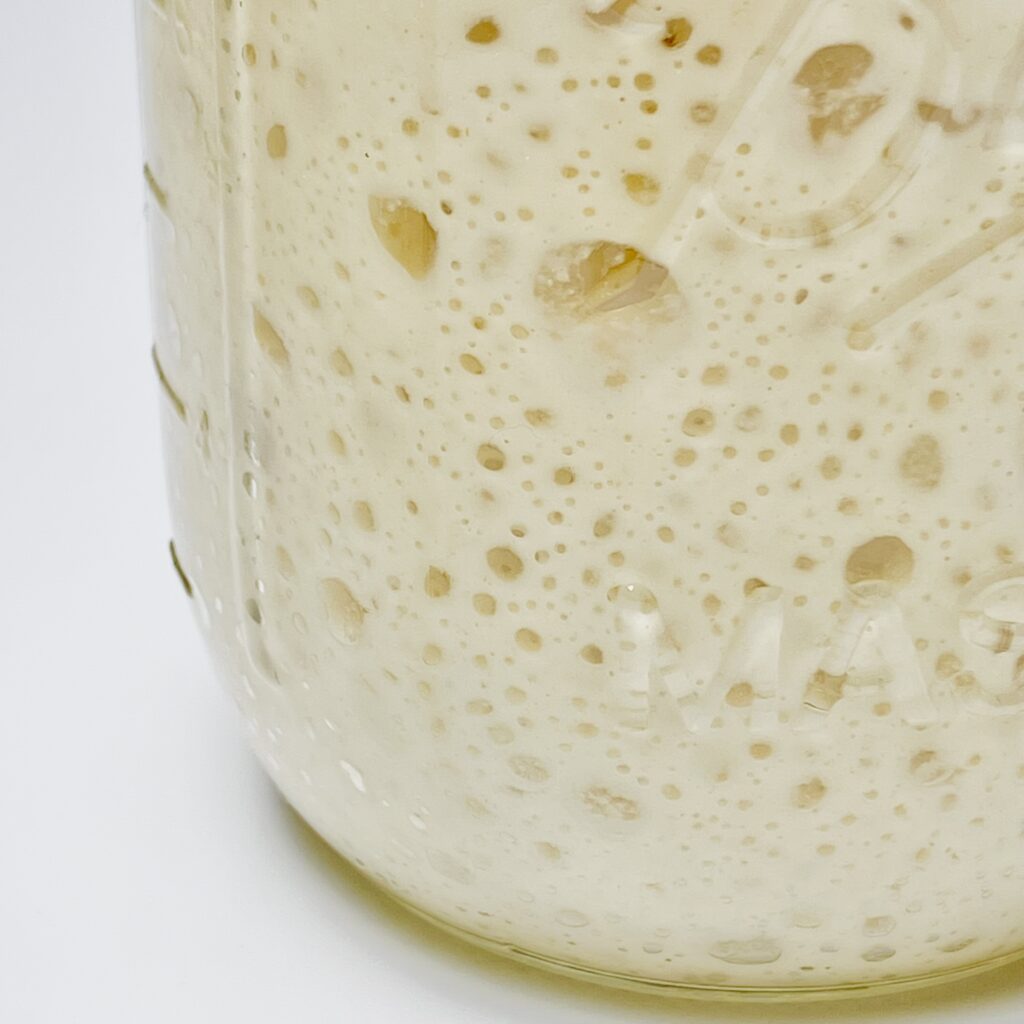
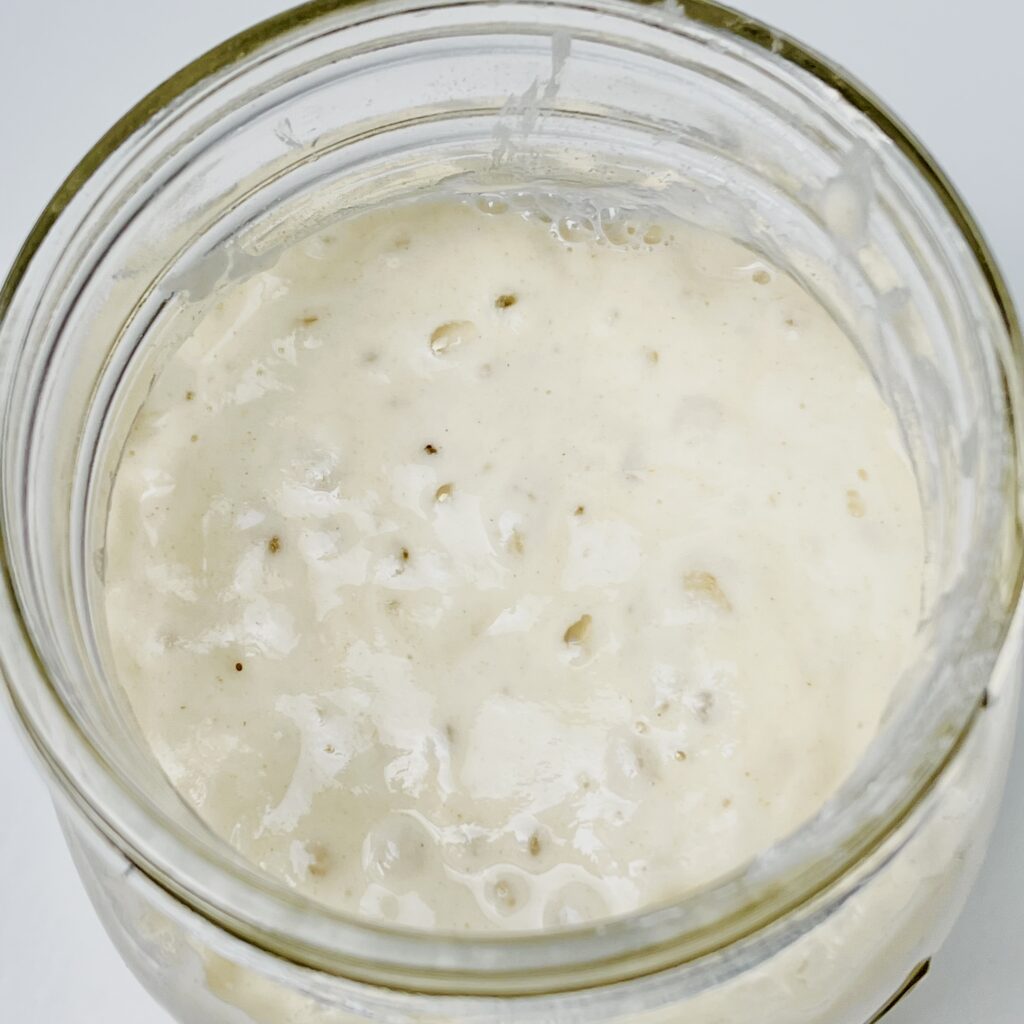
- Lots of bubbles can be seen on the top and sides of the jar
Once your starter meets these requirements, it’s time to attempt bread and find out if it truly is strong enough to leaven. The time it takes to meet these qualifications can be anywhere from two weeks to two months (depending on temperature and environment).
Once your starter truly is active, mature, and ready for bread, it is no longer necessary to keep it in a warm environment all the time. In fact, because the starter is getting stronger, an environment that is too warm will have adverse effects. If your home environment rests between 75-80 F, the feeding ratio will need to be adjusted in order to keep your starter healthy and strong.
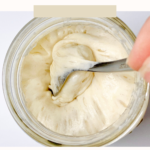
The Float Test
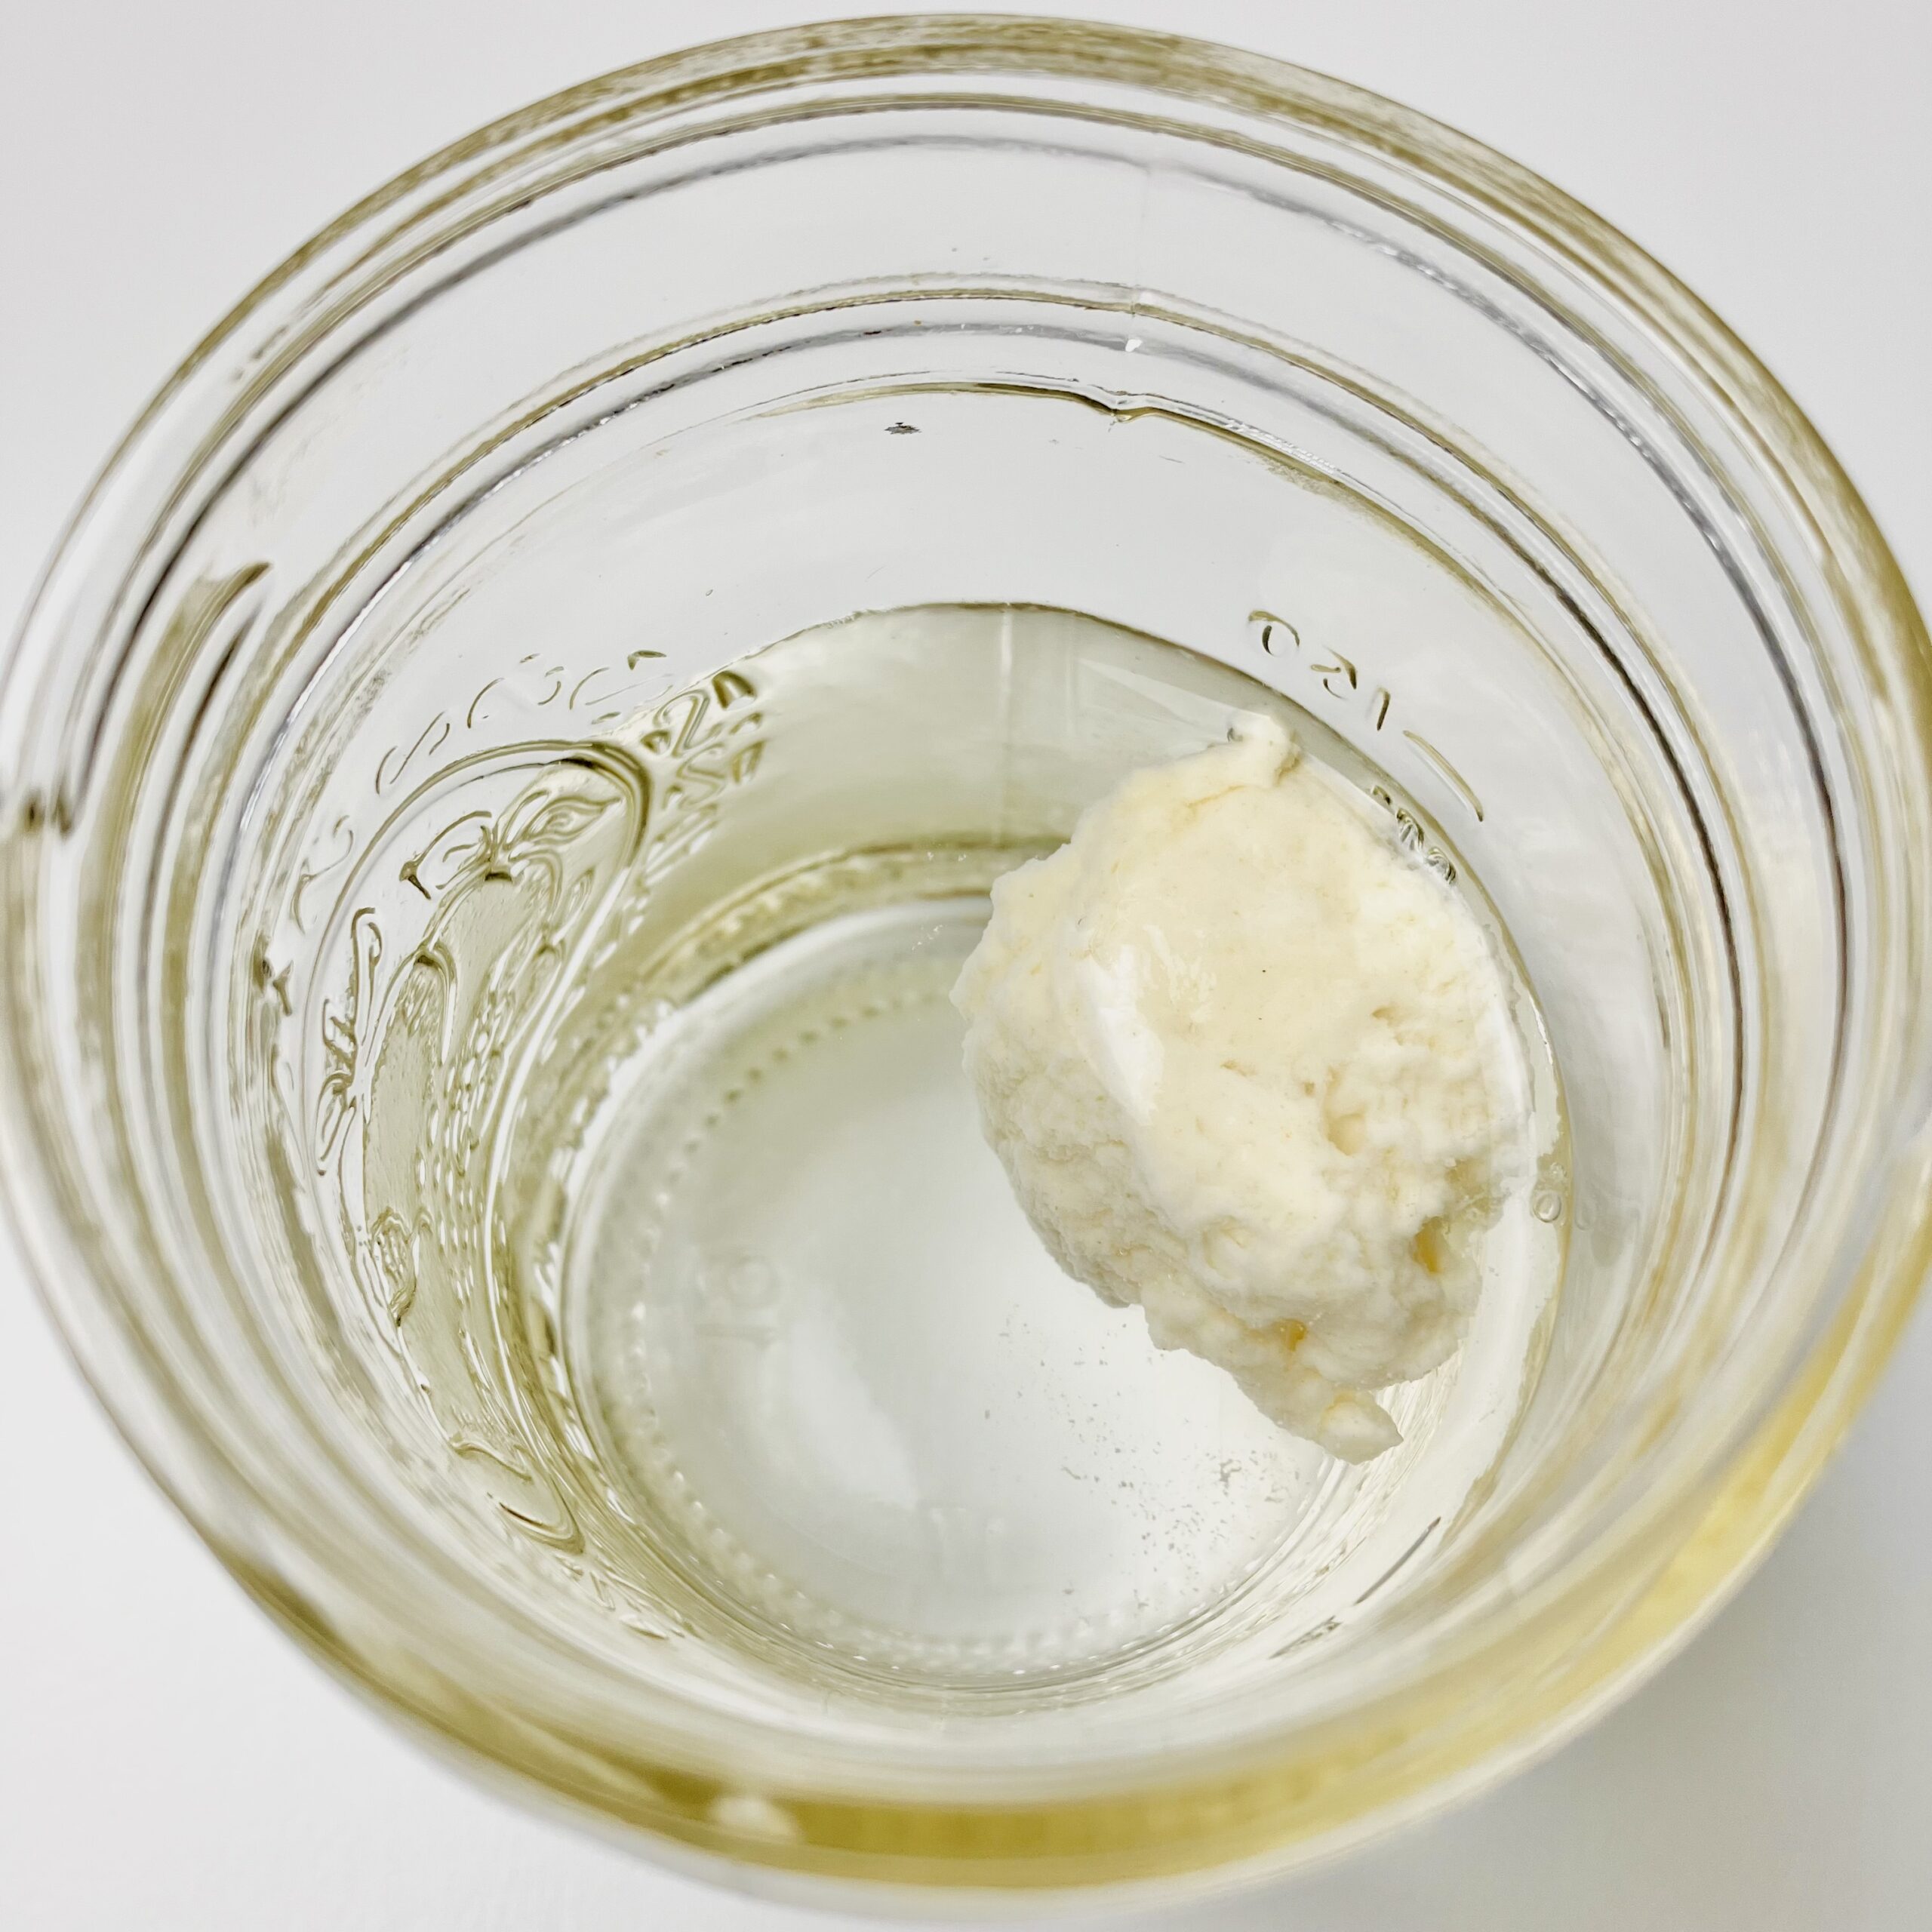
The float test is a method of determining whether sourdough starter is strong enough to leaven bread. It is performed by taking a teaspoon of starter and dropping it into a cup of water. If the starter floats, it should leaven bread satisfactorily. If it sinks, it is either too freshly fed, too far past peak, or too young and immature to leaven bread effectively.
After sourdough starter is fed, the yeast and bacteria present begin multiplying, eating up the flour and breaking down carbohydrates into sugar. When this happens, one of the byproducts is CO2. CO2 can be seen by us through bubbles, which get trapped in the gluten matrix of the starter. These bubbles are responsible for causing the starter to float at a certain point (when there are enough of them).
This means that it is possible for a starter to pass the float test even when there is still plenty of food for the yeast and bacteria to feed on. There is actually a wide range of time that a starter will float in water, from around the time it has doubled in size to a few hours after it has hit its highest point (which can be triple or quadruple in size for a healthy starter).
Once the food source has been demolished, the yeast and bacteria start to get “hungry.” As this happens, they begin a sort of deactivation process as they wait for more food. The CO2 bubbles will begin to diminish and eventually an alcohol (hooch) will form. At this point, a starter is not ideal for leavening bread. Though it can still leaven, the process may be much slower, since the cultures have already begun to deactivate. As the CO2 bubbles disappear, the starter will lose its ability to float. Starter that has gotten to this point can still be replenished and revived through feeding, but is not ideal for leavening a loaf of bread.
It is important to note that some flours are heavier than others and may weigh down the starter, causing it sink when, in reality, it can be used for leavening bread. In addition, gluten-free flours will not float in water, due to the absence of gluten, which helps keep the air bubbles in place and holds everything together.
Altogether, the float test can be a helpful tool, but should not be the only determining factor for readiness in a new starter. The float test can let you know that there is a good amount of activity going on, but it could be deceptive in having you think a starter is mature (since it floats) when, in reality, it still needs more time to feed and become stronger.
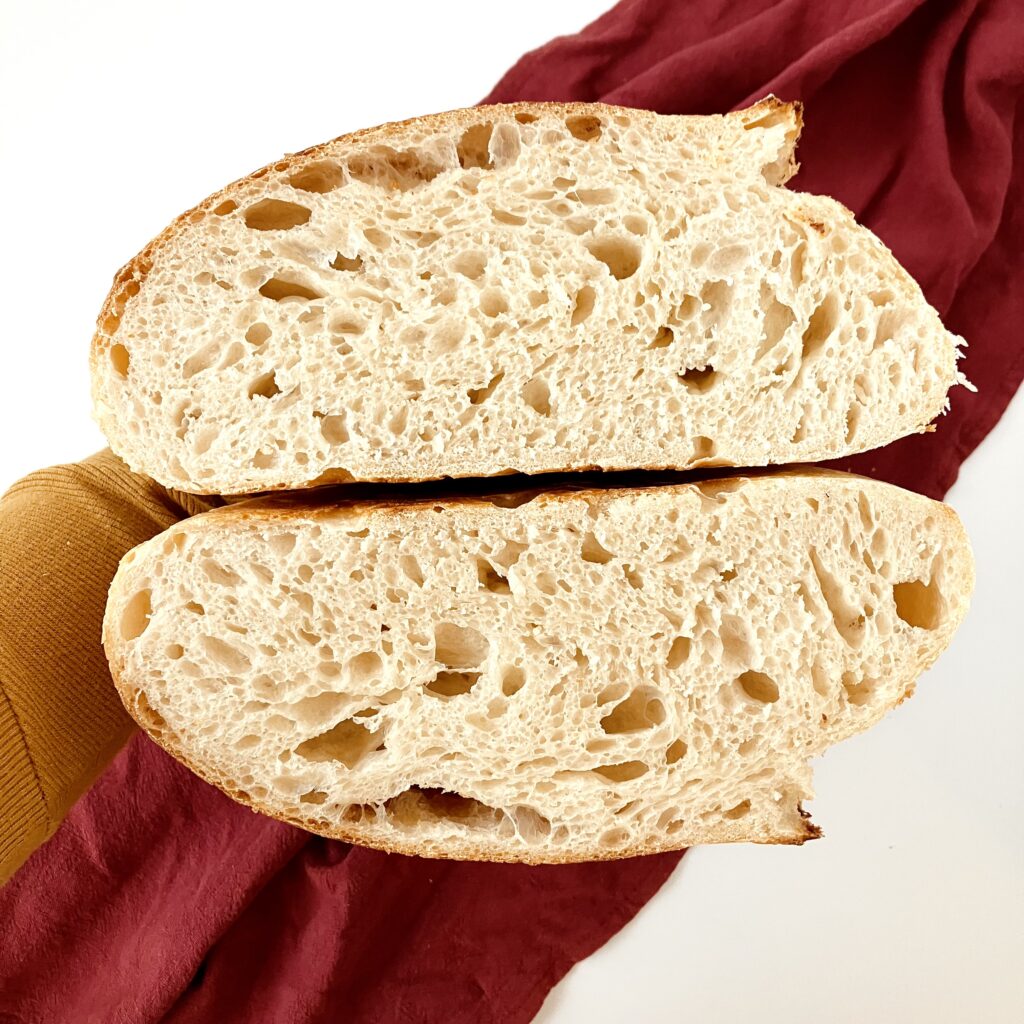
Your First Bread Recipe
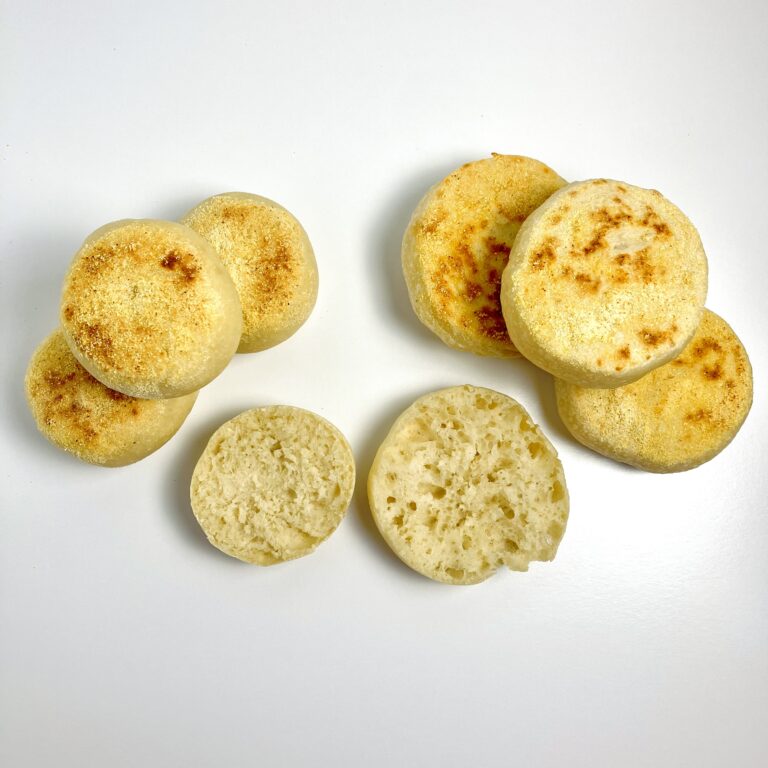
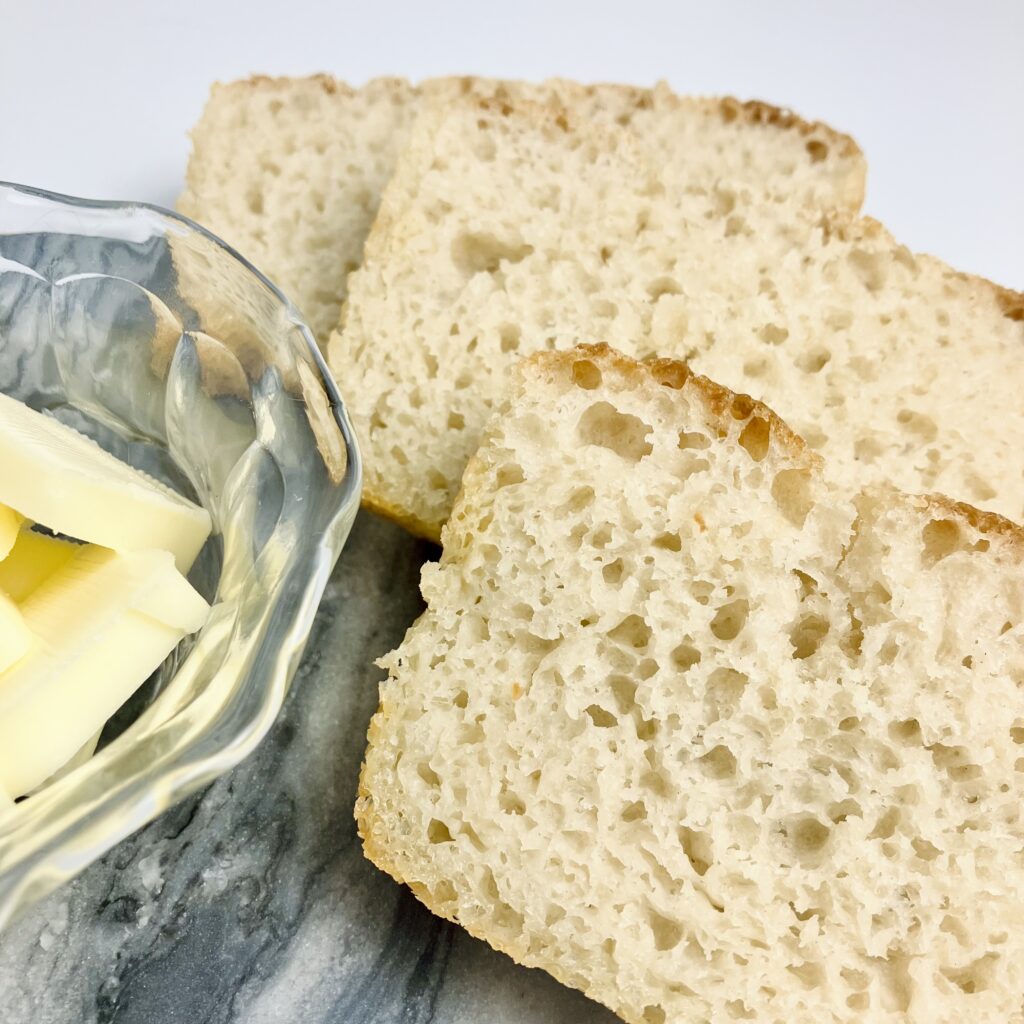
When your starter appears to meet the qualifications and you are ready to try its hand at bread, I highly recommend my batter bread recipe as your first recipe. The reason? Well, making bread can be a difficult process. There are many factors, besides your starter, that can lead to a failed loaf. It is important to know if your starter is strong enough to leaven bread and to make sure this single factor is not the culprit in a potentially failed loaf.
My batter bread recipe simply requires a single mix and a single rise. If the loaf does not rise appropriately, the starter was not ready and likely needs another week of twice daily feedings before trying again. By making batter bread as your first loaf, you are able to truly see if your starter is ready for more advanced projects with minimal effort and a delicious end result. You can find the recipe below:
How to maintain a starter after it is active, mature, and ready for bread
Once your starter is active, mature, and ready for bread, it is likely that you will want to adjust your feeding routine to meet the needs of your desired baking schedule and the temperature of your home. Let us touch on each of these factors below.
Adjusting feeding depending on home temperature
Now that your starter is active and mature, warm temperatures (75-80 F) will cause it to hit peak quicker than ever, and a continued 1:1:1 feeding ratio may not be healthy at this point. If you have been keeping your starter in a proofer or on a seedling mat, this is no longer necessary. Room temperature should be just fine. But, if your room temperature is very warm (75-80 F), you will need to make adjustments to keep your starter healthy.
Adjusting by weight
80 F: Feed your starter a 1:10:10 ratio. This means one part starter to ten parts flour to ten parts water. An example of this would be: 10 g of starter + 100 g of flour + 100 g of water. (Multiply the amount of starter by ten to determine how much flour and water it needs to be fed.) Let it sit for twelve hours, or until the starter reaches its highest point (likely more than double in size), has lots of bubbles, and passes a float test. Then, use it to leaven bread.
The reason we have adjusted the feeding to include a much greater amount of flour and water in proportion to starter for the initial mix is because, at 80 F, the yeast and bacteria will multiply rapidly. We want to make sure there is plenty of food for them to feast on in this twelve hour period, during this rapid multiplication. This way, they do not use up their food source and starve within just a few hours.
If, on the other hand, you are wanting your starter to be ready to use more rapidly than twelve hours, you can always feed it a smaller proportion, or less flour and water. The key to keeping a healthy starter now is to feed your starter with an amount of flour that is equal to or greater than the amount of starter you are feeding. Then, make sure the amount of water included matches the amount of flour fed by weight. Last, a starter will stay healthy when it is fed again at peak, or its highest point. This ensures the yeast and bacteria in your starter never run out of food, and that they are continuing to multiply, stay healthy, and grow strong.
75 F: Feed your starter a 1:6:6 ratio. This means one part starter to six parts flour to six parts water. An example of this would be: 10 g of starter + 60 g of flour + 60 g of water. (Multiply the amount of starter by six to determine how much flour and water it needs to be fed.) Let it sit for twelve hours, or until the starter reaches its highest point (likely more than double in size), has lots of bubbles, and passes a float test. Then, use it to leaven bread.
The reason we have adjusted the feeding to include a much greater amount of flour and water in proportion to starter for the initial mix is because, at 75 F, the yeast and bacteria will multiply rapidly. They will not multiply as rapidly as they would at 80 F, but they will still multiply fairly quickly. We want to make sure there is plenty of food for them to feast on in this twelve hour period, during this rapid multiplication. This way, they do not use up their food source and starve within just a few hours.
If, on the other hand, you are wanting your starter to be ready to use more rapidly than twelve hours, you can always feed it a smaller proportion, or less flour and water. The key to keeping a healthy starter now is to feed your starter with an amount of flour that is equal to or greater than the amount of starter you are feeding. Then, make sure the amount of water included matches the amount of flour fed by weight. Last, a starter will stay healthy when it is fed again at peak, or its highest point. This ensures the yeast and bacteria in your starter never run out of food, and that they are continuing to multiply, stay healthy, and grow strong.
70 F: Feed your starter a 1:2:2 ratio. This means one part starter to two parts flour to two parts water. An example of this would be: 20 g of starter + 40 g of flour + 40 g of water. (Multiply the amount of starter by two to determine how much flour and water it needs to be fed.) Let it sit for twelve hours, or until the starter reaches its highest point (likely more than double in size), has lots of bubbles, and passes a float test. Then, use it to leaven bread.
We have only adjusted the feeding slightly for this temperature, due to the fact that the yeast and bacteria will multiply at a much slower rate than at temperatures of 75-80 F. Feeding your starter a 1:2:2 ratio will be sufficient to keeping it healthy and strong in this twelve hour time period.
The key to keeping a healthy starter now is to feed your starter with an amount of flour that is equal to or greater than the amount of starter you are feeding. Then, make sure the amount of water included matches the amount of flour fed by weight. Last, a starter will stay healthy when it is fed again at peak, or its highest point. This ensures the yeast and bacteria in your starter never run out of food, and that they are continuing to multiply, stay healthy, and grow strong.
65 F: Continue feeding your starter a 1:1:1 ratio. This means one part starter to one part flour to one part water. An example of this would be: 50 g of starter + 50 g of flour + 50 g of water. Let it sit for twelve hours, or until the starter reaches its highest point (likely more than double in size), has lots of bubbles, and passes a float test. Then, use it to leaven bread.
We have not had to adjust the feeding ratios at all for this temperature, due to the fact that the yeast and bacteria will multiply at a much slower rate than at higher temperatures. Feeding your starter a 1:1:1 ratio will be sufficient to keeping it healthy and strong in this twelve hour time period.
The key to keeping a healthy starter now is to feed your starter with an amount of flour that is equal to or greater than the amount of starter you are feeding. Then, make sure the amount of water included matches the amount of flour fed by weight. Last, a starter will stay healthy when it is fed again at peak, or its highest point. This ensures the yeast and bacteria in your starter never run out of food, and that they are continuing to multiply, stay healthy, and grow strong.
In-between temperatures: If your home is kept at temperatures in between any of these variables, you can still keep your starter healthy by following the guidelines above. It is possible to feed your starter 1:3:3, 1:4:4, 1:5:5, 1:7:7, 1:8:8, and 1:9:9 ratios if this is better for your situation. Experiment and find what works best to keep your starter healthy and strong.
Adjusting by volume
If you have not purchased a scale by this point, I highly recommend doing so. For one, in my opinion, figuring calculations such as this by volume over weight is much more difficult. In addition, a kitchen scale is not expensive and will come of such value to your home through your sourdough bread journey. Nonetheless, here are some guidelines to help if you still prefer to measure by volume.
80 F: Feed your starter a 1:20:10 ratio. This means one part starter to twenty parts flour to ten parts water. An example of this would be: 1 tbsp of starter + 20 tbsp of flour + 10 tbsp of water. Using cups instead of tablespoons, this would be approximately 1 tbsp of starter + 1 1/4 cups of flour + 5/8 cups of water. Let it sit for twelve hours, or until the starter reaches its highest point (likely more than double in size), has lots of bubbles, and passes a float test. Then, use it to leaven bread.
The reason we have adjusted the feeding to include a much greater amount of flour and water in proportion to starter for the initial mix is because, at 80 F, the yeast and bacteria will multiply rapidly. We want to make sure there is plenty of food for them to feast on in this twelve hour period, during this rapid multiplication. This way, they do not use up their food source and starve within just a few hours.
If, on the other hand, you are wanting your starter to be ready to use more rapidly than twelve hours, you can always feed it a smaller proportion, or less flour and water. The key to keeping a healthy starter now is to feed your starter with an amount of flour that is at least double (by volume) the amount of starter you are feeding. Then, make sure the amount of water included is half of the amount of flour fed by volume. Last, a starter will stay healthy when it is fed again at peak, or its highest point. This ensures the yeast and bacteria in your starter never run out of food, and that they are continuing to multiply, stay healthy, and grow strong.
75 F: Feed your starter a 1:12:6 ratio. This means one part starter to twelve parts flour to six parts water. An example of this would be: 1 tbsp of starter + 12 tbsp of flour + 6 tbsp of water. Using cups instead of tablespoons, this would be approximately 1 tbsp of starter + 3/4 cup of flour + 3/8 cup of water. Let it sit for twelve hours, or until the starter reaches its highest point (likely more than double in size), has lots of bubbles, and passes a float test. Then, use it to leaven bread.
The reason we have adjusted the feeding to include a much greater amount of flour and water in proportion to starter for the initial mix is because, at 75 F, the yeast and bacteria will multiply rapidly. They will not multiply as rapidly as they would at 80 F, but they will still multiply fairly quickly. We want to make sure there is plenty of food for them to feast on in this twelve hour period, during this rapid multiplication. This way, they do not use up their food source and starve within just a few hours.
If, on the other hand, you are wanting your starter to be ready to use more rapidly than twelve hours, you can always feed it a smaller proportion, or less flour and water. The key to keeping a healthy starter now is to feed your starter with an amount of flour that is at least double (by volume) the amount of starter you are feeding. Then, make sure the amount of water included is half of the amount of flour fed by volume. Last, a starter will stay healthy when it is fed again at peak, or its highest point. This ensures the yeast and bacteria in your starter never run out of food, and that they are continuing to multiply, stay healthy, and grow strong.
70 F: Feed your starter a 1:4:2 ratio. This means one part starter to four parts flour to two parts water. An example of this would be: 1/4 cup of starter + 1 cup of flour + 1/2 cup of water. Let it sit for twelve hours, or until the starter reaches its highest point (likely more than double in size), has lots of bubbles, and passes a float test. Then, use it to leaven bread.
We have only adjusted the feeding slightly for this temperature, due to the fact that the yeast and bacteria will multiply at a much slower rate than at temperatures of 75-80 F. Feeding your starter a 1:4:2 ratio will be sufficient to keeping it healthy and strong in this twelve hour time period.
The key to keeping a healthy starter now is to feed your starter with an amount of flour that is at least double (by volume) the amount of starter you are feeding. Then, make sure the amount of water included is half of the amount of flour fed by volume. Last, a starter will stay healthy when it is fed again at peak, or its highest point. This ensures the yeast and bacteria in your starter never run out of food, and that they are continuing to multiply, stay healthy, and grow strong.
65 F: Continue feeding your starter a 1:2:1 ratio. This means one part starter to two parts flour to one part water. An example of this would be: 1/2 cup of starter + 1 cup of flour + 1/2 cup of water. Let it sit for twelve hours, or until the starter reaches its highest point (likely more than double in size), has lots of bubbles, and passes a float test. Then, use it to leaven bread.
We have not had to adjust the feeding ratios at all for this temperature, due to the fact that the yeast and bacteria will multiply at a much slower rate than at higher temperatures. Feeding your starter a 1:2:1 ratio will be sufficient to keeping it healthy and strong in this twelve hour time period.
The key to keeping a healthy starter now is to feed your starter with an amount of flour that is at least double (by volume) the amount of starter you are feeding. Then, make sure the amount of water included is half of the amount of flour fed by volume. Last, a starter will stay healthy when it is fed again at peak, or its highest point. This ensures the yeast and bacteria in your starter never run out of food, and that they are continuing to multiply, stay healthy, and grow strong.
In-between temperatures: If your home is kept at temperatures in between any of these variables, you can still keep your starter healthy by following the guidelines above. It is possible to feed your starter any ratio in between, depending on what is best for your situation. Experiment and find what works best to keep your starter healthy and strong.
Maintaining a starter at room temperature
A starter maintained at room temperature will simply need to be fed the ratios above every twelve hours. The ratios can be adjusted to fit your desired preferences for maintenance, or the amount needed for the bread recipe you are wanting to make. Use the starter to leaven bread when it has reached its highest point (likely more than double in size), has lots of bubbles, and passes a float test. Extra starter not used for a feeding or to leaven bread can be saved in the refrigerator as discard.
Maintaining a starter in the refrigerator
A starter maintained in the refrigerator will only need to be fed once a week. In all actuality, a starter can go much longer than this between feedings when stored in the refrigerator, but a once-a-week feeding is best practice.
Twelve hours before you are ready to make bread, take your starter out of the refrigerator and feed it according to the ratios described above, according to your home’s temperature. If it has been longer than one week since its last feeding, it may be necessary to give the starter two or three feedings before trying its hand at bread. Leave the starter on the counter until it has reached its highest point (likely more than double in size), has lots of bubbles, and passes a float test. Then, use it to leaven bread. After using what is needed for bread, the remaining starter in the jar can either:
- Be stored directly in the fridge without feeding OR
- Be fed a 1:1:1 ratio (by weight) or a 1:2:1 ratio (by volume) and placed in the refrigerator until the next week.
How to adjust the amount of starter for a recipe
By weight:
To know how much to feed your starter based on the amount of starter a recipe calls for, begin by taking the amount of starter needed and divide by two. So, if a recipe calls for 100 g of starter, we will divide this number by two to get 50.
100 / 2 = 50 g
50 g is the amount of flour and the amount of water that needs to be mixed together with some of your starter in order to create 100 g of starter for the recipe (plus a little extra to replenish your stash).
The amount of starter that needs to be added should be equal to or less than the amount of flour added. So, in this example, we can add 50 g or less starter to the mix. Use your knowledge of the environment and how long you are wanting the starter to take to reach peak to help you determine a number. It is possible to simply take a spoonful of starter, drop it in a jar, then add 50 g of flour + 50 g of water and mix well. Once the starter hits peak, however long that takes, it is ready to use.
In the end, you want to end up with a little bit more starter than the recipe calls for. This ensures that there is plenty of starter leftover to replenish your stash and to continue making bread.
By volume:
To know how much to feed your starter based on the amount of starter a recipe calls for, begin by taking the amount of starter needed and divide by three. So, if a recipe calls for 1 cup of starter, we will divide this by three to get 1/3.
1 cup / 3 = 1/3 cup
1/3 cup is the amount of water needed to feed your starter. Double this amount to know how much flour to add.
1/3 X 2 = 2/3 cup
2/3 cup is the amount of flour that should be used to feed your starter. 1/3 cup of water + 2/3 cup of flour = 1 cup of starter.
Mix these amounts with a little bit of your starter to obtain the amount you need for the recipe (plus a little extra to replenish your stash).
The amount of starter that needs to be added should be equal to or less than the amount of water added. So, in this example, we can add 1/3 cup or less starter to the mix. Use your knowledge of the environment and how long you are wanting the starter to take to reach peak to help you determine a number. It is possible to simply take a spoonful of starter, drop it in a jar, then add 2/3 cup of flour + 1/3 cup of water and mix well. Once the starter hits peak, however long that takes, it is ready to use.
In the end, you want to end up with a little bit more starter than the recipe calls for. This ensures that there is plenty of starter leftover to replenish your stash and to continue making bread.
Your second bread Recipe
Once you have made a successful loaf of batter bread, it is time to choose a recipe and repeat it until it is mastered.
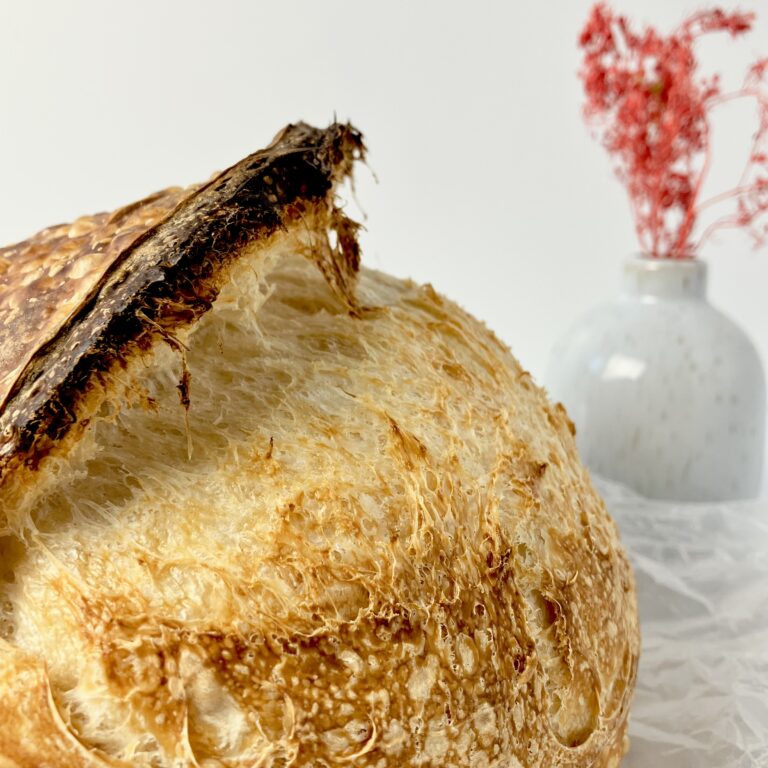
When it comes to sourdough, many people begin with, and stick with, Artisan bread, which can be quite a learning adventure. Artisan bread is higher in hydration than other styles, which simply means it contains more water. A wetter dough has its pros and cons, and is simply different to work with, learn, and master than other styles. My basic country loaf is linked below:
If the chewy interior, crispy exterior, a rounded shape are not your preference, a sandwich loaf may be better to begin with. My basic white sandwich bread recipe is low in hydration, meaning it makes a stiffer dough that can easily be kneaded in a stand mixer, or by hand, in ten minutes. This recipe will resemble the kind of bread you may be used to buying from the store, with a much softer crumb than an Artisan loaf. If this is more your cup of tea, I recommend starting here for your first advanced loaf.

A note on gluten-Free Starters
Gluten-free starters will be harder to judge in terms of readiness. Some gluten-free flours will double in size, while others will not. A gluten-free starter that will double in size is typically made from whole grains, such as: buckwheat, chickpea, or brown rice.
Due to the absence of gluten, the starter cannot hold in air bubbles in the same way that a regular starter can. This means that a gluten-free starter will not pass a float test and it may be more difficult to see bubbles on the sides of the jar.
When a gluten-free starter is ready, you will be able to see some bubbles surfacing on the top of the jar, and may notice gaps in the mixture on the sides of the jar. In addition, the starter should still have a strong “yeasty” smell, like alcohol or stout beer. When it is at peak, it should have risen by at least 25% (or more, depending on the flour).
It is best practice to wait at least fourteen days before putting your gluten-free starter to the test. If temperatures are cool in your home, it may be wise to wait a month.
Despite not showing the same signs of readiness, a gluten-free starter contains the same good yeast and bacteria as a starter containing gluten, and will function just as well. Though the absence of gluten will cause some differences, a gluten-free starter can leaven just the same.
The video
Long before writing this article, I made a (fairly low-quality, sorry) video demonstrating how to make a starter from scratch. In the video, I make two starters: one which is kept in a warmer environment, and another kept in a cooler one. This way, you can observe the differences in each and be confident you are on the right track in your journey.
I also walk you through the feeding process (using a scale measuring grams), and mention how to deal with issues that may come up (such as liquid separation).
You can find a very broken-down segment of time stamps for this video by heading directly to YouTube and checking the description. This way, you can pop on and off the video as needed while you are making your own starter in your own home.
Watch the video below:
Congrats!
Congratulations on making it this far! If you have read through all of this information, watched the video, and even made your own starter from it – wow! You have just gained so much knowledge! I cannot wait to see where your sourdough journey takes you.
If you still have questions or confusions at this point, feel free to leave a comment below or contact me.
Best of luck and happy baking!
Join the email list
Join the email list to be notified when a new recipe or blog post comes out. No spam, just sourdough. Unsubscribe at any time.
Recent POSTS