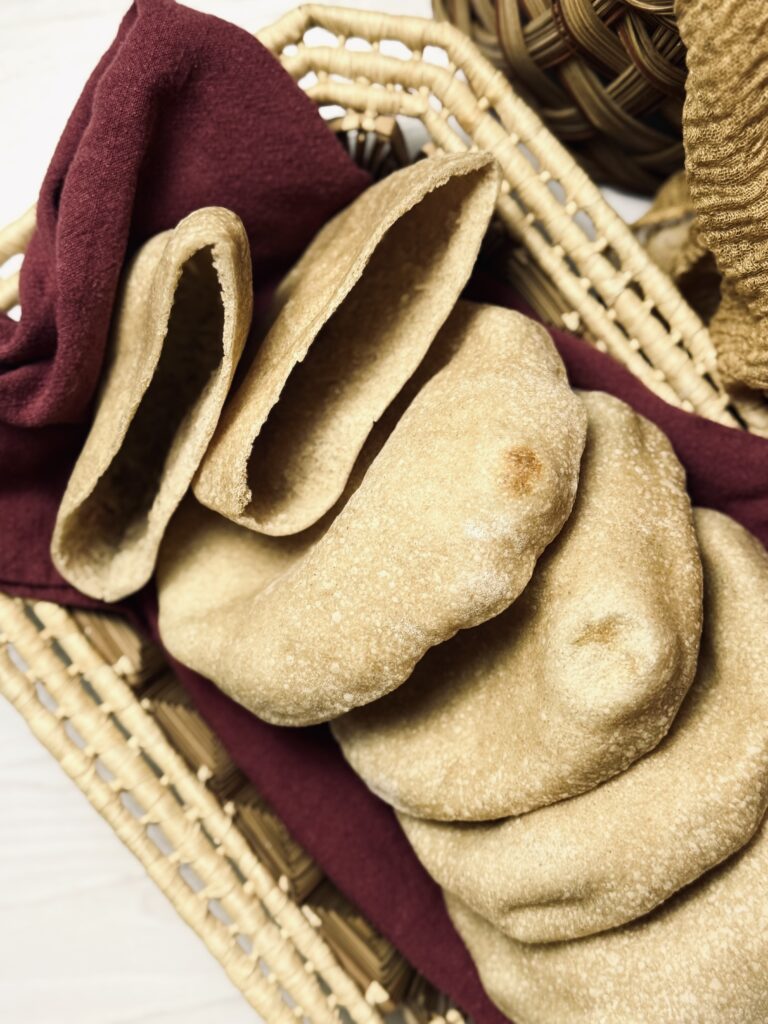
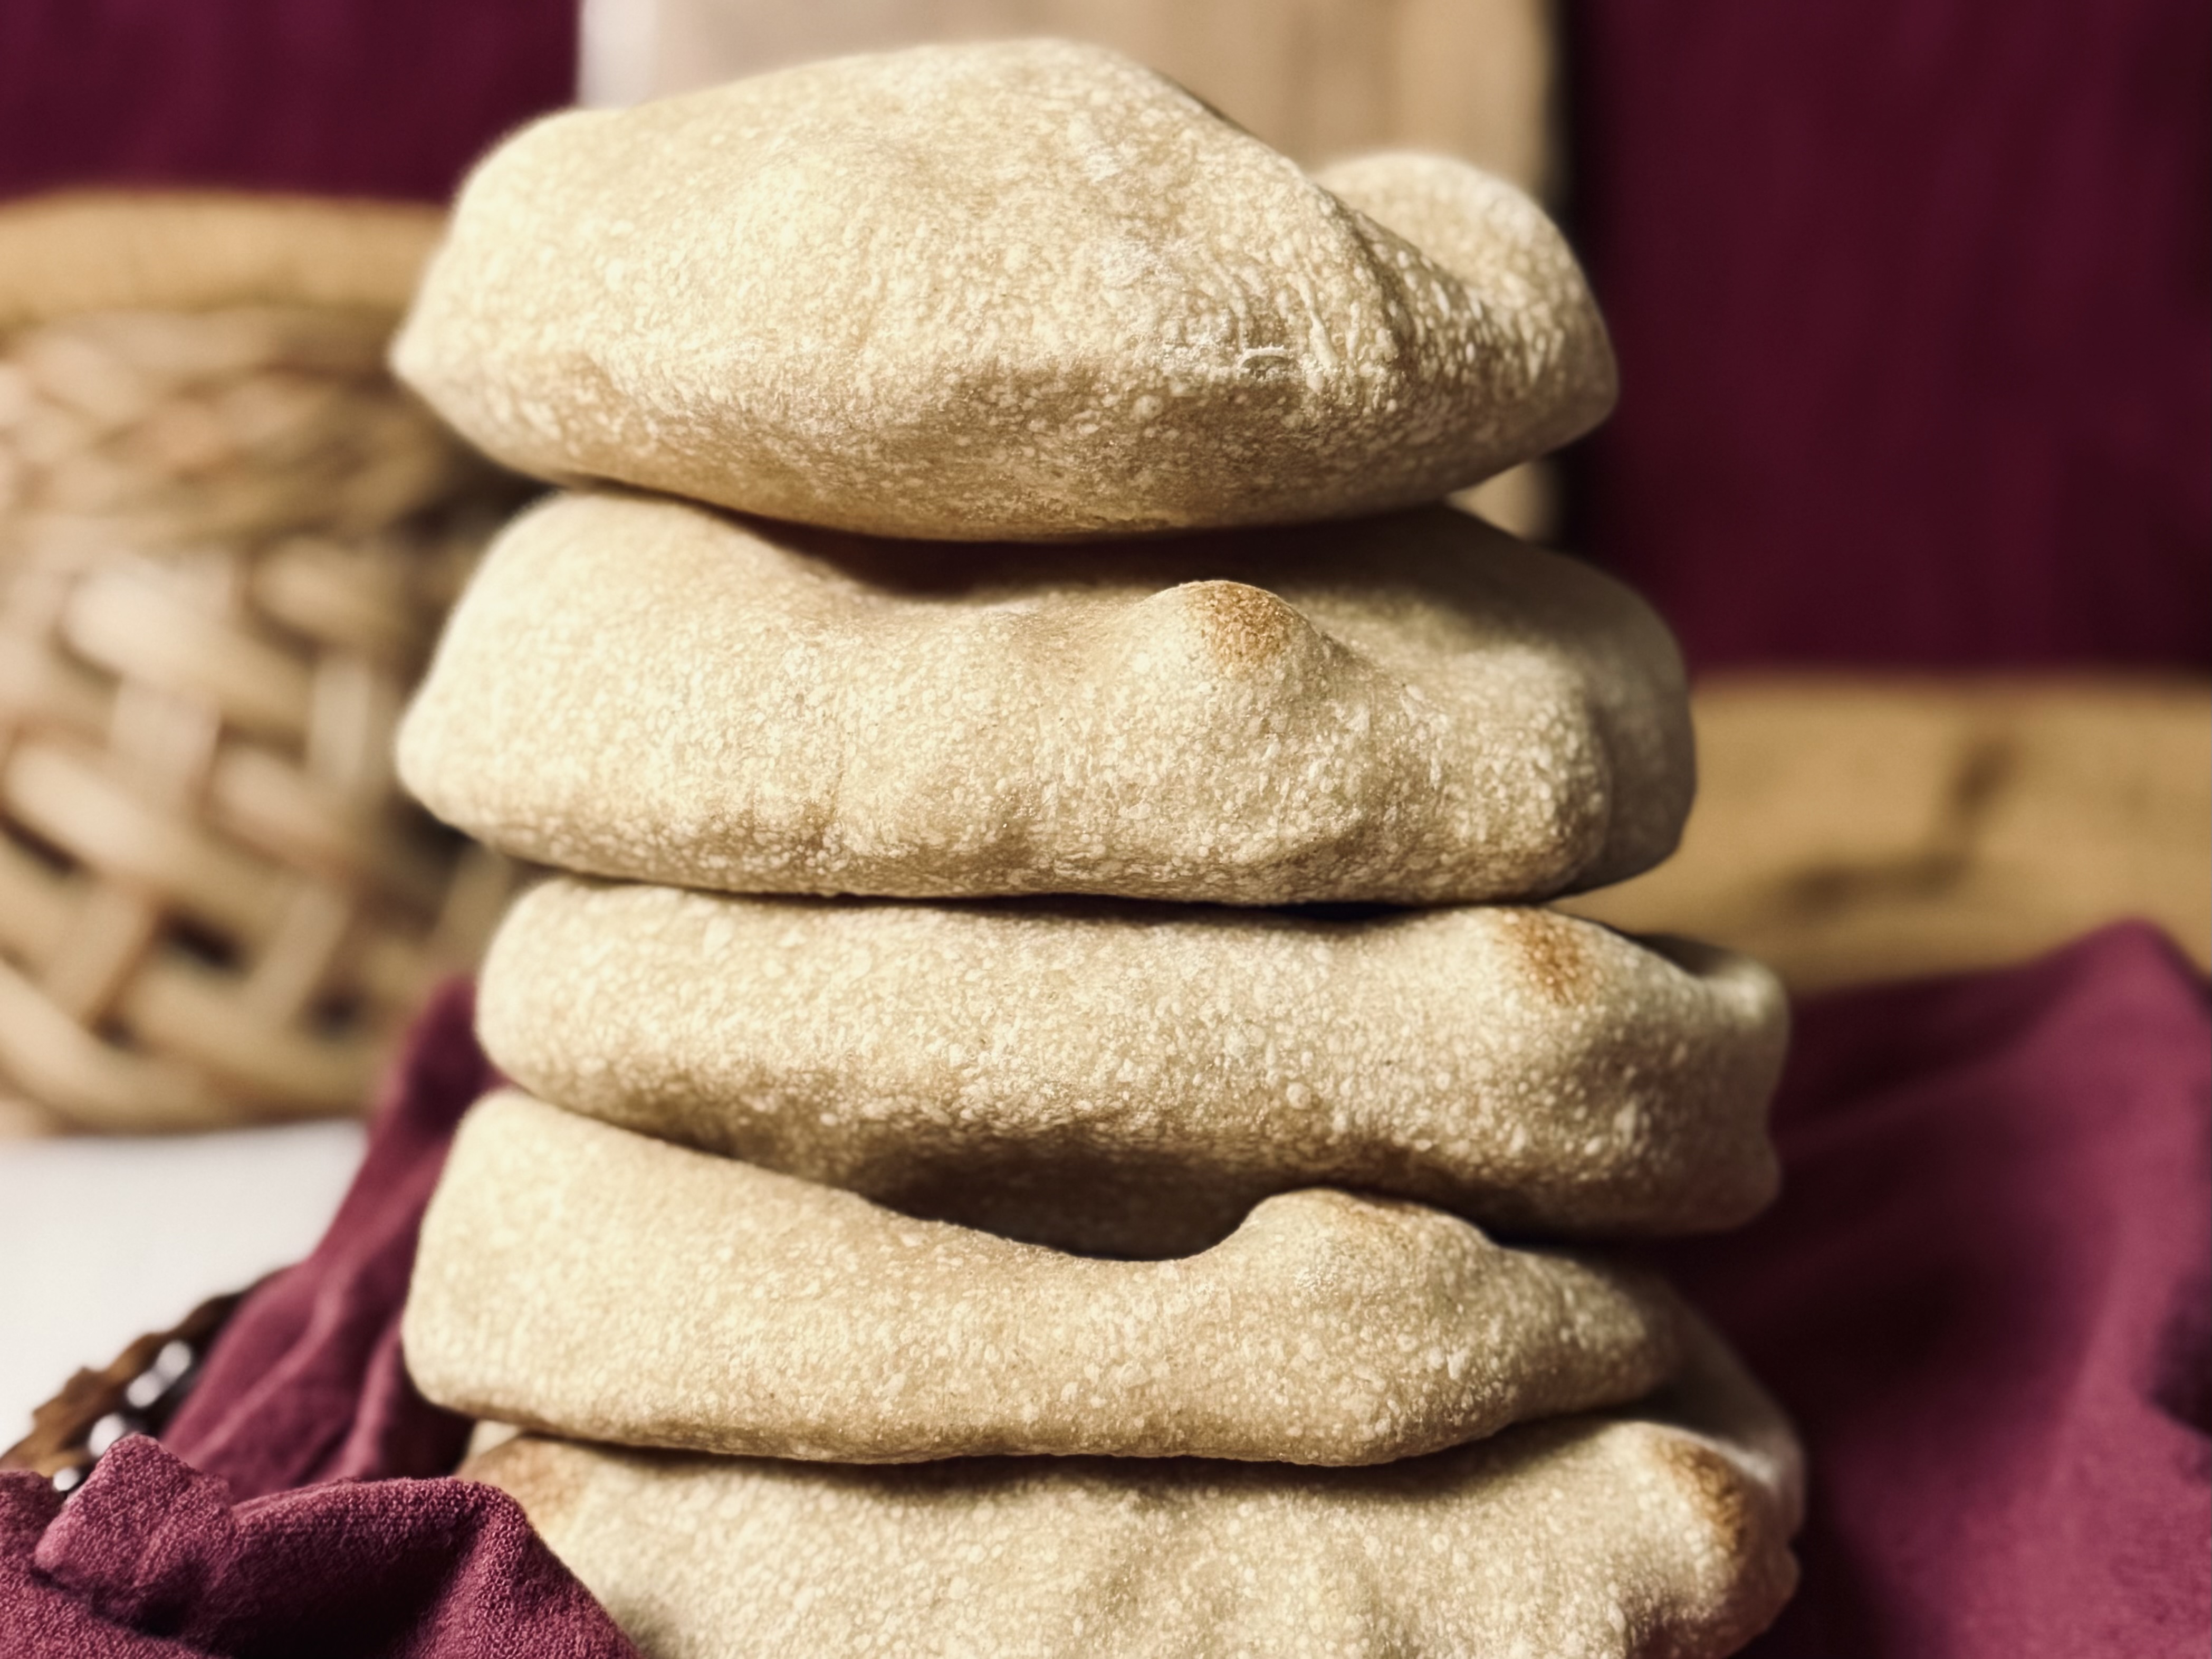
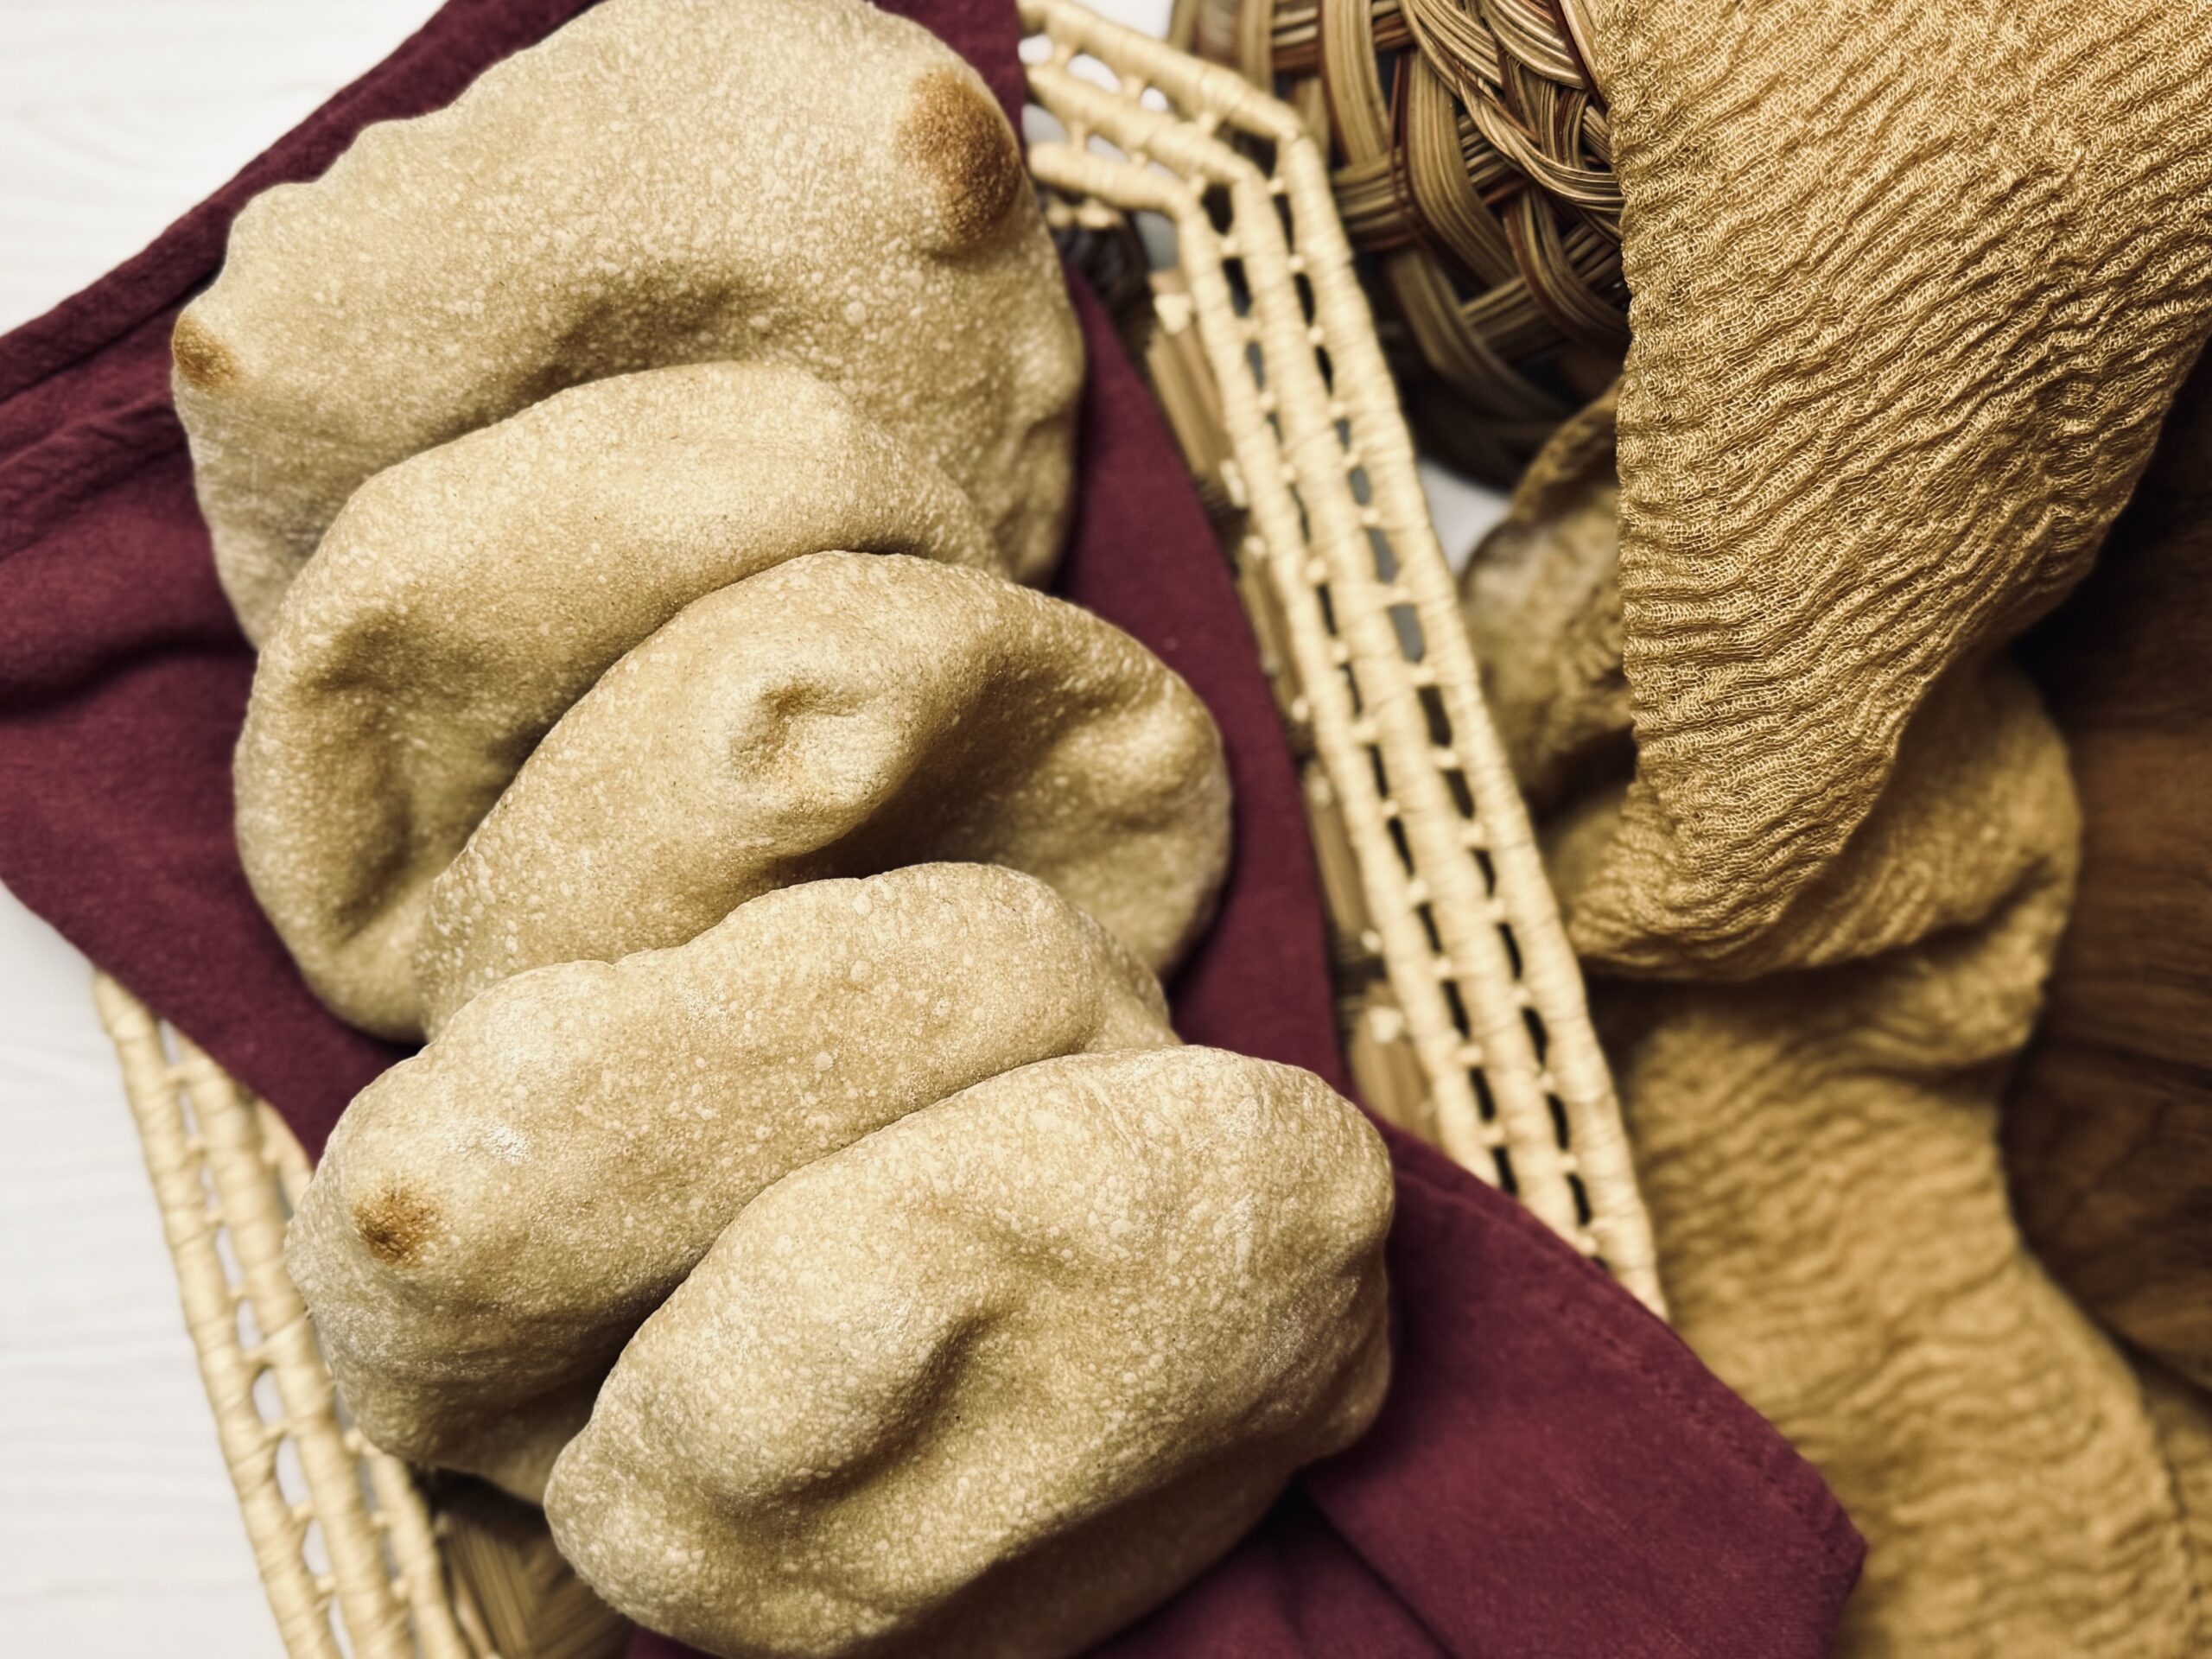
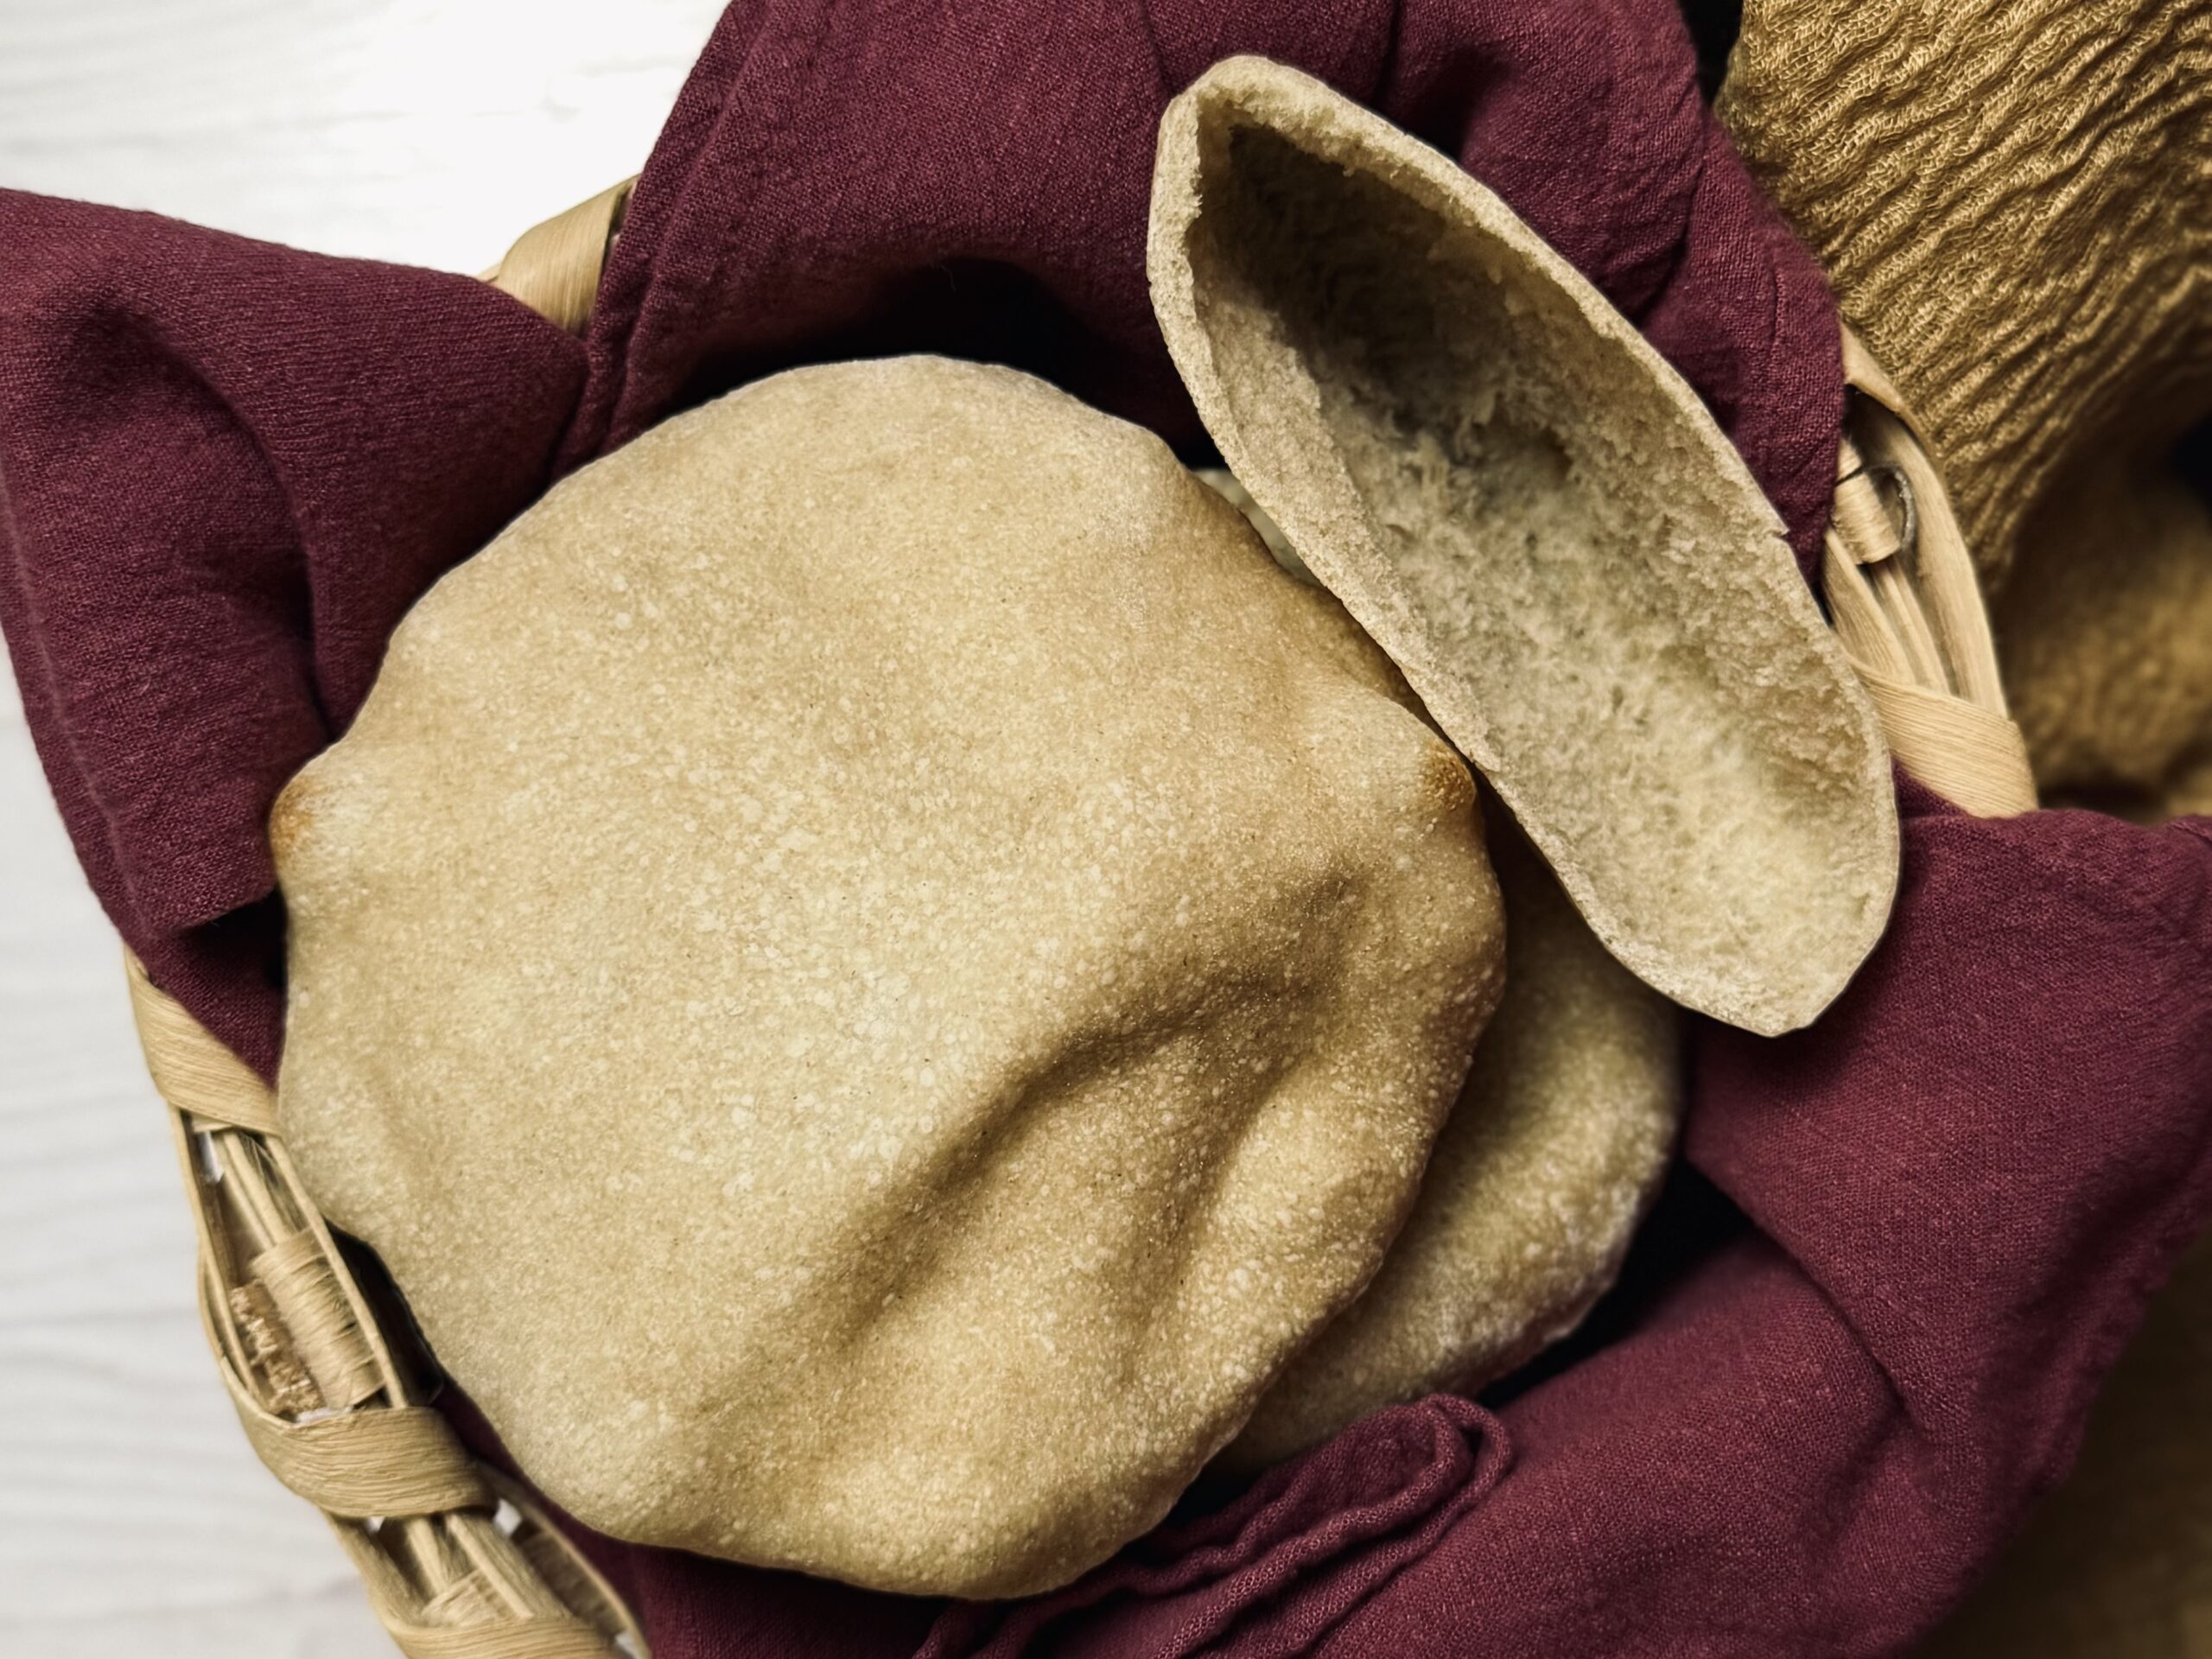
You can’t go wrong with this recipe! This simple flatbread puffs up beautifully in the oven, creating a perfect pocket for sandwiches, dips, or a quick snack. With just a few basic ingredients, you’ll have fresh, warm pitas that are miles better than store-bought. Plus, watching them rise and fill with air like little bread balloons is pure kitchen magic!
What Is Pocket Pita?
A pocket pita is a round, soft flatbread that puffs up when baked, creating a hollow space inside. This “pocket” makes it perfect for stuffing with meats, veggies, and spreads like hummus. Pita bread has been eaten for thousands of years, especially in the Middle East and Mediterranean regions. People love using it for sandwiches, dipping into soups and sauces, or even tearing it into pieces to scoop up food. Whether warm from the oven or toasted for extra crunch, pocket pita is a delicious and versatile bread!
What I Love About This Recipe
One of the things I love most about this recipe is that pocket pitas will puff up even without perfect gluten development or fermentation. That means you don’t need to stress about getting everything just right—this dough is forgiving, and you’ll still end up with beautifully puffed pitas every time. It’s a recipe that delivers great results without requiring perfection.
I also choose to bake my pitas in a very hot oven rather than cooking them on the stovetop. While stovetop pitas can sometimes fail to puff, baking ensures that all of them rise properly—8 out of 8 every time! The trade-off is a lighter crust instead of the deep golden color that comes from frying, but to me, the pocket matters more. Finally, I incorporate some whole wheat flour for a richer flavor and a slightly darker color, adding just a bit more depth to this already delicious bread.
All The "Why's"
Flour Choice
I prefer using bread flour in all my bread recipes, especially those with lower hydration. While gluten development isn’t crucial for pitas to puff, it does help create a stronger network for trapping steam, leading to a better rise. If you decide to use a different flour, keep in mind that the water content may need adjusting. The goal is a smooth, soft dough that’s pliable but not sticky. For this recipe, I use King Arthur Bread Flour, which has a protein content of about 12.7%.
I also include a portion of whole wheat flour to add depth to both flavor and color. Since these pitas are baked rather than cooked on the stovetop, the crust tends to be lighter in color. The whole wheat helps deepen the hue, preventing the bread from looking too pale. For this, I use King Arthur Whole Wheat Flour.
Salt enhances the flavor of bread by bringing out the natural taste of the wheat and the complex acids and alcohols produced during fermentation. It also affects the dough’s structure, acting as a tightening agent that makes the dough more elastic and strong—though this isn’t a major factor in pita bread. Because salt strengthens the dough, it also slows fermentation, a detail always considered in bread baking since salt is essential for flavor.
I prefer using fine salt because it dissolves more easily into the dough. I also choose salts without anti-caking agents and particularly love Redmond Real Salt for its pure ingredients and natural texture. Despite lacking additives, it remains free-flowing and easy to work with. In all my recipes, I follow the standard 2% salt ratio unless otherwise noted.
Water
Water not only hydrates the dough, but also activates enzymes that feed the yeast. It helps create a more extensible (stretchy) dough, making it easier to roll out. Since this is a relatively stiff dough, we need just enough water to bring it together without making it overly sticky. The goal is a smooth, soft, and pliable dough that’s easy to work with. If you’re making this recipe for the first time or using a different type of flour, consider holding back a small amount of water and adjusting as needed.
Oil
Fat helps lock in moisture, keeping the dough soft and easy to work with. It also prevents the crust from drying out, ensuring the pitas stay pliable and the pockets remain flexible. For this recipe I went with a neutral oil (any will work) over other options, like butter or lard, purely for simplicity's sake.
Sourdough Starter
Your sourdough starter is the key to a quality fermentation. I've written bunches on the sourdough starter here. I prefer to use unfed starter, which is 12-16 hours old (depending on my timing and the recipe). My starter is well-maintained, with a strong yeast population and a balanced acid load, which helps create a vigorous and effective fermentation that does not negatively impact my dough.
I prefer to mix this dough at night for an overnight bulk fermentation at 70 F (21 C), meaning I usually use my sourdough starter at the younger mark: 12 hours old. At this point, it isn't as vigorous as, say, a starter at 16 hours old. To compensate, I add a little extra to my dough, which ensures a strong and vigorous fermentation.
Now, you may be thinking - doesn't that just mean my dough will overproof faster? Only if your starter contains an excess of lactic acid. Otherwise, the additional starter is only beneficial to fermentation, especially if your gluten network is solid and the dough can ferment properly.
While pitas will puff even with minimal fermentation, a well-developed dough creates better flavor and more consistent results. As fermentation progresses, the dough gains complexity from natural acids and gases, while the gluten relaxes, making it easier to roll out. This prevents the dough from shrinking back and helps the pitas puff evenly in the oven, giving you perfect, airy pockets every time.
Low Hydration
The term “low hydration” means this dough contains less water than many other bread recipes, making it firmer and easier to handle. With an approximate hydration of 63%, it is soft and supple—malleable enough to shape easily but strong enough to hold its structure. While the dough may feel slightly tacky at first, it should not stick to your hands or the counter when kneading. This balance of moisture ensures a smooth, workable dough that’s easy to roll out.
This consistency is ideal for pita pockets because it allows them to be shaped effortlessly. The dough has just enough water to stay pliable but not so much that it becomes difficult to roll out thin and even. Since achieving a thin, uniform shape is key to getting a well-puffed pocket, this hydration level makes the process more forgiving. Whether you're a beginner or an experienced baker, working with this dough makes it easier to create beautifully round and airy pitas.
Another advantage of lower hydration is a milder flavor. Stiffer doughs—and even stiff sourdough starters—tend to discourage the growth of bacteria that produce lactic and acetic acids, which contribute to sourness. As a result, this dough develops a more neutral, wheat-forward flavor rather than a tangy one. This makes it a great base for both savory and slightly sweet fillings, letting the ingredients shine without too much fermentation acidity competing for attention.
Mixing
Even though gluten isn’t essential for pita pockets to puff, I still prefer to knead this dough. Why? Kneading helps create a more consistent texture and increases the chances of the dough performing exactly as expected in the oven. It also strengthens elasticity, making the dough easier to roll out thinly and evenly, which is key for well-shaped pitas. While pitas don’t require an extensive gluten network like other breads, a bit of kneading ensures the dough is smooth, cohesive, and easy to handle.
I knead this dough as I would for most breads, using my stand mixer to make the process easier. In my Ankarsrum mixer with the dough roller, I knead for about 8–10 minutes, but you can use any stand mixer or knead by hand. The goal is to transform the dough from a shaggy, rough mass into a smooth, soft ball that holds together well. When properly kneaded, the dough should stretch slightly rather than tear immediately when you pull a piece of it. This balance of strength and flexibility makes shaping and baking much more predictable, leading to consistently great pita pockets.
Bulk Fermentation
As I mentioned before, while pitas will puff even with minimal fermentation, a well-fermented dough enhances both flavor and consistency. The natural acids and gases produced during fermentation create a more complex taste and improve the dough’s texture, making it easier to roll out and shape. I find it most convenient to let bulk fermentation happen overnight—about ten hours at 70°F (21°C). During this time, I look for the dough to double in size before moving on to pre-shaping and final shaping in the morning.
That said, there’s no need to stress over bulk fermentation! Pita dough is forgiving, and even if it’s slightly under- or over-fermented, you can still achieve great results. If the dough ferments a little less, it may be a bit tighter but will still puff in the oven. If it goes a little longer, the flavor may deepen slightly, but as long as it hasn’t collapsed, it will still work just fine. The key is to focus on a smooth, workable dough rather than aiming for perfection—pita pockets are more flexible than they seem!
Shaping + Final Proof
I find that using both a pre-shape and final shape method works best for this dough. Pre-shaping helps divide the dough into even portions and forms them into smooth rounds, making rolling easier later on. It also gives the dough a little extra fermentation time, which can enhance flavor and texture—something I personally love. Once shaped into balls, the dough only needs a short rest to relax before rolling.
After the final shaping, when the dough is rolled into thin discs, it’s important to let it rest just long enough to prevent shrinkage. Unlike other breads, pitas don’t need a long proofing time—just enough to keep the dough soft and pliable. While the dough is relaxing, it’s the perfect time to preheat your oven as hot as possible. When the relaxed dough meets the intense heat, it will puff dramatically, creating those beautiful, airy pockets that make pita bread so special.
Baking Method
For this recipe, I crank my oven to the highest temperature possible. If your oven only goes up to 500°F (260°C), that will work, but if it reaches 550°F (288°C) or even higher, that’s even better! The key to getting pitas to puff properly is intense heat. If the oven isn’t hot enough, even with perfect fermentation and shaping, the pitas may not fully puff or may do so inconsistently. A blazing-hot oven creates the sudden burst of steam needed to form the signature pocket.
I prefer to bake these pitas rather than fry them because baking produces more consistent results. While oven-baked pitas tend to be lighter in color than their stovetop-fried counterparts, they reliably puff up without the risk of burning. Plus, baking allows multiple pitas to cook at once, making the process more efficient. If you prefer frying, I’ll include instructions in the recipe card, but for me, baking is the best way to achieve a perfect, airy pocket every time.
It’s important not to over-bake these pita pockets, as the crust needs to stay soft for easy filling. If they bake too long, they can become dry and brittle, making them harder to fold or stuff. The fat in the recipe helps maintain softness, but the best way to ensure a pliable pita is to bake them just until they’re done—lightly golden and fully puffed. This way, they stay flexible and perfect for sandwiches, wraps, or dipping.
Cover After Baking
Unlike most bread recipes that recommend cooling the bread completely before storing, this one benefits from being covered immediately. Covering the pitas right after baking helps retain moisture and prevents the crust from hardening. I like to cover my pita pockets in cotton kitchen towels once they come out of the oven to keep them soft and fresh.
Suggested Timeline
Suggested Timeline
DAY 1
9:00 p.m.
Mix and knead the dough.
9:30 p.m.
Bulk ferment the dough.
DAY 2
8:00 a.m.
Divide and pre-shape into rounds.
10:00 a.m.
Roll out and rest while the oven preheats.
11:00 a.m.
Bake and enjoy!
📌 Quick Tip: Read the recipe in its entirety before you start cooking. This will help you understand the ingredients, steps, and timing involved, and allow you to prepare any necessary equipment or ingredients beforehand.
A pita bread with the perfect pocket for sandwiches, dips, or a quick snack.
Ingredients
225grams bread flour (I use King Arthur)
75grams whole wheat flour (I use King Arthur)
6grams salt (I use Redmond Real Salt)
175grams water
25grams olive oil (or any neutral oil)
75grams active sourdough starter (mine is 85% hydration)
Instructions
1
Roughly mix together the flours, salt, water, oliveoil, and sourdoughstarter in the bowl of a stand mixer.
2
Mix the dough on a low speed until the mixture is homogenous, then increase the speed to medium-low and continue kneading until the dough transforms into a smooth mass.
For an Ankarsrum mixer, use the dough roller and knead on speed 1-2 o'clock for 8-10 minutes.
For a KitchenAid mixer, use the dough hook attachment and knead on a speed 2 for 8-10 minutes.
Alternatively, knead by hand until the mixture is smooth, cohesive, and doesn't tear immediately when pulled (about 10-15 minutes)
3
Transfer the dough to a 2 qt container and let it rest until it fills the container about 3/4 of the way, about 10 hours at 70 F (21 C).
4
Turn the dough out onto a lightly floured counter and divide it into eight pieces, approximately 70-72 grams each.
5
Shape each piece into a round by tucking all the ends underneath the surface. Cover the rounds and let them rest for approximately two more hours at 70 F (21 C).
Timing here does not have to be perfect. While this is a good opportunity to allow the dough to ferment even more, the main thing is that the gluten can relax so that the rounds are easy to roll out.
6
Preheat an oven (with a baking stone inside) to its highest setting for at least one hour before baking the pitas.
The oven needs to be very hot in order to ensure all pitas puff. The oven should be at least 500 F (260 C), but the higher the better. I bake mine around 550 F (288 C).
If you do not have a baking stone, you can use a baking sheet instead (just do not preheat it!).
7
Prepare 8 squares of parchment paper, approximately 6-8 inches wide.
8
On a lightly floured surface, roll each round out until it is about 1/4 inch thick, or 6-inches in diameter. Place each pita on its own square of parchment paper, then cover and rest again while the oven preheats, about 30-60 more minutes at 70 F (21 C).
How to roll: Use two hands, one on either side of the rolling pin, for even weight. Lightly dust the top and bottom of one pita round with flour. Roll the pita forward and back, then give it a half turn and roll it again, forward and back. Next give the pita a quarter turn, repeating the forward and backward rolling motion. Continue giving the pita quarter turns and rolling gently until the pita is about 1/4 inch thick and 6-inches in diameter (about three more turns).
If the pita becomes difficult to roll, set it aside while you roll out a few more pitas, then come back to it. Giving the gluten a few additional minutes to relax will help the pita roll out easier.
9
After the pitas have had their final rest and the oven is very hot, transfer the pitas to the oven using a pizza peel and bake for about 3 minutes, until puffed and lightly golden. Do not over-bake.
10
Transfer the pitas to a cloth-lined bowl and cover immediately to reserve moisture.
Nutrition Facts
Servings 8
Amount Per Serving
Calories186.53kcal
% Daily Value *
Total Fat4.05g7%
Saturated Fat0.58g3%
Sodium167.14mg7%
Potassium73.17mg3%
Total Carbohydrate32g11%
Dietary Fiber1.88g8%
Sugars0.55g
Protein5.62g12%
Calcium 13.03 mg
Iron 1.96 mg
Vitamin E 0.64 IU
Vitamin K 2.2 mcg
Thiamin 0.34 mg
Riboflavin 0.19 mg
Niacin 3.04 mg
Vitamin B6 0.05 mg
Folate 18.65 mcg
Phosphorus 70.59 mg
Magnesium 23.09 mg
Zinc 0.58 mg
* Nutrition values are auto-calculated and should be used as an approximation only.
Notes
Storage: While pitas are best eaten fresh, you can store them in a Ziplock bag on the counter for three to five days, or in the freezer. Microwave in 5-10 second intervals to warm.
Stovetop Instructions: Use a cast iron skillet, griddle, or nonstick pan and heat it over medium-high to high heat until it's very hot. A well-heated pan is crucial for getting the pitas to puff. Cook the pitas, one at a time, on the pan, flipping every 30-seconds, until lightly golden and puffed. Transfer to a cloth-lined dish and cover immediately to reserve moisture.