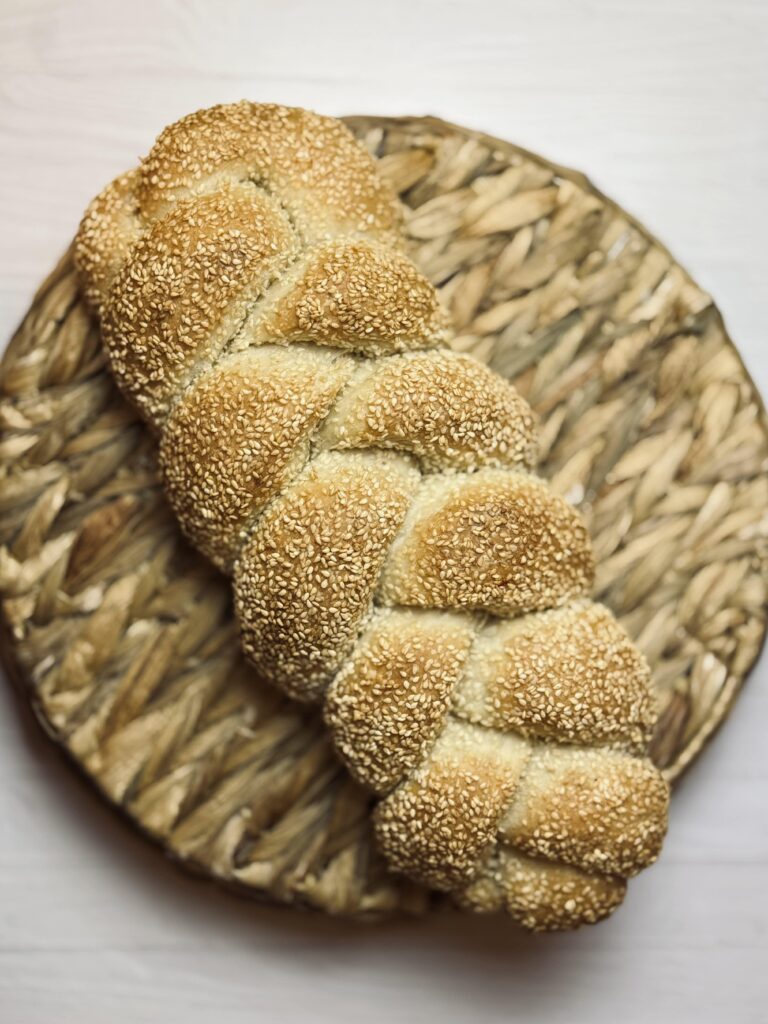
Picture a golden, braided loaf covered in crunchy sesame seeds—perfect for making a delicious sandwich! That’s Scali bread, a favorite in Boston. The sesame seeds give it a warm, nutty flavor and a little crunch in every bite. This tasty bread was brought to the city by Sicilian immigrants and has been loved ever since. You can enjoy it plain, with butter, or dipped in olive oil, but it’s best known for making amazing sandwiches, from classic Italian subs to gooey, toasted paninis.
What Is Scali Bread?
Scali bread ("Scali" is plural; "Scala" is singular) is a soft, light bread with a crispy crust, covered in tasty sesame seeds. It is usually braided, which makes it look extra special. This bread comes from Boston, where it was first made by Sicilian immigrants who brought their baking traditions from Italy. Over time, Scali bread became a popular choice in local bakeries and homes. People love it because it has a slightly nutty flavor from the sesame seeds and a texture that is perfect for making sandwiches. Today, it is one of Boston’s most famous breads and is enjoyed in many different ways!
What I Love About This Recipe
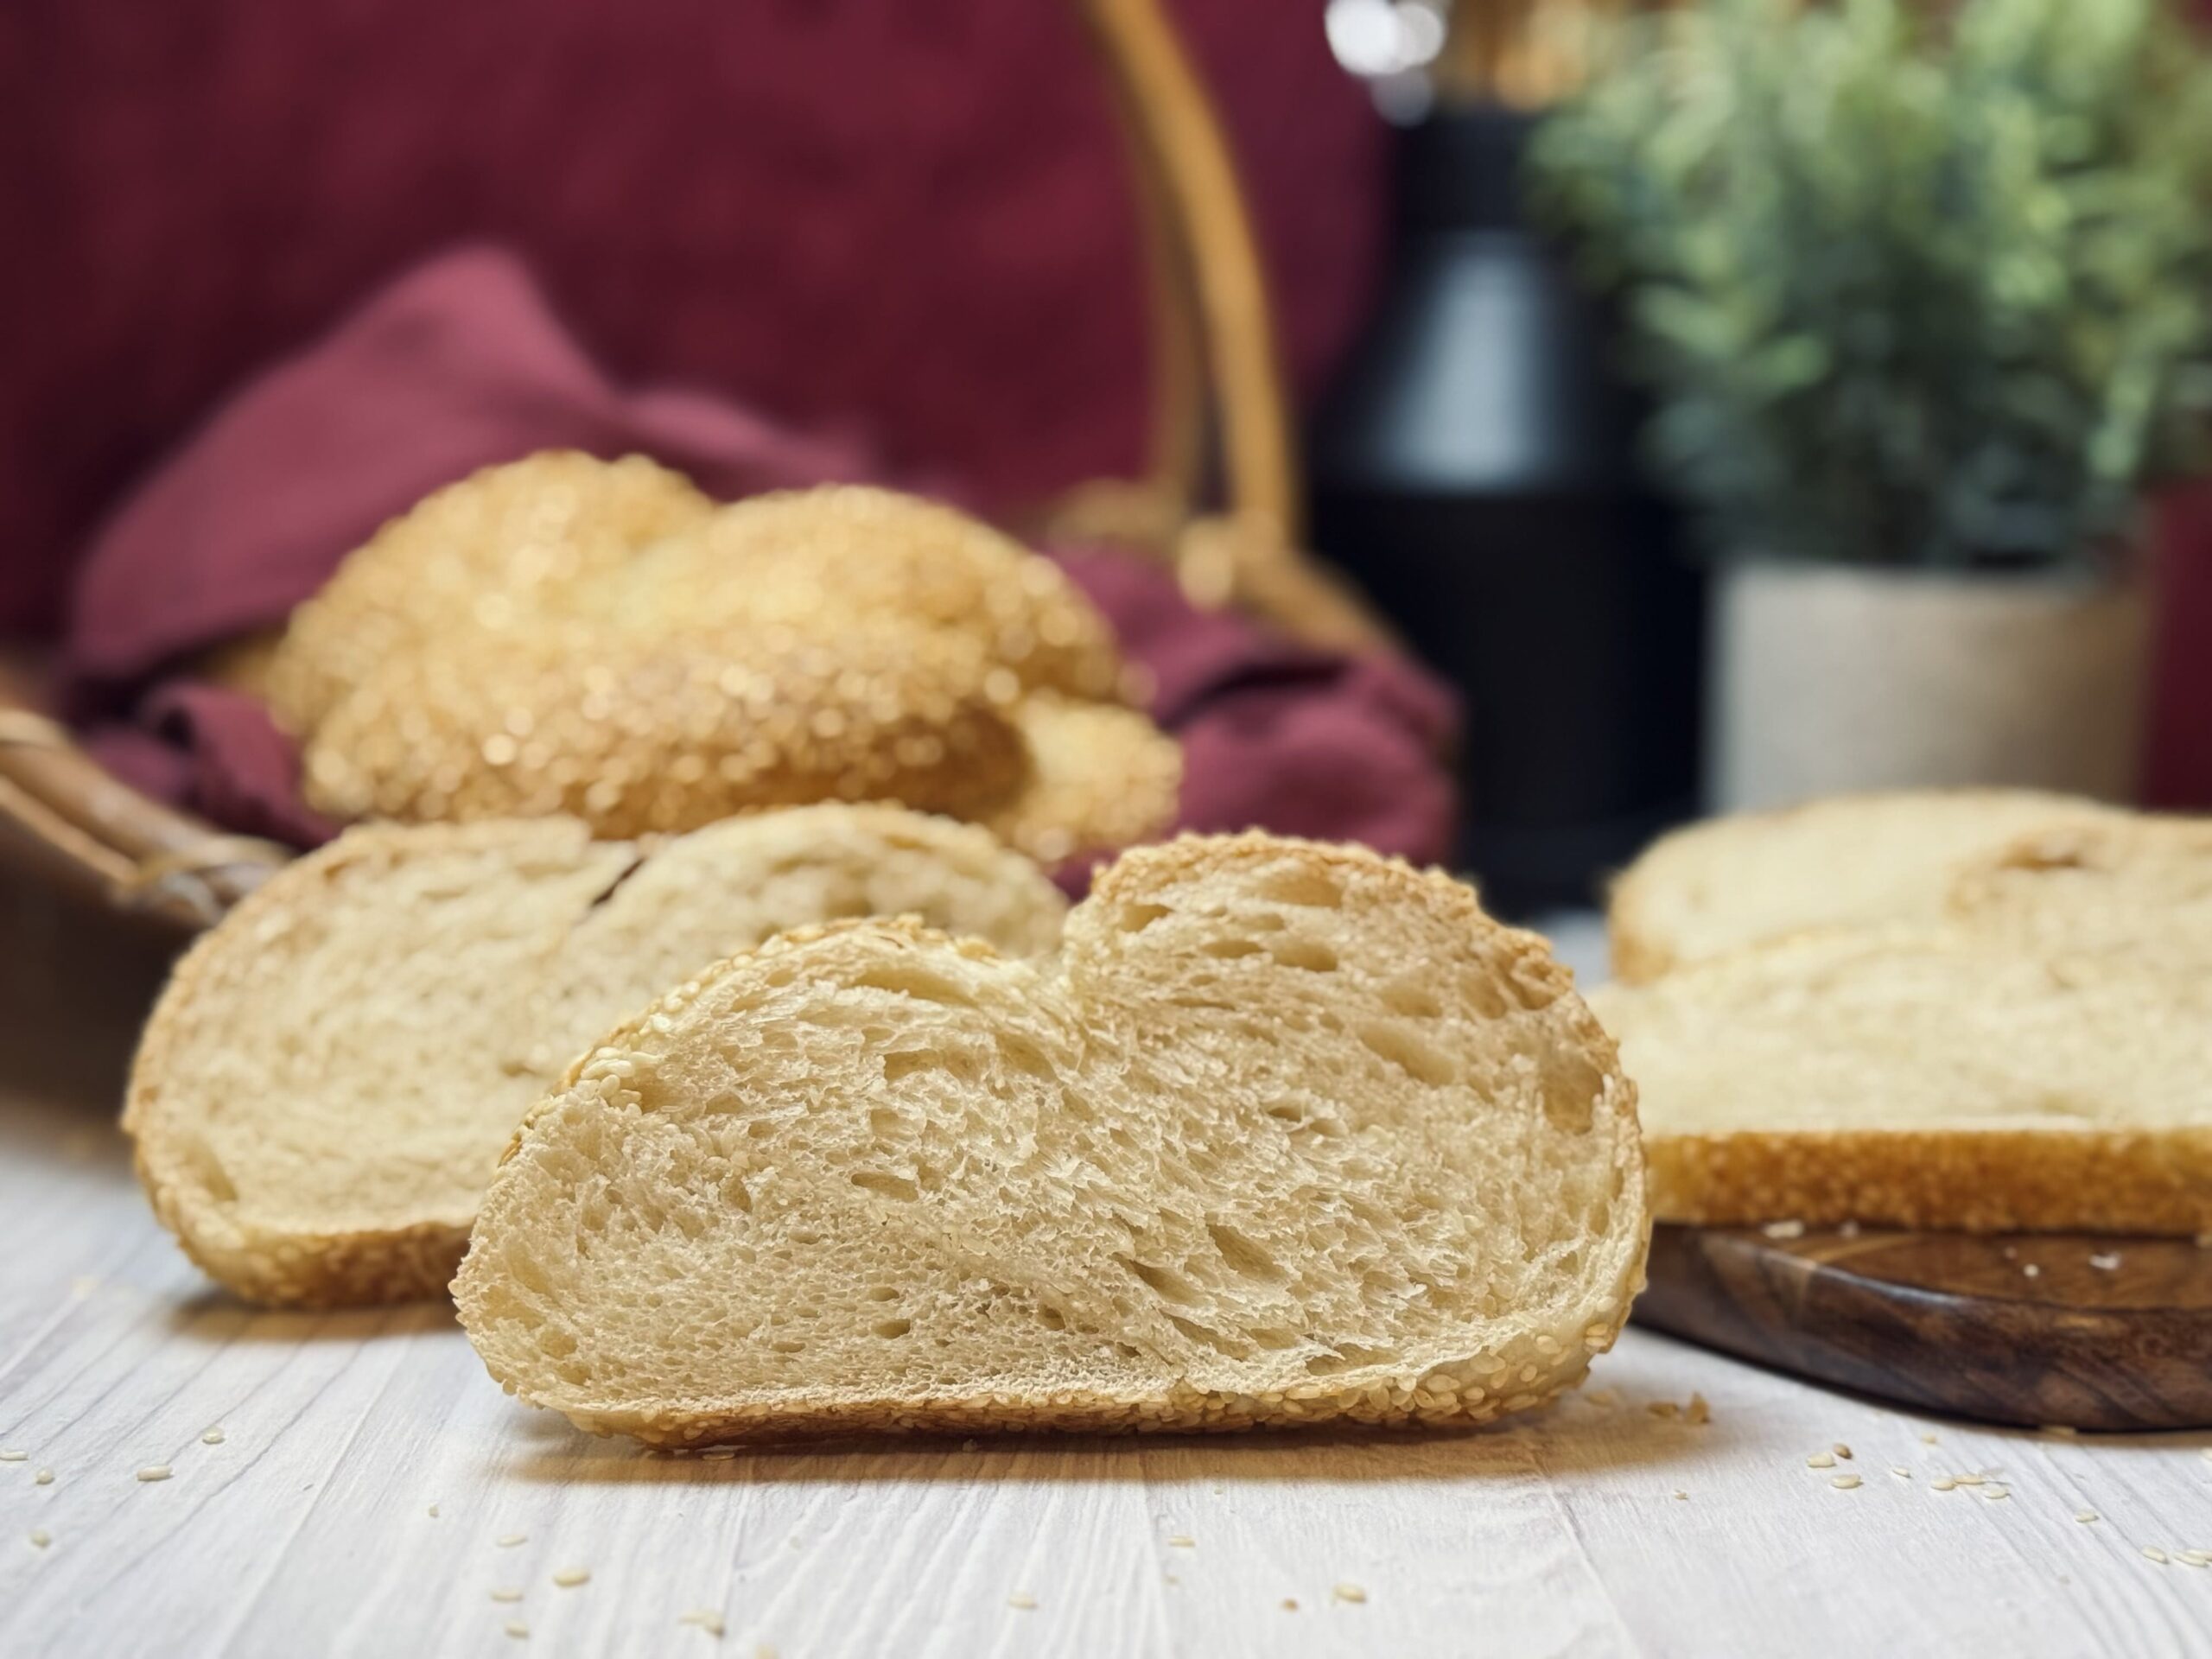
Dare I say my favorite thing about this recipe is... fermentation? You see, I inoculated this bread with 30% starter (20% is standard, meaning this recipe contains more starter than other recipes), which creates a vigorous fermentation. This vigorous fermentation (only possible with a healthy starter, of course, or else you'll run into other issues) packs the bread with gas, which is responsible for a light and airy texture, as well as a massive oven spring, which contributes to the beautiful, bold shape of this braid.
Of course, my favorite part should be what makes this bread unique: the sesame seeds. Really, to me, this is just like the cherry on top. The nutty flavor is perfect for pairing with a variety of dishes and is just what makes this loaf of bread extra special.
All The "Why's"
Flour Choice
In my honest opinion, all breads are better with bread flour. It's all about gluten, which has a significant impact on fermentation. Bread flour contains more gluten-binding proteins, which are essential for helping the dough trap air. This, in turn, lends a lighter, airier texture, even (actually, especially) in stiff doughs like this one.
Bread flour also absorbs more moisture, which means this dough will feel and appear slightly stiffer than a dough of the same hydration made with all-purpose flour. Of course, this can easily be adjusted, if needed, by holding back some of the water or by adding a bit more flour.
Altogether, from dough consistency to gluten to fermentation, flour choice matters. The type of flour you choose to use can completely change your results. I usually use King Arthur Bread Flour, protein content about 12.7%, in any recipe that calls for bread flour; however, I have been baking with Bob's Red Mill Artisan Bread Flour a lot lately, protein content 12.5%, as King Arthur has been hard to find, and I've found it comparable.
Salt is extremely important for many reasons. For one, it brings out flavor - flavor from the wheat and from the acids and alcohol produced during fermentation. Without salt, bread would taste almost like nothing, very mild.
However, salt also has notable effects on the dough. Salt is a tightening agent, meaning it contributes a more elastic (strong) dough, though that does not matter much in this recipe. Because it tightens the dough, it also slows fermentation, a factor that is always accounted for because salt is so very important to flavoring bread.
I find it best to use a fine salt, as it dissolves better than other salt options. I also prefer to use a salt without caking agents, and love to use Redmond Real Salt for its clean ingredients and the fact that it does not clump together, even without the anti-caking agents.
I use the standard - 2% salt - in all my recipes, unless otherwise noted.
Water
Water is the main source of hydration in this recipe, bringing the dough together as well as activating enzymes that provide food for yeast. Its use lends a dough that is more extensible (stretchier), making it easier to roll out, and a bread that leans toward light and airy, compared to other options. This is a stiff dough, so we need just enough water to bring the dough together, but not so much that the dough is a sticky mess. It may be a good idea to hold a little of the water back if this is your first time making this recipe, especially if you are using a different type of flour than I am.
Milk
Milk adds softness, density, and a subtle creamy flavor. It also helps contribute to a darker crust. I find a touch of it in this recipe gives this sandwich bread the perfect texture and flavor.
Oil
Fat is an essential component of sandwich breads, as it works to lock in moisture and keep everything soft. It helps lend a plush crumb and a cushiony crust. For this recipe I went with a neutral oil (any will work) over other options, like butter or lard, purely for simplicity's sake.
Sourdough Starter
Your sourdough starter is the key to a quality fermentation. I've written bunches on the sourdough starter here. I prefer to use unfed starter, which is 12-16 hours old (depending on my timing and the recipe). My starter is well-maintained, with a strong yeast population and a balanced acid load, which helps create a vigorous and effective fermentation that does not negatively impact my dough.
I prefer to mix this dough at night for an overnight bulk fermentation at 70 F (21 C), meaning I usually use my sourdough starter at the younger mark: 12 hours old. At this point, it isn't as vigorous as, say, a starter at 16 hours old. To compensate, I add a little extra to my dough, which ensures a strong and vigorous fermentation.
Now, you may be thinking - doesn't that just mean my dough will overproof faster? Only if your starter contains an excess of lactic acid. Otherwise, the additional starter is only beneficial to fermentation, especially if your gluten network is solid and the dough can ferment properly.
The extra starter creates more gas. Not only does this gas contribute to a lighter, airier texture, but it also substantially increases the size of the loaf and gives it a phenomenal oven spring.
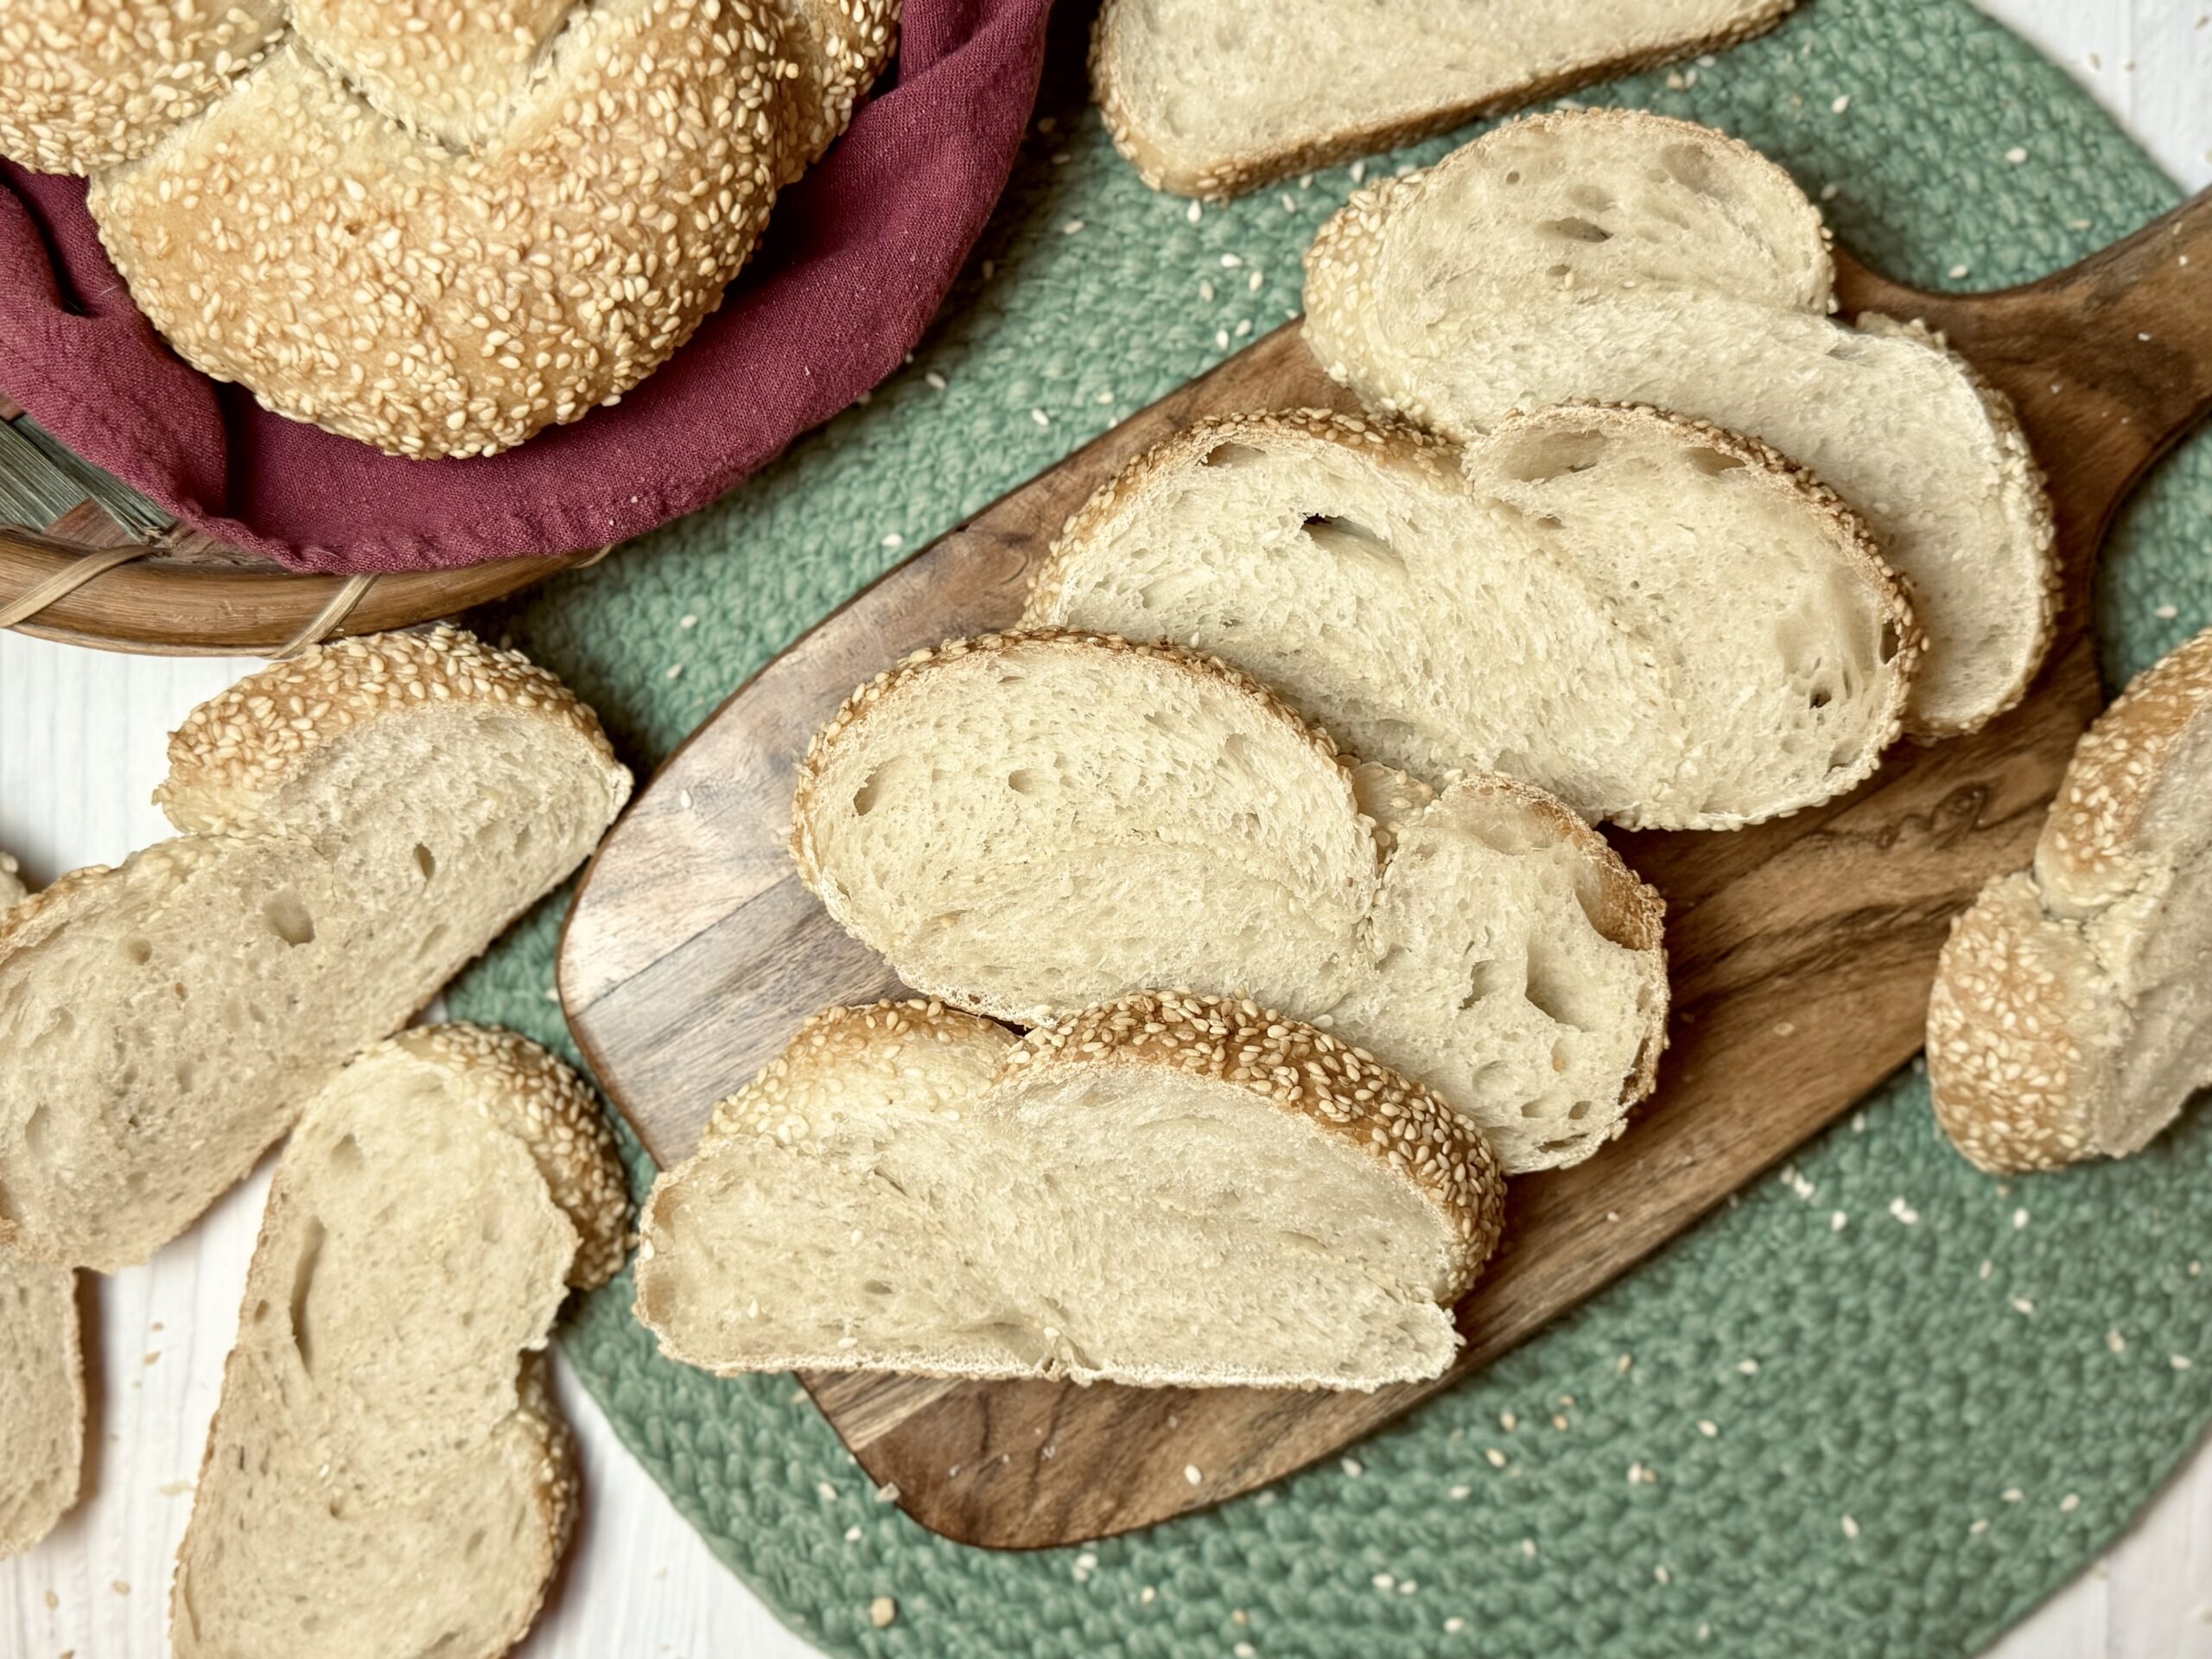
Low Hydration
The term “low hydration” simply means this is not a wet and sticky dough; it does not include as much moisture as other recipes. It is a soft and supple dough, still malleable but strong enough to stand firm. The approximate hydration is 63%. The dough may be slightly sticky but should not stick to your hands or the counter when kneading.
This consistency (plus some added tension we will add to the dough while shaping) allows the dough to hold its shape with ease, producing a beautiful, pronounced braid.
The low hydration of the dough also has one other bonus - reduced sourness. Stiff doughs (and starters, for that matter) do not encourage the reproduction of bacteria that release acids resulting in a sour flavor. In other words, the dough's consistency helps give the bread a more neutral flavor compared to a dough with more water.
Mixing
For this recipe, we just need the dough to form a gluten network. This can be a difficult task in stiff doughs due to the lack of water (which makes it harder for gluten to form). Luckily, this is the perfect stand mixer recipe, kneading easily in any mixer (or by hand). I knead this dough for about 12 minutes in my Ankarsrum mixer with the dough roller. The dough should turn from a shaggy mess to a smooth, soft dough ball that does not tear immediately when a piece of it is pulled up.
Bulk Fermentation
Letting the dough rise as much as possible, but not too much, contributes to the airiest of loaves. In an attempt to favor the yeast and reduce sourness, I recommend keeping the dough temperature between 70-75 F (21-24 C). Because I give this dough a long final proof and prefer to skip any time in the fridge, I find it most convenient to let bulk fermentation happen overnight, which for me is about ten hours at 70 F (21 C). At the minimum, this dough should double in size, but you can let it triple if it was developed well in the stand mixer. Use your knowledge of your environment to bulk ferment this dough appropriately; it should take about 8-10 hours in the low-mid 70s F.
Shaping
Scali bread isn’t just tasty—it looks fancy too! Instead of a regular loaf, it’s braided, kind of like a cool hairstyle for bread. But it’s not just for looks! The braid helps make more crispy edges when it bakes, giving it extra crunch and flavor. Some people say the shape comes from old Sicilian baking traditions, while others think it just makes the bread more fun to eat. Either way, Scali’s special braid makes it extra delicious and different from a plain loaf!
To shape this braid, I actually use a pre-shape and final shape technique. First, I create three rounds, which gives me a solid start to a smooth surface. After the gluten has relaxed, I am able to elongate each piece for the braids, adding tension that will later help the loaf "pop" in the oven. You don't have to do this; you could just divide the mass and roll it out. However, I find the pre-shape method to be my preferred method for its evenness and for the tension it adds to the strands of the braid.
Other than that technicality, braiding the three strands of dough for Scali is just like braiding hair - straightforward and easy! Adding the egg white wash and the sesame seeds only help make braiding seamless, as it prevents any bit of stickiness from taking over.
Egg White Wash
Egg whites are like glue, and brushing them all over your loaf will keep most of the sesame seeds from falling off. While some will still fall, you'll find the amount much more minimal compared to using just water.
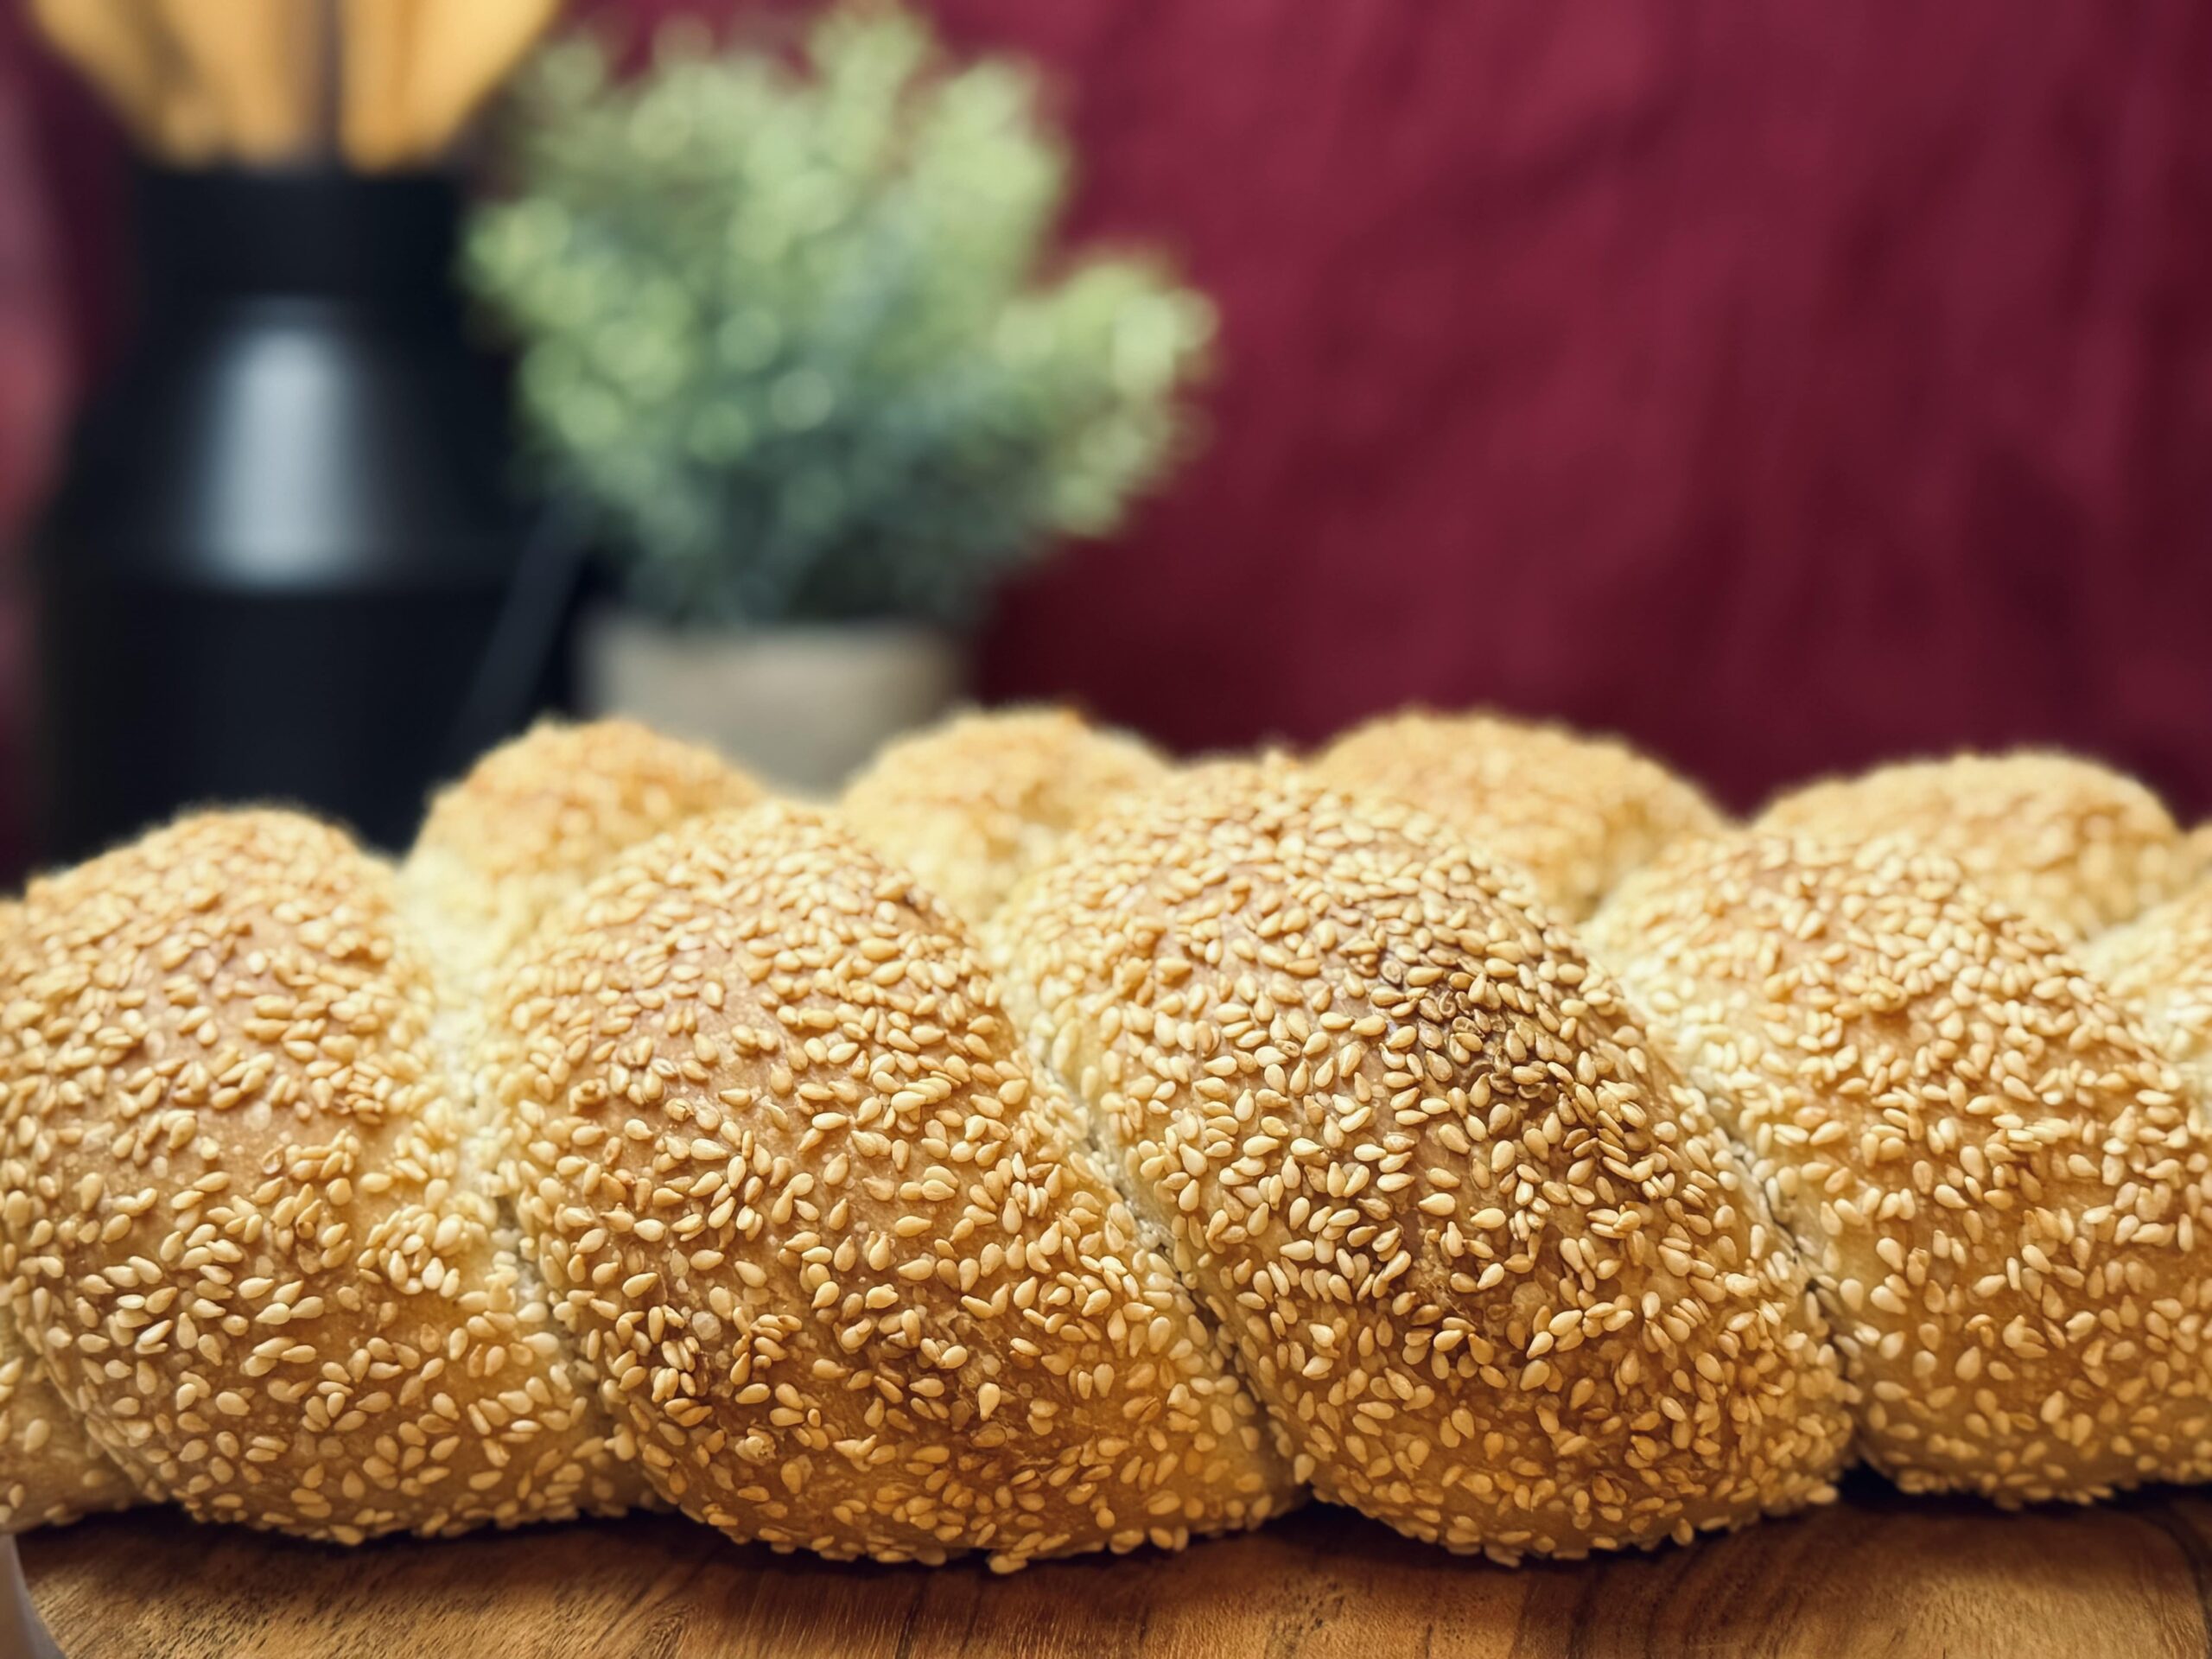
Sesame Seeds
Scali bread is covered in sesame seeds to give it a little extra crunch and a warm, nutty flavor. When the seeds toast in the oven, they make the crust even more delicious. Their light, crispy texture makes every bite more fun to eat!
Final Proof
This is where you will really notice the effect of the extra starter. Your loaf will turn big and puffy, full of air. Because this dough is on the stiff side, it can handle a longer final proof. I usually proof this dough for about three to four hours in my 70 F (21 C) home.
Baking Method
The temperature of 400 F (220 C) allows for a beautiful oven spring and exterior browning, while also perfectly cooking the interior and toasting the sesame seeds.
Suggested Timeline
Suggested Timeline
DAY 1
9:00 p.m.
Mix and knead the dough.
9:30 p.m.
Bulk ferment the dough.
DAY 2
8:00 a.m.
Divide and pre-shape.
8:30 a.m.
Shape.
12:30 p.m.
Bake and enjoy!
📌 Quick Tip: Read the recipe in its entirety before you start cooking. This will help you understand the ingredients, steps, and timing involved, and allow you to prepare any necessary equipment or ingredients beforehand.
150grams active sourdough starter (mine is 85% hydration)
1large egg white (plus 1 tbsp cold water)
Sesame seeds (bulk, about 1/2-1 cup)
Instructions
1
Roughly mix together the flour, salt, water, milk, oil, and sourdoughstarter in the bowl of a stand mixer.
2
Mix the dough on a low speed until the mixture is homogenous, then increase the speed to medium-low and continue kneading until the dough transforms into a smooth mass.
For an Ankarsrum mixer, use the dough roller and knead on speed 1-2 o'clock for about 12 minutes.
For a KitchenAid mixer, use the dough hook attachment and knead on a speed 2 for about 10 minutes.
3
Transfer the dough to a 2 qt container and let it rest until it completely fills the container, about 10 hours at 70 F (21 C).
4
Turn the dough out onto a lightly floured counter and divide it into three pieces, approximately 310 grams each.
5
Shape each piece into a round by tucking all the ends underneath the surface. Let them rest for 30 minutes to allow the gluten to relax.
6
Roll out each piece into an 18-inch (anywhere in the 16- to 20-inch range is good) long rope.
I like to do this by flipping the round bottom side up (onto a very lightly floured surface) and folding the top and bottom of the round into the middle. Then, I fold the entire section in half, gently roll it out, then fold it in half again, repeating until the rope is about eighteen inches long. If needed, I will let the rope rest for about five minutes while I work with the other sections, which allows the gluten relax so that I can roll the pieces out further. This technique builds tension on the rope, which helps it "pop" in the oven, as well as keeps the strands as even as possible.
7
Once each piece has been rolled out, whisk together one large egg white + one tbsp of cold water until frothy and prepare a half-size sheet pan with sesame seeds.
8
Cover each strand of dough in the egg white mixture, then roll in sesame seeds to cover. Place each piece on a clean (and lined or oiled) half-size sheet pan.
9
Braid the strands (just as you would braid hair) to make one large loaf.
10
Cover the loaf and let it rest until very puffy and doubled, or more, in size (about three to four hours at 70-72 F; 21-22 C).
11
Meanwhile, preheat an oven to 400 F (205 C).
12
Bake the Scala for 30 minutes, or until the internal temperature reaches at least 190 F (88 C).
13
Let it cool for at least 30 minutes before diving in!
Nutrition Facts
Servings 12
Amount Per Serving
Calories244.71kcal
% Daily Value *
Total Fat7.41g12%
Saturated Fat0.9g5%
Trans Fat0.01g
Cholesterol0.41mg1%
Sodium202.51mg9%
Potassium92.29mg3%
Total Carbohydrate36.8g13%
Dietary Fiber1.93g8%
Sugars0.94g
Protein7.59g16%
Vitamin A 1.91 IU
Calcium 76.47 mg
Iron 3.11 mg
Vitamin D 0.05 IU
Vitamin E 0.78 IU
Vitamin K 2.59 mcg
Thiamin 0.45 mg
Riboflavin 0.28 mg
Niacin 3.86 mg
Vitamin B6 0.07 mg
Folate 26.2 mcg
Vitamin B12 0.02 mcg
Phosphorus 93.17 mg
Magnesium 35.86 mg
Zinc 0.94 mg
* Nutrition values are auto-calculated and should be used as an approximation only.
Notes
Storage: Store in a Ziploc or bread bag on the counter for three to five days, or slice and store in the freezer. Toast to warm.
While Scali bread is traditionally made with sesame seeds, you can substitute the sesame for poppy seeds, sunflower seeds, dried minced onion, cinnamon sugar, everything bagel seasoning, you name it! Your imagination is the limit.
If you do not like having seeds in the middle of each slice, you'll want to add the egg white wash and seeds to the top of the loaf after it is already braided.