About This Recipe
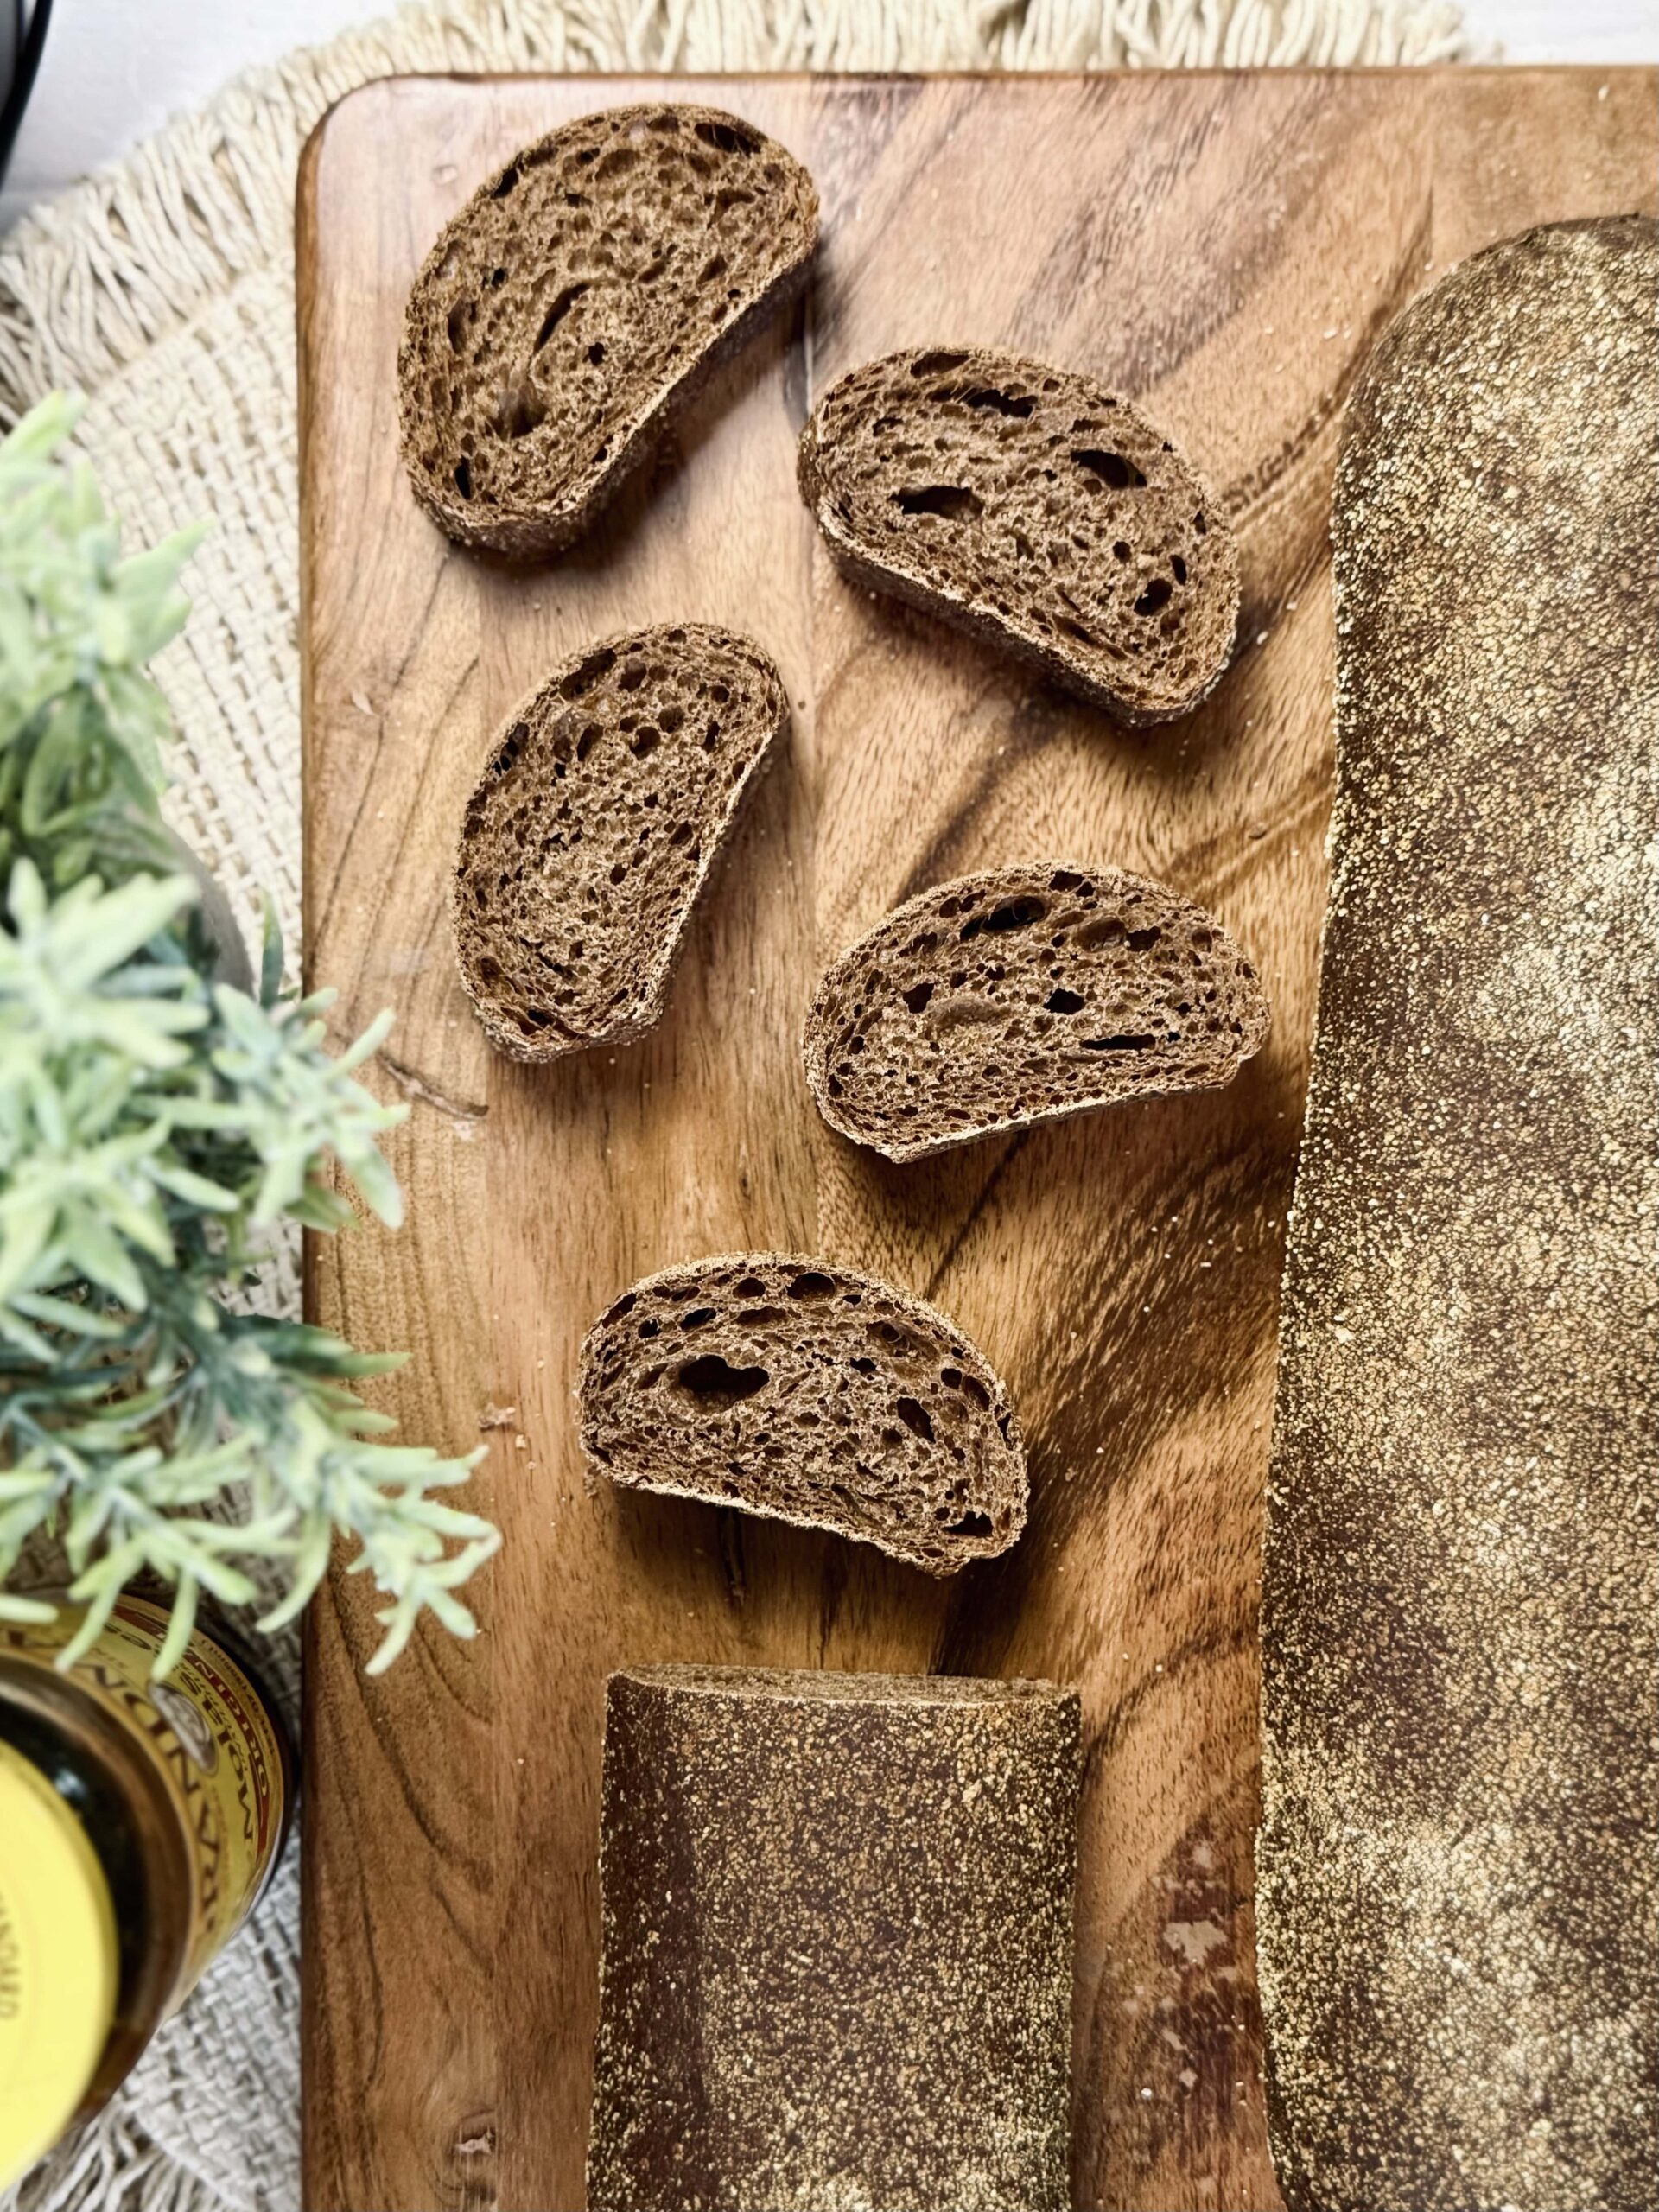
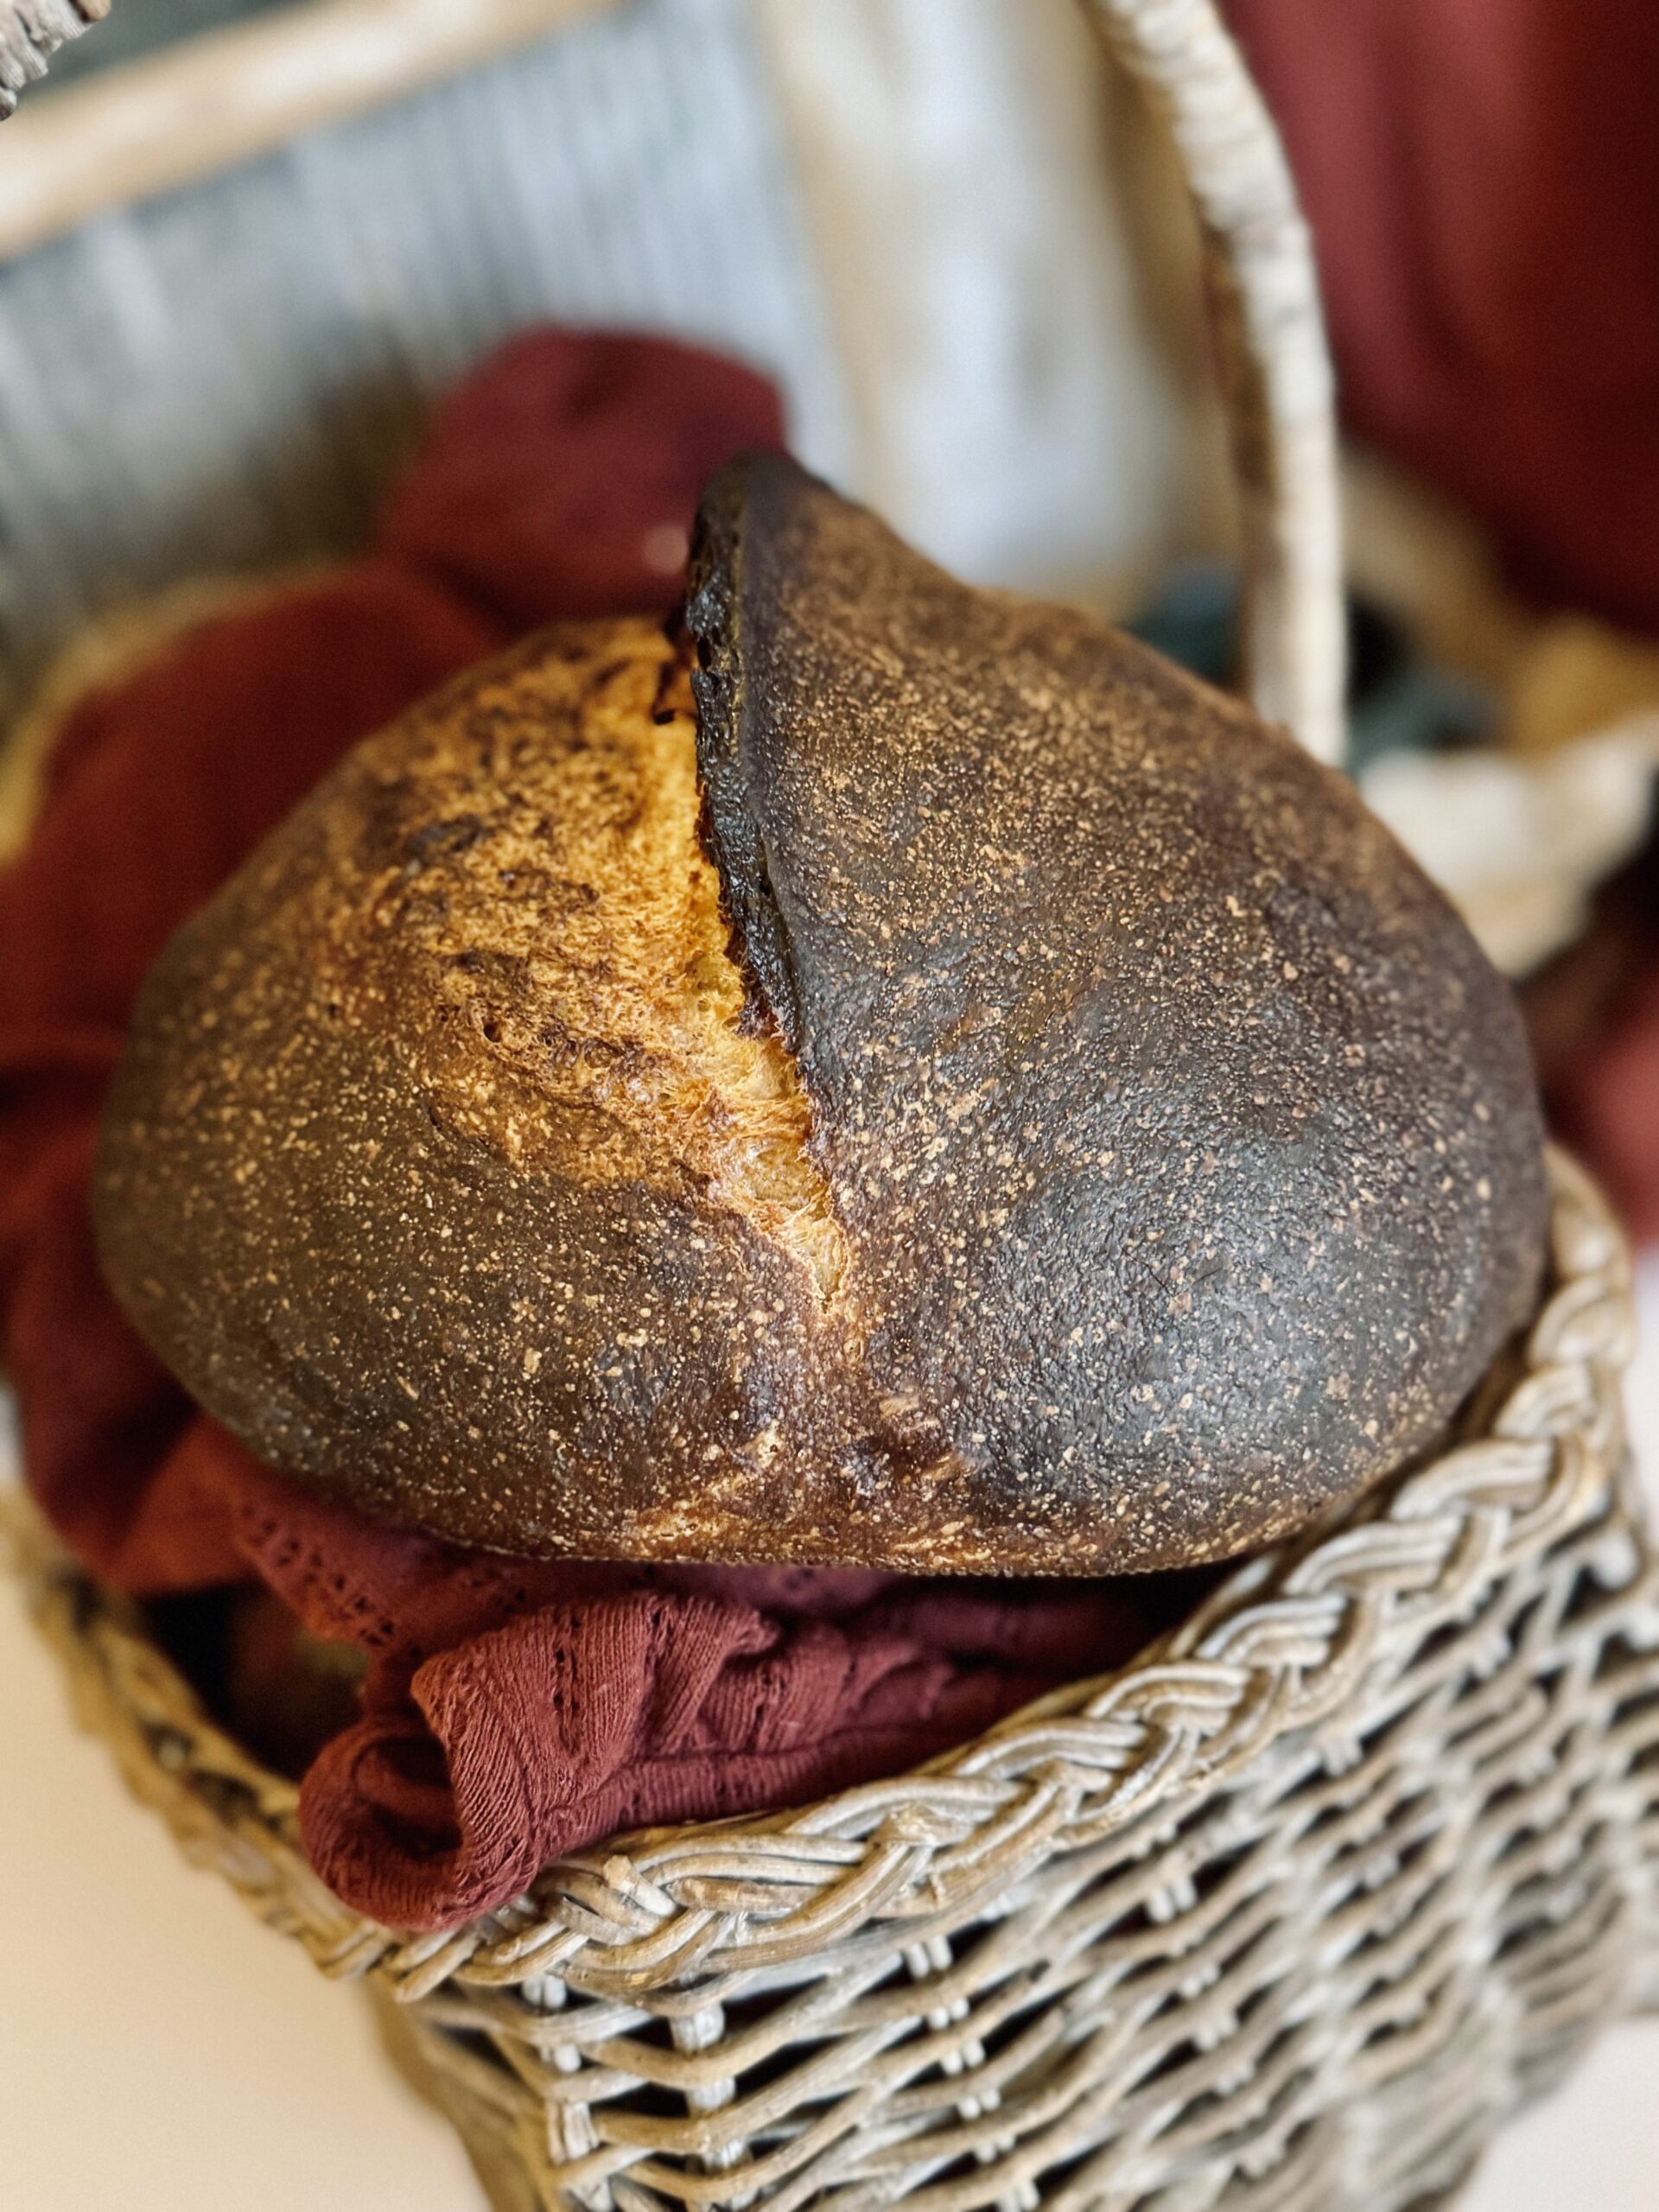
This bread is inspired by the unique, deep flavor of rye, a favorite in many parts of the world, made in the form of the common sourdough boule. I wanted to make a bread where rye was clear and prominent, but not too overbearing. I can already hear my German community screaming, “Too overbearing! Never.” But, in my part of the world, rye is not so common. I also wanted to incorporate flavors commonly paired with rye, hence the optional caraway, which is inspired by Czech rye. Here, I use 45% whole rye flour to balance the deep, heavy flavor of rye for the tastebuds of my North American surroundings, as well as keep the process at least somewhat similar to that of the ever-so-popular sourdough boule.
Rye’s Unique Characteristics
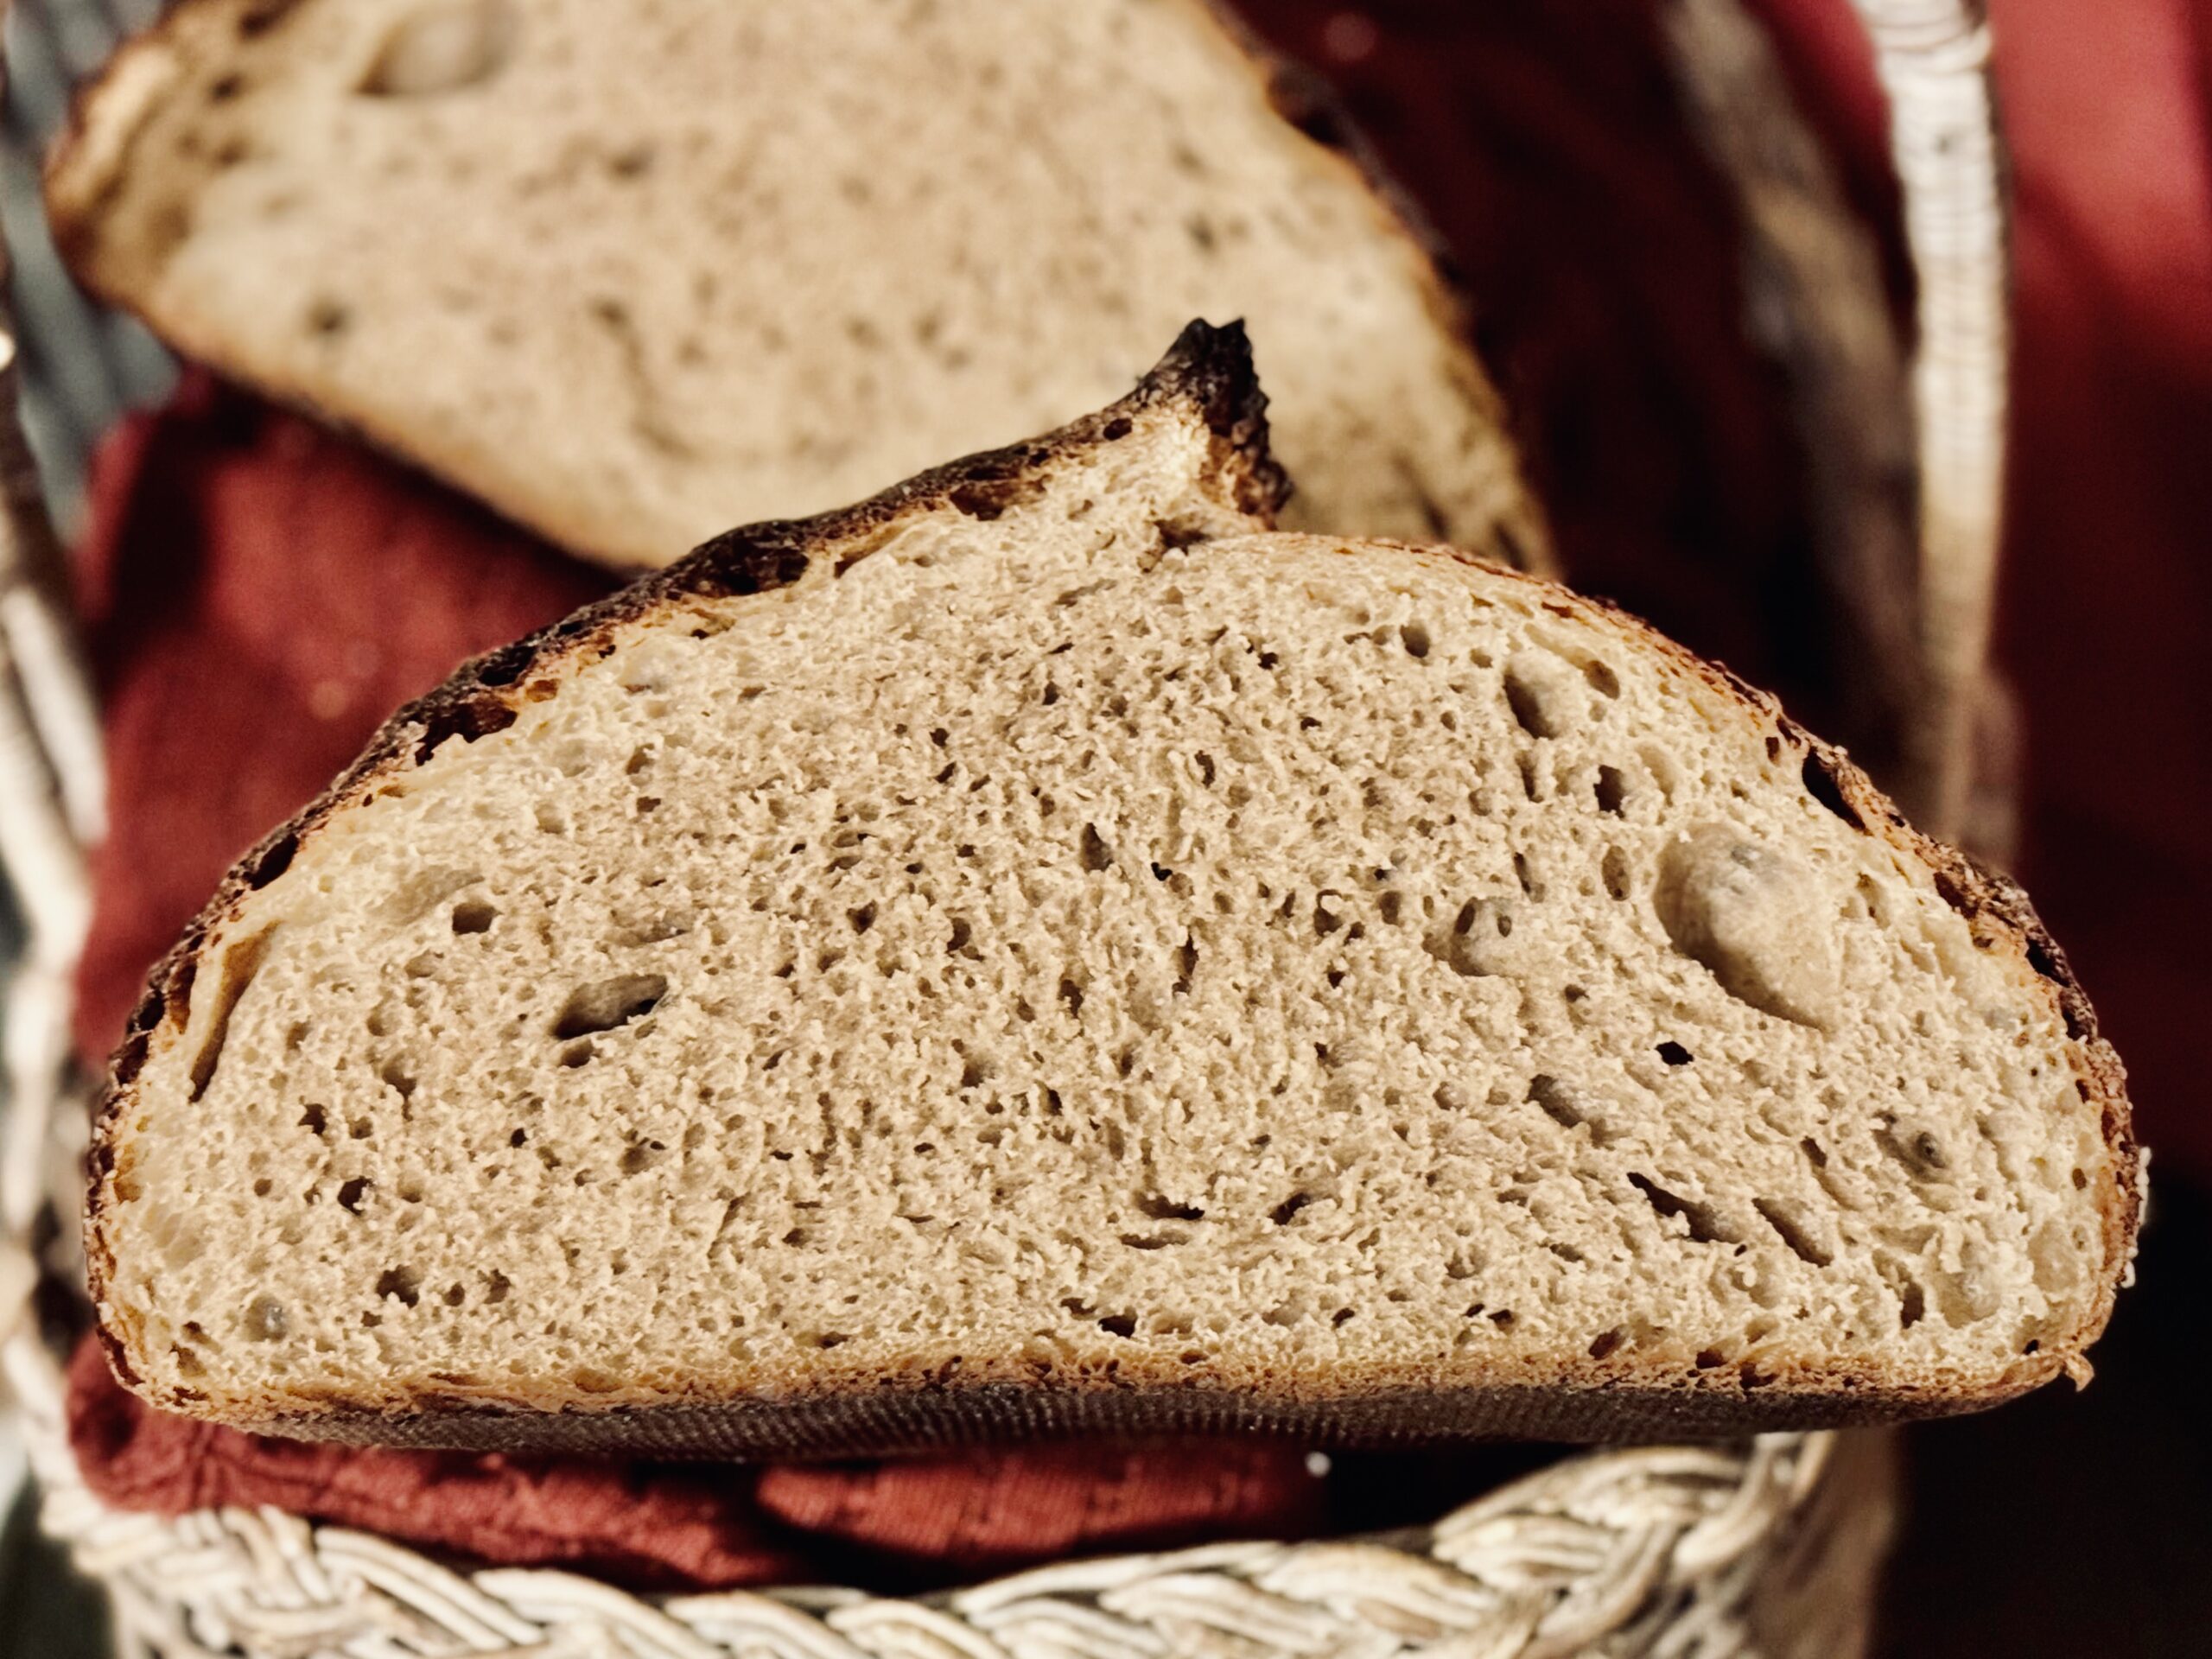
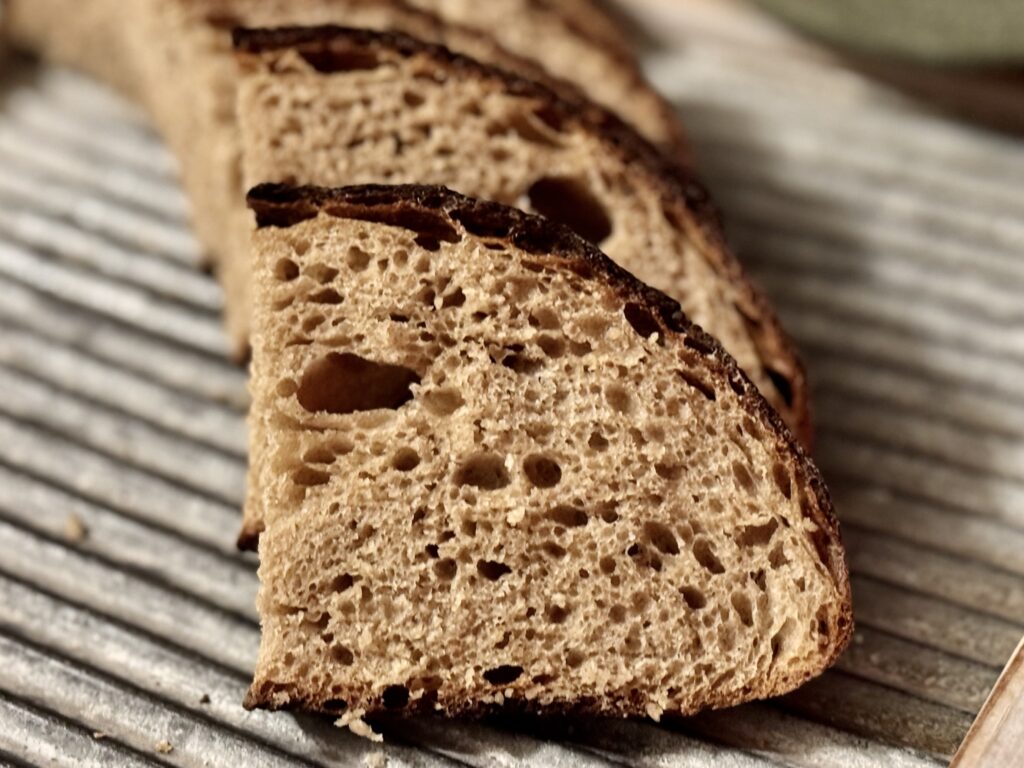
Rye flour does not function like wheat flour in any respect. Rye is very low in gluten, which means it can be very difficult to work with. It also means it does not ferment well, since the gluten is weak and struggles to hold in air. Whole rye paired with low gluten means a closed, yet even, crumb (or, at least, that is the most I have been able to achieve from it so far). Crumb preferences aside, we can still get a balanced flavor and soft texture in our bread.
Rye is also stickier than other flours and requires special consideration to technique and process. It is a favorite of our starter: bacteria love this grain; therefore, it has the potential to create an end result that is very sour. It is important to watch the bread closely and maneuver the dough with care, since the weak flour struggles to hold in air and the stickiness of the dough can make things difficult.
However, rye’s deep and nutty flavor is a real pleasure. Despite its unusual characteristics, rye bread is a pleasure to make and a joy to eat. The bread also has an increased shelf life, thanks rye!
What I Love About This Recipe
This recipe does not skip on the rye flour. With a 45/55 combination of rye/wheat flour, rye’s deep, nutty flavor is very prominent. This recipe is very balanced, taking careful note of the effects of each ingredient. Additional water helps prevent the bread from becoming too dense, while the caraway seeds are a beautiful, Czech-inspired, pairing.
All The “Why’s”
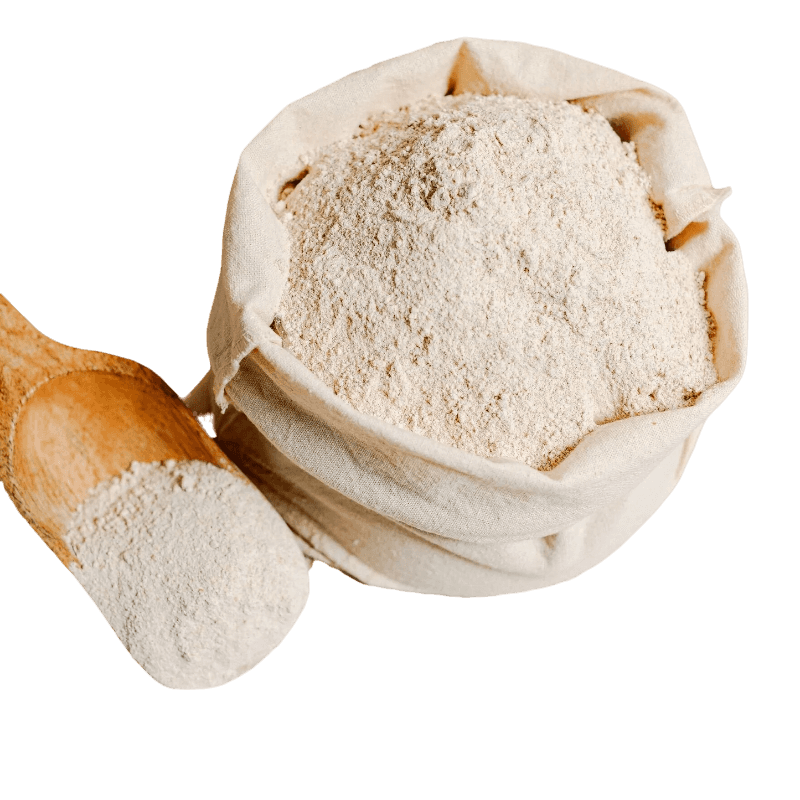
Whole Rye Flour
Whole rye brings all of the deepest rye flavor to this recipe. Whole rye flour is equivalent to whole wheat flour in that it contains all parts of the grain (bran, germ, and endosperm), rather than just the endosperm (which is light rye flour). This means there will be a more pronounced rye flavor, darker color, and denser texture.
Rye flour is also low in gluten binding proteins, and using whole rye means we have the bran and germ to think of, which cut through gluten, making it even weaker than it already is. Less gluten means weaker structure, which means the dough cannot hold in air very well. This, in itself, leads to a more closed crumb, as well as a need to reduce fermentation time (otherwise the loaf would “overproof” and lose structure very quickly).
Fear not, I accommodate everything that rye brings to the table as much as possible. I do my best to reduce density and create as strong a loaf I can for the best fermentation. I also want to note that rye flour is stickier, meaning this dough will be noticeably sticker than other doughs since I use 45% rye flour in this recipe. With a little bit of water on your hands or work surface, though, the dough is still completely manageable.
Bread Flour
Here’s the thing about artisan bread: most of the gluten is developed through time during the slow fermentation process. You see, as dough rests, gluten comes together naturally and fermentation provides strength. Bread flour contains more gluten binding proteins, which naturally create a stronger network that traps air and helps the loaf ferment more efficiently. In this recipe, this is especially important. We need to do everything we can to help trap air and create gluten. I use King Arthur Bread Flour in most recipes that calls for “bread flour” because of its higher protein content (12.7%) and excellent gluten-binding properties.
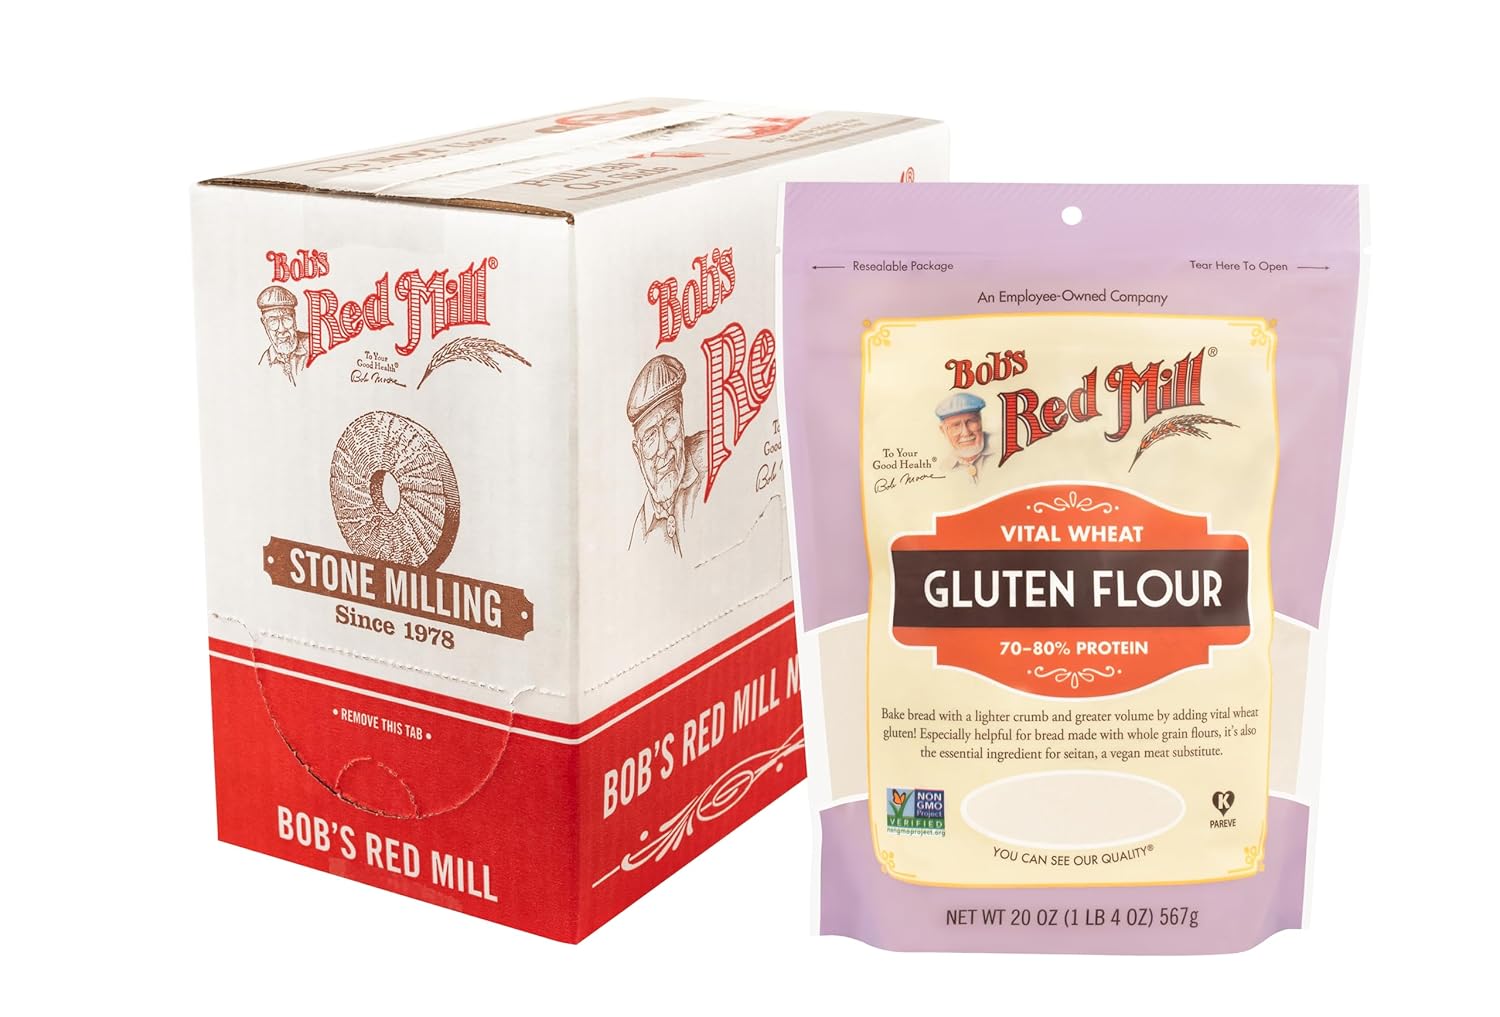
Vital Wheat Gluten
In addition to using a strong bread flour, I also add vital wheat gluten to the dough. In short, vital wheat gluten is basically straight gluten. Because rye flour lacks the ability to create a strong gluten network, adding a tablespoon of vital wheat gluten helps make up for some of this inability and works to help the dough come together better, which creates a more balanced loaf that can rise as well as possible, hold itself strong and tall in the oven, and avoid cracking during the baking process.
Salt
Salt helps bring out flavor (without salt, bread would taste almost like nothing), but also has notable effects on the dough. Salt is a tightening agent, meaning it helps create a more elastic (strong) dough. It does slow fermentation, as well as gluten development, but these are things we must account for in the recipe because we cannot have a recipe without salt. It is important to use just the right amount, enough to bring out the flavor, but not so much that the loaf cannot ferment or come together. I use the standard – 2% salt – in all my recipes, unless otherwise noted.
Hydration
This recipe has an approximate hydration of 85%. While this seems high, it is necessary to compensate for the amount of water absorbed by the whole rye flour. Rye flour is already a sticky flour and the extra water can make for an advanced working dough. But, with proper strength, fermentation, and handling techniques, this dough is completely manageable.
The extra water works to counteract the dense tendencies that rye typically brings to the table, resulting in a lighter bread. It also makes the dough more workable by hand, allowing for folds to still take place to help with dough development, which aids in the dough’s overall structure and rise. Read more about dough hydration here.
Molasses
I have added just a tiny bit of sugar in this recipe to nudge fermentation along. Despite the loaf not being able to ferment well (due to the weaker structure from the rye), it does need something to help nudge fermentation along, since rye flour actually slows yeast reproduction. The amount of sugar in this recipe (3%) is not enough to sweeten, or even create osmotic stress. It is just enough to feed the yeast in your starter so that they can keep up with the bacteria in your starter, who are very much enjoying that rye flour. This helps to create a more balanced bread, one that aerates (yeast) and ferments (bacteria) evenly. Bacteria that overproduce in a recipe risk creating an overly sour bread, or a bread whose structure is completely broken down before it has a chance to rise properly. While you could use sugar, honey, maple syrup, or barley malt in place of the molasses, I find the flavor of the molasses compliments the loaf well. Barley malt would be my second choice, followed by honey, and then sugar.
Caraway
Caraway is optional; its purpose is simply to compliment the rye. This is a classic Czech flavor combination, and may or may not be preferred, depending on your taste preferences.
Dough and Gluten Development
Because this dough is naturally weaker, I tend to work it more. This just helps ensure that the dough comes together, and that I get a beautiful rise in the oven. I’ve recently come to see the benefits of kneading bread dough in order to develop more of the gluten up front (which helps the loaf ferment better). Therefore, I knead this dough upfront for eight minutes (which is longer than I usually do). The dough will not have a complete windowpane by this point, but should after the first rest. Then, after achieving a windowpane, we can let fermentation do the strengthening and structure the dough through folds.
Bulk Fermentation
Fermentation for this bread is going to be very different than your 100% white flour loaf. The dough will not be able to ferment as long as usual, due to the weaker structure. In fact, I cut fermentation time to almost half of what I usually do. This is all because of the rye.
Please remember that fermentation varies significantly depending on temperature and climate. My home generally rests around 68-72 F (20-22 C), so my fermentation times are very extended from someone whose home rests around 75 F (24 C), or even warmer. Always watch the dough and read your baked loaf as best as possible to be able to determine necessary adjustments for your next attempt. The goal is to ferment the dough as long as possible, but not to overproof. The longer the dough ferments, the lighter and airier your bread will be.
Shaping
Since we are only making one loaf of bread, it is not necessary to pre-shape the dough. Simply turn it out, and shape it using your preferred method for a boule or batard before adding to your banneton.
Cold Proof
A cold proof is always an option to extend the baking timeline and create flexibility. I choose not to cold ferment this dough, simply because it is so easy to bake all in one day.
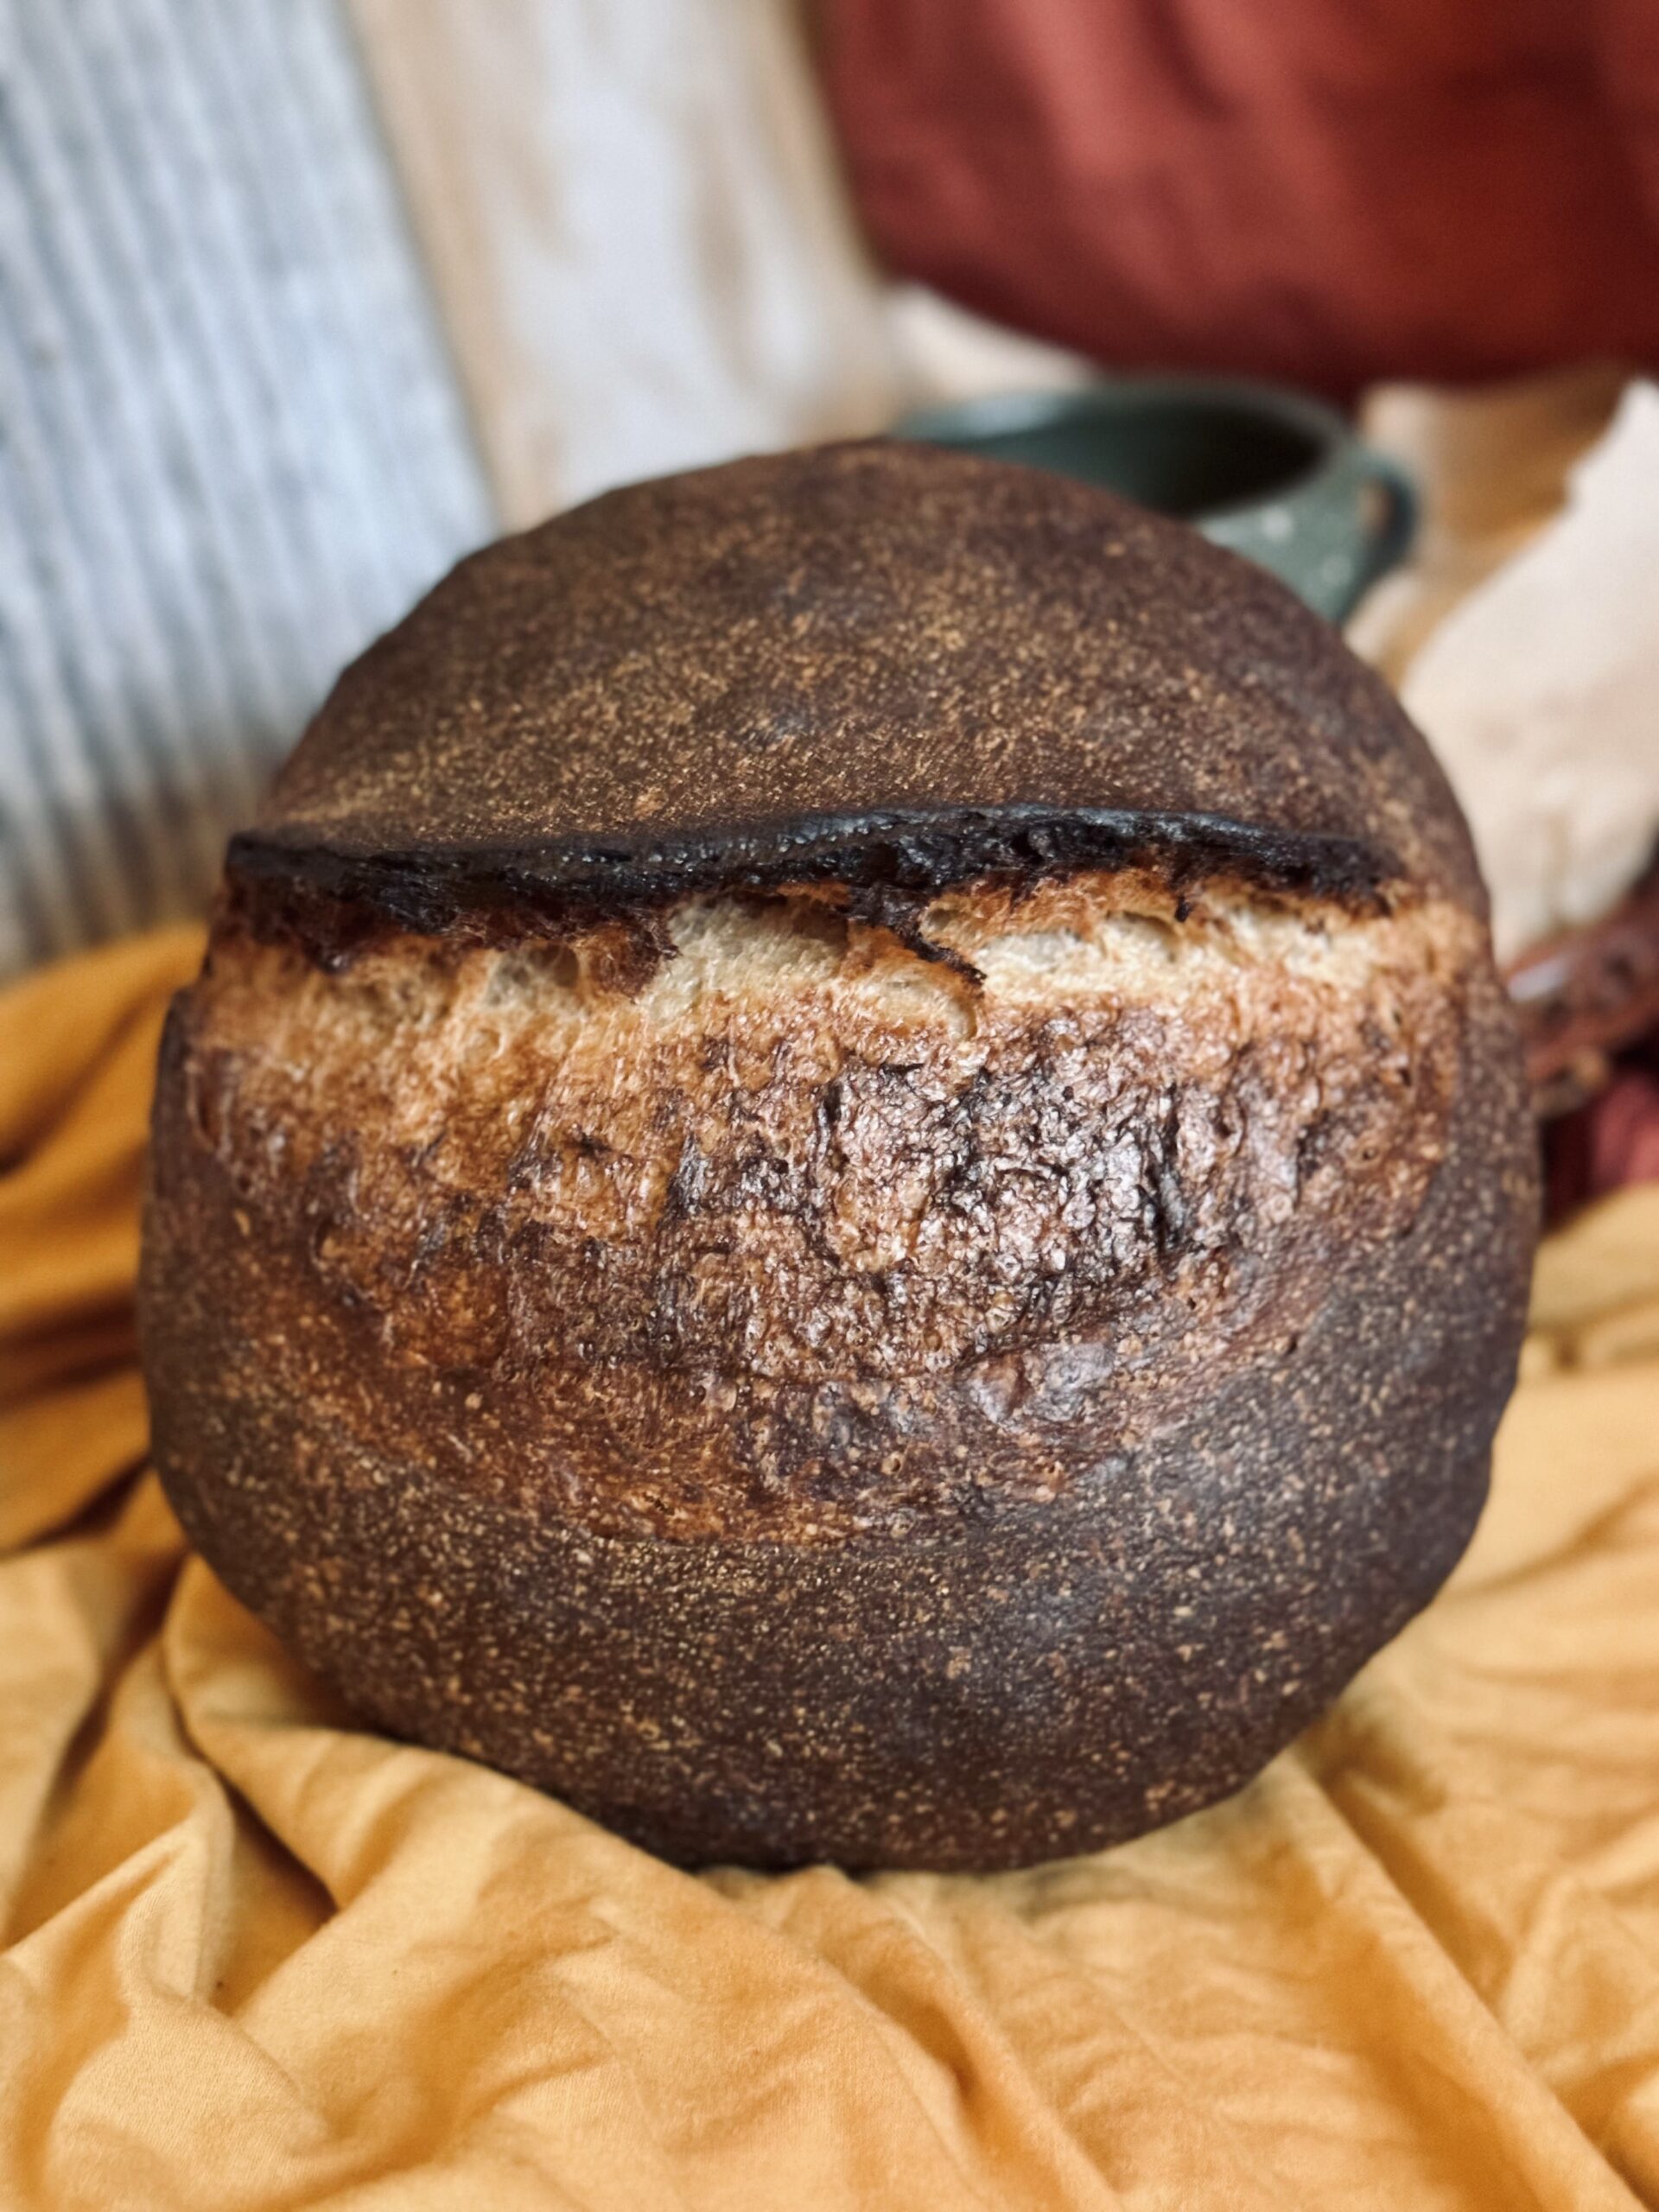
Scoring
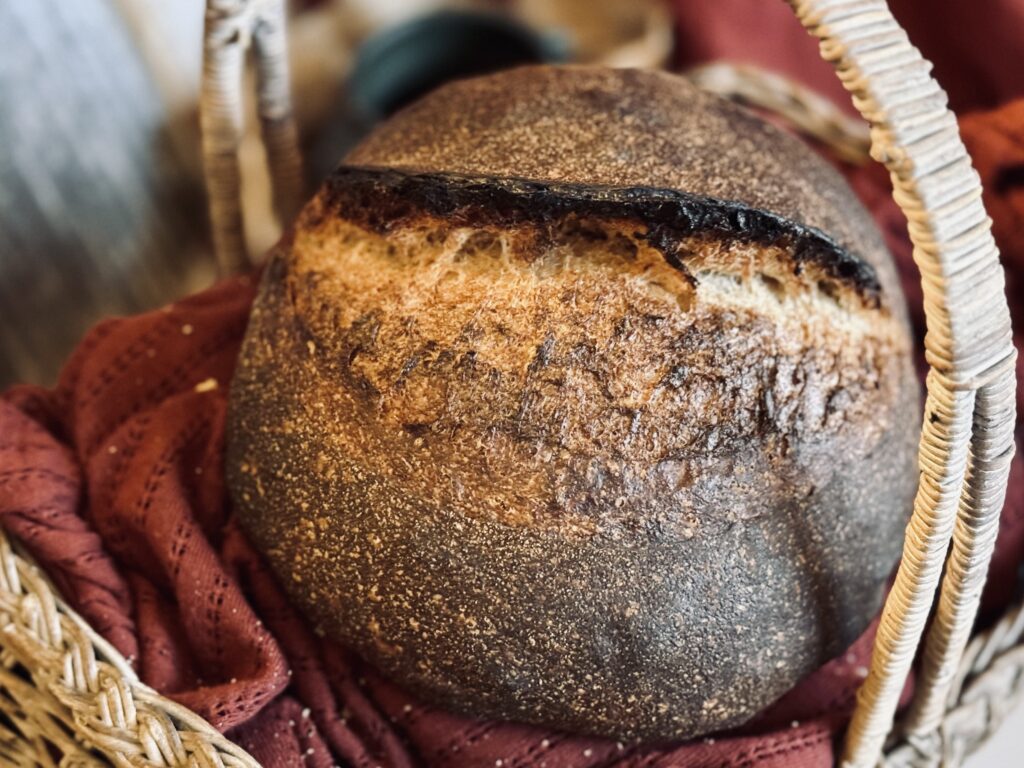
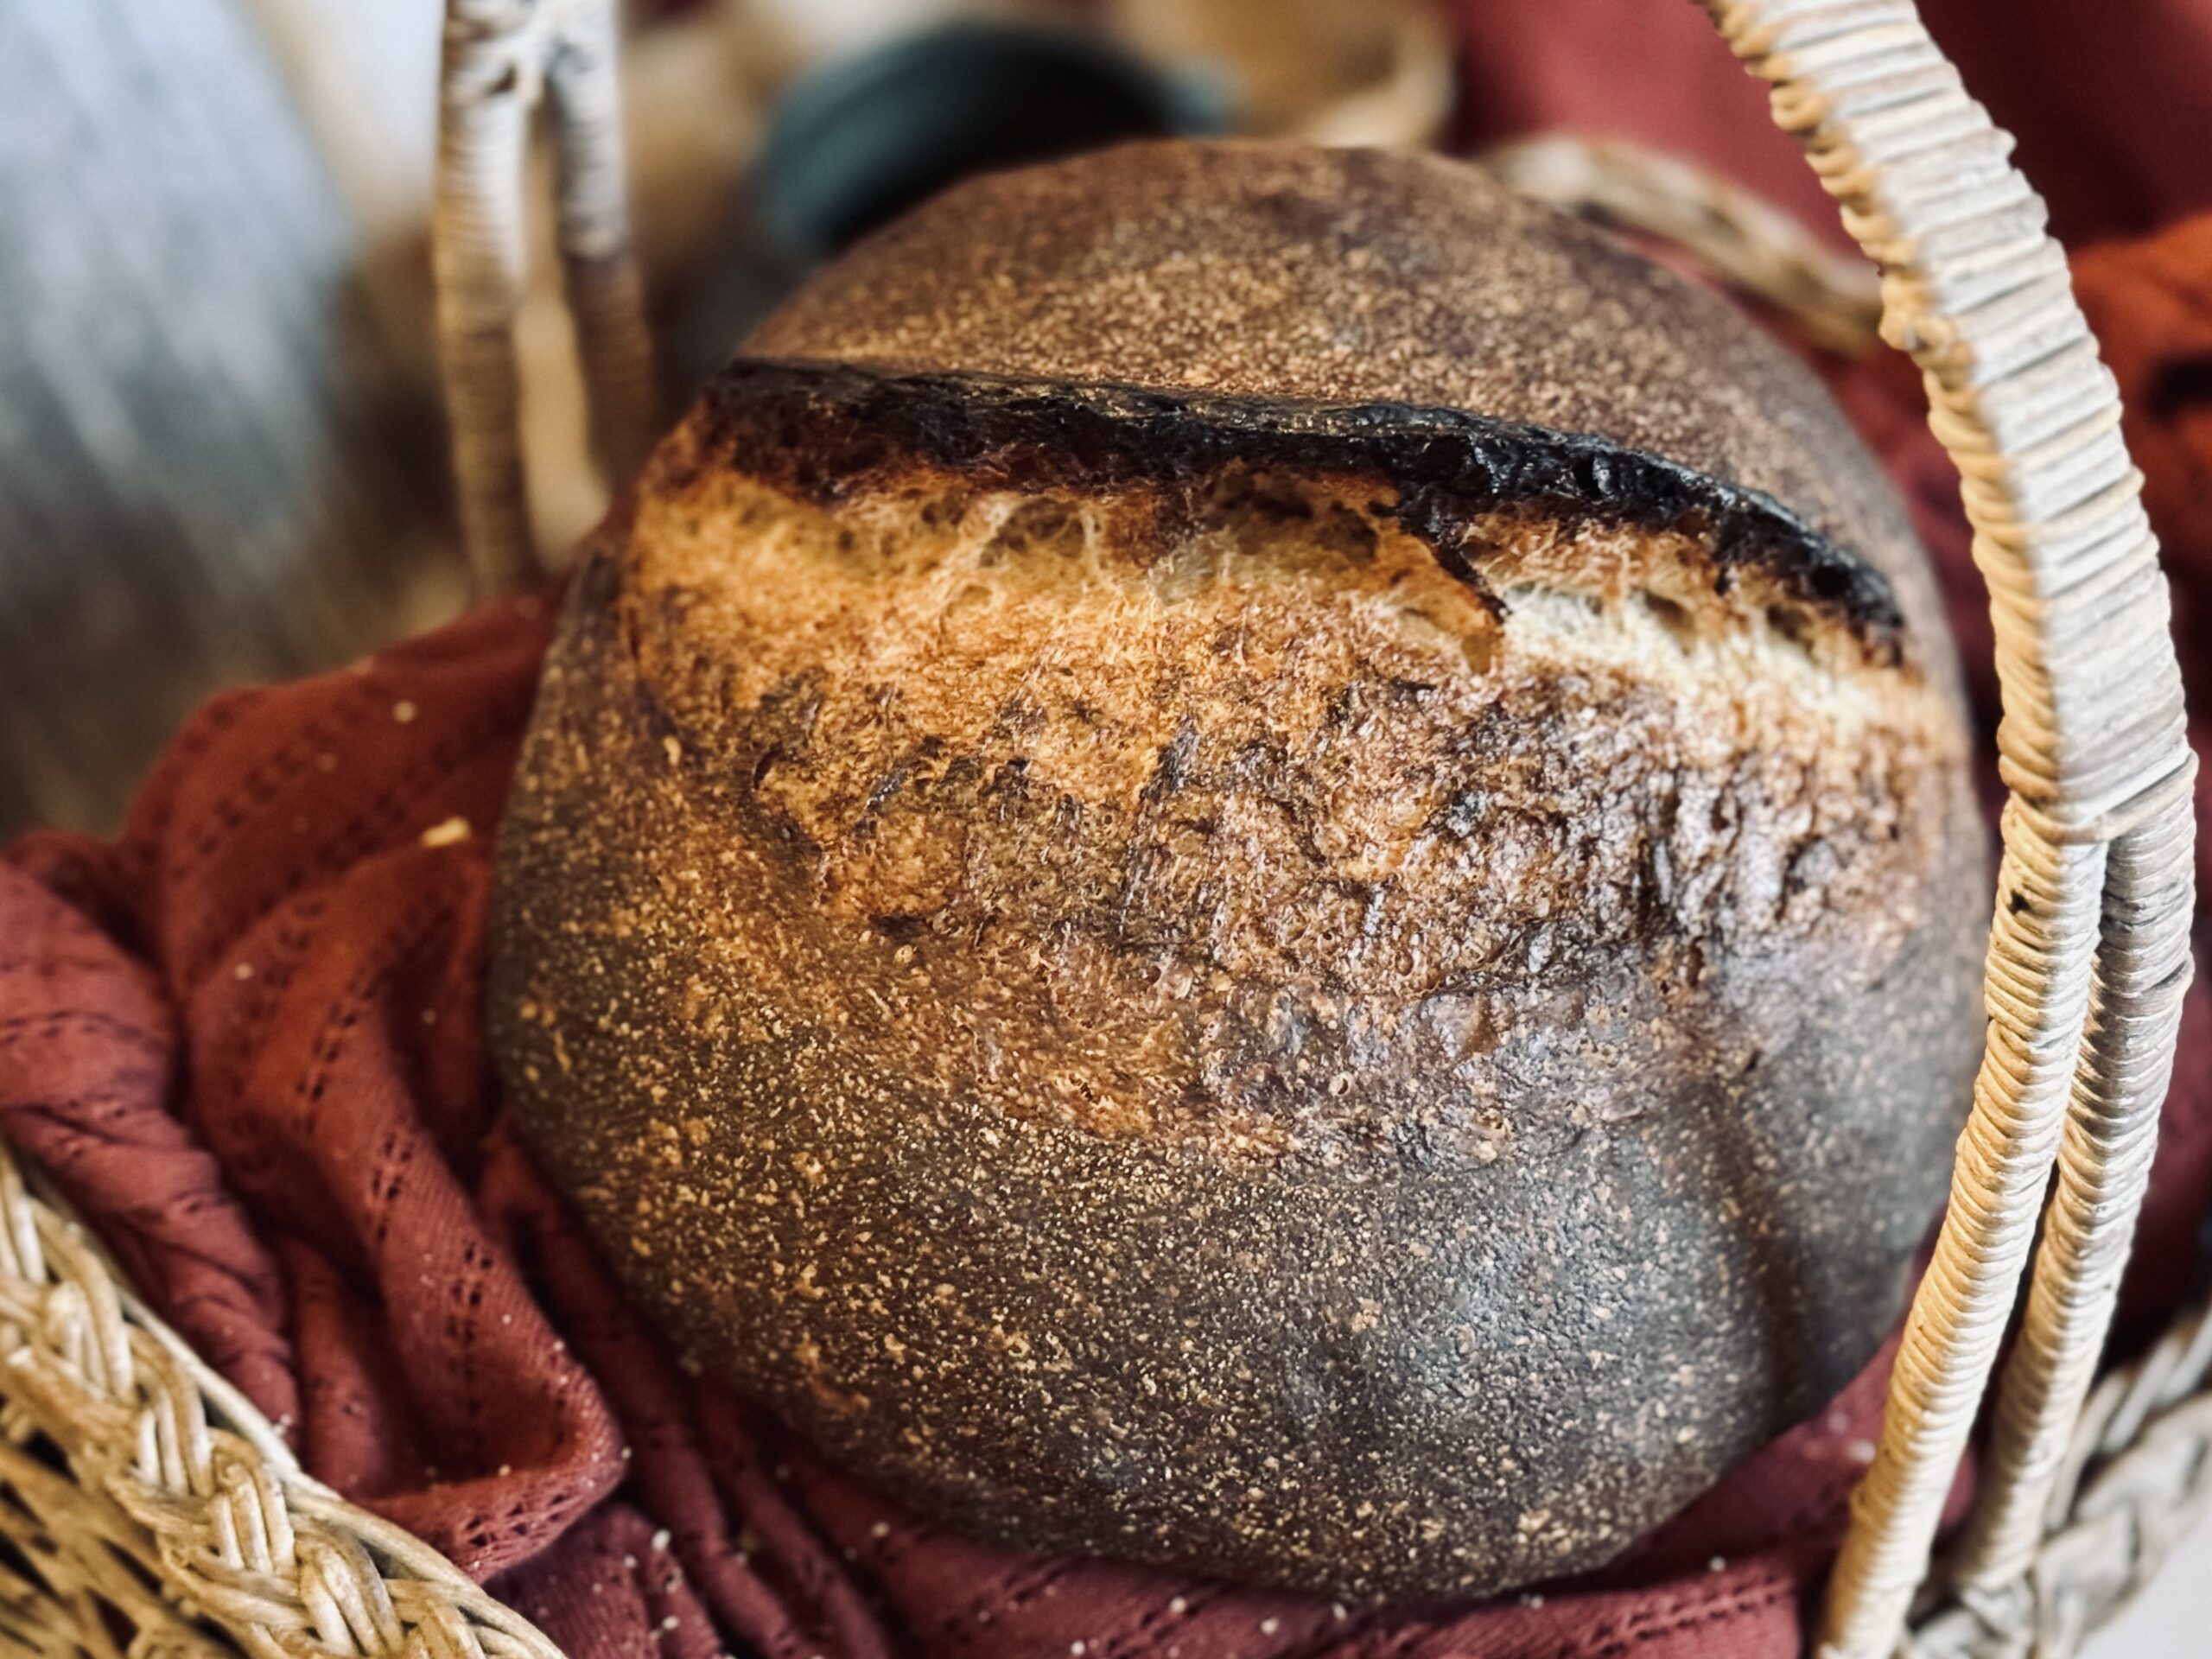
I am super simple when it comes to scoring. You only need one score, 1/4 to 1/2 inch deep, to help this loaf expand without cracking all over. I do just this. It is very important to make sure you do not score too deep on this one, since the weak rye will not expand as prominently in the oven as a white flour bread would.
While I used to be picky about scoring angle to achieve the best ear, I now realize that 1) I do not love having one obnoxious piece of burnt crust that contrasts the rest of my loaf so obnoxiously and 2) you will still achieve an ear if all the steps are done correctly. While scoring parallel with the counter will help you gain an even more beautiful and prominent ear, I do not find it necessary. Just score the dough (or don’t, if you prefer a more rustic, cracked look).
Baking Method: Temperature
The best oven spring and crumb comes from baking the dough hot and fast. I chose a temperature of 500 F to give the dough the best “pop” in the oven.
Baking Method: Steam
Use steam for the first twenty minutes of baking to help the dough expand properly. I leave the steam method open because I believe everyone has a preferred method for steaming their oven for bread that is right for their oven. You could bake this in a Challenger Bread Pan, or you could simply use boiling water or ice on the bottom of the oven to create the right amount of steam. The main goal: make sure your bread has the ability to expand to its maximum potential before the crust begins to harden.
Because I have a gas oven, it is hard to open bake. I open bake breads that are smaller in size, such as bialy or pan de cristal, but whole loaves do not do well. Therefore, I always use a Dutch oven for bakes like this (lid on for the first half of baking [steam], lid off second half [to firm up the crust]). Currently, that is my Challenger bread pan (which I absolutely love!).
Suggested Timelines
Daytime Baking Timeline
DAY 1
8:00 a.m.
- Mix and knead the dough.
8:30 a.m. – 10:00 a.m.
- Strengthen the dough through folds.
3:00 p.m.
- Shape the dough.
5:00 p.m.
- Bake and enjoy!
Cold-Ferment Timeline
DAY 1
2:00 p.m.
- Mix and knead the dough.
2:30 p.m. – 4:00 p.m.
- Strengthen the dough through folds.
9:00 p.m.
- Shape and refrigerate the dough.
DAY 2
8:00 a.m.
- Bake and enjoy!
📌 Quick Tip: Read the recipe in its entirety before you start cooking. This will help you understand the ingredients, steps, and timing involved, and allow you to prepare any necessary equipment or ingredients beforehand.

Rustic Rye Bread
Ingredients
Instructions
-
Mix all the ingredients together in a medium bowl. I like to whisk the dry ingredients and the wet ingredients separately, then combine them for the best mix. Continue mixing and kneading the dough for eight minutes. Set a timer and, when it goes off, you can stop. Cover the bowl with a lid, damp cloth, or plastic cling wrap. Rest 30-60 minutes.
-
Ferment and strengthen the dough:
NOTE: Before the first set of folds, the dough should have formed a complete windowpane. If not, knead three to five minutes in place of one set of folds.
Perform four sets stretch and folds (four folds) within the next two hours. To do this, fold the dough all the way up (as far as it will go without tearing, then over to the other side. Do this once in each cardinal direction. Then, let the dough rest until it has increased in volume by about 50%. This is three more hours at 70 F (21 C).
-
Shape: Turn the dough out onto your new working surface. Fold the long sides toward the middle, then the top toward the middle, and finally fold the bottom all the way over. Last, using wet hands, push and tuck the dough to form a tight round.
-
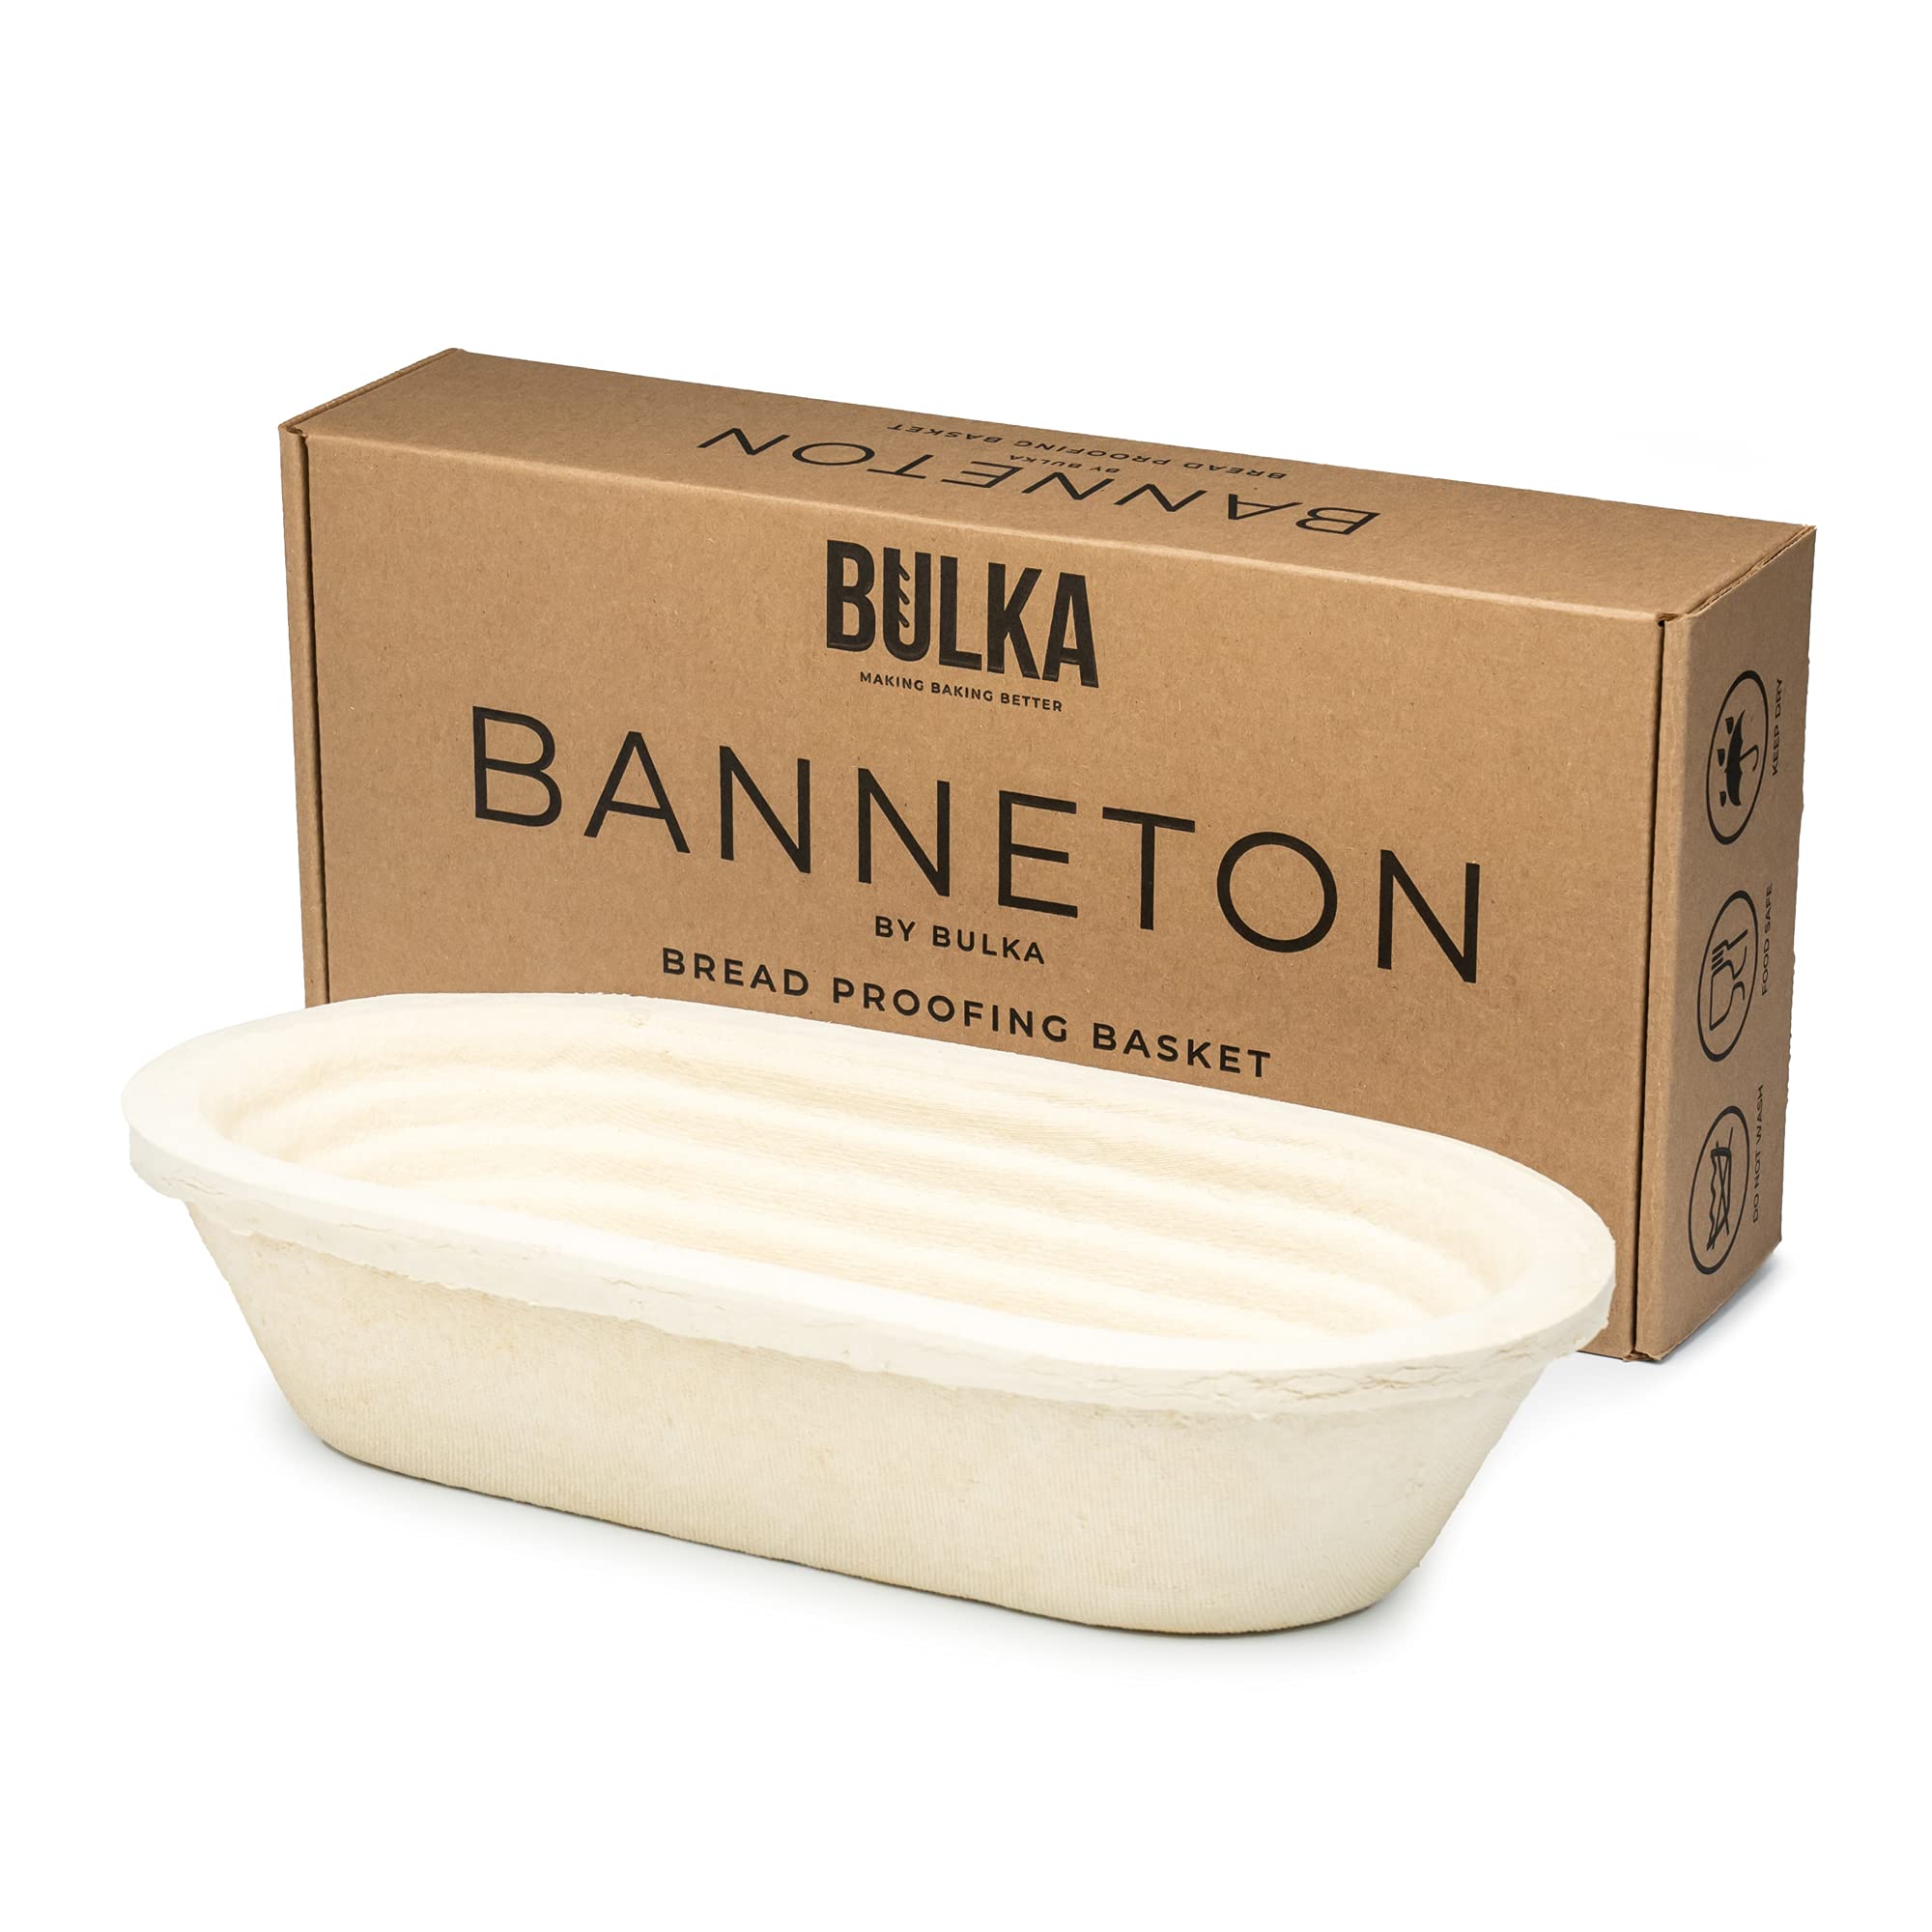
Place seam side up in a floured banneton. (Rice flour will prevent any and all sticking.)
-
Working from opposite ends of the round, pull the sides of the dough inward to tighten the skin once more.
-
Final proof: Let the dough proof on the counter for two more hours (this is my timing at 70 F [21 C]), preheating your oven for baking one hour in. Alternatively, finish proofing in the refrigerator overnight, and then proceed with baking directions the next day.
-
Preheat an oven to 500 F (260 C) with a Dutch oven on the top rack and a baking stone on the rack underneath (to prevent the bottom of the loaf from burning). Alternatively, you can open bake this loaf if you have an electric oven. Use any preferred steaming method that works best for your oven.
-
Turn your dough out onto parchment paper. Dust off any extra flour from the banneton.
-
Score your dough ¼ to ½ inch deep.
-
Bake in the preheated Dutch oven for 20 minutes with the lid on (or 20 minutes with steam, for an open bake). Then, remove the lid (or steam) and reduce the oven temperature to 450 F (230 C). Bake for 15-20 minutes more, until the loaf is deeply brown and the crust is darkened to your liking. The dough’s internal temperature should register 200 F.
-
Cool at least 30 minutes before slicing. Enjoy!
You might need...


Affiliate Disclosure: This post contains Amazon affiliate links. This means when you buy a product using one of my links, I may receive a small commission at no cost to you. Thank you, in advance, for supporting my work.
Nutrition Facts
Servings 12
- Amount Per Serving
- Calories 166.91kcal
- % Daily Value *
- Total Fat 1g2%
- Saturated Fat 0.13g1%
- Sodium 187mg8%
- Potassium 128.9mg4%
- Total Carbohydrate 33.66g12%
- Dietary Fiber 3.13g13%
- Sugars 1.57g
- Protein 6.09g13%
- Vitamin A 0.22 IU
- Vitamin C 0.26 mg
- Calcium 24.83 mg
- Iron 1.97 mg
- Vitamin E 0.37 IU
- Vitamin K 1.1 mcg
- Thiamin 0.28 mg
- Riboflavin 0.16 mg
- Niacin 2.31 mg
- Vitamin B6 0.07 mg
- Folate 17.33 mcg
- Phosphorus 76.11 mg
- Magnesium 25.14 mg
- Zinc 0.7 mg
* Nutrition values are auto-calculated and should be used as an approximation only.
Notes
- Storage: Store in a Ziploc or bread bag on the counter for three to five days, or slice and store in the freezer. Toast to warm.

User Reviews
I have been in search of a sourdough rye boule that tastes good, rises well and isn’t fussy. This is the recipe! It was delicious, everyone devoured it! Lot’s of dark rye flavor, can’t say enough. Bueno! I did use a proofer at 75 degrees as my kitchen is 65-68 all year and I don’t want super sour or super long ferments.