
About This Recipe
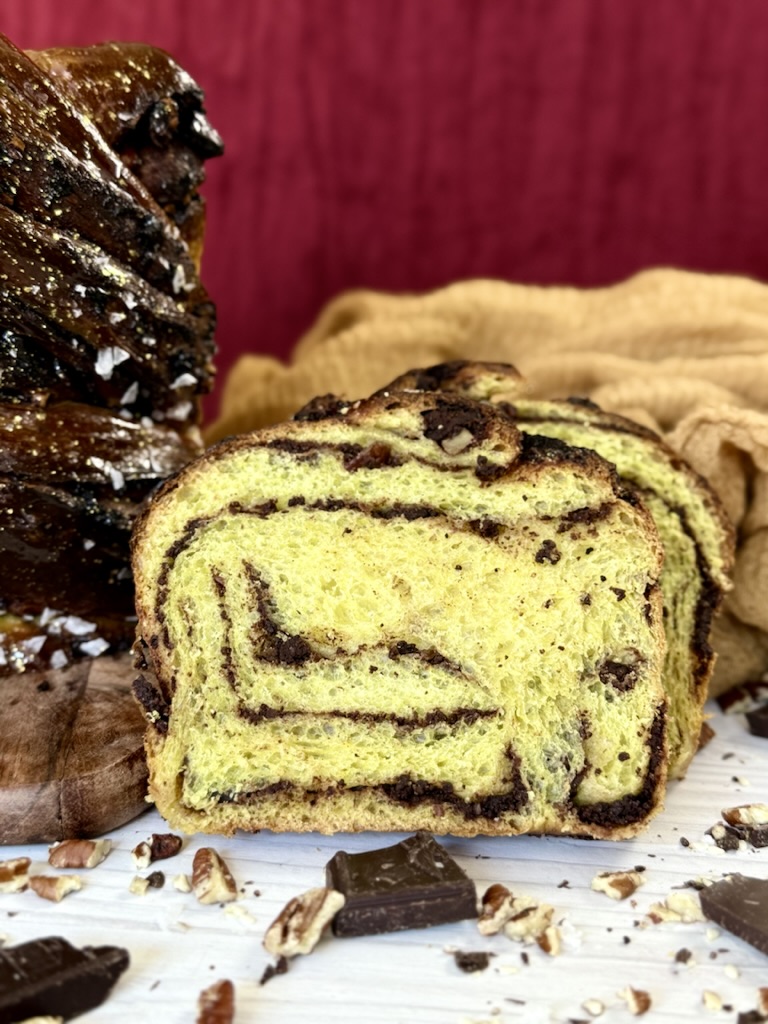
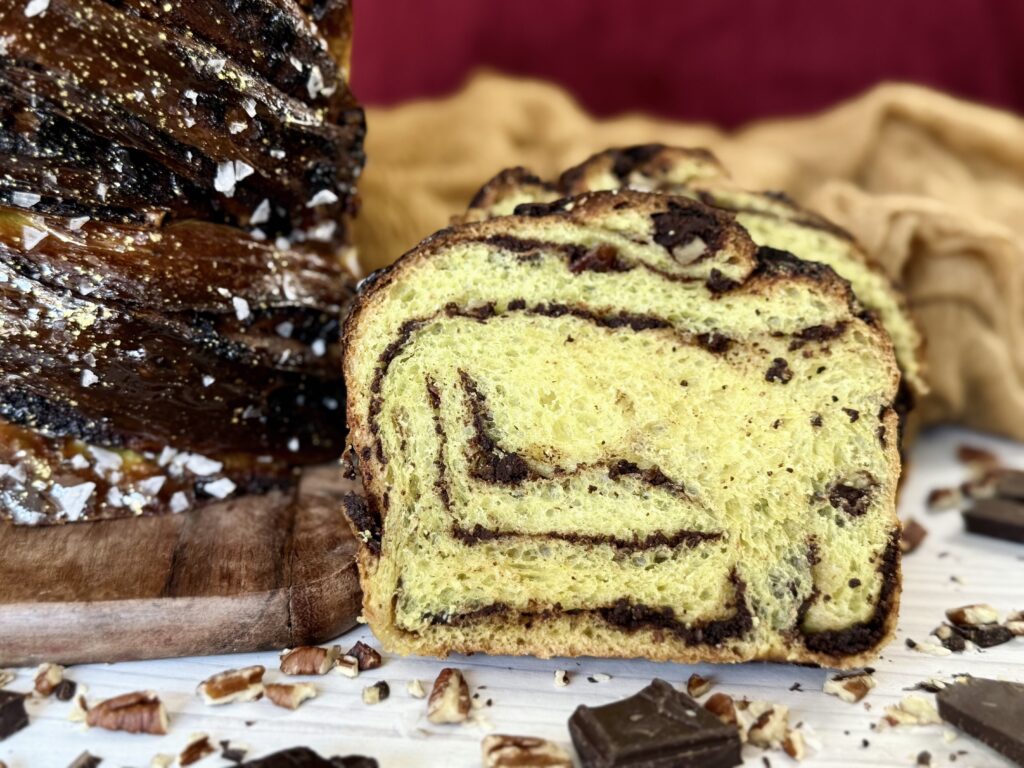
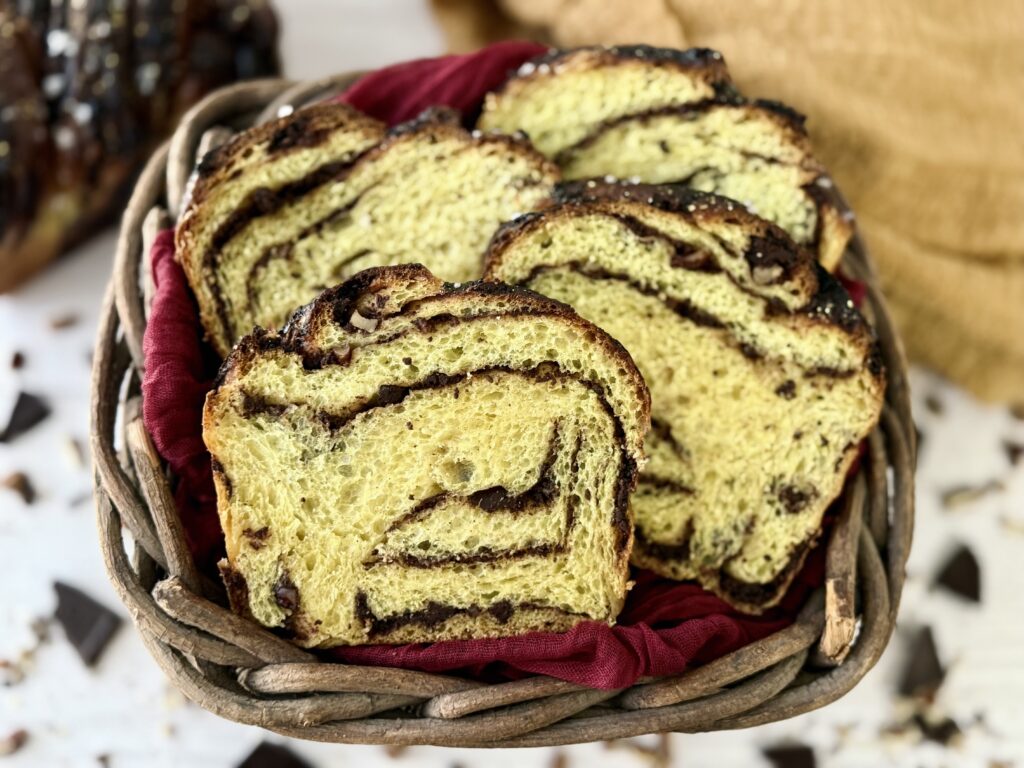
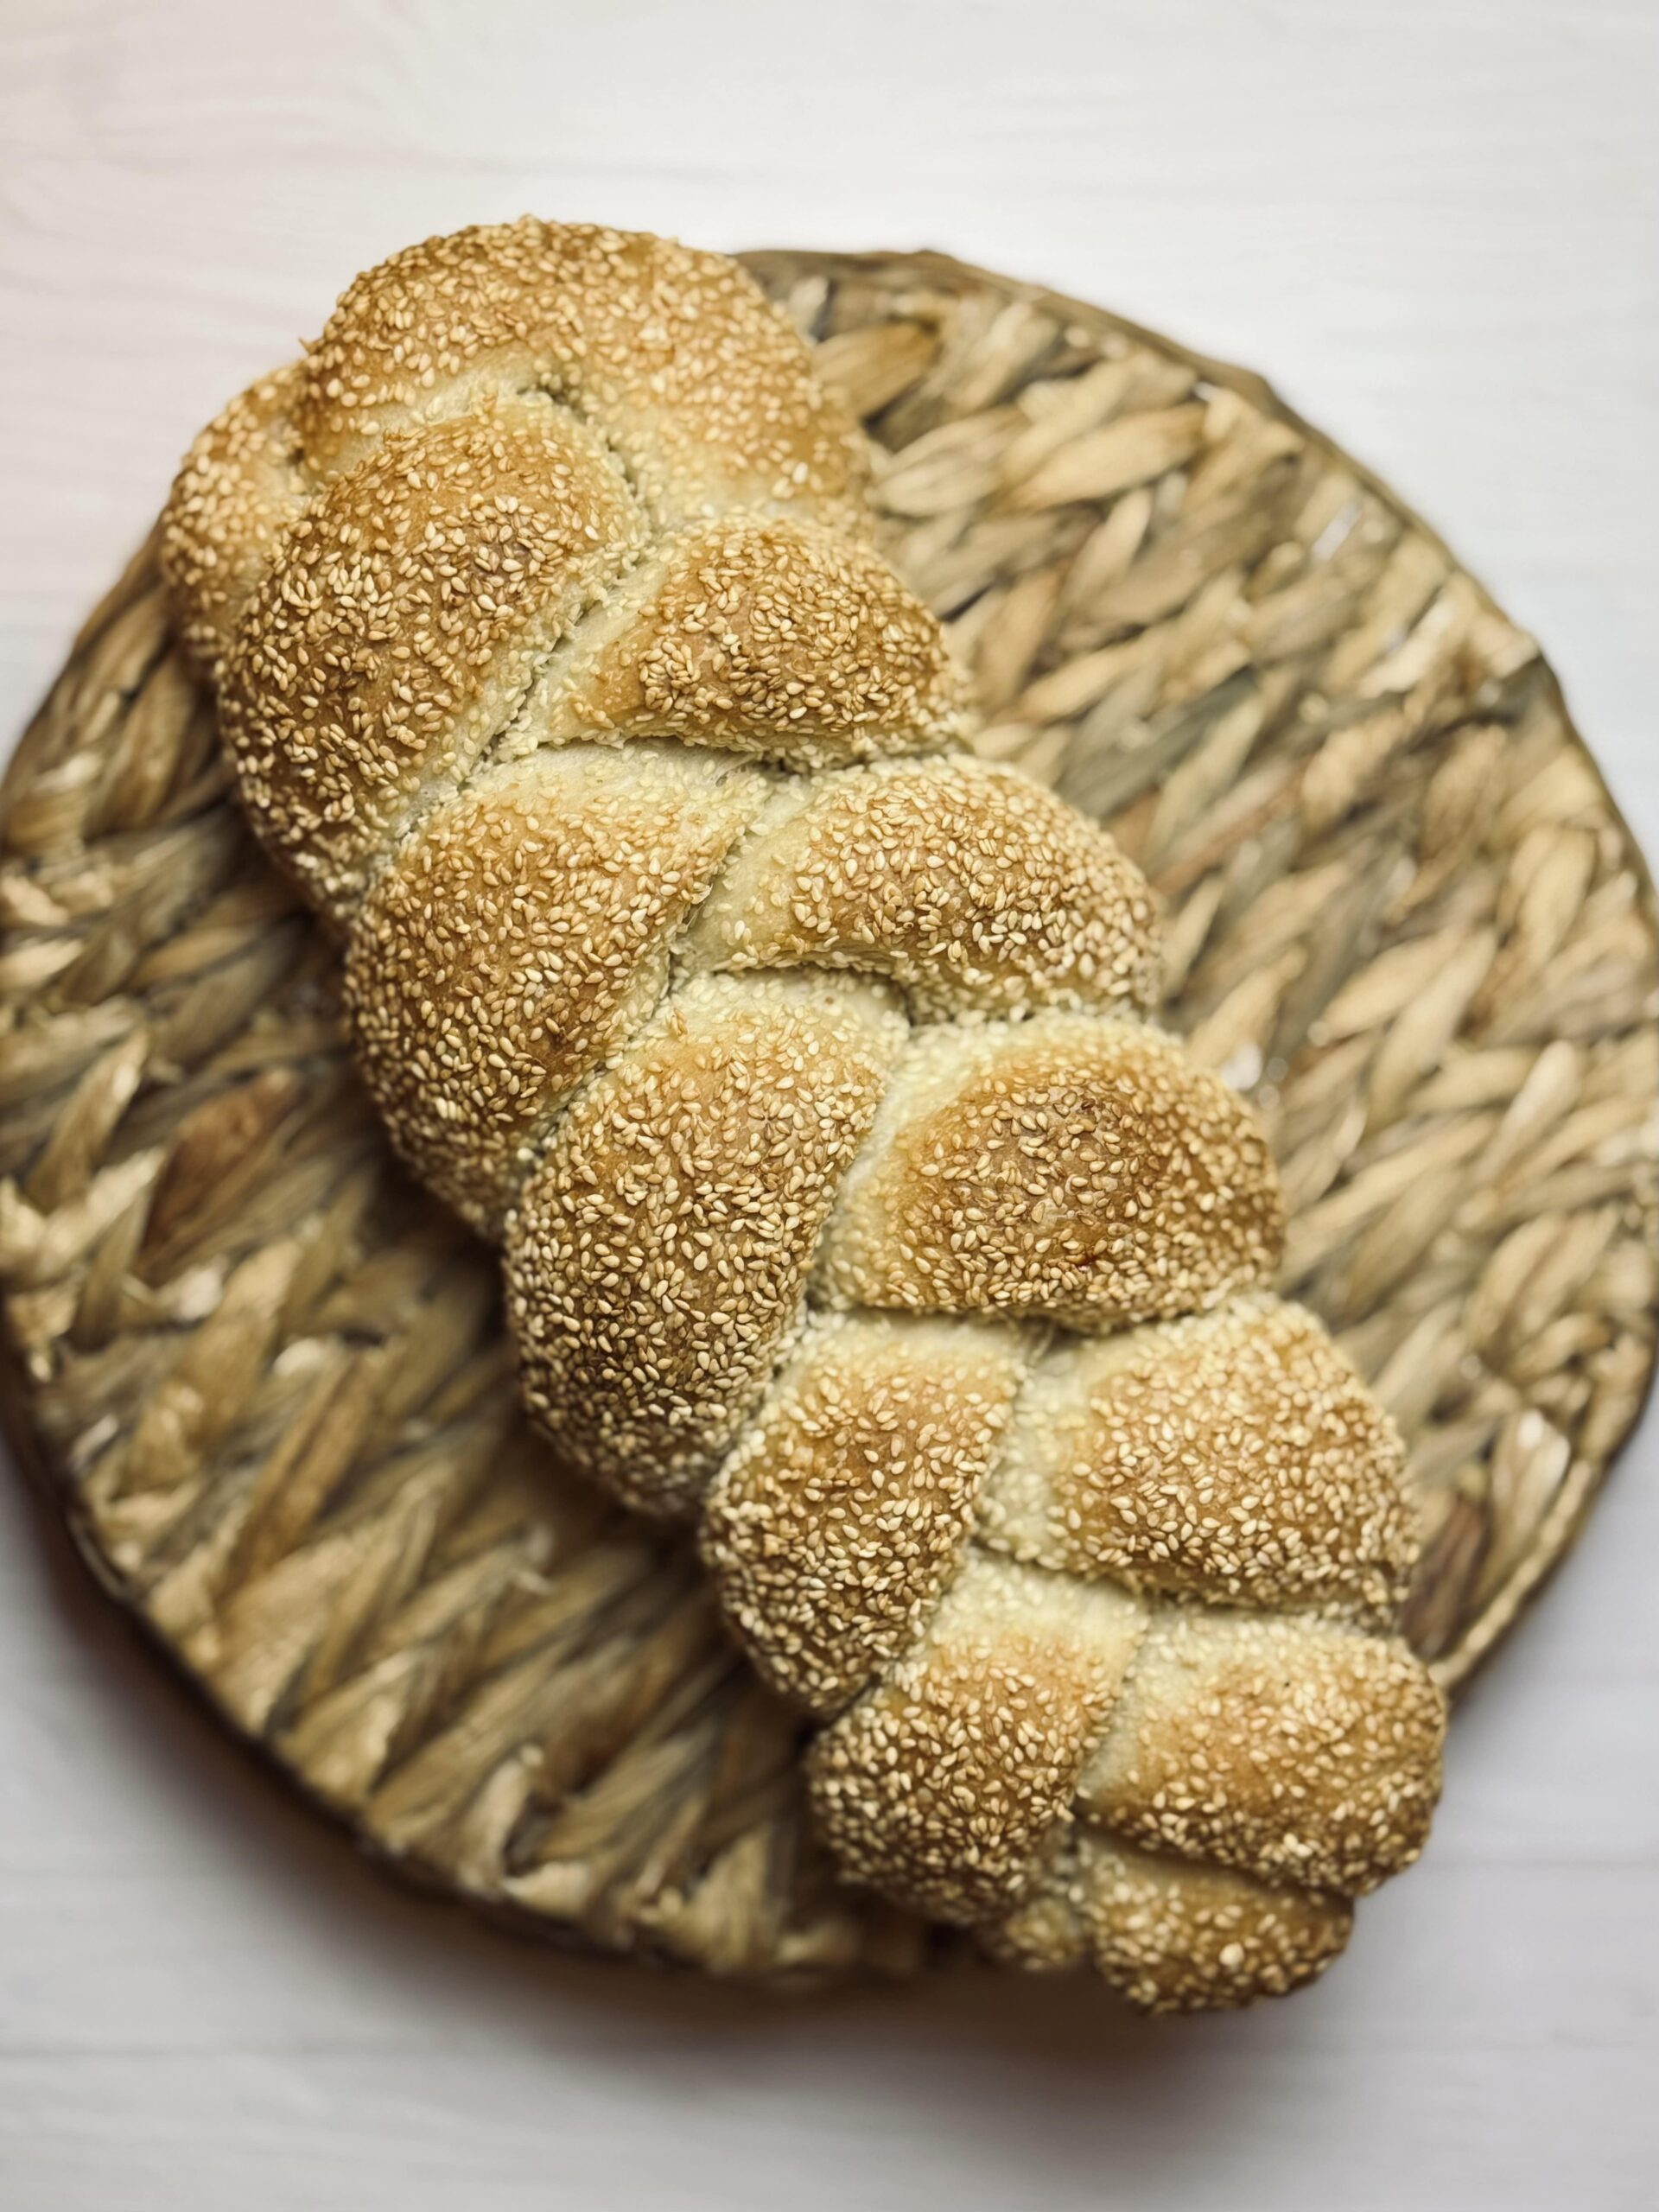
For Mother’s Day, I wanted to make a unique bread that represented motherhood in every respect. Of course, being the person I am, I had to think deeply about the symbolism and meaning behind every step. I created this recipe with moms in mind—not just for them, but about them. Every ingredient tells a story. Every twist in the dough reflects the tangled beauty of the role. Whether you’re baking it for your own mother, for yourself, or simply to celebrate someone who shows up with love day after day, this loaf is meant to nourish, comfort, and shine.
What Is Babka?
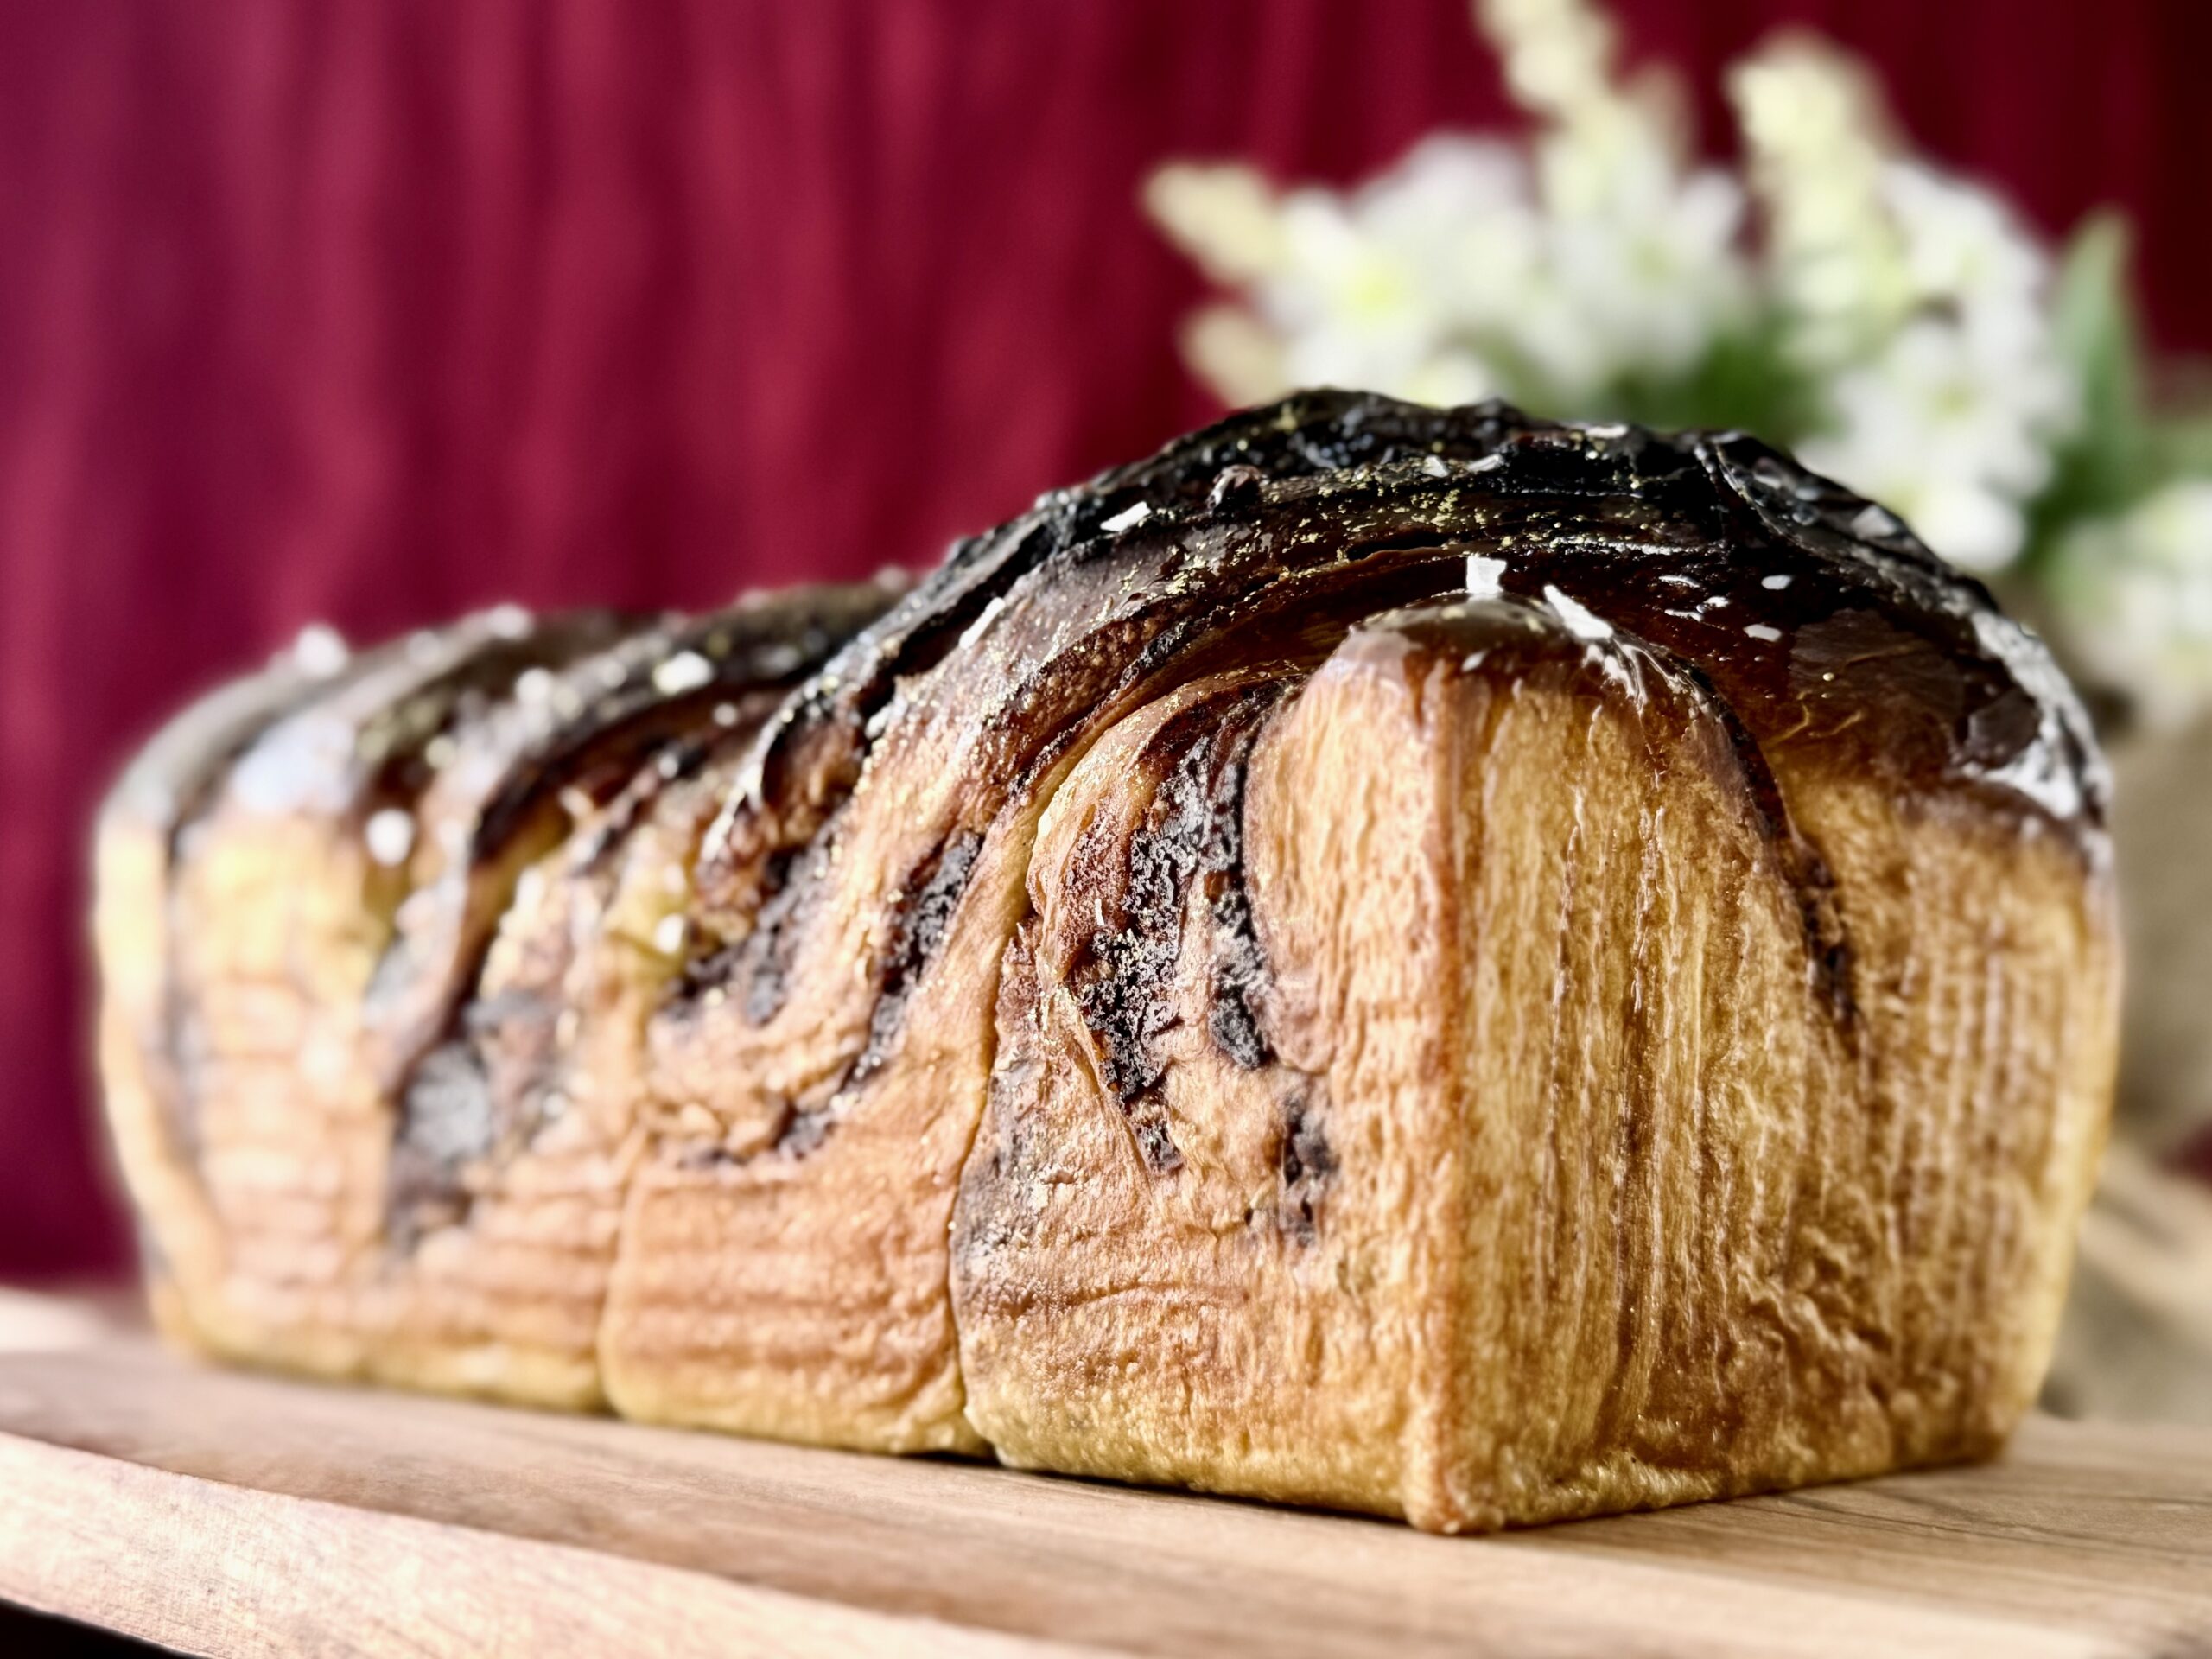
Babka is a sweet, braided bread that comes from Jewish communities in Eastern Europe. It’s made with a rich dough, rolled out and filled (usually with chocolate, cinnamon, or fruit), then twisted before baking. The name “babka” means “little grandmother” in Polish, and it’s often baked in a loaf pan like you see in this recipe. Traditionally, babka is enjoyed on holidays or special occasions, sliced and shared with family. It’s soft, sweet, and perfect alongside a cup of tea or coffee.
What’s The Deal With This Babka?
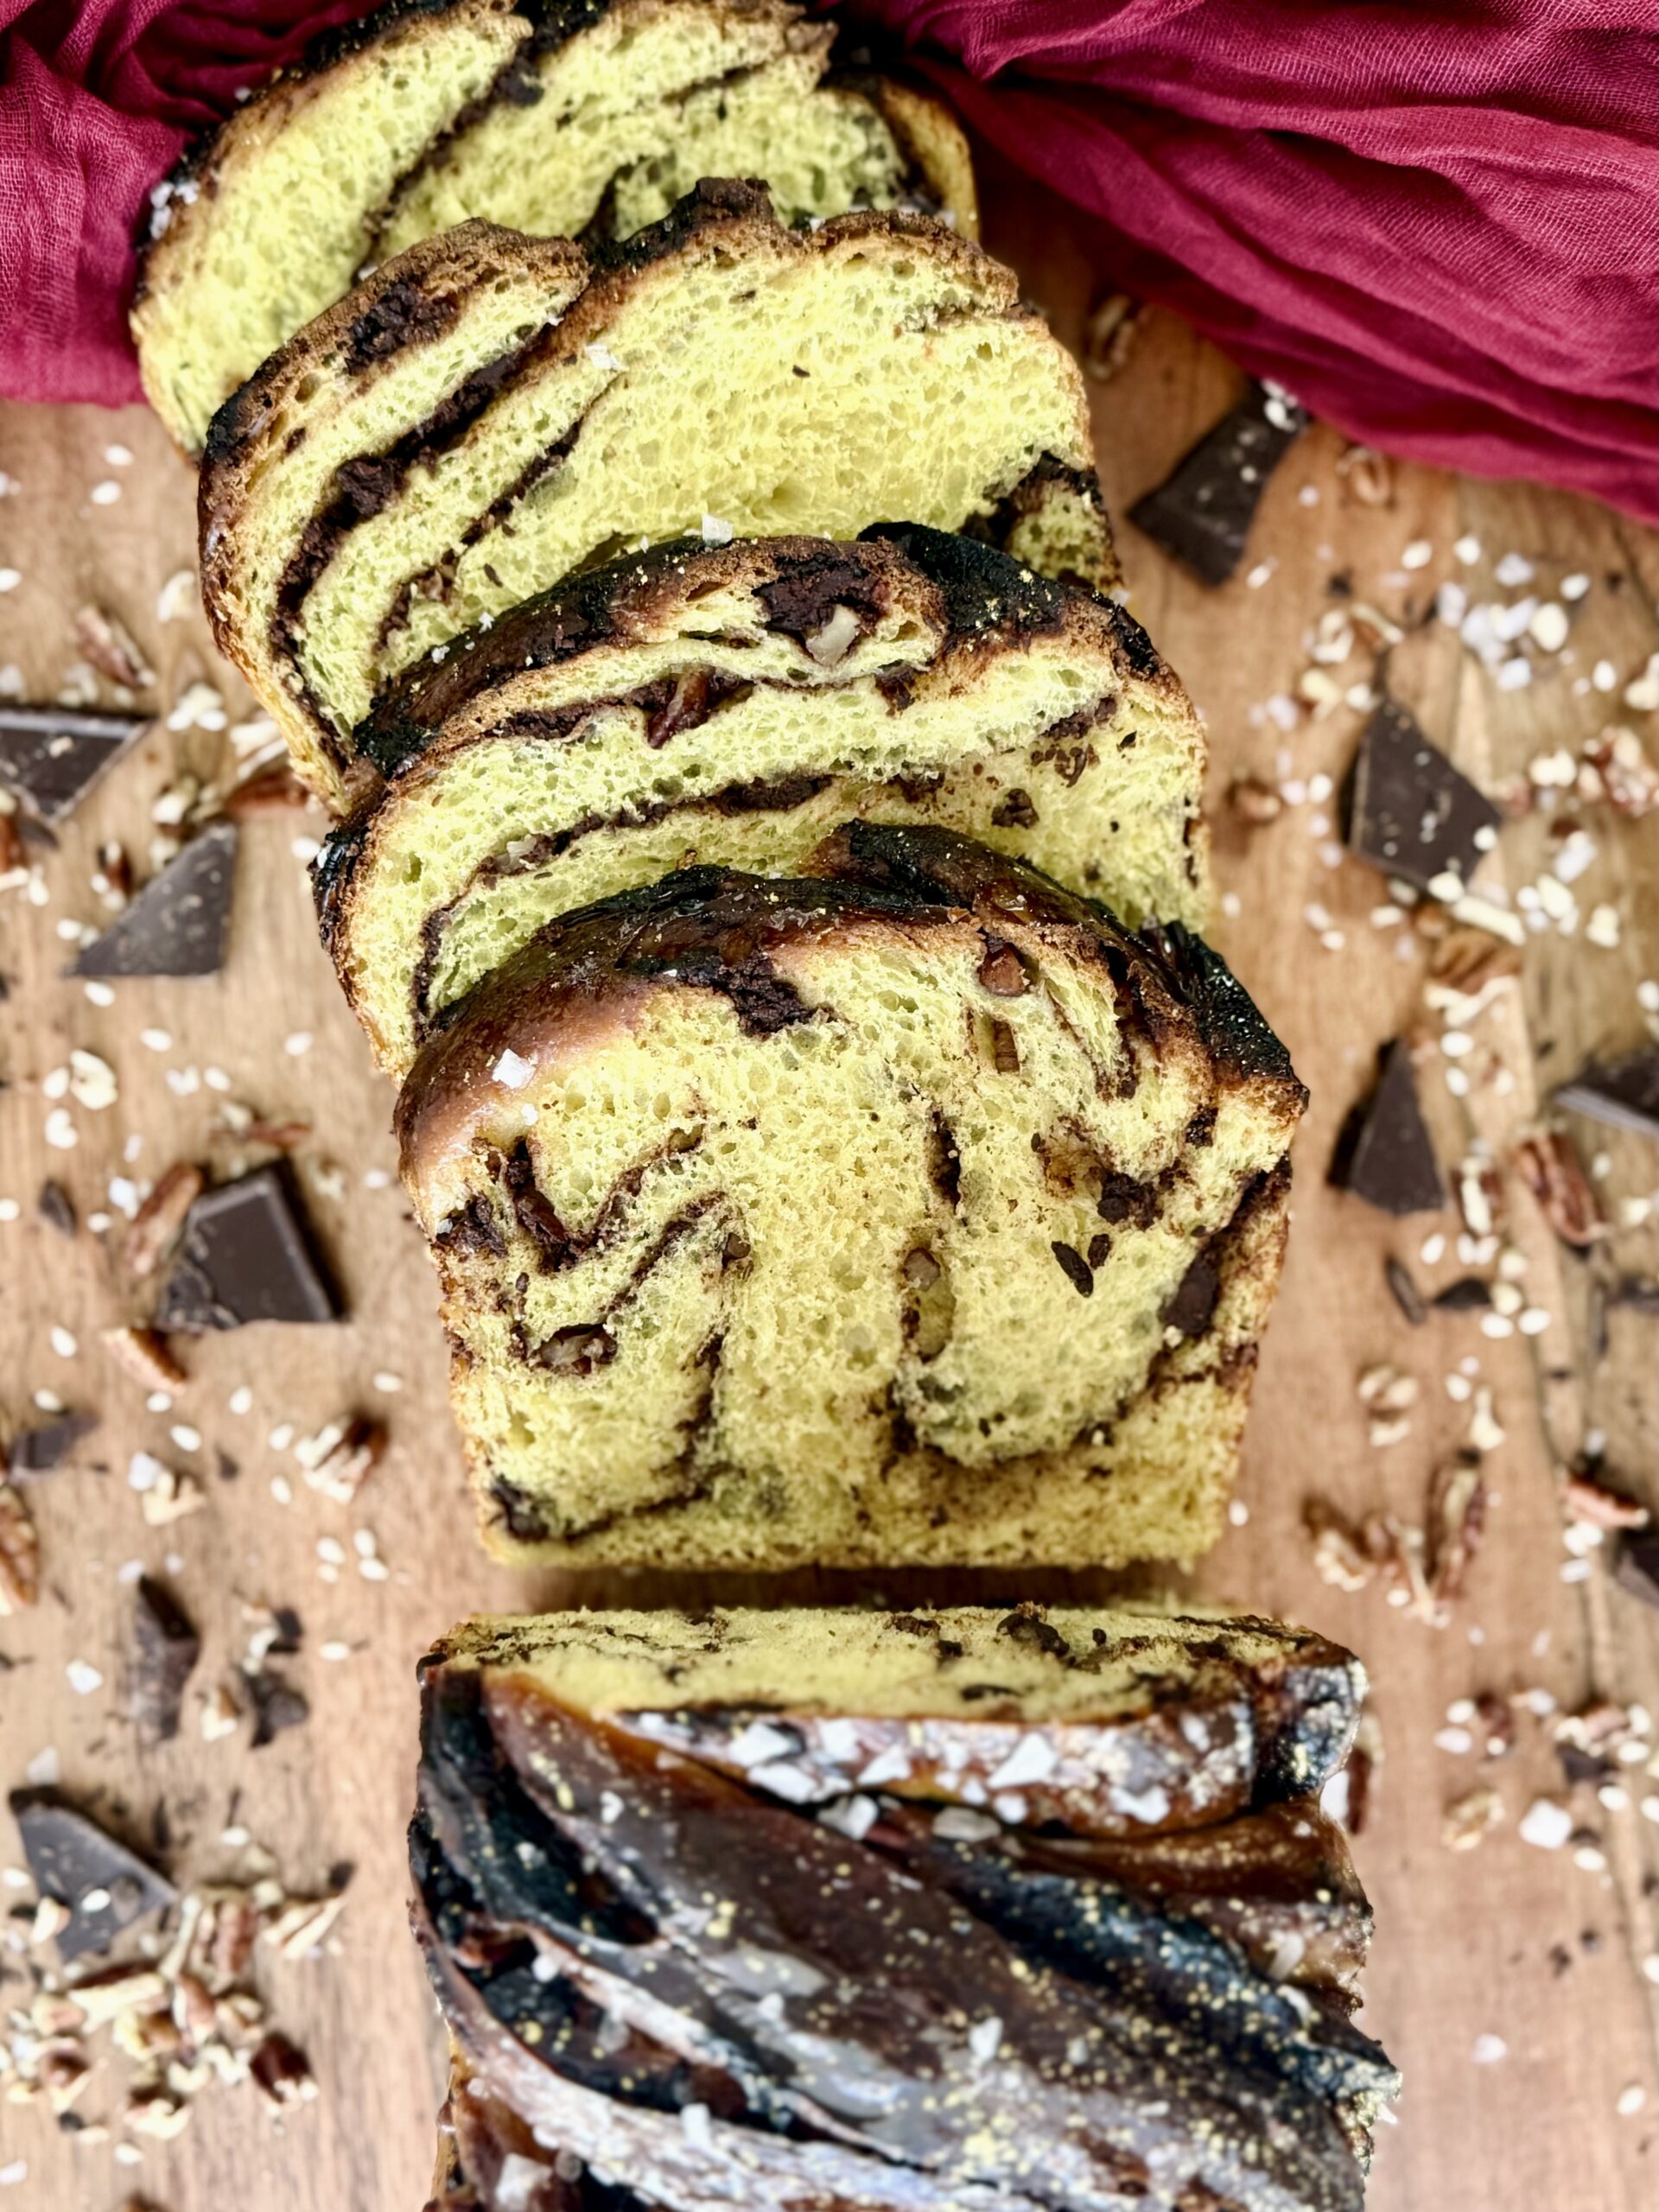
This babka is special because every part of it—from the ingredients to the shaping to the garnish—holds symbolic meaning tied to motherhood. It’s a creation of my own, designed to represent motherhood from the inside out, with earthy-sweet flavor and a stunning, swirled appearance to match.
Since it uses a few unique ingredients and extra steps, I’ve labeled it as an advanced recipe. But if you’ve made any of my sweet breads before, this one will feel familiar. So don’t be intimidated! It’s not too hard, it just needs a little extra love.
The Symbolism
| Feature | What It Represents |
| Golden Dough | Warm, soft, and glowing. Just like a mother’s love, even on her hardest days. |
| Turmeric | Earthy and grounding, representing inner resilience and steady strength. |
| Honey | In both the dough and the filling, it’s a symbol of love, sweetness, and quiet reward. |
| Tahini | Smooth but heavy. A perfect symbol of the emotional and mental load moms cary. |
| Cocoa | Rich and dark, representing the emotional weight and complexity of motherhood. |
| Orange Zest | Bright bursts of flavor, like the joy, giggles, and little wins that keep everything going. |
| Crushed Pecans + Chocolate | For texture, representing the constant, buzzing “mental clutter.” |
| Swirled Twist | From chaos to meaningful, the twist shows how the chaos of motherhood can still become something beautiful. |
| Syrup Glaze | Shiny and soft, just like a mother’s care and her ability to show up even when it’s hard. |
| Coarse Salt | A sprinkle of truth: tears, tension, and grit that makes the sweet parts sweeter. |
| Edible Glitter | A sparkle of celebration, and a tiny reminder that you’re doing amazing mama. |
Considerations For Enriched Doughs
Enriched doughs, like this babka, contain added fats and sugars that can make it harder for gluten to develop. Fats (usually butter) and sugars (honey in this case) in medium to large amounts can interfere with gluten formation, so it’s important to knead the dough to a windowpane before fermentation. Without strong gluten, the dough simply cannot hold in air the same way and may turn out dense or biscuit-like instead of soft and airy as intended.
On a scale of 1 to 10, where 1 is an unenriched dough (like country bread) and 10 is a very rich one (like panettone), this babka falls around a 5. It has a moderate amount of sugar and butter—not too heavy, but enough that gluten development matters. With any enriched dough, though, I always use my stand mixer for the best experience. This dough typically takes 10–15 minutes of kneading to reach a windowpane, and I find it much easier with a mixer—especially once the butter is added.
Some home mixers are not built for kneading bread efficiently. Check your machine’s manual to make sure it can safely run for up to 30 minutes. (For reference, panettone dough can require 60+ minutes of mixing!) You want to avoid overworking the dough or burning out your motor. I love my Ankarsrum stand mixer, which is more than capable of living up to the task of kneading even the toughest of doughs.
If you do not own a mixer, hand-kneading is totally possible—it just takes some time and patience to build that windowpane. You can use your favorite kneading technique, or find ideas in my video on methods of gluten development, here.

The “Why” Behind The Starter Build
Why Build A Starter (Levain) For This Recipe?
The purpose of a sweet stiff starter is to reduce sourness, a flavor that’s usually not desired in sweet breads. By building a levain with specific ingredients, we can create an environment that suppresses the microorganisms responsible for sour flavor, especially certain types of bacteria.
Although over-fermentation can still lead to a sourness, a sweet stiff starter helps slow that process down, giving you a bigger window for balanced flavor. To understand how this works, it helps to know how yeast, bacteria, and acid production play the game of fermentation.
Sourness shows up when bacteria outnumber yeast in your starter. This happens naturally, as bacteria reproduce faster than yeast, especially in warm, ideal conditions. When they get too dominant, they produce higher levels of lactic and acetic acids, which cause that tangy flavor. A sweet stiff starter comb its this by using sugar and less water to create something called “osmotic stress,” which puts pressure on the bacteria and slows their activity. This gives yeast the upper hand, leading to a better rise and milder, more pleasant flavor in your bread.
That’s the whole goal of this type of levain: to favor rise over tang, and create sweet breads with a soft, clean flavor.
Stiff Starter
By giving the yeast more food (this means they can continue to eat, multiply, and produce CO2) and reducing the amount of water (bacteria favor wet climates), we can effectively reduce the amount of acidity in our starter at the same percentage of rise as a starter made with equal amounts of flour and water.
Sugar
This is one of the most important components of this levain—do not skip it! Sugar is a powerful tool. (Read more about sugar here.) Added in just the right amount (10–15% of the total weight of the flour), we create something called “osmotic stress,” which limits bacteria’s ability to reproduce. This suppresses acid buildup, which, therefore, limits overall sourness coming from the starter.
Temperature
In order to favor yeast growth, I aim to keep this levain between 70–75 F (21–24 C) and use it when it has at least tripled in size. Yeast produce most abundantly in these temperatures, while both lactic and acetic acids released from bacteria remain balanced. This specific temperature range helps provide balance to the starter, which translates to how efficiently the starter is able to ferment bread and how mild the overall sour flavor is.
Optional Kneading
Have you ever heard of developing gluten in your starter? While it is not essential, kneading this starter for just a few minutes will help trap air, introducing oxygen and stimulating yeast growth. It also provides structure (by creating a slightly more elastic gluten network), which helps the levain rise and maintain peak more efficiently.

The “Why” Behind The Dough
Tangzhong
Tangzhong is magical. I use it in most bread recipes that are meant to be soft and tender. By heating up a small portion of the flour with water, we are gelatinize the starches, which is where all the benefits kick in. This process basically “explodes” the starch granules, allowing them to absorb more water than they normally would. That extra water helps the dough stay moist, plush, and soft for days without drying out.
Now, we can’t do this with all the flour. If we did, there’d be no starch left to gelatinize in the oven, and the bread could turn out overly soft, or have a strange, gummy texture. Bread is all about balance, remember? And just the right amount of tangzhong gives you the perfect texture without overdoing it.
Milk
Milk plays several important roles in this dough. It adds flavor, a touch of sweetness, and a creamy, tender texture. It also helps the crust darken in the oven, thanks to its natural sugars. But the main reason I use milk is that it helps tighten the dough, making it stronger and more elastic. Combined with water and eggs, it creates a beautifully balanced dough with great flavor and structure.
If you want to substitute the milk, I recommend using another animal-based milk or high-fat dairy alternative. You can use nut milk or plant-based milks, but they don’t usually have the same strengthening effect. Your dough may end up a little looser or sticker than mine. That said, this is already a soft, enriched dough (so some stickiness is normal) but it should still feel manageable.
Eggs
Eggs help hydrate the dough, along with the water from the tangzhong and the milk. Their yolks also add fat, flavor, and a rich creaminess. But the biggest benefit of eggs is their ability to trap air. The proteins in eggs are unique: they help hold on to air during mixing and baking, which leads to a fluffier, lighter loaf.
Honey
The sugar in this dough isn’t just symbolic—it adds sweetness and helps suppress acid production during fermentation. I’ve adjusted the starter in this recipe to ensure the dough still rises properly with the added sugar.
Butter
Butter is a tenderizer—it makes the dough fragile and soft, while also imparting a rich flavor. The amount used here is just right: enough to keep the bread soft and tender, but not so much that it interferes too heavily with gluten development.
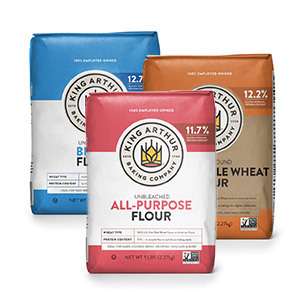
Bread Flour
In my book, bread flour is a must for making great bread. Bread flour has more gluten-forming proteins, which naturally build a stronger gluten network. This helps trap air better during fermentation, leading to a lighter, airier texture. It’s especially important in a recipe like this one, where the enriched dough practically begs for a strong support system.
You can use all-purpose flour if that’s what you have, but you might notice some differences. The dough might not hold air as well, and it can sometimes tear during shaping. These are signs of weaker flour, which usually means a denser loaf that doesn’t spring up right in the oven and has a texture closer to a biscuit than a bread roll. If you notice this happening, I definitely recommend trying the recipe again with a different flour.
For most recipes that call for “bread flour,” I use King Arthur Bread Flour because of its higher protein content (12.7%) and amazing gluten strength. I recommend this flour over my other go-to, Bob’s Red Mill Artisan Bread Flour (around 12.5% protein) for this recipe, as it is stronger and leads to a higher quality bread.
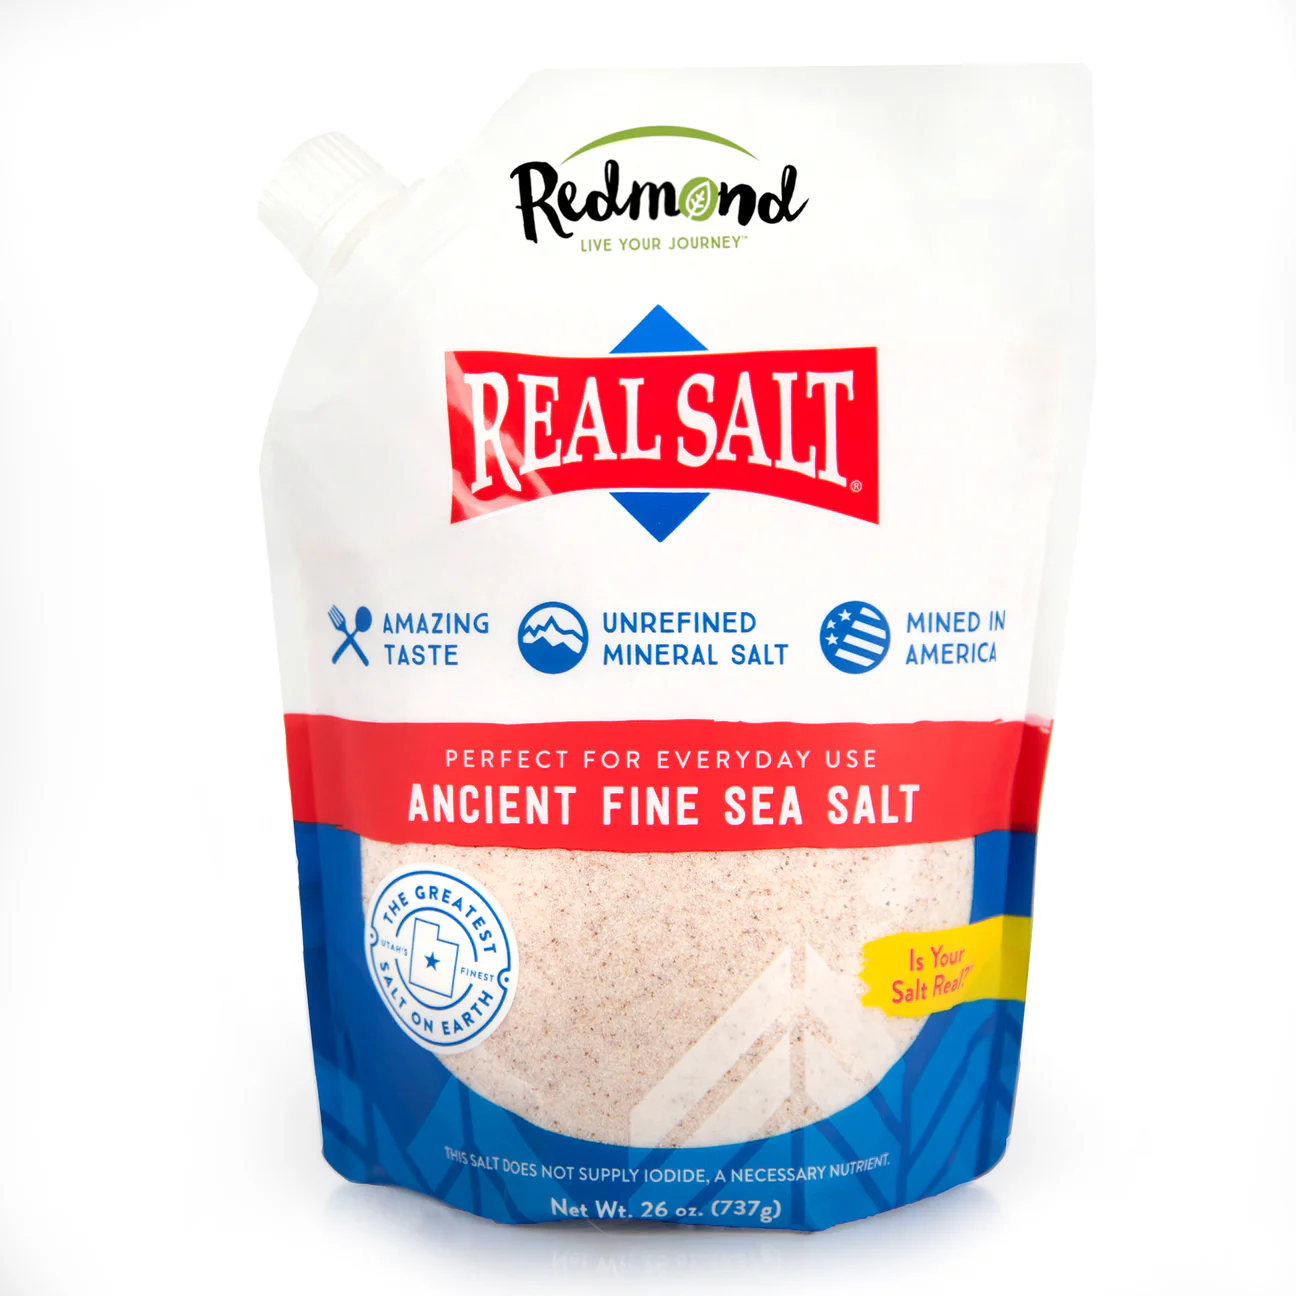
Salt
When it comes to salt, I like to use a fine salt without any anti-caking agents. Fine salt dissolves more easily, and skipping the caking agents means a cleaner dough. Lately, I’ve been loving Redmond’s Real Salt for all my bread recipes.
Salt does way more than just make bread taste good (without it, bread would honestly taste like nothing). It also acts as a tightening agent, helping to create a stronger, more elastic dough. On the flip side, salt does slow down fermentation and gluten development a little—but that’s totally normal and something we plan for when building the recipe. Bread needs salt, no question about it. The key is using just the right amount: enough to bring out the flavor without stopping the dough from rising properly.
Vanilla Paste
Lately, I’ve been loving vanilla paste over vanilla extract. I find it imparts a better vanilla flavor without any trace of alcohol, and I love how you can see the little specks of vanilla bean throughout your dough.
Turmeric
Turmeric has a subtle earthiness that pairs beautifully with the honey and cocoa in the filling. It’s also what gives the dough its warm, golden color. Both the flavor and color are gentle—not overpowering—but add just enough depth to make the loaf feel extra special.
The Filling
Brown Butter
Butter brings moisture and richness, helping to make the filling more spreadable and flavorful. Browning the butter only adds to the complex and deep flavor profile of this bread. Without butter, the filling would be dry and crumbly.
Tahini
Tahini offers a nutty, slightly bitter base that balances the sweetness and adds depth. It’s the heart of the filling. Without it, the flavor would be one-dimensional and far less complex.
You can try substituting tahini with other nut butters for different flavors. This recipe works great with almond butter for less bitterness.
Honey
Honey adds natural sweetness, complimenting the earthy notes from the tahini, cocoa, and turmeric in the dough.
Cocoa Powder
Cocoa darkens the filling both visually and flavor-wise, enhancing contrast with the golden dough.
Vanilla Paste
Vanilla paste adds depth and warmth, enhancing every other flavor in the filling. It subtly ties together the honey, tahini, and cocoa, making the whole thing feel more complete.
Orange Zest
Orange zest cuts though the richness with bright, aromatic lift. It adds a pop of freshness you’d miss if it weren’t there—like a quiet surprise in each bite.
Pecans + Chocolate
The pecans and chocolate add texture contrast. You can replace the pecans with another nut of choice, such as sliced almonds or crushed walnuts, and the dark chocolate with another variety, such as white or milk chocolate, or a dried fruit, such as chopped dates or even candied oranges.
The Glaze
I went with a simple syrup glaze here, which is traditional for babka. It gets brushed over the top to keep the bread soft while forming a light, shiny shell as it sets. I also add a splash of orange blossom water to enhance the subtle citrus notes from the orange zest in the filling.

The “Why” Behind The Process
Mixing
Enriched doughs, like this babka, contain added fats and sugars that make gluten development more difficult. That’s why it’s important to knead the dough to a windowpane before fermentation. Without strong gluten, the dough can’t hold air properly and may bake up dense or biscuit-like, rather than soft and airy as intended. That’s why I recommend using a stand mixer here—it makes the process much easier and more effective. Hand-kneading is absolutely possible, but it requires more time, effort, and patience. You can use your favorite technique or check out my video on gluten development methods for ideas.
The goal is to knead this dough until it stretches thin without tearing (this is called a windowpane). Other signs that the dough is ready include: pulling away cleanly from the bowl and forming a smooth ball around the dough hook. If you’re using a KitchenAid or similar mixer, you might even notice the mixer start to “jump” when the dough reaches full strength.
Start by mixing on a low to medium-low speed until the ingredients come together into a cohesive dough. This stage is just about combining everything and hydrating the flour’s proteins. Going too fast here can disorganize gluten that hasn’t fully formed yet, which can slow down development. Once the dough is fully mixed, increase the speed and knead until you reach windowpane. The exact speed and time will depend on your mixer and the dough itself, but here are some basic guidelines:
- A lower speed will take longer, while a higher speed will knead the dough much faster.
- A lower speed will keep the dough elastic (strong, not stretchy), while a higher speed will create extensibility (stretchiness).
- Too high a speed will bread gluten bonds and ruin fermentation.
- The dough temperature should not exceed 78 F (26 C).
- Use the guidelines from your mixer to determine what it is able to handle.
Bulk Fermentation
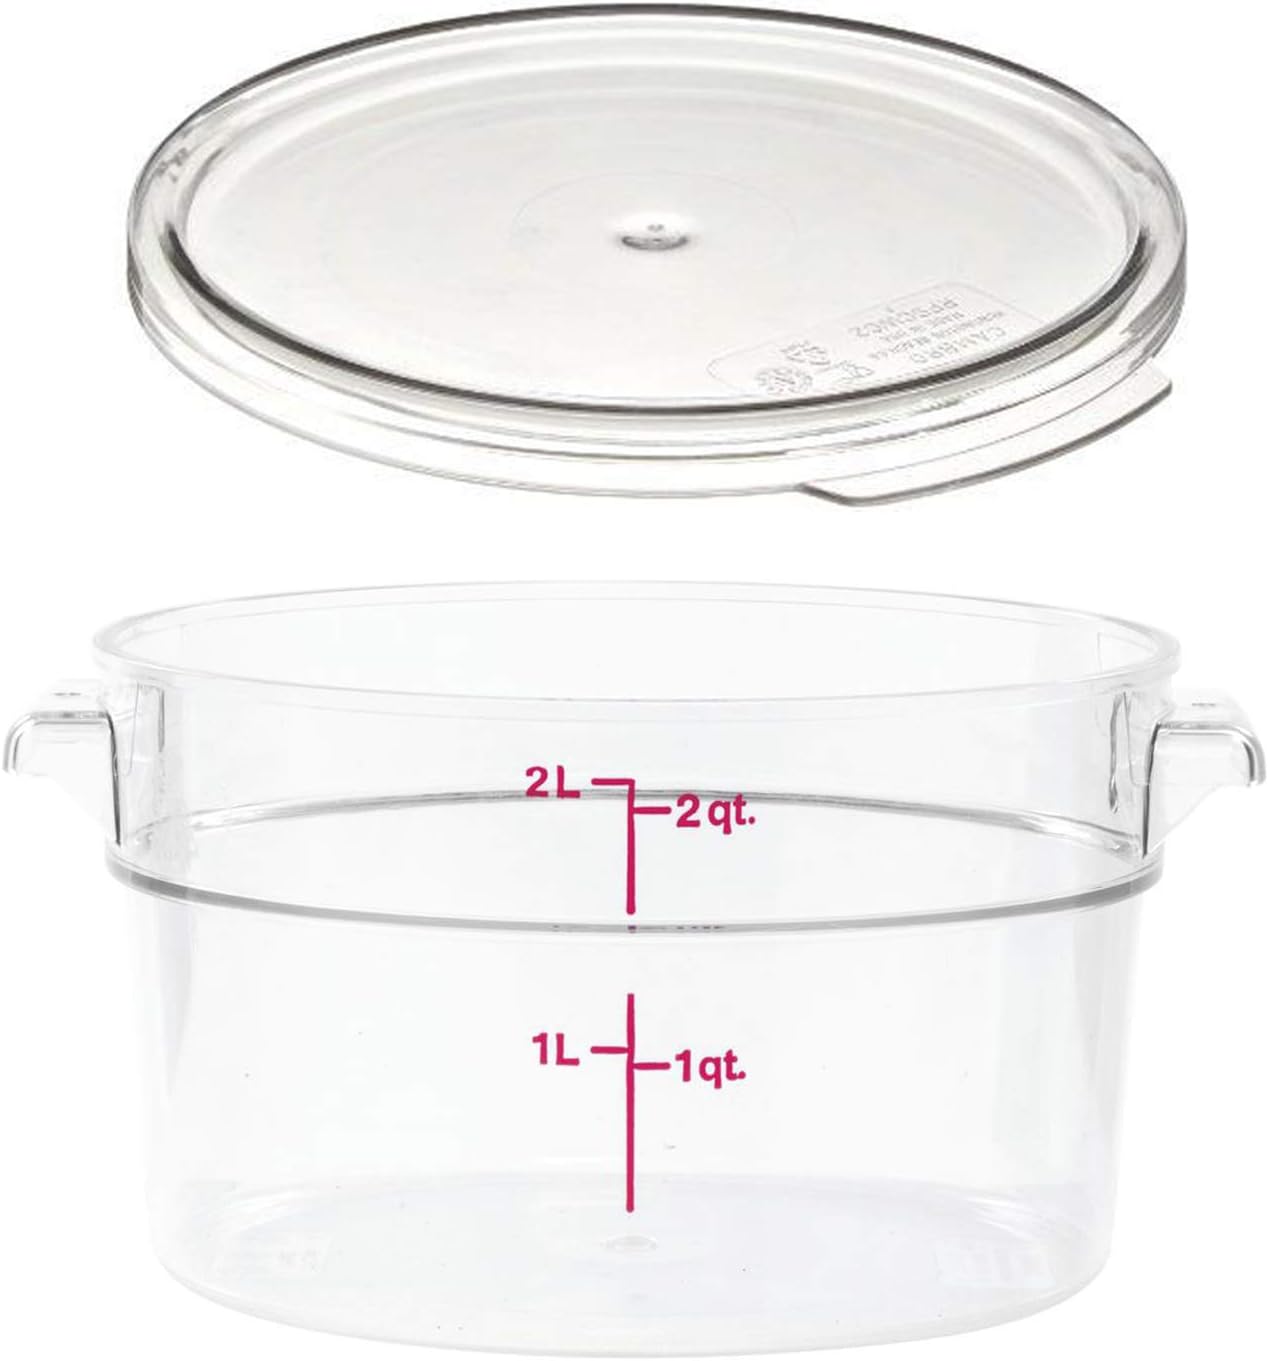
Letting the dough rise as much as possible—without overdoing it—leads to the airiest bread. The best way to judge fermentation is by how much the dough has grown in size. If your gluten is well-developed, you’re using a strong flour, and your starter is vigorous, this method is reliable every time. To favor yeast activity and keep sourness in check, aim to keep the dough temperature between 70–75 F (21–24 C). Let the dough rise until it fills a 2-qt container and touches the lid.
If you need to extend the timeline, you can refrigerate the dough. I recommend still allowing it to rise until it fills (but doesn’t overflow) the container before chilling. I’ve tested refrigeration up to six hours with great results, though you can go as long as twelve hours if needed. Any longer, and the flavor may become overly complex or sour, which starts to undo the purpose of using a sweet stiff starter in the first place.
The Filling
The order for making the filling is important! The butter goes into the saucepan first to brown, followed by the tahini, honey, and cocoa when the butter is ready. These ingredients and whisked until just combined and smoothed and then removed from heat, otherwise the filling will become too thick. Vanilla and orange zest are added after that, so that their flavors don’t dissipate. And don’t stir the chocolate pieces into the mix! We aren’t trying to melt the chocolate; it’s there for texture instead. The chocolate and nuts are sprinkled on after the filling is spread.
Shaping
Shaping this bread happens in a few simple steps. First, the dough is rolled out. Since it’s a bit sticky, I like to dust the surface generously with flour. This helps it roll out smoothly and prevents tearing, which keeps the gluten structure intact for better fermentation.
The goal here is to roll it out as long as possible—aim for 24-inches if you can! A longer rectangle means more layers of filling and more dramatic twists.
Once the filling is spread, roll the dough into a log. At this point, I like to brush off any excess flour and trim off the ends until I see a clear swirl, which helps create a consistent pattern throughout the loaf.
Next comes the essential step: freeze the log for 20 minutes. This firms everything up, making it much easier to slice and twist without mess or tearing.
Finally, slice the log in half and twist the two pieces together. That’s what gives you those gorgeous, bakery-style swirls.
Baking
I like to bake this loaf next to a pan of boiling water, just to keep the crust soft and ensure the babka gets the best possible rise. However, I have baked this loaf without steam and it’s come out just fine, so you can definitely do this if you’re feeling lazy or in a pinch.
350 F (175 C) is all this loaf needs for beautiful browning. Milk, honey, and a good fermentation will cause this loaf to get dark without high temperatures or an egg wash. A final internal temperature of 185 F (85 C) cooks these loaves until they are just done, leaving you with the softest and fluffiest final bake.
The Glaze
It’s best to start the simple syrup as soon as you put the babka in the oven. This will allow time for it to cool a bit and thicken while the babka finishes baking, so that it can be brushed onto the hot babka as soon as it comes out of the oven.
The Garnish
If you choose to garnish this babka, do so while the glaze is still slightly tack to help it stick!
Suggested Timelines
Shape in AM Timeline
DAY 1
9:00 a.m.
- Make the sweet stiff starter.
- Make the tangzhong and refrigerate (option 1).
9:00 p.m.
- Make the tangzhong (option 2).
- Mix and knead the dough.
9:30 p.m.
- Begin bulk fermentation.
DAY 2
7:00 a.m.
- Prepare the filling.
7:20 a.m.
- Roll out the dough, fill, roll up, freeze.
7:45 a.m.
- Divide, twist, proof.
4-5:00 p.m.
- Bake.
- Make the glaze.
4-5:45 p.m.
- Brush with glaze & garnish.
- Enjoy!
Shape in PM Timeline
DAY 1
10:00 p.m.
- Make the sweet stiff starter.
- Make the tangzhong and refrigerate (option 1).
DAY 2
10:30 a.m.
- Make the tangzhong (option 2).
- Mix and knead the dough.
11:00 a.m.
- Begin bulk fermentation.
9:15 p.m.
- Prepare the filling.
9:35 p.m.
- Roll out the dough, fill, roll up, freeze.
10:00 p.m.
- Divide, twist, proof.
DAY 3
7 a.m.
- Bake.
- Make the glaze.
7:45 a.m.
- Brush with glaze & garnish.
- Enjoy!
📌 Quick Tip: Read the recipe in its entirety before you start cooking. This will help you understand the ingredients, steps, and timing involved, and allow you to prepare any necessary equipment or ingredients beforehand.
Motherhood Babka


Ingredients
Sweet Stiff Starter
Tangzhong
Main Dough
Filling
Syrup Glaze
Garnish
Instructions
Sweet Stiff Starter
-
Mix together all ingredients for the sweet stiff starter.
-
Knead the starter until everything is well-combined and some air has been incorporated, 2-4 minutes.
-
Cover and rest until the starter has tripled or quadrupled in size, about 12 hours at 73-75 F (23-24 C).
Tangzhong
-
In a small, 1 qt, saucepan, measure out the ingredients for the tangzhong.
-
Place the saucepan over medium to medium-low heat, whisking continuously, until the mixture thickens like a gravy.
-
If you've made the tangzhong significantly before you're ready to mix your dough, cover tightly with plastic cling wrap (to prevent a film from forming) and place it in the refrigerator until you are ready to mix the dough.
-
If you've made the tangzhong just before mixing the dough, place it in your stand mixer and pour the cold milk right over it, whisking to cool it off before adding your remaining ingredients.
-
Main Dough
-
To the bowl of a stand mixer, add all of the ingredients for the main dough. Roughly mix to combine.
-
Transfer the bowl to a stand mixer fitted with a dough hook attachment and knead the dough at a medium to medium-low speed until it balls up around the dough hook, can be stretched without tearing, and passes a windowpane.
- For an Ankarsrum mixer, use the dough roller and scraper attachments. Mix the dough on speed 12-1 o'clock for 3-4 minutes, until the ingredients are well-incorporated. Increase the speed to 2-3 o'clock for 10-15 minutes, until the dough balls up, stretches without tearing, and passes a windowpane.
-
Give the dough a few coil folds in the bowl to gather it up, then transfer to a 2 qt container for bulk fermentation.
-
Let the dough rest until it touches the lid of the 2 qt container, about 10 hours at 70 F (21 C) or 7 hours at 74 F (24 C).
You can refrigerate the dough near or at the end of bulk fermentation if you need more time before shaping.
Filling
-
Brown the butter in a small, 1-qt saucepan over medium-low heat.
-
When the butter is browned, add the tahini, honey, and cocoa powder. Whisk until smooth, then remove from heat. Stir in the vanilla paste and orange zest.
Assembly
-
When the dough is ready and the filling is prepared, roll the dough out into a rectangle 10X24 inches using a generous dusting of flour as needed. The longer the rectangle, the better, because this will create more layers.
-
Spread the filling all over the top of the rolled-out dough.
The filling thickens quickly as it cools and becomes hard to spread, thanks to the cocoa powder. It's best if it's still a little warm when you add it to the dough. -
Sprinkle the crushed pecans and dark chocolate all over the top.
-
Starting from one of the short sides, roll the dough tightly into a log, dusting off any excess flour as you go.
At this point, I like to trim the edges until I see the swirl pattern. This ensures I get a beautiful swirl throughout. -
Transfer the log to a baking sheet and freeze for 20 minutes.
This step is essential to getting a clean twist. -
After 20 minutes, remove the babka from the freezer and slice the log in half.
-
Turn the halves so the layered side is facing upward, and the smooth size is facing down.
-
Twist the halves two or three times, tucking the ends underneath or to the sides. Transfer to a 1.25 lb, 9X5 inch, loaf pan.
-
Cover and let the dough rest again until it just passes the top of the loaf pan, about another 8 hours at 70 F (21 C).
You can also refrigerate the dough at this step, if needed. Just make sure the dough still rises above the rim of the loaf pan before you bake it. If you bake from cold, you may need to increase the baking time.
Bake & Glaze
-
When the babka is almost ready to bake, preheat an oven to 350 F (175 C) and boil some water in a tea kettle or over the stovetop.
-
Bake the babka for 40-45 minutes next to a water-safe loaf pan filled about halfway with boiling water. (Situate them in the oven like an "11", not like an "=".)
-
After you've placed the babka in the oven, prepare the glaze. Whisk together the water and sugar in a small, 1-qt saucepan over medium to medium low heat until the sugar dissolves.
-
Continue to heat the mixture until it just starts to bubble. Give it one more stir, then remove from heat.
-
When the glaze has cooled slightly, stir in the orange blossom water. Set aside until the babka is finished baking.
-
The babka is done when the internal temperature registers 185-190 F (85-88 C). Brush the glaze all over the hot babka.
-
When the glaze is still slightly tacky, but not fully hardened, garnish the babka with flake salt and edible glitter, if desired.
-
Cool the babka in the pan for 15-20 minutes, then turn out onto a wire rack to cool completely. Enjoy!
You might need...


Affiliate Disclosure: This post contains Amazon affiliate links. This means when you buy a product using one of my links, I may receive a small commission at no cost to you. Thank you, in advance, for supporting my work.
Nutrition Facts
Servings 12
- Amount Per Serving
- Calories 326.93kcal
- % Daily Value *
- Total Fat 14.98g24%
- Saturated Fat 6.3g32%
- Cholesterol 49.65mg17%
- Sodium 258.78mg11%
- Potassium 163.34mg5%
- Total Carbohydrate 42.19g15%
- Dietary Fiber 2.77g12%
- Sugars 14.15g
- Protein 7.37g15%
- Vitamin A 74.73 IU
- Vitamin C 5.87 mg
- Calcium 57.5 mg
- Iron 2.98 mg
- Vitamin D 0.24 IU
- Vitamin E 0.51 IU
- Vitamin K 1.12 mcg
- Thiamin 0.38 mg
- Riboflavin 0.27 mg
- Niacin 3.06 mg
- Vitamin B6 0.05 mg
- Folate 26.6 mcg
- Vitamin B12 0.12 mcg
- Phosphorus 131.78 mg
- Magnesium 35.46 mg
- Zinc 1.05 mg
* Nutrition values are auto-calculated and should be used as an approximation only.
Notes
- Storage: I like to store this babka in a Ziploc bag on the counter for five to seven days. To reheat, I prefer to slice and stick in a low oven (200-250 F; 95-120 C) for five to ten minutes to warm slightly.
- Substitutions:
- It's best to replace milk with another animal version, like goat milk or buttermilk. You can use a nut milk (or even just water) but it may make the dough stickier. If choosing this option, I'd start with 50 g instead of 75 g.
- You can replace the honey with granulated sugar. The dough will be slightly drier.
- You can replace the butter with your favorite fat, preferably a solid fat, just be aware of flavor differences.
- While vanilla paste gives those beautiful specs of vanilla bean, you can use vanilla extract or eliminate it altogether.
- Turmeric is for color only and can be eliminated, if desired.
- You can replace tahini with another nut butter, like almond butter or peanut butter. It's best if the nut butter doesn't have any added sugar.
- You can eliminate the orange, if desired.
- You can replace the crushed pecans with slivered almonds or crushed walnuts.
- You can replace the chocolate with chopped dates.
- The garnish is optional. If you don't like it, skip it or use whatever you like.


